
Operating Instructions
Page 7
...(Synchro Rec 83 Changing or Canceling VCR Timer Settings (Timer List 84 Recording From Connected Equipment Without a Timer 86 Dubbing (TAPE y DVD 87 Dubbing From a VHS Tape to a DVD 87 Dubbing From a DVD to a VHS Tape 88 Finalizing a Disc (Preparing a Disc for Playback on Other ... Settings/Factory Settings (Options 106 Easy Setup (Resetting the Recorder 108 Additional Information 109 Troubleshooting 109 Notes About This Recorder 114 Specifications 115 About i.LINK 117 Guide to Parts and Controls 118 Glossary 123 DVD Audio/Subtitle Language 124 Cable Box/Satellite Receiver ...
...(Synchro Rec 83 Changing or Canceling VCR Timer Settings (Timer List 84 Recording From Connected Equipment Without a Timer 86 Dubbing (TAPE y DVD 87 Dubbing From a VHS Tape to a DVD 87 Dubbing From a DVD to a VHS Tape 88 Finalizing a Disc (Preparing a Disc for Playback on Other ... Settings/Factory Settings (Options 106 Easy Setup (Resetting the Recorder 108 Additional Information 109 Troubleshooting 109 Notes About This Recorder 114 Specifications 115 About i.LINK 117 Guide to Parts and Controls 118 Glossary 123 DVD Audio/Subtitle Language 124 Cable Box/Satellite Receiver ...

Operating Instructions
Page 22
Notes • Depending on the connected unit, you may not be able to control your AV amplifier (receiver) with some or any of the buttons. • If you enter a new code number, the code number previously entered will be erased. • When you replace the batteries of the remote, the code number may be reset to the default setting. Set the appropriate code number again. 22
Notes • Depending on the connected unit, you may not be able to control your AV amplifier (receiver) with some or any of the buttons. • If you enter a new code number, the code number previously entered will be erased. • When you replace the batteries of the remote, the code number may be reset to the default setting. Set the appropriate code number again. 22

Operating Instructions
Page 61
To reset the start point of a Playlist title (page 66). z Hints • A chapter mark is ... Title No. 01 May/02/2006 08:00 PM End 00:00:00 Point Divide ,continued 61 When editing a DVD-RW (VR mode) or DVD-R (VR mode), press ORIGINAL/ PLAYLIST to switch to the "Title List (Original)," if necessary. 2 Select a title...for setting point A and B appears. "End" is erased. The chapter mark divides the title into two. When editing a DVD-RW (VR mode) or DVD-R (VR mode), press ORIGINAL/ PLAYLIST to switch to the "Title List (Original)," if necessary. 2 Select a title, and ...
To reset the start point of a Playlist title (page 66). z Hints • A chapter mark is ... Title No. 01 May/02/2006 08:00 PM End 00:00:00 Point Divide ,continued 61 When editing a DVD-RW (VR mode) or DVD-R (VR mode), press ORIGINAL/ PLAYLIST to switch to the "Title List (Original)," if necessary. 2 Select a title...for setting point A and B appears. "End" is erased. The chapter mark divides the title into two. When editing a DVD-RW (VR mode) or DVD-R (VR mode), press ORIGINAL/ PLAYLIST to switch to the "Title List (Original)," if necessary. 2 Select a title, and ...

Operating Instructions
Page 62
...:00:10 T Title No. 01 May/02/2006 08:00 PM End 00:00:10 Point Divide 5 Press ENTER. The display asks for confirmation. To reset the dividing point, select "No" and press ENTER, then repeat from step 4. 6 Select "Yes," and press ENTER. appears on the screen, and the scenes before...
...:00:10 T Title No. 01 May/02/2006 08:00 PM End 00:00:10 Point Divide 5 Press ENTER. The display asks for confirmation. To reset the dividing point, select "No" and press ENTER, then repeat from step 4. 6 Select "Yes," and press ENTER. appears on the screen, and the scenes before...

Operating Instructions
Page 65
...:00:00 00:00:07 End 00:00:00 Start End Make Finish 5 Press ENTER at the end point. z Hint When a Playlist title is selected. DVD Editing 3 Select "Edit," and press ENTER. Edit Title List Timer Create Playlist Edit Playlist Edit Dubbing Disc Setting Setup 10:10 AM 4 Select "Create Playlist...:00:00 Start End Make Finish 6 Press ENTER at the start or end point, select "Start" or "End" and repeat step 5 or 6. 7 Press ENTER. To reset the start point. Playing a Playlist title 1 Press TITLE LIST. 2 Press ORIGINAL/PLAYLIST to switch to find the point.
...:00:00 00:00:07 End 00:00:00 Start End Make Finish 5 Press ENTER at the end point. z Hint When a Playlist title is selected. DVD Editing 3 Select "Edit," and press ENTER. Edit Title List Timer Create Playlist Edit Playlist Edit Dubbing Disc Setting Setup 10:10 AM 4 Select "Create Playlist...:00:00 Start End Make Finish 6 Press ENTER at the start or end point, select "Start" or "End" and repeat step 5 or 6. 7 Press ENTER. To reset the start point. Playing a Playlist title 1 Press TITLE LIST. 2 Press ORIGINAL/PLAYLIST to switch to find the point.

Operating Instructions
Page 68
... press ENTER. 3 Select "Modify," and press ENTER. 1 Follow steps 1 to find the point. The "Edit Scene" display appears. 2 Select the scene you have set. To reset the start point. To cancel modifying Select "Cancel," and press ENTER. The re-selected section is selected. Moving a scene (Move) -RWVR -RVR You can use...
... press ENTER. 3 Select "Modify," and press ENTER. 1 Follow steps 1 to find the point. The "Edit Scene" display appears. 2 Select the scene you have set. To reset the start point. To cancel modifying Select "Cancel," and press ENTER. The re-selected section is selected. Moving a scene (Move) -RWVR -RVR You can use...

Operating Instructions
Page 69
... find the point. "Start" is selected. You can copy and add a selected scene. 1 Follow steps 1 to copy, and press ENTER. 3 Select "Copy," and press ENTER. DVD Editing 3 Select "Add," and press ENTER. Add 10:10 AM Scene No.01 Start 00:00:10 00:00:10 T Playlist No. 01 May/02...:00:00 Start End Add Cancel 5 Press ENTER at the start or end point, select "Start" or "End" and repeat step 4 or 5. 6 Press ENTER. To reset the start point.
... find the point. "Start" is selected. You can copy and add a selected scene. 1 Follow steps 1 to copy, and press ENTER. 3 Select "Copy," and press ENTER. DVD Editing 3 Select "Add," and press ENTER. Add 10:10 AM Scene No.01 Start 00:00:10 00:00:10 T Playlist No. 01 May/02...:00:00 Start End Add Cancel 5 Press ENTER at the start or end point, select "Start" or "End" and repeat step 4 or 5. 6 Press ENTER. To reset the start point.

Operating Instructions
Page 72
...00:00 point automatically, see page 9. 72 LP mode recordings made on the TV screen, press DISPLAY. H PLAY x STOP 1 Press VIDEO to find later. When the tape reaches the end, it will be played. • For simultaneous VHS and DVD operation, see page 75. To turn off the power ...00:00." The counter in the front panel display resets to the VCR while playing a disc, DVD playback stops. • The VCR does not record in EP (3x) mode is not guaranteed. • The VCR is rewinding. "Auto Play" of S-VHS tapes recorded in S-VHS format, but will play , but picture quality will...
...00:00 point automatically, see page 9. 72 LP mode recordings made on the TV screen, press DISPLAY. H PLAY x STOP 1 Press VIDEO to find later. When the tape reaches the end, it will be played. • For simultaneous VHS and DVD operation, see page 75. To turn off the power ...00:00." The counter in the front panel display resets to the VCR while playing a disc, DVD playback stops. • The VCR does not record in EP (3x) mode is not guaranteed. • The VCR is rewinding. "Auto Play" of S-VHS tapes recorded in S-VHS format, but will play , but picture quality will...

Operating Instructions
Page 75
Searching Using Various Functions The VCR automatically marks the tape with an index signal at the point where each recording begins. You can easily find a specific point using various search functions. Note During DVD recording, you cannot use VCR search functions. CLEAR VIDEO M/m/
Searching Using Various Functions The VCR automatically marks the tape with an index signal at the point where each recording begins. You can easily find a specific point using various search functions. Note During DVD recording, you cannot use VCR search functions. CLEAR VIDEO M/m/

Operating Instructions
Page 90
... Disc Setting Setup 10:10 AM 6 Select "Create Dubbing List," and press ENTER. To dub the entire title, select "Title Dubbing" and press ENTER. To reset the start point. To continue, select "Yes" and press ENTER. The Program Dubbing List appears with the selected scene. You can use H PLAY, , ./>, x STOP, and...
... Disc Setting Setup 10:10 AM 6 Select "Create Dubbing List," and press ENTER. To dub the entire title, select "Title Dubbing" and press ENTER. To reset the start point. To continue, select "Yes" and press ENTER. The Program Dubbing List appears with the selected scene. You can use H PLAY, , ./>, x STOP, and...

Operating Instructions
Page 108
... mode conflicts with other DVD equipment. The setup settings return to make initial settings. Easy Setup 10:10 AM Follow the guide to their default settings. Before you have a Sony DVD player or more than one Sony DVD recorder" on again, and the recorder is reset to run the Easy Setup... program. 1 Press SYSTEM MENU while the recorder is assigned the same command mode. The power automatically turns off ...
... mode conflicts with other DVD equipment. The setup settings return to make initial settings. Easy Setup 10:10 AM Follow the guide to their default settings. Before you have a Sony DVD player or more than one Sony DVD recorder" on again, and the recorder is reset to run the Easy Setup... program. 1 Press SYSTEM MENU while the recorder is assigned the same command mode. The power automatically turns off ...

Operating Instructions
Page 112
...; The tape starts playing as soon as it is reset during recording. , The recorder's internal clock stopped due to video input. Timer recording is not complete or did not start at your nearest Sony dealer (a standard service fee will be received (page 99). Reset the clock (page 99). , The program that ... the heads cleaned at the same time, the program listed first in your local Sony dealer for the VCR. VCR Playback The playback picture does not appear on a DVD with enough space for the recording. Do not use a commercially available liquid type cleaning cassette, as it to a...
...; The tape starts playing as soon as it is reset during recording. , The recorder's internal clock stopped due to video input. Timer recording is not complete or did not start at your nearest Sony dealer (a standard service fee will be received (page 99). Reset the clock (page 99). , The program that ... the heads cleaned at the same time, the program listed first in your local Sony dealer for the VCR. VCR Playback The playback picture does not appear on a DVD with enough space for the recording. Do not use a commercially available liquid type cleaning cassette, as it to a...
Operating Instructions
Page 113
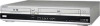
... box is turned on appears in again. Reset the code (page 21). , Turn on the recorder. ,continued 113 Additional Information Press down "/1 on the recorder for more than ten seconds until "SONY DVD" appears in the front panel display. , When static electricity, etc., causes the recorder to open after timer recording is not at its end. , Make...
... box is turned on appears in again. Reset the code (page 21). , Turn on the recorder. ,continued 113 Additional Information Press down "/1 on the recorder for more than ten seconds until "SONY DVD" appears in the front panel display. , When static electricity, etc., causes the recorder to open after timer recording is not at its end. , Make...

Operating Instructions
Page 131
..." 60 Q Quick Timer 50, 79 R Rear panel 122 REC 50, 79 REC MODE 50, 79 Recording 48, 78 recordable discs 30 recording format 30 recording mode 48 tape speed 78 while watching another program 50, 79 Recording mode 48, 78 Recording time 48, 51 Region code 34 Remaining time 47, 80 Remote 20, 119 REPEAT 38... Repeat A-B Play 39 REPLAY 37, 74 Resetting 108 Resume Play 39 Rotate 44 S Safety tab 78 SAP (Second Audio Program) 49, 78 Satellite...
..." 60 Q Quick Timer 50, 79 R Rear panel 122 REC 50, 79 REC MODE 50, 79 Recording 48, 78 recordable discs 30 recording format 30 recording mode 48 tape speed 78 while watching another program 50, 79 Recording mode 48, 78 Recording time 48, 51 Region code 34 Remaining time 47, 80 Remote 20, 119 REPEAT 38... Repeat A-B Play 39 REPLAY 37, 74 Resetting 108 Resume Play 39 Rotate 44 S Safety tab 78 SAP (Second Audio Program) 49, 78 Satellite...


