Quick Start Guide
Page 41
... by using Disc 1 from your computer's hard disk drive. To recover the original software programs, start the VAIO Recovery Wizard from your Recovery Media Kit. ❑ Perform a complete hard disk drive recovery Completely recover your Recovery Media Kit. 41 This option recovers drives C and D, and the hidden recovery drive. To perform a complete hard disk drive recovery, start the VAIO Recovery Wizard...
... by using Disc 1 from your computer's hard disk drive. To recover the original software programs, start the VAIO Recovery Wizard from your Recovery Media Kit. ❑ Perform a complete hard disk drive recovery Completely recover your Recovery Media Kit. 41 This option recovers drives C and D, and the hidden recovery drive. To perform a complete hard disk drive recovery, start the VAIO Recovery Wizard...
Quick Start Guide
Page 44
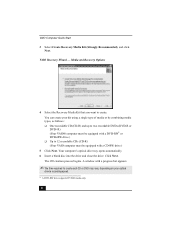
... to 12 recordable CDs (CD-R) (Your VAIO computer must be equipped with a CD-RW drive.) 5 Click Next. Click Next. VAIO Computer Quick Start 3 Select Create Recovery Media Kit (Strongly Recommended), and click Next. Your computer's optical drive tray opens automatically. 6 Insert a blank disc into the drive and close the drive.... combining media types, as follows: ❑ One recordable CD (CD-R) and up to two recordable DVDs (DVD-R or DVD+R) (Your VAIO® computer must be equipped with a DVD-RW* or DVD±RW drive.) ❑ Up to create. You can create your optical drive's recording...
... to 12 recordable CDs (CD-R) (Your VAIO computer must be equipped with a CD-RW drive.) 5 Click Next. Click Next. VAIO Computer Quick Start 3 Select Create Recovery Media Kit (Strongly Recommended), and click Next. Your computer's optical drive tray opens automatically. 6 Insert a blank disc into the drive and close the drive.... combining media types, as follows: ❑ One recordable CD (CD-R) and up to two recordable DVDs (DVD-R or DVD+R) (Your VAIO® computer must be equipped with a DVD-RW* or DVD±RW drive.) ❑ Up to create. You can create your optical drive's recording...
Quick Start Guide
Page 45
... in a safe location. About the Recovery Media Kit 7 When prompted, eject the disc. Label the top of the disc with a permanent marker according to access the Sony Direct Accessories and Parts Center Web site, contact a customer service representative at http://servicesales.sel.sony.com. 2 Enter your computer's model number (for example, PCV-XXX), and click List Parts...
... in a safe location. About the Recovery Media Kit 7 When prompted, eject the disc. Label the top of the disc with a permanent marker according to access the Sony Direct Accessories and Parts Center Web site, contact a customer service representative at http://servicesales.sel.sony.com. 2 Enter your computer's model number (for example, PCV-XXX), and click List Parts...

Quick Start Guide
Page 46
Starting the VAIO Recovery Wizard To access the VAIO Recovery Wizard from the Recovery Media Kit 1 Press the power switch on the computer to restart your computer, even if you to turn on the power. 2 Open the optical drive, and place the Startup Recovery Disc in the optical drive. 3 Close the drive and turn on your notebook computer. You can access...
Starting the VAIO Recovery Wizard To access the VAIO Recovery Wizard from the Recovery Media Kit 1 Press the power switch on the computer to restart your computer, even if you to turn on the power. 2 Open the optical drive, and place the Startup Recovery Disc in the optical drive. 3 Close the drive and turn on your notebook computer. You can access...

Quick Start Guide
Page 51
... on the power. 2 Open the optical drive, and place the Startup Recovery Disc in each wizard, and respond to install each prompt or message. The VAIO Recovery Wizard appears. 7 Click Next. 8 Select Custom Recovery (for approximately 30 seconds, and then turn on the computer to recover additional software, click Back. When the selected software has been...
... on the power. 2 Open the optical drive, and place the Startup Recovery Disc in each wizard, and respond to install each prompt or message. The VAIO Recovery Wizard appears. 7 Click Next. 8 Select Custom Recovery (for approximately 30 seconds, and then turn on the computer to recover additional software, click Back. When the selected software has been...

Quick Start Guide
Page 52
...the disc. Close the drive, and click Next. For VAIO® computers with Giga Pocket software preinstalled, you must change the software settings to enable file saving to drive C. ❑ Resizing your hard disk drive partitions can result in the loss of the VAIO® Recovery ...Wizard. ❑ Giga Pocket™ software requires a drive D in each wizard, and respond to drive D. Your computer may restart several times. Additional Information ❑ Certain software, such as DVgate...
...the disc. Close the drive, and click Next. For VAIO® computers with Giga Pocket software preinstalled, you must change the software settings to enable file saving to drive C. ❑ Resizing your hard disk drive partitions can result in the loss of the VAIO® Recovery ...Wizard. ❑ Giga Pocket™ software requires a drive D in each wizard, and respond to drive D. Your computer may restart several times. Additional Information ❑ Certain software, such as DVgate...

VAIO User Guide
Page 134
...dirt or scratches. The preinstalled CD or DVD software may not be working properly. To access VAIO Recovery Options, follow these steps: 1. From the VAIO Help And Support Center menu, click VAIO Recovery Options. Page 134 Click Start in the tray with the label side facing up. Install your... CD or DVD software according to the manufacturer's instructions. If your drive reads some DVDs or CDs, but not others, check the shiny side of the disc for ...
...dirt or scratches. The preinstalled CD or DVD software may not be working properly. To access VAIO Recovery Options, follow these steps: 1. From the VAIO Help And Support Center menu, click VAIO Recovery Options. Page 134 Click Start in the tray with the label side facing up. Install your... CD or DVD software according to the manufacturer's instructions. If your drive reads some DVDs or CDs, but not others, check the shiny side of the disc for ...

VAIO User Guide
Page 135
...ALL" appears on the DVD or on its packaging, you cannot play the disc on this software, see video, your computer's video resolution may be set to read the disc. To verify or change your speakers and the computer. 5. Change the Screen resolution and Color quality to stop responding while it... and then click Systems. The System Properties dialog box appears. 3. If necessary, remove the disc and check that the region code of your screen area is set too high. To access VAIO Recovery Options, follow these steps: 1. Click Start in the Audio Mixer. 3. Check the volume ...
...ALL" appears on the DVD or on its packaging, you cannot play the disc on this software, see video, your computer's video resolution may be set to read the disc. To verify or change your speakers and the computer. 5. Change the Screen resolution and Color quality to stop responding while it... and then click Systems. The System Properties dialog box appears. 3. If necessary, remove the disc and check that the region code of your screen area is set too high. To access VAIO Recovery Options, follow these steps: 1. Click Start in the Audio Mixer. 3. Check the volume ...


