
Quick Start Guide
Page 6
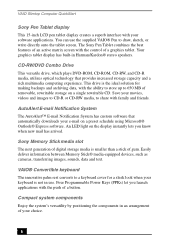
... System The AutoAlert™ E-mail Notification System has custom software that provides increased storage capacity and a rich multimedia computing experience. Easily deliver information between Memory Stick® media-equipped devices, such as cameras, transferring images, sounds, data and text. Save your movies...stick of a button. Sony Memory Stick media slot The next generation of digital storage media is not in use. The Sony Pen Tablet combines the best features of an active matrix screen with the push of gum. VAIO Slimtop Computer QuickStart Sony Pen Tablet display This ...
... System The AutoAlert™ E-mail Notification System has custom software that provides increased storage capacity and a rich multimedia computing experience. Easily deliver information between Memory Stick® media-equipped devices, such as cameras, transferring images, sounds, data and text. Save your movies...stick of a button. Sony Memory Stick media slot The next generation of digital storage media is not in use. The Sony Pen Tablet combines the best features of an active matrix screen with the push of gum. VAIO Slimtop Computer QuickStart Sony Pen Tablet display This ...

Quick Start Guide
Page 21
... Maintenance dialog box appears. 2 Click the Control Panel icon for Home/Office Desk (default Power Scheme), select the Power Schemes tab. Your computer is set your computer to automatically enter hibernate mode after a certain time period, by following these steps: 1 Click Start in the Windows® taskbar, click... mode, it returns to the previous state. To Use the Hibernate Mode To Use the Hibernate Mode Hibernate mode enables your computer to store everything in its memory to the hard disk drive before your computer goes into hibernate mode automatically, according to your settings. 21
... Maintenance dialog box appears. 2 Click the Control Panel icon for Home/Office Desk (default Power Scheme), select the Power Schemes tab. Your computer is set your computer to automatically enter hibernate mode after a certain time period, by following these steps: 1 Click Start in the Windows® taskbar, click... mode, it returns to the previous state. To Use the Hibernate Mode To Use the Hibernate Mode Hibernate mode enables your computer to store everything in its memory to the hard disk drive before your computer goes into hibernate mode automatically, according to your settings. 21

Quick Start Guide
Page 27
...com and find out which plan is available in a visually pleasing, artistic manner. VAIO Action Setup Sony Electronics Inc. Overview of -the-art Sony multimedia browser designed specifically for Memory Stick® media. Continuing to take advantage of files by other applications like PictureGear&#... capability, and a parametric equalizer for finetuning audio playback. To find out what is best for computer, digital audio/video and network convergence. VisualFlow™ Sony Electronics Inc. Create professional-looking documents, such as DSL, Internet connection services.
...com and find out which plan is available in a visually pleasing, artistic manner. VAIO Action Setup Sony Electronics Inc. Overview of -the-art Sony multimedia browser designed specifically for Memory Stick® media. Continuing to take advantage of files by other applications like PictureGear&#... capability, and a parametric equalizer for finetuning audio playback. To find out what is best for computer, digital audio/video and network convergence. VisualFlow™ Sony Electronics Inc. Create professional-looking documents, such as DSL, Internet connection services.

Quick Start Guide
Page 34
...such as "1" or "ALL" are labeled on your computer speakers. ❑ Check the connections between your speakers and the computer. ❑ Verify that drivers are preinstalled on your computer's video memory (RAM) is 11 MB shared system memory, you may improve video resolution by following : ❑... are using 32-bit color (preset factory default). VAIO Slimtop Computer QuickStart Topic: I change the video resolution of my display?" ✍ If your computer, see "To Use the Application Recovery CD(s)" for details about your computer's video resolution may be that the region code of...
...such as "1" or "ALL" are labeled on your computer speakers. ❑ Check the connections between your speakers and the computer. ❑ Verify that drivers are preinstalled on your computer's video memory (RAM) is 11 MB shared system memory, you may improve video resolution by following : ❑... are using 32-bit color (preset factory default). VAIO Slimtop Computer QuickStart Topic: I change the video resolution of my display?" ✍ If your computer, see "To Use the Application Recovery CD(s)" for details about your computer's video resolution may be that the region code of...
Quick Start Guide
Page 40
Topic: Why is placed over its location. 1 Right-click on installing memory, please see the online VAIO® User Guide. For information on the taskbar and select Properties from the edge of the display screen. Close any applications that you ... number of applications that are not currently using. ❑ Increasing the system memory may be hidden or minimized. ❑ Use the mouse to locate a hidden taskbar by pointing to the left , right, top, and bottom edges of the screen. VAIO Slimtop Computer QuickStart Topic: I install a printer? ❑ If your printer has a USB, ...
Topic: Why is placed over its location. 1 Right-click on installing memory, please see the online VAIO® User Guide. For information on the taskbar and select Properties from the edge of the display screen. Close any applications that you ... number of applications that are not currently using. ❑ Increasing the system memory may be hidden or minimized. ❑ Use the mouse to locate a hidden taskbar by pointing to the left , right, top, and bottom edges of the screen. VAIO Slimtop Computer QuickStart Topic: I install a printer? ❑ If your printer has a USB, ...

Quick Start Guide
Page 41
... installation. ✍ If the printer is not included on . Topic: My connected printer doesn't function after the computer resumes from a power saving mode. To contact Sony for approximately 10 seconds, and then turning it back on the list and no drivers are installing a recently manufactured...the printer, choose an alternate printer driver that came with your printer may emulate. Clear the printer memory by turning the printer off for technical support For further technical assistance, call 1-888-4-SONY-PC (1-888-476-6972) or access the Sony Computing Support Web site at http://www...
... installation. ✍ If the printer is not included on . Topic: My connected printer doesn't function after the computer resumes from a power saving mode. To contact Sony for approximately 10 seconds, and then turning it back on the list and no drivers are installing a recently manufactured...the printer, choose an alternate printer driver that came with your printer may emulate. Clear the printer memory by turning the printer off for technical support For further technical assistance, call 1-888-4-SONY-PC (1-888-476-6972) or access the Sony Computing Support Web site at http://www...

System Reference Manual
Page 2
...THEREOF. Memory Stick and Sony Corporation. are trademarks of Intel, Pentium, and Celeron are trademarks or registered trademarks of Microsoft Corporation. SONY ELECTRONICS INC. IN NO EVENT SHALL SONY ELECTRONICS INC. The software described herein is prohibited. Sony, VAIO, the VAIO logo, VAIO Smart, VAIO Slimtop, ... IBM Corporation. This product contains software owned by Sony and licensed by the terms of the Intel Corporation. Refer to the model and serial numbers when you call your Sony VAIO® computer. Reproduction in whole or in a secure location...
...THEREOF. Memory Stick and Sony Corporation. are trademarks of Intel, Pentium, and Celeron are trademarks or registered trademarks of Microsoft Corporation. SONY ELECTRONICS INC. IN NO EVENT SHALL SONY ELECTRONICS INC. The software described herein is prohibited. Sony, VAIO, the VAIO logo, VAIO Smart, VAIO Slimtop, ... IBM Corporation. This product contains software owned by Sony and licensed by the terms of the Intel Corporation. Refer to the model and serial numbers when you call your Sony VAIO® computer. Reproduction in whole or in a secure location...

System Reference Manual
Page 10
x VAIO Slimtop System Reference Manual Chapter 3 - System Board 47 Memory Module (DIMM) Slots 48 Power (ATX PWR) Header 49 CLR CMOS Jumper...Replacing the Lithium Battery 30 Removing the Power Supply 33 Replacing the Power Supply 34 Removing a Memory Module 35 Installing System Memory 37 Replacing the Hard Drive 40 To identify additional hard disk space 43 Removing a Slot Cover... 44 Covering an Open I /O Address Map 71 Memory Map 74 CMOS Setup Options 51 Main Screen 53 Advanced Screen 56 Power Screen 61 Boot Screen 63 ...
x VAIO Slimtop System Reference Manual Chapter 3 - System Board 47 Memory Module (DIMM) Slots 48 Power (ATX PWR) Header 49 CLR CMOS Jumper...Replacing the Lithium Battery 30 Removing the Power Supply 33 Replacing the Power Supply 34 Removing a Memory Module 35 Installing System Memory 37 Replacing the Hard Drive 40 To identify additional hard disk space 43 Removing a Slot Cover... 44 Covering an Open I /O Address Map 71 Memory Map 74 CMOS Setup Options 51 Main Screen 53 Advanced Screen 56 Power Screen 61 Boot Screen 63 ...

System Reference Manual
Page 11
Specifications 75 Processor 75 Chipset ...75 PCI Bus ...75 Memory Modules (DIMMs 75 Memory Configurations 76 L2 Cache ...76 Graphics ...76 Audio ...77 Communications 77 I/O and Expansion Slots 77 i.LINK Interface 78 Ethernet Interface 78 Drives and Controllers 78 System CMOS 78 Index 79 xi Chapter 7 -
Specifications 75 Processor 75 Chipset ...75 PCI Bus ...75 Memory Modules (DIMMs 75 Memory Configurations 76 L2 Cache ...76 Graphics ...76 Audio ...77 Communications 77 I/O and Expansion Slots 77 i.LINK Interface 78 Ethernet Interface 78 Drives and Controllers 78 System CMOS 78 Index 79 xi Chapter 7 -

System Reference Manual
Page 17
... to use. On (amber) indicates hard disk drive activity. Off (no color) indicates the computer is out of Stand by mode. On (green) indicates the computer is turned off. On (amber) indicates optical disc activity. Indicators Identifying Components 5 Sony Memory Stick media access indicator Hard disk drive access indicator CD-RW/DVD combo drive...
... to use. On (amber) indicates hard disk drive activity. Off (no color) indicates the computer is out of Stand by mode. On (green) indicates the computer is turned off. On (amber) indicates optical disc activity. Indicators Identifying Components 5 Sony Memory Stick media access indicator Hard disk drive access indicator CD-RW/DVD combo drive...

System Reference Manual
Page 19
Accommodates Memory Stick media. Slots Identifying Components 7 PC card slot Memory Stick media slot Slot PC card slot Memory Stick® media slot Description Accommodates one Type I or Type II PCMCIA card.
Accommodates Memory Stick media. Slots Identifying Components 7 PC card slot Memory Stick media slot Slot PC card slot Memory Stick® media slot Description Accommodates one Type I or Type II PCMCIA card.

System Reference Manual
Page 22
USB Connectors A total of the base next to the Ethernet connector, and USB4 is located on the Fax/Modem plug-in card. 10 VAIO Slimtop System Reference Manual I/O Connectors The following section identifies the various I/O connectors. The second, third, and fourth USB connectors (USB2, USB3, and USB4) are ...are located next to the Mouse port. The first USB connector (USB1) is located on the Sony Pen Tablet or LCD display on the front panel between the i.LINK® connector and the Sony Memory Stick® media slot. The fifth USB connector (USB5) is located on the right side of...
USB Connectors A total of the base next to the Ethernet connector, and USB4 is located on the Fax/Modem plug-in card. 10 VAIO Slimtop System Reference Manual I/O Connectors The following section identifies the various I/O connectors. The second, third, and fourth USB connectors (USB2, USB3, and USB4) are ...are located next to the Mouse port. The first USB connector (USB1) is located on the Sony Pen Tablet or LCD display on the front panel between the i.LINK® connector and the Sony Memory Stick® media slot. The fifth USB connector (USB5) is located on the right side of...
System Reference Manual
Page 42
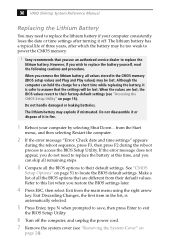
...Sony recommends that you use an authorized service dealer to access the BIOS Setup Utility. Make a list of all the BIOS options that the settings will be lost , the BIOS values revert to locate the BIOS default settings. When you remove the lithium battery, all values stored in the CMOS memory...exit the BIOS Setup Utility. 6 Turn off . 30 VAIO Slimtop System Reference Manual Replacing the Lithium Battery You may need to replace the battery at this list when you do not need to replace the lithium battery if your computer by selecting Shut Down... Do not handle damaged or ...
...Sony recommends that you use an authorized service dealer to access the BIOS Setup Utility. Make a list of all the BIOS options that the settings will be lost , the BIOS values revert to locate the BIOS default settings. When you remove the lithium battery, all values stored in the CMOS memory...exit the BIOS Setup Utility. 6 Turn off . 30 VAIO Slimtop System Reference Manual Replacing the Lithium Battery You may need to replace the battery at this list when you do not need to replace the lithium battery if your computer by selecting Shut Down... Do not handle damaged or ...

System Reference Manual
Page 47
...#2, skip steps 3 to remove a memory module if you wish to eject the module from its socket. Before opening the system unit, save and close all open files, exit all open applications, turn off the power to all attached peripheral devices, shut down the computer, and unplug the power cord. ...1 Remove the system cover (see "Removing the System Cover" on each side of the memory module to remove. Removing, Installing, and Replacing Components 35 Removing...
...#2, skip steps 3 to remove a memory module if you wish to eject the module from its socket. Before opening the system unit, save and close all open files, exit all open applications, turn off the power to all attached peripheral devices, shut down the computer, and unplug the power cord. ...1 Remove the system cover (see "Removing the System Cover" on each side of the memory module to remove. Removing, Installing, and Replacing Components 35 Removing...

System Reference Manual
Page 48
Touch any exposed metal part of the chassis to discharge static electricity in a static-free bag. ! Store the module in your body before handling the memory module. 5 Replace the system cover (see "Replacing the System Cover" on page 25). 36 VAIO Slimtop System Reference Manual 4 Lift the memory module out by grasping it by its edges.
Touch any exposed metal part of the chassis to discharge static electricity in a static-free bag. ! Store the module in your body before handling the memory module. 5 Replace the system cover (see "Replacing the System Cover" on page 25). 36 VAIO Slimtop System Reference Manual 4 Lift the memory module out by grasping it by its edges.

System Reference Manual
Page 49
... applications, turn off the power to all attached peripheral devices, shut down the computer, and unplug the power cord. 1 If necessary, remove the memory module you wish to replace (see "Removing a Memory Module" on page 35). 2 Remove the new memory module from its edges to discharge static electricity in size and speed between sockets...
... applications, turn off the power to all attached peripheral devices, shut down the computer, and unplug the power cord. 1 If necessary, remove the memory module you wish to replace (see "Removing a Memory Module" on page 35). 2 Remove the new memory module from its edges to discharge static electricity in size and speed between sockets...

System Reference Manual
Page 50
note the location of pin 1 on the module and pin 1 on each side of the module. Memory module (DIMM) 1 Indicates pin 1 5 Carefully but firmly insert the edge of the module until the latches lock into the slot on the socket. If the ... seated, the latches on each side of the module into the socket. 6 Press down on each side are straight up and locked into place. 38 VAIO Slimtop System Reference Manual 4 Align the module over the appropriate socket;
note the location of pin 1 on the module and pin 1 on each side of the module. Memory module (DIMM) 1 Indicates pin 1 5 Carefully but firmly insert the edge of the module until the latches lock into the slot on the socket. If the ... seated, the latches on each side of the module into the socket. 6 Press down on each side are straight up and locked into place. 38 VAIO Slimtop System Reference Manual 4 Align the module over the appropriate socket;

System Reference Manual
Page 51
No further action is required. Your computer automatically recognizes the extra memory and configures itself accordingly when you turn it on page 25). Removing, Installing, and Replacing Components 39 7 Replace the system cover (see "Replacing the System Cover" on .
No further action is required. Your computer automatically recognizes the extra memory and configures itself accordingly when you turn it on page 25). Removing, Installing, and Replacing Components 39 7 Replace the system cover (see "Replacing the System Cover" on .

System Reference Manual
Page 59
Chapter 4 System Board This chapter identifies and describes components on the system board. Battery ATX PWR Wake On LAN (not used) PWR Fan VGA Monitor USB1, USB2, Ethernet Line In Line Out Mic i.LINK 1394 i.LINK LCD Monitor (unused) CD-IN Memory SWI (Config.switch) Secondary IDE Primary IDE CPU O12 N to Modem/ USB3 PCMCIA Socket Sony Memory Stick USB4 i.LINK CPU Fan Sony Panel 1394 i.LINK 47
Chapter 4 System Board This chapter identifies and describes components on the system board. Battery ATX PWR Wake On LAN (not used) PWR Fan VGA Monitor USB1, USB2, Ethernet Line In Line Out Mic i.LINK 1394 i.LINK LCD Monitor (unused) CD-IN Memory SWI (Config.switch) Secondary IDE Primary IDE CPU O12 N to Modem/ USB3 PCMCIA Socket Sony Memory Stick USB4 i.LINK CPU Fan Sony Panel 1394 i.LINK 47

System Reference Manual
Page 60
Memory module (DIMM) 1 Indicates pin 1 Be sure to the left of each Dual Inline Memory Module (DIMM) look very similar. 48 VAIO Slimtop System Reference Manual Memory Module (DIMM) Slots O12 N DIMM1 DIMM2 Both sides of pin 1. The side with pin 1 has a small "1" to orient a DIMM correctly in the DIMM connector (a small triangle on the connector indicates pin 1).
Memory module (DIMM) 1 Indicates pin 1 Be sure to the left of each Dual Inline Memory Module (DIMM) look very similar. 48 VAIO Slimtop System Reference Manual Memory Module (DIMM) Slots O12 N DIMM1 DIMM2 Both sides of pin 1. The side with pin 1 has a small "1" to orient a DIMM correctly in the DIMM connector (a small triangle on the connector indicates pin 1).


