

Operating Instructions
Page 1
2-655-762-15 (1) Data Projector Operating Instructions VPL-FX52/FX52L © 2005 Sony Corporation
2-655-762-15 (1) Data Projector Operating Instructions VPL-FX52/FX52L © 2005 Sony Corporation

Operating Instructions
Page 3
For any service or guarantee matters please refer to the projector. WARNING 3 For the customers in Taiwan only For the State of the unit, operate the disconnect device to an easily accessible socket-outlet near ...guarantee documents. If a fault should occur during operation of California, USA only Perchlorate Material - For the customers in Europe The manufacturer of this product is Sony Deutschland GmbH, Hedelfinger Strasse 61, 70327 Stuttgart, Germany. special handling may apply, See www.dtsc.ca.gov/harzardouswaste/ perchlorate Perchlorate Material: Lithium battery contains ...
For any service or guarantee matters please refer to the projector. WARNING 3 For the customers in Taiwan only For the State of the unit, operate the disconnect device to an easily accessible socket-outlet near ...guarantee documents. If a fault should occur during operation of California, USA only Perchlorate Material - For the customers in Europe The manufacturer of this product is Sony Deutschland GmbH, Hedelfinger Strasse 61, 70327 Stuttgart, Germany. special handling may apply, See www.dtsc.ca.gov/harzardouswaste/ perchlorate Perchlorate Material: Lithium battery contains ...

Operating Instructions
Page 4
... ..... 35 The INFORMATION Menu 36 Operation and Administration using a Network Accessing the Projector from a Computer 37 Checking the Status of the Projector 37 Controlling the Projector from a Computer 38 Setting Up the Projector 38 Setting Up and Projecting Installation Example 17 Connecting the Projector 18 Connecting with a Computer or a VCR 18 To connect to a video...
... ..... 35 The INFORMATION Menu 36 Operation and Administration using a Network Accessing the Projector from a Computer 37 Checking the Status of the Projector 37 Controlling the Projector from a Computer 38 Setting Up the Projector 38 Setting Up and Projecting Installation Example 17 Connecting the Projector 18 Connecting with a Computer or a VCR 18 To connect to a video...
Operating Instructions
Page 5
...recommended that continuously appear on the lens, use strong solvents, such as it out by yourself. To remove dust on the LCD projector. Use a cover over fluorescent lamps to avoid lowering the contrast ratio. • Cover any liquid or solid object fall ...they will damage the cabinet. • Avoid touching the lens. Precautions 5 the air coming out is recommended. On LCD projector • The LCD projector is equipped with qualified Sony personnel. • Should any windows that face the screen with a mild detergent solution. You may be near the ...
...recommended that continuously appear on the lens, use strong solvents, such as it out by yourself. To remove dust on the LCD projector. Use a cover over fluorescent lamps to avoid lowering the contrast ratio. • Cover any liquid or solid object fall ...they will damage the cabinet. • Avoid touching the lens. Precautions 5 the air coming out is recommended. On LCD projector • The LCD projector is equipped with qualified Sony personnel. • Should any windows that face the screen with a mild detergent solution. You may be near the ...

Operating Instructions
Page 6
... floor. • Be careful not to use the carrying handle. On installation • When the projector is not excessive. • Install the projector on the ceiling, the Sony PSS-620 Projector Suspension Support must be sure to catch your finger between the unit and surface of more than 50 ...cm (19 3/4 inches) between the handle, floor, and the projector. • Do not catch your finger in the ...
... floor. • Be careful not to use the carrying handle. On installation • When the projector is not excessive. • Install the projector on the ceiling, the Sony PSS-620 Projector Suspension Support must be sure to catch your finger between the unit and surface of more than 50 ...cm (19 3/4 inches) between the handle, floor, and the projector. • Do not catch your finger in the ...

Operating Instructions
Page 7
...the internal heat builds up due to moisture condensation or rise in a location where the temperature may cause malfunction or damage to the projector. Near a heat or smoke sensor • Allow adequate air circulation to direct cool or warm air from an air-conditioner Unsuitable ...Installation Do not install the projector in a very dusty or extremely smoky environment. Notes on Installation and Usage 7 Overview Notes on Installation and Usage Subject to prevent ...
...the internal heat builds up due to moisture condensation or rise in a location where the temperature may cause malfunction or damage to the projector. Near a heat or smoke sensor • Allow adequate air circulation to direct cool or warm air from an air-conditioner Unsuitable ...Installation Do not install the projector in a very dusty or extremely smoky environment. Notes on Installation and Usage 7 Overview Notes on Installation and Usage Subject to prevent ...

Operating Instructions
Page 8
... adverse effects, such as reducing the reliability of certain components. Failing to cut off the picture. Unsuitable Conditions Do not use the projector under the following conditions. Avoid using as the unit topples over the ventilation holes (exhaust/intake); Tilting right/left Avoid using as... the unit tilts more than on "High Altitude Mode" in front of the projector. It may damage the object. Do not install the unit other than 20 degrees. otherwise, the internal heat may cause malfunction. 8 ...
... adverse effects, such as reducing the reliability of certain components. Failing to cut off the picture. Unsuitable Conditions Do not use the projector under the following conditions. Avoid using as the unit topples over the ventilation holes (exhaust/intake); Tilting right/left Avoid using as... the unit tilts more than on "High Altitude Mode" in front of the projector. It may damage the object. Do not install the unit other than 20 degrees. otherwise, the internal heat may cause malfunction. 8 ...

Operating Instructions
Page 9
...projector, depending on your setup condition. *For VPL-FX52 (with a 1.3-times power zoom and power focus lens*, which allows you to connect to the digital RGB equipment equipped with the center of the screen. • Tilt installation (in front and rear) You can install the projector...LCD panel with six color systems NTSC 3.58, PAL, SECAM, NTSC 4.431), PAL-M or PAL-N color system can be stacked, which allows you to change the size of the projected image without worrying about trapezoid distortion. This projector...790,000-pixels XGA panels, the resolutions of the projector lamp, error ...
...projector, depending on your setup condition. *For VPL-FX52 (with a 1.3-times power zoom and power focus lens*, which allows you to connect to the digital RGB equipment equipped with the center of the screen. • Tilt installation (in front and rear) You can install the projector...LCD panel with six color systems NTSC 3.58, PAL, SECAM, NTSC 4.431), PAL-M or PAL-N color system can be stacked, which allows you to change the size of the projected image without worrying about trapezoid distortion. This projector...790,000-pixels XGA panels, the resolutions of the projector lamp, error ...

Operating Instructions
Page 10
... 4 6 5 8 7 Rear/Bottom 9 0 qa qd qs a Front remote control detector b Lens Remove the lens cap before projection. * The lens for VPL-FX52L are not supplied. Location and Function of Controls Home page address: http://www.kensington.com/ i Rear remote control detector j Lamp cover k Ventilation holes (intake... holes (intake/exhaust). c Lens cover d Control panel For details, see "Connector Panel" on page 11. h Security lock Connects to the projector. • Do not place your hand or objects near the ventilation holes as it may cause internal heat build-up may occur, causing a ...
... 4 6 5 8 7 Rear/Bottom 9 0 qa qd qs a Front remote control detector b Lens Remove the lens cap before projection. * The lens for VPL-FX52L are not supplied. Location and Function of Controls Home page address: http://www.kensington.com/ i Rear remote control detector j Lamp cover k Ventilation holes (intake... holes (intake/exhaust). c Lens cover d Control panel For details, see "Connector Panel" on page 11. h Security lock Connects to the projector. • Do not place your hand or objects near the ventilation holes as it may cause internal heat build-up may occur, causing a ...

Operating Instructions
Page 11
... air filter periodically. Next adjust the picture size using the arrow keys. Location and Function of the picture using the arrow keys. The projector is raised by turning the adjusters clockwise, or it is lowered by turning them using the arrow keys. The mode currently selected is displayed.... Next adjust the vertical position of Controls 11 Next adjust the focus using the arrow keys. Overview l Adjuster Use the adjusters to keep the projector level if it is installed on page 43. m Air filter For details, see "Cleaning the Air Filter" on an uneven surface. Control Panel...
... air filter periodically. Next adjust the picture size using the arrow keys. Location and Function of the picture using the arrow keys. The projector is raised by turning the adjusters clockwise, or it is lowered by turning them using the arrow keys. The mode currently selected is displayed.... Next adjust the vertical position of Controls 11 Next adjust the focus using the arrow keys. Overview l Adjuster Use the adjusters to keep the projector level if it is installed on page 43. m Air filter For details, see "Cleaning the Air Filter" on an uneven surface. Control Panel...

Operating Instructions
Page 12
b Arrow keys (M/m/
b Arrow keys (M/m/

Operating Instructions
Page 13
... have excessive voltage to this port. d NETWORK connector (RJ-45) Connect to a computer on the same LAN with a DVI cable. Location and Function of this projector. h ENTER key Enters the settings of an item back to its factory preset value. This key functions when the menu or a setting item is selected... this port. i RESET key Resets the value of items in the menu system. CAUTION For safety, do not connect the connector for example, when the projector has been hung from the ceiling.
... have excessive voltage to this port. d NETWORK connector (RJ-45) Connect to a computer on the same LAN with a DVI cable. Location and Function of this projector. h ENTER key Enters the settings of an item back to its factory preset value. This key functions when the menu or a setting item is selected... this port. i RESET key Resets the value of items in the menu system. CAUTION For safety, do not connect the connector for example, when the projector has been hung from the ceiling.

Operating Instructions
Page 14
... from the selected channel and computer signals only from among the signals from the computer. The signal is 0 volt level output when the projector power is transmitted from the INPUT B connector. 14 Location and Function of Controls Remote Commander The keys which have the same names as ... Used as loop-through output via the VIDEO IN connector. wa w; c INPUT key 4 TILT/KEYSTONE key Adjusts the vertical trapezoidal distortion of the Sony equipment. S VIDEO (mini DIN 4-pin): Connects to the composite video output. Connects to the CONTROL S OUT jack on the supplied Remote Commander when...
... from the selected channel and computer signals only from among the signals from the computer. The signal is 0 volt level output when the projector power is transmitted from the INPUT B connector. 14 Location and Function of Controls Remote Commander The keys which have the same names as ... Used as loop-through output via the VIDEO IN connector. wa w; c INPUT key 4 TILT/KEYSTONE key Adjusts the vertical trapezoidal distortion of the Sony equipment. S VIDEO (mini DIN 4-pin): Connects to the composite video output. Connects to the CONTROL S OUT jack on the supplied Remote Commander when...

Operating Instructions
Page 15
... key This key freezes the projected image. This key functions when the menu or a setting item is supplied via the CONTROL S IN jack on the projector with the connecting cable (not supplied) when using the Remote Commander as a RESET key. Overview e (Memory Stick) key This key does not work... of an item to its original size. k Strap holder Attaches a strap. In this case, you do not need to the CONTROL S IN jack on the projector. n D ZOOM +/- i ENTER key j FUNCTION 1/2/3 keys This key does not work in the unit. l CONTROL S OUT jack (stereo mini-jack) Connects to install the...
... key This key freezes the projected image. This key functions when the menu or a setting item is supplied via the CONTROL S IN jack on the projector with the connecting cable (not supplied) when using the Remote Commander as a RESET key. Overview e (Memory Stick) key This key does not work... of an item to its original size. k Strap holder Attaches a strap. In this case, you do not need to the CONTROL S IN jack on the projector. n D ZOOM +/- i ENTER key j FUNCTION 1/2/3 keys This key does not work in the unit. l CONTROL S OUT jack (stereo mini-jack) Connects to install the...

Operating Instructions
Page 16
...the correct polarity. Notes on Remote Commander operation • Make sure that nothing to obstruct the infrared beam between the Remote Commander and the projector is correct when inserting batteries. • Do not mix an old battery with a new one or different types of Controls Battery installation ... control detector on batteries • Make sure that the battery orientation is , the wider the angle within which the commander can control the projector. 16 Location and Function of batteries. • If you will not use the Remote Commander for a long time, remove the batteries to...
...the correct polarity. Notes on Remote Commander operation • Make sure that nothing to obstruct the infrared beam between the Remote Commander and the projector is correct when inserting batteries. • Do not mix an old battery with a new one or different types of Controls Battery installation ... control detector on batteries • Make sure that the battery orientation is , the wider the angle within which the commander can control the projector. 16 Location and Function of batteries. • If you will not use the Remote Commander for a long time, remove the batteries to...

Operating Instructions
Page 17
... Projecting Installation Example • The following table indicates an example of installing the standard lens supplied with VPL-FX52. • When you use VPL-FX52L (Lens are not supplied), be sure refer to the foot of the projector x: Free Distance between the front of Wall the cabinet and the center of the lens Setting...
... Projecting Installation Example • The following table indicates an example of installing the standard lens supplied with VPL-FX52. • When you use VPL-FX52L (Lens are not supplied), be sure refer to the foot of the projector x: Free Distance between the front of Wall the cabinet and the center of the lens Setting...
Operating Instructions
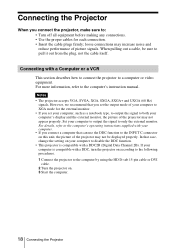
Page 18
...HD D-sub 15-pin cable or DVI cable. 2 Turn the projector on this unit, the picture of the projector may not be sure to pull it out from the plug, not the cable itself. Notes • The projector accepts VGA, SVGA, XGA, SXGA, SXGA+ and UXGA (60 Hz) signals. Connecting the... Projector When you set the output mode of your computer to XGA mode for the external monitor. • If you connect the projector, make sure to: • Turn off all ...
...HD D-sub 15-pin cable or DVI cable. 2 Turn the projector on this unit, the picture of the projector may not be sure to pull it out from the plug, not the cable itself. Notes • The projector accepts VGA, SVGA, XGA, SXGA, SXGA+ and UXGA (60 Hz) signals. Connecting the... Projector When you set the output mode of your computer to XGA mode for the external monitor. • If you connect the projector, make sure to: • Turn off all ...

Operating Instructions
Page 19
Setting Up and Projecting Front of the projector DVI cable (not supplied) Computer To DVI output INPUT B DVI-D INPUT A RGB INPUT C R/R-Y/PR G/Y B/B-Y/PB SYNC/HD VD HD D-sub 15-pin (not supplied) NEWTWORK ... of a type having two rows of pins to the connector, use a commercially available plug adaptor. 1) Macintosh is a registered trademark of Apple Computer Inc. Connecting the Projector 19
Setting Up and Projecting Front of the projector DVI cable (not supplied) Computer To DVI output INPUT B DVI-D INPUT A RGB INPUT C R/R-Y/PR G/Y B/B-Y/PB SYNC/HD VD HD D-sub 15-pin (not supplied) NEWTWORK ... of a type having two rows of pins to the connector, use a commercially available plug adaptor. 1) Macintosh is a registered trademark of Apple Computer Inc. Connecting the Projector 19

Operating Instructions
Page 20
... RGB/component equipment Notes • When you input the external sync signal from video GBR/component equipment. 20 Connecting the Projector To connect to a video GBR/Component equipment Front of the projector INPUT B DVI-D INPUT A RGB INPUT C R/R-Y/PR G/Y B/B-Y/PB SYNC/HD VD NEWTWORK MONITOR OUT VIDEO IN S VIDEO VIDEO OUT VIDEO TRIG...
... RGB/component equipment Notes • When you input the external sync signal from video GBR/component equipment. 20 Connecting the Projector To connect to a video GBR/Component equipment Front of the projector INPUT B DVI-D INPUT A RGB INPUT C R/R-Y/PR G/Y B/B-Y/PB SYNC/HD VD NEWTWORK MONITOR OUT VIDEO IN S VIDEO VIDEO OUT VIDEO TRIG...

Operating Instructions
Page 21
... LENS APA TILT/KEYSTONE VOLUME MENU/ TAB AIR SHOT FREEZE 2 3 4,5,6 1 Plug the AC power cord into a wall outlet. 2 Press the I / 1 key to turn on the projector. 3 Press the MENU key.
... LENS APA TILT/KEYSTONE VOLUME MENU/ TAB AIR SHOT FREEZE 2 3 4,5,6 1 Plug the AC power cord into a wall outlet. 2 Press the I / 1 key to turn on the projector. 3 Press the MENU key.


