User Guide
Page 12
Printing images How to print images 122 Printing images directly using a PictBridge compliant printer 123 Troubleshooting Troubleshooting 127 Warning messages 137 Others On the "Memory Stick 139 On the CF card/Microdrive 141 On the battery pack 142 On the battery charger 143 Optional accessories 144 Precautions 147 Specifications 149 Reset default 151 Index 155 12
Printing images How to print images 122 Printing images directly using a PictBridge compliant printer 123 Troubleshooting Troubleshooting 127 Warning messages 137 Others On the "Memory Stick 139 On the CF card/Microdrive 141 On the battery pack 142 On the battery charger 143 Optional accessories 144 Precautions 147 Specifications 149 Reset default 151 Index 155 12

User Guide
Page 103
...the blower brush to prevent the dust from resettling in the camera. • Do not use a commercially available blower brush and...Confirm that [Yes] is selected. The message "After cleaning the CCD, turn camera off. appears. 3 Select [Yes] with b on the shooting environment. Before... CCD, use a spray blower because it may scatter vapor inside the camera body. 103 The cleaning should be performed only when the battery level ... then select [Enter]. Complete the cleaning quickly. • Hold the camera's face downward to clean the CCD surface and the surrounding area. •...
...the blower brush to prevent the dust from resettling in the camera. • Do not use a commercially available blower brush and...Confirm that [Yes] is selected. The message "After cleaning the CCD, turn camera off. appears. 3 Select [Yes] with b on the shooting environment. Before... CCD, use a spray blower because it may scatter vapor inside the camera body. 103 The cleaning should be performed only when the battery level ... then select [Enter]. Complete the cleaning quickly. • Hold the camera's face downward to clean the CCD surface and the surrounding area. •...

User Guide
Page 107
...inserted to a computer using the USB connection Follow Stages 1 through 4 on the camera and the computer. You can copy images from the camera and insert it in a computer Remove the recording medium from the camera to your computer using a Windows computer as follows. Copying images to your computer 107... For connecting the camera with the AC Adaptor/charger (not supplied). • When you copy images to copy images. For directly inserting the recording medium in the computer and copy ...
...inserted to a computer using the USB connection Follow Stages 1 through 4 on the camera and the computer. You can copy images from the camera and insert it in a computer Remove the recording medium from the camera to your computer using a Windows computer as follows. Copying images to your computer 107... For connecting the camera with the AC Adaptor/charger (not supplied). • When you copy images to copy images. For directly inserting the recording medium in the computer and copy ...

User Guide
Page 123
... a single image on the printer. • You cannot print RAW data files. 4 Select [PTP] with the USB cable. Printing images 123 Stage 1: Preparing the camera Prepare the camera to connect it to the printer with V, then press the center of the controller. Printing images directly using a PictBridge compliant printer Even if you... may not be printed as an index image differ depending on a printing sheet. MENU button Controller • It is recommended to use the AC Adaptor/ charger (not supplied) to [PTP]. 5 Turn the camera off partway through printing.
... a single image on the printer. • You cannot print RAW data files. 4 Select [PTP] with the USB cable. Printing images 123 Stage 1: Preparing the camera Prepare the camera to connect it to the printer with V, then press the center of the controller. Printing images directly using a PictBridge compliant printer Even if you... may not be printed as an index image differ depending on a printing sheet. MENU button Controller • It is recommended to use the AC Adaptor/ charger (not supplied) to [PTP]. 5 Turn the camera off partway through printing.
User Guide
Page 132
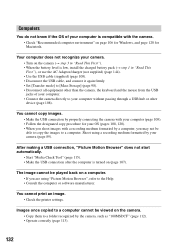
... First"). • When the battery level is turned on a computer. • If you shoot images with the camera. • Check "Recommended computer environment" on the camera (t step 3 in "Read This First"), or use the AC Adaptor/charger (not supplied) (page 144). • Use the USB cable (supplied) (page 108). • Disconnect the USB...
... First"). • When the battery level is turned on a computer. • If you shoot images with the camera. • Check "Recommended computer environment" on the camera (t step 3 in "Read This First"), or use the AC Adaptor/charger (not supplied) (page 144). • Use the USB cable (supplied) (page 108). • Disconnect the USB...

User Guide
Page 136
...the POWER switch was set to shoot but the Super SteadyShot function will not work. If the Super SteadyShot scale continues to ON. Others Your camera does not work. • Use the type of battery pack you can continue to OFF and the access lamp is set to flash, ...switch is not illuminated (t step 1 in "Read This First"). The message "Set date and time?" If an AC Adaptor/charger (not supplied) is changed, consult your Sony dealer or local authorized Sony service facility. 136 If the date setting is lost every time the battery pack is used, disconnect the power cord...
...the POWER switch was set to shoot but the Super SteadyShot function will not work. If the Super SteadyShot scale continues to ON. Others Your camera does not work. • Use the type of battery pack you can continue to OFF and the access lamp is set to flash, ...switch is not illuminated (t step 1 in "Read This First"). The message "Set date and time?" If an AC Adaptor/charger (not supplied) is changed, consult your Sony dealer or local authorized Sony service facility. 136 If the date setting is lost every time the battery pack is used, disconnect the power cord...
User Guide
Page 137
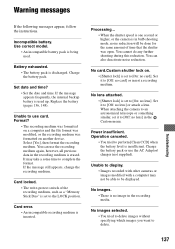
...medium again, however, all previous data in the recording media. When attaching the camera to an astronomical telescope or something similar, set to complete the format. Unable to display. • Images recorded...Yes], then format the recording medium. Processing... • When the shutter speed is one second or higher, or the camera is erased. Operation canceled. • You tried to be done for the same amount of the recording medium, such as...appears, change the recording medium. Set it to use the AC Adaptor/ charger (not supplied). No images. • There is used .
...medium again, however, all previous data in the recording media. When attaching the camera to an astronomical telescope or something similar, set to complete the format. Unable to display. • Images recorded...Yes], then format the recording medium. Processing... • When the shutter speed is one second or higher, or the camera is erased. Operation canceled. • You tried to be done for the same amount of the recording medium, such as...appears, change the recording medium. Set it to use the AC Adaptor/ charger (not supplied). No images. • There is used .

User Guide
Page 143
... if you leave the charged battery pack in the battery charger (supplied) with your camera. Check that a battery pack other than the specified type have occurred. • If the battery charger is the specified type. Clean the battery charger with new one or another one and check if the ...battery charger operates correctly. If the battery pack is the specified type,...
... if you leave the charged battery pack in the battery charger (supplied) with your camera. Check that a battery pack other than the specified type have occurred. • If the battery charger is the specified type. Clean the battery charger with new one or another one and check if the ...battery charger operates correctly. If the battery pack is the specified type,...
User Guide
Page 144
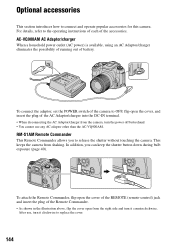
...the illustration above, flip the cover open the cover, and insert the plug of the AC Adaptor/charger into the DC-IN terminal. • When disconnecting the AC Adaptor/charger from the camera, turn the power off beforehand. • You cannot use , turn it clockwise to the ...operating instructions of each of battery. AC-VQ900AM AC Adaptor/charger When a household power outlet (AC power) is available, using an AC Adaptor/charger eliminates the possibility of...
...the illustration above, flip the cover open the cover, and insert the plug of the AC Adaptor/charger into the DC-IN terminal. • When disconnecting the AC Adaptor/charger from the camera, turn the power off beforehand. • You cannot use , turn it clockwise to the ...operating instructions of each of battery. AC-VQ900AM AC Adaptor/charger When a household power outlet (AC power) is available, using an AC Adaptor/charger eliminates the possibility of...
User Guide
Page 148
...time. Charging method of the NP-FM55H battery pack t step 1 in the camera, or connect the camera to charge this rechargeable battery before using the AC Adaptor/charger (not supplied), and leave the camera for about 8 month it becomes completely discharged. However, even if this case,... be sure to a wall outlet (wall socket) using the camera. Charging method of the internal rechargeable battery Insert...
...time. Charging method of the NP-FM55H battery pack t step 1 in the camera, or connect the camera to charge this rechargeable battery before using the AC Adaptor/charger (not supplied), and leave the camera for about 8 month it becomes completely discharged. However, even if this case,... be sure to a wall outlet (wall socket) using the camera. Charging method of the internal rechargeable battery Insert...
User Guide
Page 150
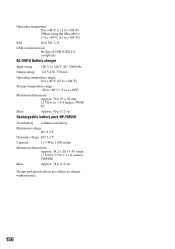
...;F) (When using the Microdrive: +5 to +40°C (41 to +104°F)) Exif Exif Ver. 2.21 USB communication Hi-Speed USB (USB 2.0 compliant) BC-VM10 Battery charger Input rating 100 V to 240 V AC, 50/60 Hz Output rating 8.4 V DC, 750 mA Operating temperature range 0 to +40°C (32 to +104°F) Storage...
...;F) (When using the Microdrive: +5 to +40°C (41 to +104°F)) Exif Exif Ver. 2.21 USB communication Hi-Speed USB (USB 2.0 compliant) BC-VM10 Battery charger Input rating 100 V to 240 V AC, 50/60 Hz Output rating 8.4 V DC, 750 mA Operating temperature range 0 to +40°C (32 to +104°F) Storage...
User Guide
Page 155
..."Read This First" Audio signals 99 Auto adjustment mode t step 5 in "Read This First" Auto Focus 13 Autoflash 55 Automatic AF 53 B B&W 50 Battery charger t step 1 in "Read This First" Battery pack Charging t step 1 in "Read This First" Insert/Remove t step 1 in "Read This First" Remaining..... 107, 120 Macintosh 120 Recommended environment ........ 106, 120 Software 114, 115 Viewing image files stored on a computer with your camera 113 Windows 105 Connecting Computer 108 Printer 124 TV 78 Continuous AF 54 Continuous bracket 62 Continuous shooting 61 Contrast 50 Copying images to...
..."Read This First" Audio signals 99 Auto adjustment mode t step 5 in "Read This First" Auto Focus 13 Autoflash 55 Automatic AF 53 B B&W 50 Battery charger t step 1 in "Read This First" Battery pack Charging t step 1 in "Read This First" Insert/Remove t step 1 in "Read This First" Remaining..... 107, 120 Macintosh 120 Recommended environment ........ 106, 120 Software 114, 115 Viewing image files stored on a computer with your camera 113 Windows 105 Connecting Computer 108 Printer 124 TV 78 Continuous AF 54 Continuous bracket 62 Continuous shooting 61 Contrast 50 Copying images to...

