
Computer Applications Guide
Page 7
... a computer. • Connecting with a USB cable (supplied) • Connecting with an i.LINK cable (optional) See "Step 2: Connecting your camcorder to a computer" (p. 10) for details. Overview of models with a Handycam Station, place your camcorder to the computer. On your computer (for the first time only) Step 1: Installing the software on a computer CD-ROM (supplied...
... a computer. • Connecting with a USB cable (supplied) • Connecting with an i.LINK cable (optional) See "Step 2: Connecting your camcorder to a computer" (p. 10) for details. Overview of models with a Handycam Station, place your camcorder to the computer. On your computer (for the first time only) Step 1: Installing the software on a computer CD-ROM (supplied...

Computer Applications Guide
Page 11
... computer. For Windows 2000/Windows XP When the dialogue box prompting you to confirm the digital signature appears, select [Yes] if you use Windows 2000 or select [Continue Anyway] if... Connecting to the USB jack on as the power source. The name of the power switch on the camcorder varies depending on . If [Found New Hardware Wizard] appears, click [Continue Anyway] and complete the ... source for the location. For the model that your camcorder is supplied with the Handycam Station, connect the USB cable to the USB jack on the Handycam Station, then set the USB ON/OFF switch to ...
... computer. For Windows 2000/Windows XP When the dialogue box prompting you to confirm the digital signature appears, select [Yes] if you use Windows 2000 or select [Continue Anyway] if... Connecting to the USB jack on as the power source. The name of the power switch on the camcorder varies depending on . If [Found New Hardware Wizard] appears, click [Continue Anyway] and complete the ... source for the location. For the model that your camcorder is supplied with the Handycam Station, connect the USB cable to the USB jack on the Handycam Station, then set the USB ON/OFF switch to ...

Computer Applications Guide
Page 13
...to the separate Camera Operations Guide supplied with the Handycam Station, connect the USB cable to the USB jack on the Handycam Station, then set the USB ON/OFF switch to ON. 6 Connect the other end of your camcorder to the computer. Connecting to a Windows computer ... installed Picture Package on a "Memory Stick" are recorded into your camcorder. 3 Prepare the power source for Windows XP), [Picture Package], [Handycam Tools], and [USB Streaming Tool], then start up , then pictures recorded on your camcorder to the USB jack on the computer. Before following steps. The ...
...to the separate Camera Operations Guide supplied with the Handycam Station, connect the USB cable to the USB jack on the Handycam Station, then set the USB ON/OFF switch to ON. 6 Connect the other end of your camcorder to the computer. Connecting to a Windows computer ... installed Picture Package on a "Memory Stick" are recorded into your camcorder. 3 Prepare the power source for Windows XP), [Picture Package], [Handycam Tools], and [USB Streaming Tool], then start up , then pictures recorded on your camcorder to the USB jack on the computer. Before following steps. The ...

Computer Applications Guide
Page 16
... on the model. To disconnect the i.LINK cable Turn off the power of the camcorder and disconnect the i.LINK cable from the camcorder and computer. 16 Connecting to the DV Interface on the Handycam Station. The location of the DV Interface varies depending on the operation of other image... editing software that is supplied with your camcorder for the location. z Tip • You can read video signals to the help files ...
... on the model. To disconnect the i.LINK cable Turn off the power of the camcorder and disconnect the i.LINK cable from the camcorder and computer. 16 Connecting to the DV Interface on the Handycam Station. The location of the DV Interface varies depending on the operation of other image... editing software that is supplied with your camcorder for the location. z Tip • You can read video signals to the help files ...
Computer Applications Guide
Page 26
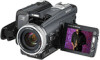
...MIX function. 1 Turn on a Windows computer Copying images for MEMORY MIX to a "Memory Stick" (only the models with each player for your camcorder, then slide the POWER switch repeatedly to select the PLAY/ EDIT mode. a DVD player compatible with Video CDs - a computer equipped with a ...DVD drive and software compatible with Video CDs - For other operating systems Click [Start], [Programs], [Picture Package], [Handycam Tools], then [MEMORY MIX Image Tool]. The name of the power switch on the camcorder varies depending on the model. 4 Set [STD-USB] in the disc drive of your...
...MIX function. 1 Turn on a Windows computer Copying images for MEMORY MIX to a "Memory Stick" (only the models with each player for your camcorder, then slide the POWER switch repeatedly to select the PLAY/ EDIT mode. a DVD player compatible with Video CDs - a computer equipped with a ...DVD drive and software compatible with Video CDs - For other operating systems Click [Start], [Programs], [Picture Package], [Handycam Tools], then [MEMORY MIX Image Tool]. The name of the power switch on the camcorder varies depending on the model. 4 Set [STD-USB] in the disc drive of your...

Computer Applications Guide
Page 28
...the correct direction. The location of the USB jack varies depending on . For the model that is supplied with the Handycam Station, connect the USB cable to the USB jack on your camcorder. The procedure of the menu settings varies depending on the model. 4 Connect the USB cable (supplied) to the... USB jack on the Handycam Station, then set the USB ON/OFF switch to ON. Refer to the separate Camera Operations Guide supplied with your camcorder. • If you connect them with the USB cable (supplied) before turning off the...
...the correct direction. The location of the USB jack varies depending on . For the model that is supplied with the Handycam Station, connect the USB cable to the USB jack on your camcorder. The procedure of the menu settings varies depending on the model. 4 Connect the USB cable (supplied) to the... USB jack on the Handycam Station, then set the USB ON/OFF switch to ON. Refer to the separate Camera Operations Guide supplied with your camcorder. • If you connect them with the USB cable (supplied) before turning off the...
Computer Applications Guide
Page 35
...the pictures to a "Memory Stick" in the menu settings of your camcorder to the camcorder firmly. cYou cannot use an i.LINK cable. You cannot view the pictures the camcorder is supplied with the Handycam Station, connect the Handycam Station to on . You cannot view the pictures recorded on a tape...the cable from the computer, turn on the camcorder, then connect it again. cFor the model that is supplied with the Handycam Station, set [STD-USB] in your camcorder. cFor the model that is seeing on the camcorder, then connect it again firmly. Additional information ...
...the pictures to a "Memory Stick" in the menu settings of your camcorder to the camcorder firmly. cYou cannot use an i.LINK cable. You cannot view the pictures the camcorder is supplied with the Handycam Station, connect the Handycam Station to on . You cannot view the pictures recorded on a tape...the cable from the computer, turn on the camcorder, then connect it again. cFor the model that is supplied with the Handycam Station, set [STD-USB] in your camcorder. cFor the model that is seeing on the camcorder, then connect it again firmly. Additional information ...
Computer Applications Guide
Page 36
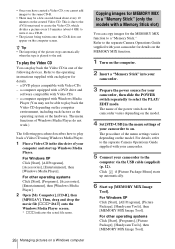
...USB driver was completed. For Windows 98*/Windows 98SE/Windows Me * When copying or playing the pictures on a tape using the USB cable. Sony Handycam] or [? Symptom The image does not appear on a "Memory Stick" (only the models with a "?" Cause and/or Corrective Actions cThe...click [My Computer]. 2 Right-click [PICTUREPACKAGE] (Disc drive)*. * Drive names (such as (E:)) may vary depending on Windows 98. 1 Check that your camcorder before the installation of your computer. 8 Follow the steps below and try to a computer. 2 Right-click [My Computer], then click [Properties]. For copying...
...USB driver was completed. For Windows 98*/Windows 98SE/Windows Me * When copying or playing the pictures on a tape using the USB cable. Sony Handycam] or [? Symptom The image does not appear on a "Memory Stick" (only the models with a "?" Cause and/or Corrective Actions cThe...click [My Computer]. 2 Right-click [PICTUREPACKAGE] (Disc drive)*. * Drive names (such as (E:)) may vary depending on Windows 98. 1 Check that your camcorder before the installation of your computer. 8 Follow the steps below and try to a computer. 2 Right-click [My Computer], then click [Properties]. For copying...

Computer Applications Guide
Page 37
...-click [My Computer]. 2 Right-click [PICTUREPACKAGE] (Disc drive)*. * Drive names (such as Administrators. 1 Check that your camcorder is connected to delete them. Sony Handycam] or [? Sony DSC] may vary depending on the computer. 3 Click [Open]. 4 Double-click [Driver]. 5 Double-click [Setup.exe]. ... [Confirm Device Removal] screen appears, click [OK]. 8 Turn off the power of your computer. ,continued Additional information 37 Sony Handycam] and [? Additional information Symptom Cause and/or Corrective Actions The image does not appear on [USB Streaming Tool] when using...
...-click [My Computer]. 2 Right-click [PICTUREPACKAGE] (Disc drive)*. * Drive names (such as Administrators. 1 Check that your camcorder is connected to delete them. Sony Handycam] or [? Sony DSC] may vary depending on the computer. 3 Click [Open]. 4 Double-click [Driver]. 5 Double-click [Setup.exe]. ... [Confirm Device Removal] screen appears, click [OK]. 8 Turn off the power of your computer. ,continued Additional information 37 Sony Handycam] and [? Additional information Symptom Cause and/or Corrective Actions The image does not appear on [USB Streaming Tool] when using...

Computer Applications Guide
Page 38
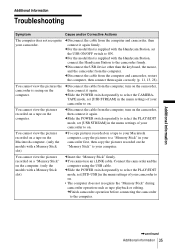
... the USB cable. (Continued from the previous page) For Windows XP Log on as (E:)) may cause malfunction of your camcorder is connected to a computer. 2 Click [Start]. 3 Right-click [My Computer], then click [Properties]. Sony Handycam] and [? For copying and viewing pictures recorded on a tape • [USB Composite Device] in the [Universal Serial Bus...
... the USB cable. (Continued from the previous page) For Windows XP Log on as (E:)) may cause malfunction of your camcorder is connected to a computer. 2 Click [Start]. 3 Right-click [My Computer], then click [Properties]. Sony Handycam] and [? For copying and viewing pictures recorded on a tape • [USB Composite Device] in the [Universal Serial Bus...

Computer Applications Guide
Page 40
...sound when the camcorder is not supported on -screen instructions, click [Next] , then click [Done]. 40 Additional information cChange the settings for your computer environment as described in the following procedures: 1 Select [Start], [Programs]( [All Programs] for Windows XP), [Picture Package], [Handycam Tools], and...start up [USB Streaming Tool]. 2 Select another device on the [Select audio device] screen. 3 Follow the on the screen of your camcorder first. cChange the settings as described in the (-) direction on [Select video quality]. 3 Follow the on Windows 98. The movie is...
...sound when the camcorder is not supported on -screen instructions, click [Next] , then click [Done]. 40 Additional information cChange the settings for your computer environment as described in the following procedures: 1 Select [Start], [Programs]( [All Programs] for Windows XP), [Picture Package], [Handycam Tools], and...start up [USB Streaming Tool]. 2 Select another device on the [Select audio device] screen. 3 Follow the on the screen of your camcorder first. cChange the settings as described in the (-) direction on [Select video quality]. 3 Follow the on Windows 98. The movie is...
Computer Applications Guide
Page 41
... C CD-R 20, 22, 23, 24, 25 CD-ROM 8 CD-RW 20, 22, 24, 25 Click to DVD 30 Copying pictures on a "Memory Stick" .... 13, 29 D Digital convert function......33 Direct Access to "Click to DVD 30 Direct Access to Video CD Burn 24 DirectX 9.0b 9 DV Interface 15, 30, 33 DVD... 30 H Handycam Station 7, 11, 13, 16, 28 I i.LINK cable 10, 15, 18, 30, 33 ImageMixer VCD2 29 Install 8 M Macintosh 28 MEMORY MIX 26 "Memory Stick" ..... 13, 26...
... C CD-R 20, 22, 23, 24, 25 CD-ROM 8 CD-RW 20, 22, 24, 25 Click to DVD 30 Copying pictures on a "Memory Stick" .... 13, 29 D Digital convert function......33 Direct Access to "Click to DVD 30 Direct Access to Video CD Burn 24 DirectX 9.0b 9 DV Interface 15, 30, 33 DVD... 30 H Handycam Station 7, 11, 13, 16, 28 I i.LINK cable 10, 15, 18, 30, 33 ImageMixer VCD2 29 Install 8 M Macintosh 28 MEMORY MIX 26 "Memory Stick" ..... 13, 26...


