
User Manual
Page 7
...or a "Memory Stick Duo 26 Recording/Playback Recording and playing back with ease (Easy Handycam 29 Recording 32 Zooming 34 Recording sound with more presence (5.1ch surround recording) (DCRDVD109E/DVD306E/DVD308E/ DVD708E 34 Recording in dark places (NightShot plus 35 Adjusting the exposure for backlit subjects 35... Recording in mirror mode 35 Selecting the aspect ratio (16:9 or 4:3) (DCR-DVD306E/DVD308E/DVD708E 35 Playback 37 Using PB zoom 39 Playing back a series of still images (Slide show 39 Playing the picture on a TV...
...or a "Memory Stick Duo 26 Recording/Playback Recording and playing back with ease (Easy Handycam 29 Recording 32 Zooming 34 Recording sound with more presence (5.1ch surround recording) (DCRDVD109E/DVD306E/DVD308E/ DVD708E 34 Recording in dark places (NightShot plus 35 Adjusting the exposure for backlit subjects 35... Recording in mirror mode 35 Selecting the aspect ratio (16:9 or 4:3) (DCR-DVD306E/DVD308E/DVD708E 35 Playback 37 Using PB zoom 39 Playing back a series of still images (Slide show 39 Playing the picture on a TV...

User Manual
Page 16
... 56 FORMAT* 57 FORMAT* 58 UNFINALIZE 58 DISC INFO 55 (SETTINGS) category To customize your camcorder (p. 60). * You can also set these items during Easy Handycam operation (p. 29).
... 56 FORMAT* 57 FORMAT* 58 UNFINALIZE 58 DISC INFO 55 (SETTINGS) category To customize your camcorder (p. 60). * You can also set these items during Easy Handycam operation (p. 29).

User Manual
Page 19
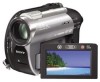
Getting Started Getting Started Step 1: Checking supplied items Make sure that item supplied. AC Adaptor (1) (p. 20) Rechargeable battery pack NP-FH40 (1) (p. 20) Mains lead (1) (p. 20) CD-ROM "Handycam Application Software" (1) (p. 78) Operating Guide (This manual) (1) A/V connecting cable (1) (p. 40, 52) USB cable (1) (p. 53) Wireless Remote Commander (DCRDVD306E/DVD308E/DVD708E) (1) (p. 113) A button-type lithium battery is already installed. 19 The number in the parentheses indicates the number of that you have the following items supplied with your camcorder.
Getting Started Getting Started Step 1: Checking supplied items Make sure that item supplied. AC Adaptor (1) (p. 20) Rechargeable battery pack NP-FH40 (1) (p. 20) Mains lead (1) (p. 20) CD-ROM "Handycam Application Software" (1) (p. 78) Operating Guide (This manual) (1) A/V connecting cable (1) (p. 40, 52) USB cable (1) (p. 53) Wireless Remote Commander (DCRDVD306E/DVD308E/DVD708E) (1) (p. 113) A button-type lithium battery is already installed. 19 The number in the parentheses indicates the number of that you have the following items supplied with your camcorder.

User Manual
Page 27
... the disc cover, it may take some time to remove the disc depending on page 57. • You can use a DVD-RW while the Easy Handycam operation (p. 29) is set incorrectly, it may cause your camcorder to your camcorder is dirty with the recording side or pickup lens (p.104). Continued , 27...
... the disc cover, it may take some time to remove the disc depending on page 57. • You can use a DVD-RW while the Easy Handycam operation (p. 29) is set incorrectly, it may cause your camcorder to your camcorder is dirty with the recording side or pickup lens (p.104). Continued , 27...

User Manual
Page 29
...easy viewing. appears on the LCD screen. 3 Press PHOTO E to OFF (CHG), turn it while pressing the green button. * DCR-DVD106E/DVD108E/DVD109E/DVD608E ** DCR-DVD306E/DVD308E/DVD708E R Movies 1 Turn the POWER switch A until the (Still) lamp turns on. 2 Press EASY B. 2 Press EASY B. ... the still image. * Movies are recorded in the [SP] recording mode. ** Still images are recorded with ease (Easy Handycam) Easy Handycam operation makes nearly all settings automatic so that you can perform recording or playing back operation without detailed settings. FlashingtLights up Press PHOTO...
...easy viewing. appears on the LCD screen. 3 Press PHOTO E to OFF (CHG), turn it while pressing the green button. * DCR-DVD106E/DVD108E/DVD109E/DVD608E ** DCR-DVD306E/DVD308E/DVD708E R Movies 1 Turn the POWER switch A until the (Still) lamp turns on. 2 Press EASY B. 2 Press EASY B. ... the still image. * Movies are recorded in the [SP] recording mode. ** Still images are recorded with ease (Easy Handycam) Easy Handycam operation makes nearly all settings automatic so that you can perform recording or playing back operation without detailed settings. FlashingtLights up Press PHOTO...

User Manual
Page 30
... INDEX screen.) Returns to the recording screen Previous 6 images Next 6 images Returns to the recording screen Displays the movies Disc type Appears with ease (Easy Handycam) (Continued) Viewing recorded movies/still images 1 Turn the POWER switch A to turn on each of the scene/ previous scene Stop (go to the VISUAL INDEX...
... INDEX screen.) Returns to the recording screen Previous 6 images Next 6 images Returns to the recording screen Displays the movies Disc type Appears with ease (Easy Handycam) (Continued) Viewing recorded movies/still images 1 Turn the POWER switch A to turn on each of the scene/ previous scene Stop (go to the VISUAL INDEX...

User Manual
Page 31
.... • Most of some menu items are all played back. • You can neither delete nor edit movies on a finalized disc during Easy Handycam operation (p. 58). 31 To view movies on a disc on other devices (Finalize) To view movies stored on a disc on finalize operation, see page 83. &#... or record additional movies onto the disc once you want to view. b Notes • You can slow down the playback speed by touching during Easy Handycam operation Press (HOME) H(or I) to display the menu items available for setup changes (p.16, 60). Return (to the VISUAL INDEX screen) Go to the...
.... • Most of some menu items are all played back. • You can neither delete nor edit movies on a finalized disc during Easy Handycam operation (p. 58). 31 To view movies on a disc on other devices (Finalize) To view movies stored on a disc on finalize operation, see page 83. &#... or record additional movies onto the disc once you want to view. b Notes • You can slow down the playback speed by touching during Easy Handycam operation Press (HOME) H(or I) to display the menu items available for setup changes (p.16, 60). Return (to the VISUAL INDEX screen) Go to the...

User Manual
Page 43
... additional movies onto the disc after adding a recording (p.44) Playback on other DVD device Finalize Only in a DVD device after finalizing the disc during Easy Handycam operation. To play back a disc in case 1 Make desired settings for the DVD menu. b Notes • Even when you are using a DVD-RW or ...+RW, you wish to a finalized disc (p.58) Recordings cannot be added as usual. Recordings can be added. Continued , 43 To do so, cancel Easy Handycam operation (p. 31). Recording/Playback To add recordings to add a recording. Make a new recording Unfinalize the disc.
... additional movies onto the disc after adding a recording (p.44) Playback on other DVD device Finalize Only in a DVD device after finalizing the disc during Easy Handycam operation. To play back a disc in case 1 Make desired settings for the DVD menu. b Notes • Even when you are using a DVD-RW or ...+RW, you wish to a finalized disc (p.58) Recordings cannot be added as usual. Recordings can be added. Continued , 43 To do so, cancel Easy Handycam operation (p. 31). Recording/Playback To add recordings to add a recording. Make a new recording Unfinalize the disc.

User Manual
Page 45
Select [NO MENU] if you do not create a DVD menu. 3 Touch . b Notes • The DVD menu style is fixed to [STYLE1] during the Easy Handycam operation. 45 Recording/Playback To select a DVD menu style DVD +RW 1 In step 4, touch (OPTION) t [DVD MENU]. 2 Select the desired style from 4 types of pattern with [T]/[t].
Select [NO MENU] if you do not create a DVD menu. 3 Touch . b Notes • The DVD menu style is fixed to [STYLE1] during the Easy Handycam operation. 45 Recording/Playback To select a DVD menu style DVD +RW 1 In step 4, touch (OPTION) t [DVD MENU]. 2 Select the desired style from 4 types of pattern with [T]/[t].

User Manual
Page 46
... recorded on the LCD screen to confirm the image. 46 b Notes • You cannot retrieve the deleted images. • You cannot delete movies during Easy Handycam operation. Deleting images You can print still images on the disc 1 Touch (OTHERS) of the (HOME) menu t [DELETE]. 2 Touch [ DELETE]. 3 Touch [ DELETE]. 4 Touch the image... want to delete. z Tips • You can select up to 100 images at once. • You can create and edit a Playlist (p. 49). Cancel the Easy Handycam operation first.
... recorded on the LCD screen to confirm the image. 46 b Notes • You cannot retrieve the deleted images. • You cannot delete movies during Easy Handycam operation. Deleting images You can print still images on the disc 1 Touch (OTHERS) of the (HOME) menu t [DELETE]. 2 Touch [ DELETE]. 3 Touch [ DELETE]. 4 Touch the image... want to delete. z Tips • You can select up to 100 images at once. • You can create and edit a Playlist (p. 49). Cancel the Easy Handycam operation first.

User Manual
Page 48
.... The movie pauses. Adjusts the dividing point more precisely after the dividing point has been selected with . Cancel the Easy Handycam operation first. 1 Touch (OTHERS) of the selected movie. Play and pause toggles as you want to the beginning of the (HOME) menu t [EDIT]. 2 Touch [DIVIDE]. 3 ...
.... The movie pauses. Adjusts the dividing point more precisely after the dividing point has been selected with . Cancel the Easy Handycam operation first. 1 Touch (OTHERS) of the selected movie. Play and pause toggles as you want to the beginning of the (HOME) menu t [EDIT]. 2 Touch [DIVIDE]. 3 ...

User Manual
Page 49
Cancel the Easy Handycam operation first. 1 Touch (OTHERS) of the movies that you want to add to confirm the image. Continued , 49 The original scenes are divided. • Do ..., as your camcorder selects the dividing point based on the LCD screen to the Playlist. . b Notes • You cannot add or edit movies during Easy Handycam operation. Touch to return to insert the recorded disc into your camcorder. It may occur from your camcorder while editing images. The selected scene is...
Cancel the Easy Handycam operation first. 1 Touch (OTHERS) of the movies that you want to add to confirm the image. Continued , 49 The original scenes are divided. • Do ..., as your camcorder selects the dividing point based on the LCD screen to the Playlist. . b Notes • You cannot add or edit movies during Easy Handycam operation. Touch to return to insert the recorded disc into your camcorder. It may occur from your camcorder while editing images. The selected scene is...

User Manual
Page 57
... when [Completed.] is recovered by deleting all the data recorded on a finalized disc. Replace it . z Tips • When you use a DVD-RW while the Easy Handycam operation (p. 29) is set, the recording format is required on each side in VIDEO mode) returns to format into your camcorder. 4 Touch (MANAGE DISC/ MEMORY...
... when [Completed.] is recovered by deleting all the data recorded on a finalized disc. Replace it . z Tips • When you use a DVD-RW while the Easy Handycam operation (p. 29) is set, the recording format is required on each side in VIDEO mode) returns to format into your camcorder. 4 Touch (MANAGE DISC/ MEMORY...

User Manual
Page 59
... are deleted. • For a double-sided disc, perform these steps for each side of power during the Easy Handycam operation. Utilizing recording media 4 Touch [YES] t [YES]. 5 When [Completed.] appears, touch . Cancel the Easy Handycam operation. A confirmation screen appears to prompt you to confirm that you wish to record additional scenes. • You...
... are deleted. • For a double-sided disc, perform these steps for each side of power during the Easy Handycam operation. Utilizing recording media 4 Touch [YES] t [YES]. 5 When [Completed.] appears, touch . Cancel the Easy Handycam operation. A confirmation screen appears to prompt you to confirm that you wish to record additional scenes. • You...

User Manual
Page 61
...*3 23 AREA SET 69 SUMMERTIME 69 LANGUAGE SET*3 69 GENERAL SET (p. 70) Items Page DEMO MODE 70 CALIBRATION 103 A.SHUT OFF 70 REMOTE CTRL*2 70 *1 DCR-DVD106E/DVD108E/DVD109E/ DVD608E *2 DCR-DVD306E/DVD308E/DVD708E *3 Also available during Easy Handycam operation. *4 Only [SOUND SETTINGS] is available during Easy...
...*3 23 AREA SET 69 SUMMERTIME 69 LANGUAGE SET*3 69 GENERAL SET (p. 70) Items Page DEMO MODE 70 CALIBRATION 103 A.SHUT OFF 70 REMOTE CTRL*2 70 *1 DCR-DVD106E/DVD108E/DVD109E/ DVD608E *2 DCR-DVD306E/DVD308E/DVD708E *3 Also available during Easy Handycam operation. *4 Only [SOUND SETTINGS] is available during Easy...

User Manual
Page 71
Customizing your camcorder at the time. • Some items appear without a tab. • The OPTION MENU cannot be used during Easy Handycam operation. (OPTION) 1 3 1 Tab 2 Touch the desired item. b Notes • The tabs and items that appears when you cannot find the desired item, touch another tab. ...
Customizing your camcorder at the time. • Some items appear without a tab. • The OPTION MENU cannot be used during Easy Handycam operation. (OPTION) 1 3 1 Tab 2 Touch the desired item. b Notes • The tabs and items that appears when you cannot find the desired item, touch another tab. ...

User Manual
Page 83
If the problem persists, disconnect the power source and contact your Sony dealer. • Overall operations/Easy Handycam operation/ Remote Commander 83 • Batteries/Power sources 84 • LCD screen/viewfinder 85 • Discs/"Memory Stick Duo 85 • Recording ...86 • Playing back on your camcorder is not displayed. • The OPTION MENU cannot be used simultaneously 90 Overall operations/Easy Handycam operation/Remote Commander The power does not turn on. • Attach a charged battery pack to the camcorder (p. 20). • Connect the plug ...
If the problem persists, disconnect the power source and contact your Sony dealer. • Overall operations/Easy Handycam operation/ Remote Commander 83 • Batteries/Power sources 84 • LCD screen/viewfinder 85 • Discs/"Memory Stick Duo 85 • Recording ...86 • Playing back on your camcorder is not displayed. • The OPTION MENU cannot be used simultaneously 90 Overall operations/Easy Handycam operation/Remote Commander The power does not turn on. • Attach a charged battery pack to the camcorder (p. 20). • Connect the plug ...
User Manual
Page 84
... is heard during Easy Handycam operation. - [FILE NO. ] - [VOLUME] - [TV TYPE] - [ DISPLAY] - [BEEP] - [SUB-T DATE] - [CLOCK SET] - [AREA SET] - [SUMMERTIME] - [WIDE SELECT]* - [DEMO MODE] - [FLASH MODE]** - [ LANGUAGE SET] * DCR-DVD106E/DVD108E/DVD109E/ DVD608E ** DCR-DVD306E/DVD308E/DVD708E Your camcorder vibrates. &#...Vibration occurs depending on the condition of your DVD device with the +/- The supplied Remote Commander does not function (DCR-DVD306E/ DVD308E/DVD708E). • Set [REMOTE CTRL] to their defaults automatically. • Following menu settings remain as direct sunlight...
... is heard during Easy Handycam operation. - [FILE NO. ] - [VOLUME] - [TV TYPE] - [ DISPLAY] - [BEEP] - [SUB-T DATE] - [CLOCK SET] - [AREA SET] - [SUMMERTIME] - [WIDE SELECT]* - [DEMO MODE] - [FLASH MODE]** - [ LANGUAGE SET] * DCR-DVD106E/DVD108E/DVD109E/ DVD608E ** DCR-DVD306E/DVD308E/DVD708E Your camcorder vibrates. &#...Vibration occurs depending on the condition of your DVD device with the +/- The supplied Remote Commander does not function (DCR-DVD306E/ DVD308E/DVD708E). • Set [REMOTE CTRL] to their defaults automatically. • Following menu settings remain as direct sunlight...

User Manual
Page 87
... occurs. • This occurs when recording images under a fluorescent lamp, sodium lamp, or mercury lamp. The recording angle looks different (DCR-DVD306E/DVD308E/DVD708E). • The recording angle may look different depending on the backlight (p. 25). The recording stops. • The temperature of the image... function. • The BACK LIGHT function cannot be able to [ON] (p. 63). • [STEADYSHOT] may not be used during Easy Handycam operation. This is not a malfunction. Turn off your camcorder. Tiny spots in white, red, blue, or green appear on the screen. •...
... occurs. • This occurs when recording images under a fluorescent lamp, sodium lamp, or mercury lamp. The recording angle looks different (DCR-DVD306E/DVD308E/DVD708E). • The recording angle may look different depending on the backlight (p. 25). The recording stops. • The temperature of the image... function. • The BACK LIGHT function cannot be able to [ON] (p. 63). • [STEADYSHOT] may not be used during Easy Handycam operation. This is not a malfunction. Turn off your camcorder. Tiny spots in white, red, blue, or green appear on the screen. •...

User Manual
Page 89
...; A movie protected on the disc Unable to [LOW], the recorded sound may freeze for deleting data (p. 13). • You cannot delete movie during the Easy Handycam operation. • A scene protected on another device cannot be divided. • A movie that does not support VR mode. A movie cannot be deleted. For the following...
...; A movie protected on the disc Unable to [LOW], the recorded sound may freeze for deleting data (p. 13). • You cannot delete movie during the Easy Handycam operation. • A scene protected on another device cannot be divided. • A movie that does not support VR mode. A movie cannot be deleted. For the following...


