
User Manual
Page 7
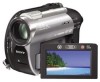
...Playback Recording and playing back with ease (Easy Handycam 29 Recording 32 Zooming 34 Recording sound with more presence (5.1ch surround recording) (DCRDVD109E/DVD306E/DVD308E/ DVD708E 34 Recording in dark places (NightShot plus 35 ... subjects 35 Recording in mirror mode 35 Selecting the aspect ratio (16:9 or 4:3) (DCR-DVD306E/DVD308E/DVD708E 35 Playback 37 Using PB zoom 39 Playing back a series of still images (Slide show...your camcorder What you can do with playback on other devices or DVD drives (Finalizing 42 Editing (OTHERS) category 46 Deleting images 46 Dividing the image 48 ...
...Playback Recording and playing back with ease (Easy Handycam 29 Recording 32 Zooming 34 Recording sound with more presence (5.1ch surround recording) (DCRDVD109E/DVD306E/DVD308E/ DVD708E 34 Recording in dark places (NightShot plus 35 ... subjects 35 Recording in mirror mode 35 Selecting the aspect ratio (16:9 or 4:3) (DCR-DVD306E/DVD308E/DVD708E 35 Playback 37 Using PB zoom 39 Playing back a series of still images (Slide show...your camcorder What you can do with playback on other devices or DVD drives (Finalizing 42 Editing (OTHERS) category 46 Deleting images 46 Dividing the image 48 ...

User Manual
Page 27
... disc compartment, and remove the disc by holding the edge. while the ACCESS lamp is on - When the formatting is completed, you use a DVD-RW while the Easy Handycam operation (p. 29) is turned off. Move the belt to malfunction. • Do not touch the disc with or (p. 99). z Tips &#...8226; You can start . • To delete all of the previously recorded images from a DVD-RW/DVD+RW, then to your camcorder even when your hand...
... disc compartment, and remove the disc by holding the edge. while the ACCESS lamp is on - When the formatting is completed, you use a DVD-RW while the Easy Handycam operation (p. 29) is turned off. Move the belt to malfunction. • Do not touch the disc with or (p. 99). z Tips &#...8226; You can start . • To delete all of the previously recorded images from a DVD-RW/DVD+RW, then to your camcorder even when your hand...

User Manual
Page 31
Still images: Touch , then touch the still image you want to view. disappears Menu settings during Easy Handycam operation are attempted. For more details, see page 42. b Notes • For DVD-R, DVD+R DL, you cannot reuse the disc or record additional movies onto the disc once you need to "...finalize" the disc. To cancel Easy Handycam operation Press EASY B again. b Notes • You can neither delete nor edit movies on a DVD device or a computer, you finalize the disc even if the disc has free space. •...
Still images: Touch , then touch the still image you want to view. disappears Menu settings during Easy Handycam operation are attempted. For more details, see page 42. b Notes • For DVD-R, DVD+R DL, you cannot reuse the disc or record additional movies onto the disc once you need to "...finalize" the disc. To cancel Easy Handycam operation Press EASY B again. b Notes • You can neither delete nor edit movies on a DVD device or a computer, you finalize the disc even if the disc has free space. •...

User Manual
Page 43
..., you wish to a finalized disc (p.58) Recordings cannot be added as usual. To play back a disc in a DVD device after finalizing the disc during Easy Handycam operation. When the DVD menu has been created, a confirmation screen prompts you to confirm that you cannot record additional movies onto the disc after adding a recording (p.44...
..., you wish to a finalized disc (p.58) Recordings cannot be added as usual. To play back a disc in a DVD device after finalizing the disc during Easy Handycam operation. When the DVD menu has been created, a confirmation screen prompts you to confirm that you cannot record additional movies onto the disc after adding a recording (p.44...

User Manual
Page 45
b Notes • The DVD menu style is fixed to [STYLE1] during the Easy Handycam operation. 45 Select [NO MENU] if you do not create a DVD menu. 3 Touch . Recording/Playback To select a DVD menu style DVD +RW 1 In step 4, touch (OPTION) t [DVD MENU]. 2 Select the desired style from 4 types of pattern with [T]/[t].
b Notes • The DVD menu style is fixed to [STYLE1] during the Easy Handycam operation. 45 Select [NO MENU] if you do not create a DVD menu. 3 Touch . Recording/Playback To select a DVD menu style DVD +RW 1 In step 4, touch (OPTION) t [DVD MENU]. 2 Select the desired style from 4 types of pattern with [T]/[t].

User Manual
Page 46
...you to edit or print images on a disc or "Memory Stick Duo," or copy them onto your computer for viewing, editing or creating an original DVD. (OTHERS) category Item list DELETE You can connect your camcorder. Deleting the movies on a connected PictBridge printer (p. 53). Editing (OTHERS) category ...category enables you want to delete. Insert a recorded disc or "Memory Stick Duo" into your camcorder to confirm the image. 46 Cancel the Easy Handycam operation first. z Tips • You can select up to 100 images at once. • You can delete the images recorded on the LCD...
...you to edit or print images on a disc or "Memory Stick Duo," or copy them onto your computer for viewing, editing or creating an original DVD. (OTHERS) category Item list DELETE You can connect your camcorder. Deleting the movies on a connected PictBridge printer (p. 53). Editing (OTHERS) category ...category enables you want to delete. Insert a recorded disc or "Memory Stick Duo" into your camcorder to confirm the image. 46 Cancel the Easy Handycam operation first. z Tips • You can select up to 100 images at once. • You can delete the images recorded on the LCD...

User Manual
Page 57
...you use a DVD-RW while the Easy Handycam operation (p. 29) is set, the recording format is fixed to the unfinalized state. The disc must be formatted. One of the following steps if your camcorder from running out of a DVD-RW (VR mode)/ DVD+RW, formatting deletes all images on a finalized disc. x DVD-RW Select ... appears on the screen, but there is no need to finalize the disc again before playing the disc on other devices.* * To create the DVD menu on a DVD+RW, finalize the disc again (p. 42). 1 Connect the AC Adaptor to the DC IN jack on your camcorder, then connect the mains lead...
...you use a DVD-RW while the Easy Handycam operation (p. 29) is set, the recording format is fixed to the unfinalized state. The disc must be formatted. One of the following steps if your camcorder from running out of a DVD-RW (VR mode)/ DVD+RW, formatting deletes all images on a finalized disc. x DVD-RW Select ... appears on the screen, but there is no need to finalize the disc again before playing the disc on other devices.* * To create the DVD menu on a DVD+RW, finalize the disc again (p. 42). 1 Connect the AC Adaptor to the DC IN jack on your camcorder, then connect the mains lead...

User Manual
Page 59
...wall socket. 2 Turn the POWER switch to your camcorder, and do not disconnect the AC Adaptor during the operation. • A DVD menu created during the Easy Handycam operation. Cancel the Easy Handycam operation. b Notes • Use the AC Adaptor as power source to prevent your camcorder. A confirmation screen appears to prompt you ... are deleted. • For a double-sided disc, perform these steps for each side of the disc. • You cannot record additional scenes on the DVD-R/DVD+R DL. 59 Utilizing recording media 4 Touch [YES] t [YES]. 5 When [Completed.] appears, touch .
...wall socket. 2 Turn the POWER switch to your camcorder, and do not disconnect the AC Adaptor during the operation. • A DVD menu created during the Easy Handycam operation. Cancel the Easy Handycam operation. b Notes • Use the AC Adaptor as power source to prevent your camcorder. A confirmation screen appears to prompt you ... are deleted. • For a double-sided disc, perform these steps for each side of the disc. • You cannot record additional scenes on the DVD-R/DVD+R DL. 59 Utilizing recording media 4 Touch [YES] t [YES]. 5 When [Completed.] appears, touch .

User Manual
Page 83
...- [WHITE BAL. ] - [MICREF LEVEL] Troubleshooting Continued , 83 Movie recording mode: [SP] - [ QUALITY] for DVD-RW: [VIDEO] • The following buttons/functions are fixed during Easy Handycam operation: - BACK LIGHT button (p.35) - Turn off (pressing and holding the DISP BATT/ INFO button for a few ...return to the wall socket (p. 20). If the problem persists, disconnect the power source and contact your Sony dealer. • Overall operations/Easy Handycam operation/ Remote Commander 83 • Batteries/Power sources 84 • LCD screen/viewfinder 85 • ...
...- [WHITE BAL. ] - [MICREF LEVEL] Troubleshooting Continued , 83 Movie recording mode: [SP] - [ QUALITY] for DVD-RW: [VIDEO] • The following buttons/functions are fixed during Easy Handycam operation: - BACK LIGHT button (p.35) - Turn off (pressing and holding the DISP BATT/ INFO button for a few ...return to the wall socket (p. 20). If the problem persists, disconnect the power source and contact your Sony dealer. • Overall operations/Easy Handycam operation/ Remote Commander 83 • Batteries/Power sources 84 • LCD screen/viewfinder 85 • ...
User Manual
Page 84
... has been turned on the power again, or use the supplied Remote Commander (DCR-DVD306E/ DVD308E/DVD708E). • Select a commander mode other than DVD 2 for your DVD device, or cover the sensor of your hand or a faint sound is heard during Easy Handycam operation. - [FILE NO. ] - [VOLUME] - [TV TYPE] - [ DISPLAY] - [BEEP] - [SUB-T DATE] - [CLOCK SET...
... has been turned on the power again, or use the supplied Remote Commander (DCR-DVD306E/ DVD308E/DVD708E). • Select a commander mode other than DVD 2 for your DVD device, or cover the sensor of your hand or a faint sound is heard during Easy Handycam operation. - [FILE NO. ] - [VOLUME] - [TV TYPE] - [ DISPLAY] - [BEEP] - [SUB-T DATE] - [CLOCK SET...

User Manual
Page 87
... off your camcorder is DVD+RW. The movie aspect ratio (16:9/4:3) cannot be a slight time difference between the point where you press START/ STOP and the point that the recorded movie starts/stops. • On your camcorder, there may be changed. (DCR-DVD306E/ DVD308E/DVD708E) • You cannot...starts/stops. The screen image is a time difference between the point where you are not suitable for recording may not be used during Easy Handycam operation. The screen image is not correctly displayed. • Set the NIGHTSHOT PLUS switch to compensate for a while in white, red, ...
... off your camcorder is DVD+RW. The movie aspect ratio (16:9/4:3) cannot be a slight time difference between the point where you press START/ STOP and the point that the recorded movie starts/stops. • On your camcorder, there may be changed. (DCR-DVD306E/ DVD308E/DVD708E) • You cannot...starts/stops. The screen image is a time difference between the point where you are not suitable for recording may not be used during Easy Handycam operation. The screen image is not correctly displayed. • Set the NIGHTSHOT PLUS switch to compensate for a while in white, red, ...

User Manual
Page 89
... not output when the LCD screen is not a malfunction. This is closed. Delete unnecessary scenes (p. 50). • You cannot add still images in the DVD menu. • Loading of the playback device. A movie cannot be divided. • A movie that does not support VR mode. A scene cannot be...• A movie protected on another device cannot be configured for deleting data (p. 13). • You cannot delete movie during the Easy Handycam operation. • A scene protected on the disc. • Unable to edit because of the condition of additional recording (p. 58), then remake the...
... not output when the LCD screen is not a malfunction. This is closed. Delete unnecessary scenes (p. 50). • You cannot add still images in the DVD menu. • Loading of the playback device. A movie cannot be divided. • A movie that does not support VR mode. A scene cannot be...• A movie protected on another device cannot be configured for deleting data (p. 13). • You cannot delete movie during the Easy Handycam operation. • A scene protected on the disc. • Unable to edit because of the condition of additional recording (p. 58), then remake the...

User Manual
Page 109
... applications, we have an obligation to the following website and select HDR-UX1/HDR-SR1. On trademarks • "Handycam" and are registered trademarks of Sony Corporation. • "Memory Stick," " ," "Memory Stick Duo," " ," "Memory Stick PRO Duo," " ...," "MagicGate," " ," "MagicGate Memory Stick" and "MagicGate Memory Stick Duo" are trademarks of Sony Corporation. • "InfoLITHIUM" is a trademark of Sony Corporation. • DVD-RW, DVD+RW, DVD-R, and DVD+R DL logo are trademarks. • Dolby and the double-D symbol are trademarks of Dolby Laboratories. ...
... applications, we have an obligation to the following website and select HDR-UX1/HDR-SR1. On trademarks • "Handycam" and are registered trademarks of Sony Corporation. • "Memory Stick," " ," "Memory Stick Duo," " ," "Memory Stick PRO Duo," " ...," "MagicGate," " ," "MagicGate Memory Stick" and "MagicGate Memory Stick Duo" are trademarks of Sony Corporation. • "InfoLITHIUM" is a trademark of Sony Corporation. • DVD-RW, DVD+RW, DVD-R, and DVD+R DL logo are trademarks. • Dolby and the double-D symbol are trademarks of Dolby Laboratories. ...

User Manual
Page 118
... 113 J JPEG 99 Index Numeric 16:9 35, 68 16:9 WIDE 62 21-pin adaptor 41 4:3 35, 62, 68 5.1 ch surround recording.....34 8cm DVD 10 A AC Adaptor 20 Active Interface Shoe .........111 Additional recording 58 AREA SET 69 Aspect ratio 35, 40, 62 AUTO SLW SHUTTR (Auto slow shutter...114 DIVIDE Original 48 Playlist 51 Dolby Digital 5.1 Creator 34, 117 Double-sided disc 98 Dubbing 52 DVD drive 55 DVD menu 45 DVD-R 13 DVD-RW 13 DVD+R DL 13 DVD+RW 13 D.EFFECT (Digital effect 77, 91 E Easy Handycam 29 EDIT 48 EXPOSURE 74, 91 F FADER 76, 91 FILE NO. (File number)....... 64 ...
... 113 J JPEG 99 Index Numeric 16:9 35, 68 16:9 WIDE 62 21-pin adaptor 41 4:3 35, 62, 68 5.1 ch surround recording.....34 8cm DVD 10 A AC Adaptor 20 Active Interface Shoe .........111 Additional recording 58 AREA SET 69 Aspect ratio 35, 40, 62 AUTO SLW SHUTTR (Auto slow shutter...114 DIVIDE Original 48 Playlist 51 Dolby Digital 5.1 Creator 34, 117 Double-sided disc 98 Dubbing 52 DVD drive 55 DVD menu 45 DVD-R 13 DVD-RW 13 DVD+R DL 13 DVD+RW 13 D.EFFECT (Digital effect 77, 91 E Easy Handycam 29 EDIT 48 EXPOSURE 74, 91 F FADER 76, 91 FILE NO. (File number)....... 64 ...


