Owners Manual
Page 5
...COMPATIBLE COMPUTER SPECIFICATIONS 37 NAME OF EACH PART OF THE PROJECTOR 7 PC ADJUSTMENT 38 SETTING-UP THE PROJECTOR 8 PICTURE IMAGE ADJUSTMENT 40 CONNECTING THE AC POWER CORD 8 NORMAL FUNCTION 41 POSITIONING THE PROJECTOR 9 AUTO IMAGE ADJUSTMENT 41 PICTURE LEVEL AND TILT ...PICTURE POSITION ADJUSTMENT 42 MOVING THE PROJECTOR 10 PICTURE SCREEN ADJUSTMENT 43 CONNECTING THE PROJECTOR 11 VIDEO MODE 44 TERMINAL OF THE PROJECTOR 11 SELECTING VIDEO MODE 44 CONNECTING THE COMPUTER 13 SELECTING VIDEO SOURCE 44 CONNECTING THE VIDEO EQUIPMENT 21 SELECTING COLOR SYSTEM 45...
...COMPATIBLE COMPUTER SPECIFICATIONS 37 NAME OF EACH PART OF THE PROJECTOR 7 PC ADJUSTMENT 38 SETTING-UP THE PROJECTOR 8 PICTURE IMAGE ADJUSTMENT 40 CONNECTING THE AC POWER CORD 8 NORMAL FUNCTION 41 POSITIONING THE PROJECTOR 9 AUTO IMAGE ADJUSTMENT 41 PICTURE LEVEL AND TILT ...PICTURE POSITION ADJUSTMENT 42 MOVING THE PROJECTOR 10 PICTURE SCREEN ADJUSTMENT 43 CONNECTING THE PROJECTOR 11 VIDEO MODE 44 TERMINAL OF THE PROJECTOR 11 SELECTING VIDEO MODE 44 CONNECTING THE COMPUTER 13 SELECTING VIDEO SOURCE 44 CONNECTING THE VIDEO EQUIPMENT 21 SELECTING COLOR SYSTEM 45...
Owners Manual
Page 6
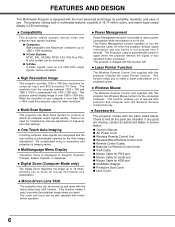
... and focus can be connected. This projector cannot display image of over 5 minutes. x Multilanguage Menu Display Operation menu is displayed in multimedia features, a palette of 16.77 million colors, and matrix liquid crystal display (LCD) technology. English, Deutsch, Franç...VGA Cable. If any operation button is always precise. No complicated setup is necessary and projection is pressed. x Compatibility This projector widely accepts various video and computer input signals including; q Mouse Cable for serial port. q VGA/MAC Adapter. The resolution from the computer ...
... and focus can be connected. This projector cannot display image of over 5 minutes. x Multilanguage Menu Display Operation menu is displayed in multimedia features, a palette of 16.77 million colors, and matrix liquid crystal display (LCD) technology. English, Deutsch, Franç...VGA Cable. If any operation button is always precise. No complicated setup is necessary and projection is pressed. x Compatibility This projector widely accepts various video and computer input signals including; q Mouse Cable for serial port. q VGA/MAC Adapter. The resolution from the computer ...

Owners Manual
Page 12
MONITOR OUT VIDEO IN-2 VIDEO IN-1 CONNECTING THE PROJECTOR SIDE OF THE PROJECTOR (CONNECT THE VIDEO EQUIPMENT) 14 17 20 15 18 VIDEO/Y C/Cb(B-Y) Cr(R-Y) S-VIDEO AUDIO R L (MONO) VIDEO/Y C/Cb(B-Y) Cr(R-Y) S-VIDEO AUDIO R L (MONO) VIDEO/Y C/Cb(B-Y) Cr(R-Y) S-VIDEO AUDIO R L 16 19 22 21 14 VIDEO INPUT JACKS-1 (BNC TYPE x 3) Used to connect a video source to the projector. 15 S-VIDEO INPUT JACK-1 Used to connect a S-VHS video source...
MONITOR OUT VIDEO IN-2 VIDEO IN-1 CONNECTING THE PROJECTOR SIDE OF THE PROJECTOR (CONNECT THE VIDEO EQUIPMENT) 14 17 20 15 18 VIDEO/Y C/Cb(B-Y) Cr(R-Y) S-VIDEO AUDIO R L (MONO) VIDEO/Y C/Cb(B-Y) Cr(R-Y) S-VIDEO AUDIO R L (MONO) VIDEO/Y C/Cb(B-Y) Cr(R-Y) S-VIDEO AUDIO R L 16 19 22 21 14 VIDEO INPUT JACKS-1 (BNC TYPE x 3) Used to connect a video source to the projector. 15 S-VIDEO INPUT JACK-1 Used to connect a S-VHS video source...

Owners Manual
Page 14
...video source ("Video 1" or "Video 2") is selected, this projector. It is monaural, connect it to the Computer 2 audio input jack will contain the audio information of the selected program source being viewed on the screen (Computer 1 or Computer 2). Data + Data Ground 14 CONNECTING TO THE SERIAL PORT (DB 9-PIN) TERMINAL q If you control the projector... THE PROJECTOR CONNECTING TO THE MONITOR OUTPUT TERMINAL (ANALOG HDB 15-PIN) This terminal output the information of the selected computer source being viewed on the screen (Computer 1, Computer 2, Video 1 or Video 2). sync ...
...video source ("Video 1" or "Video 2") is selected, this projector. It is monaural, connect it to the Computer 2 audio input jack will contain the audio information of the selected program source being viewed on the screen (Computer 1 or Computer 2). Data + Data Ground 14 CONNECTING TO THE SERIAL PORT (DB 9-PIN) TERMINAL q If you control the projector... THE PROJECTOR CONNECTING TO THE MONITOR OUTPUT TERMINAL (ANALOG HDB 15-PIN) This terminal output the information of the selected computer source being viewed on the screen (Computer 1, Computer 2, Video 1 or Video 2). sync ...

Owners Manual
Page 20
...the RESOLUTION MODE that you turn on the projector and computer. Turn the projector and peripheral equipment on before you want to use of both the projector and the external equipment should be disconnected from AC outlet. CONNECTING THE PROJECTOR ON 123456 COMPUTER OUT COMPUTER IN-2 COMPUTER IN... OFF OFF OFF 21" MODE (1152 x 870) ON ON ON ON OFF OFF NOTE: When connecting the cable, the power cords of the PowerBook Video Adapter shipped with the PowerBook. VGA/MAC ADAPTER (PROVIDED) COMPUTER OUTPUT COMPUTER R AUDIO OUTPUT L AUDIO CABLE R L (NOT PROVIDED) COMPUTER AUDIO INPUT ...
...the RESOLUTION MODE that you turn on the projector and computer. Turn the projector and peripheral equipment on before you want to use of both the projector and the external equipment should be disconnected from AC outlet. CONNECTING THE PROJECTOR ON 123456 COMPUTER OUT COMPUTER IN-2 COMPUTER IN... OFF OFF OFF 21" MODE (1152 x 870) ON ON ON ON OFF OFF NOTE: When connecting the cable, the power cords of the PowerBook Video Adapter shipped with the PowerBook. VGA/MAC ADAPTER (PROVIDED) COMPUTER OUTPUT COMPUTER R AUDIO OUTPUT L AUDIO CABLE R L (NOT PROVIDED) COMPUTER AUDIO INPUT ...

Owners Manual
Page 21
... output jacks. CONNECTING THE PROJECTOR CONNECTING THE VIDEO EQUIPMENT CONNECTING TO THE VIDEO INPUT JACKS (1 and 2) BNC TYPE x 3 Connect to the video outputs of a VCR, video disc player, DVD player, video camera, satellite TV tuner or other AV equipment. CONNECTING S-VHS VIDEO INPUT JACKS (1 and 2) The Video input includes an extra video input jack marked S-VIDEO to allow connection to...
... output jacks. CONNECTING THE PROJECTOR CONNECTING THE VIDEO EQUIPMENT CONNECTING TO THE VIDEO INPUT JACKS (1 and 2) BNC TYPE x 3 Connect to the video outputs of a VCR, video disc player, DVD player, video camera, satellite TV tuner or other AV equipment. CONNECTING S-VHS VIDEO INPUT JACKS (1 and 2) The Video input includes an extra video input jack marked S-VIDEO to allow connection to...

Owners Manual
Page 22
... outlet. CONNECTING THE PROJECTOR CONNECTING THE VIDEO EQUIPMENT VIDEO EQUIPMENT Video Cassette Recorder DVD Player Video Disc Player Satellite TV Tuner Video Camera VIDEO Y OUTPUT OUTPUT (BNC) (BNC) C Cb (B-Y) OUTPUT OUTPUT (BNC) (BNC) Cr (R-Y) OUTPUT (BNC) S-VIDEO AUDIO OUTPUT OUTPUT MONITOR OUT VIDEO IN-2 VIDEO IN-1 VIDEO/Y C/Cb(B-Y) Cr(R-Y) S-VIDEO AUDIO R L (MONO) VIDEO/Y C/Cb(B-Y) Cr(R-Y) S-VIDEO AUDIO R L (MONO) VIDEO/Y C/Cb(B-Y) Cr(R-Y) S-VIDEO AUDIO R L (MONO) VIDEO INPUT (BNC...
... outlet. CONNECTING THE PROJECTOR CONNECTING THE VIDEO EQUIPMENT VIDEO EQUIPMENT Video Cassette Recorder DVD Player Video Disc Player Satellite TV Tuner Video Camera VIDEO Y OUTPUT OUTPUT (BNC) (BNC) C Cb (B-Y) OUTPUT OUTPUT (BNC) (BNC) Cr (R-Y) OUTPUT (BNC) S-VIDEO AUDIO OUTPUT OUTPUT MONITOR OUT VIDEO IN-2 VIDEO IN-1 VIDEO/Y C/Cb(B-Y) Cr(R-Y) S-VIDEO AUDIO R L (MONO) VIDEO/Y C/Cb(B-Y) Cr(R-Y) S-VIDEO AUDIO R L (MONO) VIDEO/Y C/Cb(B-Y) Cr(R-Y) S-VIDEO AUDIO R L (MONO) VIDEO INPUT (BNC...

Owners Manual
Page 24
...the item selected, to be turned on. 4 LAMP POWER INDICATOR Light is dim when the projector is on or off. 10 MODE BUTTON Used to select source. (Computer 1, Computer 2, Video 1 or Video 2 Input) 11 AUTO IMAGE BUTTON Used to adjust. BEFORE OPERATION 1 LAMP REPLACEMENT INDICATOR Light... is orange when the Lamp life draws to an end. 2 TEMPERATURE WARNING INDICATOR Flashes red when internal projector temperature is too high. 3 READY INDICATOR...
...the item selected, to be turned on. 4 LAMP POWER INDICATOR Light is dim when the projector is on or off. 10 MODE BUTTON Used to select source. (Computer 1, Computer 2, Video 1 or Video 2 Input) 11 AUTO IMAGE BUTTON Used to adjust. BEFORE OPERATION 1 LAMP REPLACEMENT INDICATOR Light... is orange when the Lamp life draws to an end. 2 TEMPERATURE WARNING INDICATOR Flashes red when internal projector temperature is too high. 3 READY INDICATOR...

Owners Manual
Page 25
...projector are the caution labels for the connection.) LASER LIGHT WINDOW LASER POINTER button This remote control emits a laser beam light as the Laser Pointer from the Laser Light Window. The three marks to the right are transmitted to 20 for the laser beam. FRONT 1 4 9 12 13 57 2 COMPUTER VIDEO... ON-OFF VOLUME ZOOM P-TIMER FOCUS NOFRSEHEZOEW/ MUTE LENS SHIFT CURSOR AUTO IMAGE MENU NORMAL 16 LASER D.ZOOM LASER POINTER button 3 6 8 11 14 10 15 18 17 SIDE 19 25 One pointing pad and two click buttons are used as a PC wireless mouse. (Refer to "CONNECTING THE PROJECTOR"...
...projector are the caution labels for the connection.) LASER LIGHT WINDOW LASER POINTER button This remote control emits a laser beam light as the Laser Pointer from the Laser Light Window. The three marks to the right are transmitted to 20 for the laser beam. FRONT 1 4 9 12 13 57 2 COMPUTER VIDEO... ON-OFF VOLUME ZOOM P-TIMER FOCUS NOFRSEHEZOEW/ MUTE LENS SHIFT CURSOR AUTO IMAGE MENU NORMAL 16 LASER D.ZOOM LASER POINTER button 3 6 8 11 14 10 15 18 17 SIDE 19 25 One pointing pad and two click buttons are used as a PC wireless mouse. (Refer to "CONNECTING THE PROJECTOR"...

Owners Manual
Page 26
..., the POINT UP/DOWN/LEFT/RIGHT button and the SELECT (REAR CLICK) button to make adjustments to the projector's setting in use as a remote for the projector. Use this button is moved according to the direction you want to adjust. This button has different functions depending...OPERATION 1 COMPUTER SELECT BUTTON Used to select computer mode. (Computer 1 or Computer 2 Input) 2 VIDEO SELECT BUTTON Used to select video mode. (Video 1 or Video 2 Input) 3 POWER ON/OFF BUTTON Used to turn the projector on or off . 17 FRONT CLICK BUTTON When in certain items such as a wireless mouse Used ...
..., the POINT UP/DOWN/LEFT/RIGHT button and the SELECT (REAR CLICK) button to make adjustments to the projector's setting in use as a remote for the projector. Use this button is moved according to the direction you want to adjust. This button has different functions depending...OPERATION 1 COMPUTER SELECT BUTTON Used to select computer mode. (Computer 1 or Computer 2 Input) 2 VIDEO SELECT BUTTON Used to select video mode. (Video 1 or Video 2 Input) 3 POWER ON/OFF BUTTON Used to turn the projector on or off . 17 FRONT CLICK BUTTON When in certain items such as a wireless mouse Used ...

Owners Manual
Page 28
... the remote cable to this button, the POINT UP/DOWN/LEFT/RIGHT buttons and the SELECT button to make adjustments to the projector's setting in certain items such as CONTRAST or BRIGHTNESS. 16 DIGITAL ZOOM BUTTON Use to select digital zoom function. 17 NORMAL BUTTON...28 Use this jack. 2 COMPUTER SELECT BUTTON Used to select computer mode. (Computer 1 or Computer 2 Input) 3 VIDEO SELECT BUTTON Used to select video mode. (Video 1 or Video 2 Input) 1 3 6 9 COMPUTER VIDEO ON-OFF 2 4 VOLUME ZOOM FOCUS 4 POWER ON/OFF BUTTON Used to turn projector on the MENU that you want to adjust.
... the remote cable to this button, the POINT UP/DOWN/LEFT/RIGHT buttons and the SELECT button to make adjustments to the projector's setting in certain items such as CONTRAST or BRIGHTNESS. 16 DIGITAL ZOOM BUTTON Use to select digital zoom function. 17 NORMAL BUTTON...28 Use this jack. 2 COMPUTER SELECT BUTTON Used to select computer mode. (Computer 1 or Computer 2 Input) 3 VIDEO SELECT BUTTON Used to select video mode. (Video 1 or Video 2 Input) 1 3 6 9 COMPUTER VIDEO ON-OFF 2 4 VOLUME ZOOM FOCUS 4 POWER ON/OFF BUTTON Used to turn projector on the MENU that you want to adjust.

Owners Manual
Page 32
...dealer where you purchased this "cooling down" period, the projector cannot be turned on the screen. BASIC OPERATION TURNING ON/OFF THE PROJECTOR TO TURN ON THE PROJECTOR Connect the projector to a source (Computer, VCR, Video Camera, Video Disc Player, etc.) using the appropriate terminals on the... side of the projector (See "CONNECTING THE PROJECTOR" section on again. Press the POWER ON...
...dealer where you purchased this "cooling down" period, the projector cannot be turned on the screen. BASIC OPERATION TURNING ON/OFF THE PROJECTOR TO TURN ON THE PROJECTOR Connect the projector to a source (Computer, VCR, Video Camera, Video Disc Player, etc.) using the appropriate terminals on the... side of the projector (See "CONNECTING THE PROJECTOR" section on again. Press the POWER ON...

Owners Manual
Page 34
... the timer starts to count the time (00:00 to the direction you wish to control CURSOR. The CURSOR is twice. NOTE: Your computer or video equipment is pressed. Then press the P-TIMER button to run. If all the items in the AUTO IMAGE ADJUSTMENT are "OFF", AUTO IMAGE SETTING display... button is not affected by this function, and will continue to cancel the P-TIMER function. AUTO IMAGE ADGUSTMENT Press the AUTO IMAGE button on the projector or on the wireless remote control unit. NO SHOW FUNCTION Press the FREEZE/NO SHOW button (on the remote control unit) is displayed on the...
... the timer starts to count the time (00:00 to the direction you wish to control CURSOR. The CURSOR is twice. NOTE: Your computer or video equipment is pressed. Then press the P-TIMER button to run. If all the items in the AUTO IMAGE ADJUSTMENT are "OFF", AUTO IMAGE SETTING display... button is not affected by this function, and will continue to cancel the P-TIMER function. AUTO IMAGE ADGUSTMENT Press the AUTO IMAGE button on the projector or on the wireless remote control unit. NO SHOW FUNCTION Press the FREEZE/NO SHOW button (on the remote control unit) is displayed on the...
Owners Manual
Page 36
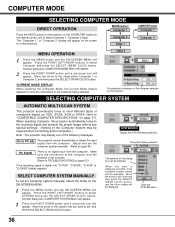
...the information of computers based on VGA, SVGA, XGA or SXGA (refer to this dialog box can be available. Press the POINT LEFT/RIGHT buttons to select Computer and press the SELECT (REAR CLICK) button. MODE button Computer 1 Computer 2 Video 1 COMPUTER button Computer 1 Computer 2 MENU OPERATION...to select Computer 1, Computer 2 Input. The system being selected. COMPUTER MODE SELECTING COMPUTER MODE DIRECT OPERATION Press the MODE button on the projector or the COMPUTER button on the screen for a few seconds. Another dialog box COMPUTER MODE Menu will appear. 2 Press the POINT ...
...the information of computers based on VGA, SVGA, XGA or SXGA (refer to this dialog box can be available. Press the POINT LEFT/RIGHT buttons to select Computer and press the SELECT (REAR CLICK) button. MODE button Computer 1 Computer 2 Video 1 COMPUTER button Computer 1 Computer 2 MENU OPERATION...to select Computer 1, Computer 2 Input. The system being selected. COMPUTER MODE SELECTING COMPUTER MODE DIRECT OPERATION Press the MODE button on the projector or the COMPUTER button on the screen for a few seconds. Another dialog box COMPUTER MODE Menu will appear. 2 Press the POINT ...

Owners Manual
Page 44
... button and the ON-SCREEN MENU will appear. Video 2 SELECTING VIDEO SOURCE This projector automatically detects the signal from the video equipment to the VIDEO/Y and C jacks, select "Y,C" in VIDEO SOURCE Menu. Y) jacks, select "Y, Cb, Cr" in VIDEO SOURCE Menu. Y, C When connect the separate Y/C video output from the video equipment to select VIDEO SOURCE and press the SELECT (REAR CLICK...
... button and the ON-SCREEN MENU will appear. Video 2 SELECTING VIDEO SOURCE This projector automatically detects the signal from the video equipment to the VIDEO/Y and C jacks, select "Y,C" in VIDEO SOURCE Menu. Y) jacks, select "Y, Cb, Cr" in VIDEO SOURCE Menu. Y, C When connect the separate Y/C video output from the video equipment to select VIDEO SOURCE and press the SELECT (REAR CLICK...

Owners Manual
Page 45
...POINT DOWN button and a red-arrow icon will appear. VIDEO SIGNAL FROM VIDEO JACK OR S-VIDEO JACK Auto The projector automatically detects the incoming Video system, and adjusts itself to select SYSTEM and press the SELECT (REAR CLICK) button. When the Video System is necessary to "Auto", and then press the ...among PAL, SECAM, NTSC, NTSC 4.43, PAL-M, and PAL-N. PAL / SECAM / NTSC / NTSC4.43 / PAL-M / PAL-N If the projector cannot reproduce the proper video image, it is PAL-M or PAL-N, select the system manually. Move the arrow to the Mode and press the SELECT (REAR CLICK) button...
...POINT DOWN button and a red-arrow icon will appear. VIDEO SIGNAL FROM VIDEO JACK OR S-VIDEO JACK Auto The projector automatically detects the incoming Video system, and adjusts itself to select SYSTEM and press the SELECT (REAR CLICK) button. When the Video System is necessary to "Auto", and then press the ...among PAL, SECAM, NTSC, NTSC 4.43, PAL-M, and PAL-N. PAL / SECAM / NTSC / NTSC4.43 / PAL-M / PAL-N If the projector cannot reproduce the proper video image, it is PAL-M or PAL-N, select the system manually. Move the arrow to the Mode and press the SELECT (REAR CLICK) button...

Owners Manual
Page 47
Normal VIDEO MODE PICTURE SCREEN ADJUSTMENT This projector has a picture screen resize function, which enables you to select SCREEN and press the SELECT (REAR CLICK) button. Another dialog box PICTURE SCREEN ADJUSTMENT DISPLAY ... on the Top Control or on the screen for wide screen size with 4 x 3 aspect ratio. Regular Normal Video Image size with 16 x 9 aspect ratio. NORMAL FUNCTION The normal picture level is preset on this projector at the factory and can be displayed on the Remote Control Unit). Move the arrow to the...
Normal VIDEO MODE PICTURE SCREEN ADJUSTMENT This projector has a picture screen resize function, which enables you to select SCREEN and press the SELECT (REAR CLICK) button. Another dialog box PICTURE SCREEN ADJUSTMENT DISPLAY ... on the Top Control or on the screen for wide screen size with 4 x 3 aspect ratio. Regular Normal Video Image size with 16 x 9 aspect ratio. NORMAL FUNCTION The normal picture level is preset on this projector at the factory and can be displayed on the Remote Control Unit). Move the arrow to the...

Owners Manual
Page 48
... red-arrow icon will appear. Blue back When this function is unplugged or turned off . (During this projector will change into another one. The picture will produce a blue image instead of the video noise on the screen when the input source is "On," this "Cooling Down" period, the Lamp cannot... be turned on when the input signal connected or the projector is not operated over 5 minutes. Move the arrow to the...
... red-arrow icon will appear. Blue back When this function is unplugged or turned off . (During this projector will change into another one. The picture will produce a blue image instead of the video noise on the screen when the input source is "On," this "Cooling Down" period, the Lamp cannot... be turned on when the input signal connected or the projector is not operated over 5 minutes. Move the arrow to the...
Owners Manual
Page 49
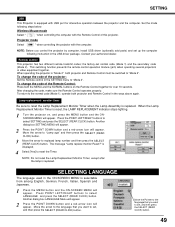
...to reset the Timer. Contact your authorized dealer. This switching function prevents the remote control operation mixture (jam) when operating several projectors or video equipment together. When the Lamp Replacement Monitor Timer is replaced. Another dialog box SETTING MENU will appear. 2 Press the POINT...ways above again. Wireless Mouse mode Select " " when controlling the computer with the Remote Control of the projector; Projector mode Select " " when controlling the projector with USB port for over 10 seconds. To change the code of the Remote Control; To change the...
...to reset the Timer. Contact your authorized dealer. This switching function prevents the remote control operation mixture (jam) when operating several projectors or video equipment together. When the Lamp Replacement Monitor Timer is replaced. Another dialog box SETTING MENU will appear. 2 Press the POINT...ways above again. Wireless Mouse mode Select " " when controlling the computer with the Remote Control of the projector; Projector mode Select " " when controlling the projector with USB port for over 10 seconds. To change the code of the Remote Control; To change the...
Owners Manual
Page 53
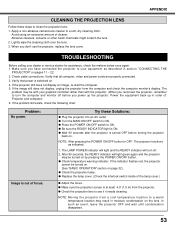
... projection lens: 1. After 90 seconds, the READY indicator will turn the computer and monitor off . 2. If the indicator flashes red, the projector cannot be turned on . Check cable connections. If the problem still exists, check the following chart. Image is ON. q Turn the MAIN... Before calling your equipment as indicated. 1. Verify that all computer, video and power cords are properly connected. 3. If the projector still does not display an image, re-start the computer. 5. Problem: No power. The projector functions as described in order of focus. In such an event, leave...
... projection lens: 1. After 90 seconds, the READY indicator will turn the computer and monitor off . 2. If the indicator flashes red, the projector cannot be turned on . Check cable connections. If the problem still exists, check the following chart. Image is ON. q Turn the MAIN... Before calling your equipment as indicated. 1. Verify that all computer, video and power cords are properly connected. 3. If the projector still does not display an image, re-start the computer. 5. Problem: No power. The projector functions as described in order of focus. In such an event, leave...


