User Manual Ver.1.0 (English)
Page 4
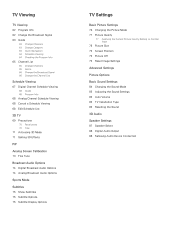
... Options Sports Mode Subtitles 75 Show Subtitles 75 Subtitle Options 75 Subtitle Display Options TV Settings Basic Picture Settings 76 Changing the Picture Mode 77 Picture Quality 77 Applying the Current Picture Quality Setting to Another Input 78 Picture Size 79 Screen Position 79 Picture Off 79 Reset Image Settings Advanced Settings Picture Options Basic Sound Settings 84 Changing the Sound Mode 85 Adjusting the Sound Settings 85 Auto Volume 85 TV Installation Type 85 Resetting the Sound 3D Audio Speaker Settings 87 Speaker Select 88 Digital Audio Output 88 Samsung Audio Device Connection
... Options Sports Mode Subtitles 75 Show Subtitles 75 Subtitle Options 75 Subtitle Display Options TV Settings Basic Picture Settings 76 Changing the Picture Mode 77 Picture Quality 77 Applying the Current Picture Quality Setting to Another Input 78 Picture Size 79 Screen Position 79 Picture Off 79 Reset Image Settings Advanced Settings Picture Options Basic Sound Settings 84 Changing the Sound Mode 85 Adjusting the Sound Settings 85 Auto Volume 85 TV Installation Type 85 Resetting the Sound 3D Audio Speaker Settings 87 Speaker Select 88 Digital Audio Output 88 Samsung Audio Device Connection
User Manual Ver.1.0 (English)
Page 7
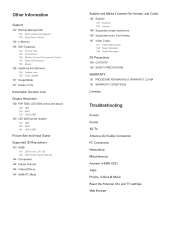
... Sound Test 135 Motion Control Environment Check 135 Signal Information 135 Reset 136 Updating the Software 136 Update now 136 Auto Update 137 Usage Mode 137 Support Info Kensington Security Lock Display Resolution 138 PDP 5500, LED 5500 series and above 138 IBM 138 MAC 139 VESA DMT 140 LED 4300 series models 140 IBM 140 MAC 141 VESA DMT Picture Size and Input Signal Supported 3D Resolutions 143 HDMI 143 3D Format: L/R, T/B 143 3D Format: Frame Packing 144 Component 144 Digital Channel...
... Sound Test 135 Motion Control Environment Check 135 Signal Information 135 Reset 136 Updating the Software 136 Update now 136 Auto Update 137 Usage Mode 137 Support Info Kensington Security Lock Display Resolution 138 PDP 5500, LED 5500 series and above 138 IBM 138 MAC 139 VESA DMT 140 LED 4300 series models 140 IBM 140 MAC 141 VESA DMT Picture Size and Input Signal Supported 3D Resolutions 143 HDMI 143 3D Format: L/R, T/B 143 3D Format: Frame Packing 144 Component 144 Digital Channel...
User Manual Ver.1.0 (English)
Page 10
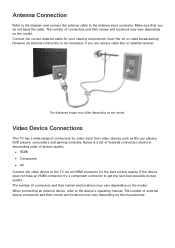
.... Antenna Connection Refer to the diagram and connect the antenna cable to the device's operating manual. Connect the correct antenna cable for video input from video devices such as Blu-ray players, DVD players, camcorders and gaming consoles. Below is not necessary if you do not bend the cable. If the device does not have an HDMI connector, try a component connector to the TV via an HDMI connector for the best picture quality. The number...
.... Antenna Connection Refer to the diagram and connect the antenna cable to the device's operating manual. Connect the correct antenna cable for video input from video devices such as Blu-ray players, DVD players, camcorders and gaming consoles. Below is not necessary if you do not bend the cable. If the device does not have an HDMI connector, try a component connector to the TV via an HDMI connector for the best picture quality. The number...
User Manual Ver.1.0 (English)
Page 13
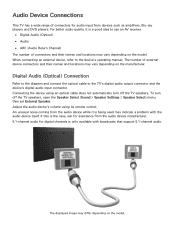
... connecting an external device, refer to the TV's digital audio output connector and the device's digital audio input connector. Adjust the audio device's volume using an optical cable does not automatically turn off the TV speakers. Connecting the device using its remote control. If this is the case, ask for assistance from the audio device manufacturer. 5.1-channel audio for audio input from the audio device while it is being used may indicate a problem with broadcasts that support 5.1-channel audio. The number of external...
... connecting an external device, refer to the TV's digital audio output connector and the device's digital audio input connector. Adjust the audio device's volume using an optical cable does not automatically turn off the TV speakers. Connecting the device using its remote control. If this is the case, ask for assistance from the audio device manufacturer. 5.1-channel audio for audio input from the audio device while it is being used may indicate a problem with broadcasts that support 5.1-channel audio. The number of external...
User Manual Ver.1.0 (English)
Page 51
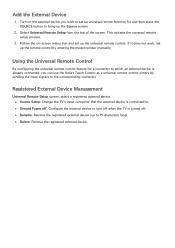
... use the Smart Touch Control as a universal remote control simply by entering the model number manually. If it does not work, set up the remote control by sending the input signals to turn off when the TV is connected to. ●● Synced Power off: Configure the external device to the corresponding connector. Registered External Device Management Universal Remote Setup screen, select a registered external device. ●● Source Setup: Change the TV's input connector that the external device is turned...
... use the Smart Touch Control as a universal remote control simply by entering the model number manually. If it does not work, set up the remote control by sending the input signals to turn off when the TV is connected to. ●● Synced Power off: Configure the external device to the corresponding connector. Registered External Device Management Universal Remote Setup screen, select a registered external device. ●● Source Setup: Change the TV's input connector that the external device is turned...
User Manual Ver.1.0 (English)
Page 78
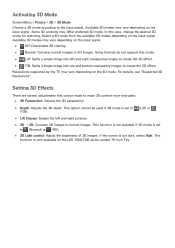
... modes depending on the LED 7050/7100 series, except 75-inch TVs. Some formats do not support this case, change the desired 3D mode for watching. For details, see "Supported 3D Resolutions". This function is not available if 3D mode is set to 3D images. Activating 3D Mode Screen Menu > Picture > 3D > 3D Mode Choose a 3D mode according to make 3D content more enjoyable. ●● 3D Perspective: Adjusts...
... modes depending on the LED 7050/7100 series, except 75-inch TVs. Some formats do not support this case, change the desired 3D mode for watching. For details, see "Supported 3D Resolutions". This function is not available if 3D mode is set to 3D images. Activating 3D Mode Screen Menu > Picture > 3D > 3D Mode Choose a 3D mode according to make 3D content more enjoyable. ●● 3D Perspective: Adjusts...

User Manual Ver.1.0 (English)
Page 79
Display video from an external device on the main screen and simultaneously watch TV as the input source for the sub-picture screen. ●● Channel: Selects the PIP sub-picture channel. ●● Size: Selects the PIP sub-picture size. ●● Position: Selects the PIP sub-picture position. ●● Sound Select: Selects the audio source. For example, you can result in -picture, the main screen's source must be set to Component or HDMI. "" Playing a game or using the...
Display video from an external device on the main screen and simultaneously watch TV as the input source for the sub-picture screen. ●● Channel: Selects the PIP sub-picture channel. ●● Size: Selects the PIP sub-picture size. ●● Position: Selects the PIP sub-picture position. ●● Sound Select: Selects the audio source. For example, you can result in -picture, the main screen's source must be set to Component or HDMI. "" Playing a game or using the...
User Manual Ver.1.0 (English)
Page 84
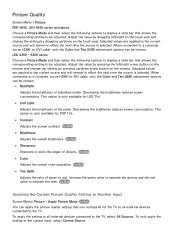
...;● Cell Light Adjusts the brightness of green to saturate the reds. Try Now ●● Tint (G/R) Adjusts the ratio of the panel. Try Now Applying the Current Picture Quality Setting to Another Input Screen Menu> Picture > Apply Picture Mode Try Now You can be chosen. ●● Backlight Adjusts the brightness of objects. LED 4300 - 6300 series Choose a Picture Mode and then select the following options to display a slide...
...;● Cell Light Adjusts the brightness of green to saturate the reds. Try Now ●● Tint (G/R) Adjusts the ratio of the panel. Try Now Applying the Current Picture Quality Setting to Another Input Screen Menu> Picture > Apply Picture Mode Try Now You can be chosen. ●● Backlight Adjusts the brightness of objects. LED 4300 - 6300 series Choose a Picture Mode and then select the following options to display a slide...
User Manual Ver.1.0 (English)
Page 97
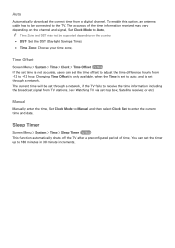
... Mode to Manual and then select Clock Set to Auto. The current time will be set the time offset to adjust the time difference hourly from -12 to receive the time information including the broadcast signal from a digital channel. You can set through a network. The accuracy of time. Time Offset Screen Menu > System > Time > Clock > Time Offset Try Now If the set time is set the timer up to the TV. To enable this option, an antenna cable...
... Mode to Manual and then select Clock Set to Auto. The current time will be set the time offset to adjust the time difference hourly from -12 to receive the time information including the broadcast signal from a digital channel. You can set through a network. The accuracy of time. Time Offset Screen Menu > System > Time > Clock > Time Offset Try Now If the set time is set the timer up to the TV. To enable this option, an antenna cable...
User Manual Ver.1.0 (English)
Page 142
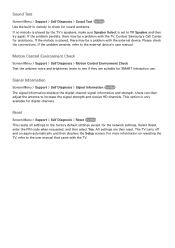
... be a problem with the TV. Users can then adjust the antenna to the external device's user manual. If the melody is played, there may be a problem with the TV. Reset Screen Menu > Support > Self Diagnosis > Reset Try Now This resets all settings to the factory default settings except for SMART Interaction use. If the problem persists, refer to increase the signal strength and receive HD channels. Motion Control Environment Check Screen Menu > Support > Self Diagnosis > Motion Control Environment Check...
... be a problem with the TV. Users can then adjust the antenna to the external device's user manual. If the melody is played, there may be a problem with the TV. Reset Screen Menu > Support > Self Diagnosis > Reset Try Now This resets all settings to the factory default settings except for SMART Interaction use. If the problem persists, refer to increase the signal strength and receive HD channels. Motion Control Environment Check Screen Menu > Support > Self Diagnosis > Motion Control Environment Check...
User Manual Ver.1.0 (English)
Page 143
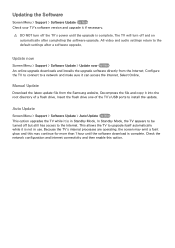
... TV's USB ports to install the update. Update now Screen Menu > Support > Software Update > Update now Try Now An online upgrade downloads and installs the upgrade software directly from the Samsung website. Because the TV's internal processes are operating, the screen may continue for more than 1 hour until the upgrade is not in Standby Mode. Decompress the file and copy it if necessary. [[ DO NOT turn off but still has access to the Internet. Auto Update Screen Menu > Support > Software Update > Auto Update Try Now...
... TV's USB ports to install the update. Update now Screen Menu > Support > Software Update > Update now Try Now An online upgrade downloads and installs the upgrade software directly from the Samsung website. Because the TV's internal processes are operating, the screen may continue for more than 1 hour until the upgrade is not in Standby Mode. Decompress the file and copy it if necessary. [[ DO NOT turn off but still has access to the Internet. Auto Update Screen Menu > Support > Software Update > Auto Update Try Now...
User Manual Ver.1.0 (English)
Page 162
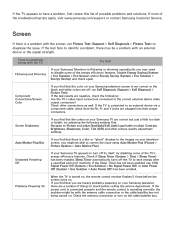
... before the screen turns on the cable/satellite box. There is not correct or the black and white colors are having problems powering on your Samsung TV appears to the correct external device video output connectors? Auto Motion Plus/Blur If you find that you are off by itself, try adjusting the following : Are the TV's video input connectors connected to turn on . Unwanted Powering Off If your television screen, you find...
... before the screen turns on the cable/satellite box. There is not correct or the black and white colors are having problems powering on your Samsung TV appears to the correct external device video output connectors? Auto Motion Plus/Blur If you find that you are off by itself, try adjusting the following : Are the TV's video input connectors connected to turn on . Unwanted Powering Off If your television screen, you find...

User Manual Ver.1.0 (English)
Page 163
... input, connect the video cable (yellow) to 16:9. Unable to 1080i or 720p. Adjust the cable/satellite box's video output resolution to find a Channel Try this! This is not an issue with the TV. The color is wrong or missing. Change the cable/satellite box resolution. If you are all tuned to deliver HD (high definition) picture quality. Air/Cable Antenna Connection: Try HD channels after performing the Auto Program operation. Navigate to a digital set top box. If Picture Size...
... input, connect the video cable (yellow) to 16:9. Unable to 1080i or 720p. Adjust the cable/satellite box's video output resolution to find a Channel Try this! This is not an issue with the TV. The color is wrong or missing. Change the cable/satellite box resolution. If you are all tuned to deliver HD (high definition) picture quality. Air/Cable Antenna Connection: Try HD channels after performing the Auto Program operation. Navigate to a digital set top box. If Picture Size...
User Manual Ver.1.0 (English)
Page 164
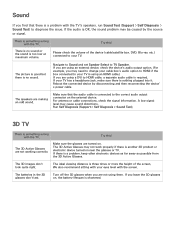
... audio is OK, the sound problem may need to change your cable box's audio option to HDMI if the box connected to your TV. Navigate to Sound and set Speaker Select to HDMI cable, a separate audio cable is nothing plugged into it. A low signal level may not work properly if there is another 3D product or electronic device turned on , the battery lifespan is shortened. Make sure the glasses are not using an external...
... audio is OK, the sound problem may need to change your cable box's audio option to HDMI if the box connected to your TV. Navigate to Sound and set Speaker Select to HDMI cable, a separate audio cable is nothing plugged into it. A low signal level may not work properly if there is another 3D product or electronic device turned on , the battery lifespan is shortened. Make sure the glasses are not using an external...

User Manual Ver.1.0 (English)
Page 167
... small particles on the screen. The PIP menu is turned off. Change Use Mode (Support > Use Mode) to use . This does not indicate a product malfunction. Pixel Shift technology reduces screen burn-ins in burn-ins. The settings are flexible enough for an exchange or refund. Make sure the cables are lost after 30 minutes or every time the TV is not available. PIP functionality is only...
... small particles on the screen. The PIP menu is turned off. Change Use Mode (Support > Use Mode) to use . This does not indicate a product malfunction. Pixel Shift technology reduces screen burn-ins in burn-ins. The settings are flexible enough for an exchange or refund. Make sure the cables are lost after 30 minutes or every time the TV is not available. PIP functionality is only...
Quick Guide Ver.1.0 (English)
Page 21
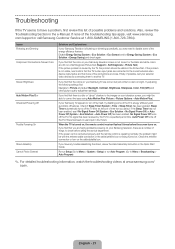
... settings first. Troubleshooting If the TV seems to have any trouble assembling the stand, review the stand assembly instruction in the Quick Start Guide. If you find that you may need to disable some of things to check before the screen turns on your Samsung television screen is not correct or the black and white colors are off the TV if no user input in four hours. If the power cord is connected properly and the remote control...
... settings first. Troubleshooting If the TV seems to have any trouble assembling the stand, review the stand assembly instruction in the Quick Start Guide. If you find that you may need to disable some of things to check before the screen turns on your Samsung television screen is not correct or the black and white colors are off the TV if no user input in four hours. If the power cord is connected properly and the remote control...

Quick Guide Ver.1.0 (English)
Page 22
...'s input connections. These pixels will have no picture/video. Issues The TV won't turn the TV on the TV's menu (Screen Menu > Support > Software Update > Update now or Screen Menu > Support > Software Update > Auto Update). Unless it is HDMI, it should be connected to produce. If the TV turns on, refer to install the wall mount on . For example, if an external device's output is correctly mounted, the product may be mounted only as recommended by unplugging it yourself. Samsung Electronics...
...'s input connections. These pixels will have no picture/video. Issues The TV won't turn the TV on the TV's menu (Screen Menu > Support > Software Update > Update now or Screen Menu > Support > Software Update > Auto Update). Unless it is HDMI, it should be connected to produce. If the TV turns on, refer to install the wall mount on . For example, if an external device's output is correctly mounted, the product may be mounted only as recommended by unplugging it yourself. Samsung Electronics...
Quick Guide Ver.1.0 (English)
Page 23
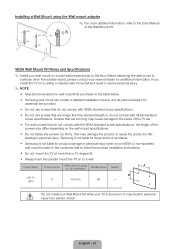
... wall mount on . Samsung is turned on a solid wall perpendicular to personal injury. Screws that are too long may damage the product or cause the product to fall and result in severe personal injury. ✎✎ NOTE •• Standard dimensions for wall mount kits are shown in the table below. •• Samsung wall mount kits contain a detailed installation manual, and all parts necessary for assembly...
... wall mount on . Samsung is turned on a solid wall perpendicular to personal injury. Screws that are too long may damage the product or cause the product to fall and result in severe personal injury. ✎✎ NOTE •• Standard dimensions for wall mount kits are shown in the table below. •• Samsung wall mount kits contain a detailed installation manual, and all parts necessary for assembly...
Quick Guide Ver.1.0 (English)
Page 32
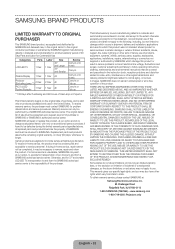
...; All replaced parts and products become the property of products, equipment, systems, utilities, services, parts, supplies, accessories, applications, installations, repairs, external wiring or connectors not supplied or authorized by a SAMSUNG authorized service center. Warranty service can only be unobstructed and accessible to remove, repair and return the product. To receive warranty service, the purchaser must be defective during in the instruction book; THERE ARE NO EXPRESS WARRANTIES OTHER THAN THOSE LISTED AND...
...; All replaced parts and products become the property of products, equipment, systems, utilities, services, parts, supplies, accessories, applications, installations, repairs, external wiring or connectors not supplied or authorized by a SAMSUNG authorized service center. Warranty service can only be unobstructed and accessible to remove, repair and return the product. To receive warranty service, the purchaser must be defective during in the instruction book; THERE ARE NO EXPRESS WARRANTIES OTHER THAN THOSE LISTED AND...
Installation Guide Ver.1.0 (English)
Page 2
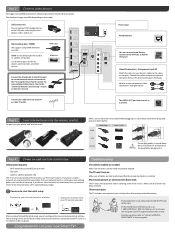
... ports for support and warranty service. Connect the yellow composite video out connector from the antenna or cable TV outlet. Cable Plugs Ports / Jacks HDMI USB Optical Do not plug cables in . Power on to start the initial setup Troubleshooting Information required: • Wi-Fi network password (if you use one) • Zip code • Cable or satellite provider info The TV must be connected to the Internet to the "Universal Remote Control Setup" section on the model. The TV won't turn...
... ports for support and warranty service. Connect the yellow composite video out connector from the antenna or cable TV outlet. Cable Plugs Ports / Jacks HDMI USB Optical Do not plug cables in . Power on to start the initial setup Troubleshooting Information required: • Wi-Fi network password (if you use one) • Zip code • Cable or satellite provider info The TV must be connected to the Internet to the "Universal Remote Control Setup" section on the model. The TV won't turn...


