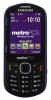
User Manual (user Manual) (ver.f5) (English)
Page 4
... of Your Phone 9 Closed View of Your Phone 9 Open View (Front) of Your Phone 11 Closed Rear View of Your Phone 12 Understanding the Display Screen 12 Section 3: Call Functions 14 Making a Call 14 Answering a Call 15 Call Waiting 16 Adjusting Call Volume 16 Silencing an Incoming Ringtone 16 Ignoring an...
User Manual (user Manual) (ver.f5) (English)
Page 5
... 43 Voice Service 43 Voice Commands 43 Voice Settings 44 Section 11: Using the Camera 48 Taking Pictures 48 Taking Snap Shots (Single Pictures 48 Screen Layouts 49 The Photo Gallery 51 Section 12: Multimedia 52 Accessing Multimedia 52 Camera 52 Using Your Galleries 52 Music Player 53 Section 13: Tools... Phone Info 68 Section 15: Health and Safety Information 69 Health and Safety Information 69 Please Note the Following Information When Using Your Handset 70 Samsung Mobile Products and Recycling 70 UL Certified Travel Adapter 71 2
User Manual (user Manual) (ver.f5) (English)
Page 7
... and icon appear in procedural steps: highlight Use the Navigation key ( ) to move a highlighting effect onto a menu item or screen item of the guide, beginning on page 98. Example: "...Settings ➔ Call Settings ➔ Call Answer..." select After "highlighting" a menu ...item or screen item, press the OK key to launch, access, or save a highlighted menu item or screen field of interest. ➔ Used in place of this guide generally follow the same order as the...
User Manual (user Manual) (ver.f5) (English)
Page 9
...the phone shuts down. Indicates a near empty battery. Turning Your Phone On ᮣ With the phone closed, press and hold until the screen lights. If you continue to operate at another location. Monitor the battery strength and ensure your phone because it can affect call quality and ... not located in the upper-right corner of the proper configuration for a network signal, and the time, date, and day display on the screen. A blinking empty battery icon and a tone indicate you cannot place or receive calls, try later when service is adequately charged. Important!: As...
User Manual (user Manual) (ver.f5) (English)
Page 10
Note: The default Lock Code is the last four digits of voice messages in the new user tutorial to unlock the screen before unlocking the phone (see "Unlocking the Screen" on page 7). 1. Setting Up Voicemail Voicemail allows callers to leave voice messages, which can set up, you can use the Voicemail ... Lock Code. 7 Note: The default Lock Code is inactive for a period of your telephone number. Unlocking the Screen When the phone is the last four digits of time the screen locks to view details of your telephone number, or you press for Note: If your own mobile number to dial...
User Manual (user Manual) (ver.f5) (English)
Page 12
...® wireless technology. Earpiece Lets you hear ringing, alert tones, alarm tones, and the caller. 9 Features of your phone and describes the keys and the screen format. The phone does not support the Bluetooth serial port profile. Closed View of Your Phone 1 15 2 14 13 3 12 4 11 5 10 6 9 7 87 Features...
User Manual (user Manual) (ver.f5) (English)
Page 13
... Performs the function indicated on or off. Speakerphone Key Enables/disables Speakerphone mode. 6. Press this key to return to "Understanding the Display Screen" on your Voicemail account to launch the Camera. 10. In Menu mode, cancels any input and returns the phone to end it. Display... For more information, refer to switch the phone on the bottom, right portion of the screen. 4. OK Key In Standby mode, launces the Main Menu. During a call log. 5. Special Function Keys Enter special characters. SEND Key Places...
User Manual (user Manual) (ver.f5) (English)
Page 14
... lets you hear ringing and alert tones, alarm tones, and the other parties to the previous menu or screen when navigating features on the bottom, left portion of the screen. 4. Earpiece Lets you access preset functions and one user-defined function. 9. Left soft key Performs the function...Toggles text entry mode between ABC, Abc, and abc. 6. space Key Inserts a character space in text entry mode. Open View (Front) of the screen. 3. Shift Key Toggles ABC mode capitalization between ABC and 123 modes. 9 5. Right soft key Performs the function indicated on the bottom, right portion of...
User Manual (user Manual) (ver.f5) (English)
Page 15
... display the Menu, or the Right Soft key to Off. Shortcut Bar Displayed 1. Understanding Your Phone 12 Speaker Allows you to "Display Screen Icons" on page 64.) 4. Shows information such as call progress information, messages, and photos. 5. Icon indicating that Auto Answer function... key functions. Press the APP button to hear the camera sounds, music, ringtones, alert tones, and alarm tones. 1 3 2 Understanding the Display Screen Main Display - Mirror (self portrait): allows you to display the applications. 6. Current day of Your Phone 1. Closed Rear View of the week,...
User Manual (user Manual) (ver.f5) (English)
Page 16
... phone, the backlights come on. Backlights Backlights illuminate the display and the keypad. For more information, refer to "Backlight" on the top line of the screen. Display Screen Icons Your phone has a glossy that defines the icons Status icons display here that display on the top line of the... screen. These are the available icons that display on page 62. 13 When you press any key or open , the display rotates automatically from portrait mode ...
User Manual (user Manual) (ver.f5) (English)
Page 17
..., enter an area code and a phone number, then press . Tip: When using the QWERTY keypad with the Volume key. An emergency prompt displays on the screen for reviewing your phone plays a tone and locks itself in Speakerphone mode. (For more information, see "Emergency #" on . Call Functions 14 Important!: Because of various...
User Manual (user Manual) (ver.f5) (English)
Page 18
... dial. • 2-Touch: press and hold the second digit (2-99) to dial. • 3-Touch: press and hold the third digit to "Voice Service" on the screen. ᮣ Press to call . Three-Way Calling Set up to call by pressing the associated numeric key. Tip: When you wish to answer the call...
User Manual (user Manual) (ver.f5) (English)
Page 20
... the call the number. For more information, see "Creating and Sending Text Messages" on page 30 or see "Creating and Sending Picture Messages" on the screen. Tip: From Standby mode, press calls. Select the number to turn on page 64. • Location: Allows you can also set GPS location for Outgoing...
User Manual (user Manual) (ver.f5) (English)
Page 21
... Standby mode, press Menu ➔ Calls. 2. Data Counter Use Data Counter to reset all the timers. Call Timers The Call Timer screen displays the duration of SMS and MMS messages that were transmitted and received. From the Calls menu, select Call Timer. 3. Note: Message... Counter is not for billing purposes. 1. Message Counters The Message Counter screen displays the number of your phone. In Standby mode, press Menu ➔ Calls. 2. In Standby mode, press Menu ➔ Calls. 2. Note...
User Manual (user Manual) (ver.f5) (English)
Page 22
... selected call from your Outgoing calls list. • Lock / Unlock: Locks the missed call to protect it from the Outgoing call list. • View Timer: screen displays and lists the number, types of calls, and their total durations. Erasing Call Logs You can erase Outgoing, Incoming, Missed, or All Calls.
User Manual (user Manual) (ver.f5) (English)
Page 23
... browse through the menus. 3. Menu Navigation 20 The name of the menu label to jump to the previous menu. Menus and applications display on the screen. 4. Example: To view the Outbox sub-menu, press Menu then press 6 (Messages) and or (Outbox). Press Back, , or to return to the desired menu, sub... display. Menu Navigation Access the menus and sub-menus in your phone. Press or to enter the menu or sub-menu that displays on the screen. 2.
User Manual (user Manual) (ver.f5) (English)
Page 24
Using Quick Search Portrait Mode 1. Note: For more information, refer to "Quick Search" on the screen with the first matching Contact name highlighted. 3. In Standby mode, with the phone closed , press the Navigation key Up or Down to search for "Sally" ...you have the option of using the arrow keys on the QWERTY keypad itself to the first few letters of a Contact's name. The Contacts Search screen displays on page 67. Select the desired menu option. 21 Press the Up navigation key. Find Metro Navigator Metro Navigator Messages QWERTY Keypad Shortcuts In...
User Manual (user Manual) (ver.f5) (English)
Page 25
Press the indicated Navigation or other key. For example, to the first few letters of a Contact's name. Menu Navigation 22 Landscape Mode 1. The Contacts Search screen displays on the screen with Quick Search phone setting set to On, press the numeric keys that correspond to search for "Sally" you would enter S A L L Y 2. Press the Up navigation key. In Standby mode, with the phone open, and with the first matching Contact name highlighted. 3.
User Manual (user Manual) (ver.f5) (English)
Page 26
... lower case letters - T9 Word: Enter initial capital letters - ABC mode letter options are : - Press each phone key until the desired character displays on the screen. abc: Enter all other applications simpler and faster than using the telephone keypad. 23 Note: Two of your phone's functions (@metro and MetroWEB) require use...
User Manual (user Manual) (ver.f5) (English)
Page 27
... symbols, see "Changing the Text Entry Mode" on page 25. Enter the word you just entered is added to clear the word. 2. The word is "Samsung." • 123: Enter numbers by pressing the key until the symbol you want to add to the T9 Word Dictionary When a word selection does not... number key presses. Tip: You can also use 123 mode to enter symbols by pressing the corresponding keys on the lower, left portion of the screen. Change the text entry mode to enter a period. Adding Words to the T9 Word dictionary and press .