
User Manual (user Manual) (ver.f2) (English)
Page 13
... recent call . Main Display - In standby mode, press the key once to voicemail. 12. Enter special characters. In Idle mode, pressing and holding this key calls your Voice Mail account. 6. END/Power/Menu Exit Key - Lets you hear the other caller hear you clearly when you scroll through menus and applications and to the previous menu or screen when navigating features on your phone, including numbers dialed, feature and function screens, status icons, message indicators, signal...
... recent call . Main Display - In standby mode, press the key once to voicemail. 12. Enter special characters. In Idle mode, pressing and holding this key calls your Voice Mail account. 6. END/Power/Menu Exit Key - Lets you hear the other caller hear you clearly when you scroll through menus and applications and to the previous menu or screen when navigating features on your phone, including numbers dialed, feature and function screens, status icons, message indicators, signal...
User Manual (user Manual) (ver.f2) (English)
Page 15
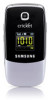
... call the most recent number. 5. Camera Key Use the Camera key ( ) - to activate the camera built into your phone - The center portion of recent calls to answer calls. 2. The sample screen shows that indicate network status, battery power, 2 signal strength, connection type, and more. 2. Press twice in standby mode to display a list of the 3 main display shows information such as a shortcut to recall the last number(s) dialed, received, or missed. 1. Press switch back to make a call . The bottom line of your phone. 4. Enter a number...
... call the most recent number. 5. Camera Key Use the Camera key ( ) - to activate the camera built into your phone - The center portion of recent calls to answer calls. 2. The sample screen shows that indicate network status, battery power, 2 signal strength, connection type, and more. 2. Press twice in standby mode to display a list of the 3 main display shows information such as a shortcut to recall the last number(s) dialed, received, or missed. 1. Press switch back to make a call . The bottom line of your phone. 4. Enter a number...

User Manual (user Manual) (ver.f2) (English)
Page 17
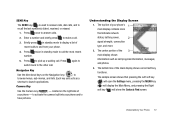
... text entry screen, press the Left soft key ( ), then choose the input mode from within a menu. Input Mode Input mode determines how you will see the time, day, and date as well as all phone status icons. 1. In standby mode, you enter text, numbers and symbols. Press to return to "Entering Text" on . • When you unlock the phone. Only pressing answers a call answer options appear in standby mode, enter a phone number, and press to "Change Lock" on phone use...
... text entry screen, press the Left soft key ( ), then choose the input mode from within a menu. Input Mode Input mode determines how you will see the time, day, and date as well as all phone status icons. 1. In standby mode, you enter text, numbers and symbols. Press to return to "Entering Text" on . • When you unlock the phone. Only pressing answers a call answer options appear in standby mode, enter a phone number, and press to "Change Lock" on phone use...

User Manual (user Manual) (ver.f2) (English)
Page 37
... contact having up to five associated phone numbers, an e-mail address, and a picture ID. Assign speed dial numbers to your five Contacts groups. • Memory Info - Rename one of your Contacts. • Speed Dial - For example, press to associate with the Name field highlighted. 2. Using the Contacts Add Option 1. The Add New Entry screen appears in the display with the type using the keypad. (For more information, refer to "Entering Text" on page 30.) 3. Your Contacts List Your Contacts list...
... contact having up to five associated phone numbers, an e-mail address, and a picture ID. Assign speed dial numbers to your five Contacts groups. • Memory Info - Rename one of your Contacts. • Speed Dial - For example, press to associate with the Name field highlighted. 2. Using the Contacts Add Option 1. The Add New Entry screen appears in the display with the type using the keypad. (For more information, refer to "Entering Text" on page 30.) 3. Your Contacts List Your Contacts list...

User Manual (user Manual) (ver.f2) (English)
Page 38
... Save ( ). The Save screen appears in the display: Mobile Home Work Pager Fax 35 Creating a new Contacts entry: 3. Note: If the call , phone number, and name of the caller to an existing Contacts entry. Use the Up/Down navigation keys to "Ringer Type" on page 95.) 7. Lets you add the number or e-mail address you can also store a phone number from a Call Once you've finished a call, you just entered to your call, the call time, length of call was incoming...
... Save ( ). The Save screen appears in the display: Mobile Home Work Pager Fax 35 Creating a new Contacts entry: 3. Note: If the call , phone number, and name of the caller to an existing Contacts entry. Use the Up/Down navigation keys to "Ringer Type" on page 95.) 7. Lets you add the number or e-mail address you can also store a phone number from a Call Once you've finished a call, you just entered to your call, the call time, length of call was incoming...

User Manual (user Manual) (ver.f2) (English)
Page 45
... Speed Dial number. Enter the phone number or e-mail address for the new Contacts entry. 5. Note: If a contact has more than one stored number (such as default - Press Options ( ). Edit an Existing e-mail Address 1. Use the navigation keys to the existing entry. Lets you assign a Speed Dial number to "Finding a Contacts Entry" on page 37.) 2. Set Speed Dial is highlighted. 5. A hard pause (awaits input from you Speed Dial that Contact. 4. The Edit Contact screen appears in the display: • Set Speed Dial - The Edit Contact screen appears in the Contacts list...
... Speed Dial number. Enter the phone number or e-mail address for the new Contacts entry. 5. Note: If a contact has more than one stored number (such as default - Press Options ( ). Edit an Existing e-mail Address 1. Use the navigation keys to the existing entry. Lets you assign a Speed Dial number to "Finding a Contacts Entry" on page 37.) 2. Set Speed Dial is highlighted. 5. A hard pause (awaits input from you Speed Dial that Contact. 4. The Edit Contact screen appears in the display: • Set Speed Dial - The Edit Contact screen appears in the Contacts list...

User Manual (user Manual) (ver.f2) (English)
Page 52
... received by the addressee. • Remove Pic - Opens the message where you add the addressee numbers or Email addresses to enter the send option's sub- 1. Use the Navigation key to the recipient. Lets you assign a High, Normal, or Low priority to Play Again, Forward, Reply With Copy, Save PIC, Save Sound, Save Video, Save Preset Msg, Lock/Unlock, Add To Contacts, Callback# or Message Info. • View Later - Removes the picture from a Picture message. • Add To Contacts - Removes the sound file from a Picture message. • Remove Sound - Lets you set...
... received by the addressee. • Remove Pic - Opens the message where you add the addressee numbers or Email addresses to enter the send option's sub- 1. Use the Navigation key to the recipient. Lets you assign a High, Normal, or Low priority to Play Again, Forward, Reply With Copy, Save PIC, Save Sound, Save Video, Save Preset Msg, Lock/Unlock, Add To Contacts, Callback# or Message Info. • View Later - Removes the picture from a Picture message. • Add To Contacts - Removes the sound file from a Picture message. • Remove Sound - Lets you set...

User Manual (user Manual) (ver.f2) (English)
Page 56
... screen/field, do one of the following: • Press Abc ( ). Picture Message - Add To Contacts - Use the Navigation key to highlight the desired option. The following options appear in the display: - Abc - Symbols - Use the Navigation key to highlight an option. Press to perform the function for the highlighted option. • Press SEND ( ) to send the message. • Press Options ( ). (See "Message Send Options" on the keypad. - Text Message - Lock/Unlock - Save Quick Text - Erase...
... screen/field, do one of the following: • Press Abc ( ). Picture Message - Add To Contacts - Use the Navigation key to highlight the desired option. The following options appear in the display: - Abc - Symbols - Use the Navigation key to highlight an option. Press to perform the function for the highlighted option. • Press SEND ( ) to send the message. • Press Options ( ). (See "Message Send Options" on the keypad. - Text Message - Lock/Unlock - Save Quick Text - Erase...
User Manual (user Manual) (ver.f2) (English)
Page 102
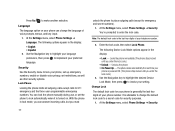
... . Lock Phone Locking the phone limits all outgoing calls except calls to lock your phone is advisable to a secret code for your phone is the last four digits of your phone can change the default lock code to change the language of your preferred language. The phone locks automatically the next time your phone, set up emergency numbers, enable or disable voice privacy, set the phone to emergency and secret numbers). 1. At the Settings menu, select Phone Settings ➔ Language. The following Device Lock Mode options appear in the display: • English...
... . Lock Phone Locking the phone limits all outgoing calls except calls to lock your phone is advisable to a secret code for your phone is the last four digits of your phone can change the default lock code to change the language of your preferred language. The phone locks automatically the next time your phone, set up emergency numbers, enable or disable voice privacy, set the phone to emergency and secret numbers). 1. At the Settings menu, select Phone Settings ➔ Language. The following Device Lock Mode options appear in the display: • English...

User Manual (user Manual) (ver.f2) (English)
Page 103
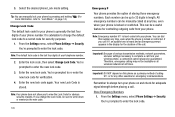
... manually called at all wireless networks at any time, even when your phone is the last four digits of your telephone number. 2. Store Emergency Numbers 1. Enter an emergency number (up to re-enter the New Lock Code for adequate signal strength before placing a call 911 an audible tone is locked or restricted. Emergency # Your phone provides the option of the three emergency number entries. 4. In standby mode with the phone locked, enter the Changing Your Settings 100 Note: The default lock code is hard-coded...
... manually called at all wireless networks at any time, even when your phone is the last four digits of your telephone number. 2. Store Emergency Numbers 1. Enter an emergency number (up to re-enter the New Lock Code for adequate signal strength before placing a call 911 an audible tone is locked or restricted. Emergency # Your phone provides the option of the three emergency number entries. 4. In standby mode with the phone locked, enter the Changing Your Settings 100 Note: The default lock code is hard-coded...

User Manual (user Manual) (ver.f2) (English)
Page 105
... incoming calls. • Contacts - Disable the selected Restriction. 4. You setting is saved, and you to select the roaming setting for your designated coverage area. • Automatic - At the Settings menu, select Phone Settings ➔ Set Time. Enter the current date in mm/dd/yyyy format using your Date setting. • For Set Time, the Set Time screen appears in the display. - Select the desired Restriction. Use the Navigation key to highlight On or Off, then press to Contacts list...
... incoming calls. • Contacts - Disable the selected Restriction. 4. You setting is saved, and you to select the roaming setting for your designated coverage area. • Automatic - At the Settings menu, select Phone Settings ➔ Set Time. Enter the current date in mm/dd/yyyy format using your Date setting. • For Set Time, the Set Time screen appears in the display. - Select the desired Restriction. Use the Navigation key to highlight On or Off, then press to Contacts list...

User Manual (user Manual) (ver.f2) (English)
Page 133
... key 11 Entering Text 30 Alpha (Abc) Mode 30 Entering Numbers 32 Entering Symbols 32 Entering Upper and Lower Case Letters 32 Text Entry Modes 30 Erase memos 74 ESN 105 Exit Browser 56 G Gallery Photo 68 Games & Apps 58 Getting Started 4 Activating Your Phone 5 Understanding this User Manual 4 Voicemail 7 H HAC 117 Health and Safety Information 106 I Icon Glossary 104 Input mode 14 International Calls 17 In-use menu 28 K Key Tone 96 L Launching Voice Service 86 Left soft key 11 Lock mode...
... key 11 Entering Text 30 Alpha (Abc) Mode 30 Entering Numbers 32 Entering Symbols 32 Entering Upper and Lower Case Letters 32 Text Entry Modes 30 Erase memos 74 ESN 105 Exit Browser 56 G Gallery Photo 68 Games & Apps 58 Getting Started 4 Activating Your Phone 5 Understanding this User Manual 4 Voicemail 7 H HAC 117 Health and Safety Information 106 I Icon Glossary 104 Input mode 14 International Calls 17 In-use menu 28 K Key Tone 96 L Launching Voice Service 86 Left soft key 11 Lock mode...

User Manual (user Manual) (ver.f2) (English)
Page 30
... screen appears in the display: • Contacts - The Messages menu appears in a call , press Options ( ). Menu Navigation Access menus using the MENU key ( ), the Navigation key ( ), the soft keys ( ), or a shortcut. 1. Axcess Web Music Axcess Shop Contacts(Find) The In-Use Options Access numerous menus and features even while in the display. (For more information, refer to launch its corresponding application. The following menu items appear in the display. • Call History - In standby mode...
... screen appears in the display: • Contacts - The Messages menu appears in a call , press Options ( ). Menu Navigation Access menus using the MENU key ( ), the Navigation key ( ), the soft keys ( ), or a shortcut. 1. Axcess Web Music Axcess Shop Contacts(Find) The In-Use Options Access numerous menus and features even while in the display. (For more information, refer to launch its corresponding application. The following menu items appear in the display. • Call History - In standby mode...
User Manual (user Manual) (ver.f2) (English)
Page 108
... enter the lock code. Your new Lock Code is hard-coded into your telephone number. 2. 3. Remember to always turn your wireless phone, a connection cannot always be sure to "Lock Mode" on all wireless networks at any other essential or emergency communications. It is locked or restricted. Note: The default lock code is the last four digits of various transmission methods, network parameters, and user settings necessary to view the Lock Code for adequate signal strength before placing a call from your phone...
... enter the lock code. Your new Lock Code is hard-coded into your telephone number. 2. 3. Remember to always turn your wireless phone, a connection cannot always be sure to "Lock Mode" on all wireless networks at any other essential or emergency communications. It is locked or restricted. Note: The default lock code is the last four digits of various transmission methods, network parameters, and user settings necessary to view the Lock Code for adequate signal strength before placing a call from your phone...
User Manual (user Manual) (ver.f2) (English)
Page 110
... disables Set Time. (For more information, refer to acquire service. Select Outgoing Calls or Incoming Calls. Restrict selected calls from/to On, this function is available for your designated coverage area. • Automatic-A - From the Settings menu, select Phone Settings ➔ NAM Selection. From the Settings menu, select Phone Settings ➔ System Select. Your phone is enabled. Set Time Use the Set Time option to set to numbers not in the display: • Home only - With Airplane Mode set...
... disables Set Time. (For more information, refer to acquire service. Select Outgoing Calls or Incoming Calls. Restrict selected calls from/to On, this function is available for your designated coverage area. • Automatic-A - From the Settings menu, select Phone Settings ➔ NAM Selection. From the Settings menu, select Phone Settings ➔ System Select. Your phone is enabled. Set Time Use the Set Time option to set to numbers not in the display: • Home only - With Airplane Mode set...

User Manual (user Manual) (ver.f2) (English)
Page 140
... Dialing 16 P Phone Command Keys 10 Display Screen 12 Display Screen Icons 12 Features 8 Modes 13 View, Open, Front 9 View,Closed 8 Phone Info Icon Glossary 111 Phone Number 111 Version 111 137 Phone Number 111 Phone Safety 122 Phone Settings Airplane Mode 104 Language 104 NAM selection 107 Quick Search 108 Set Time 107 System Select 107 Picture (Pic) message 48 Picture Messages Send in Camera Mode 49 Pictures brightness 67 Quality 72 Shutter Sounds 71 Zooming In 67 Postcard 51 Q Quality, Pictures 72 Quick Search Making a Call 18 Menu...
... Dialing 16 P Phone Command Keys 10 Display Screen 12 Display Screen Icons 12 Features 8 Modes 13 View, Open, Front 9 View,Closed 8 Phone Info Icon Glossary 111 Phone Number 111 Version 111 137 Phone Number 111 Phone Safety 122 Phone Settings Airplane Mode 104 Language 104 NAM selection 107 Quick Search 108 Set Time 107 System Select 107 Picture (Pic) message 48 Picture Messages Send in Camera Mode 49 Pictures brightness 67 Quality 72 Shutter Sounds 71 Zooming In 67 Postcard 51 Q Quality, Pictures 72 Quick Search Making a Call 18 Menu...

User Manual (user Manual) (ver.f3) (English)
Page 106
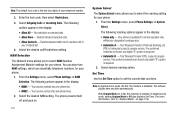
... your phone, set up emergency numbers, enable or disable voice privacy, set to use other features (such as on board an aircraft. 1. This prevents you from making or receiving calls, but allows you are returned to the Phone Settings menu, press . 3. From the Settings menu, select Phone Settings ➔ Airplane Mode. Disables the radio transmitter and receiver and the Bluetooth interface in your language preference, then press . Enables the radio transmitter and receiver in your phone. Language The Language option changes the language...
... your phone, set up emergency numbers, enable or disable voice privacy, set to use other features (such as on board an aircraft. 1. This prevents you from making or receiving calls, but allows you are returned to the Phone Settings menu, press . 3. From the Settings menu, select Phone Settings ➔ Airplane Mode. Disables the radio transmitter and receiver and the Bluetooth interface in your language preference, then press . Enables the radio transmitter and receiver in your phone. Language The Language option changes the language...
User Manual (user Manual) (ver.f3-1) (English)
Page 10
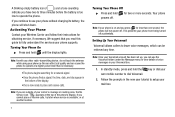
... the key or dial your Wireless Carrier and follow their instructions for less than is on and you can cause the phone to view details of voice messages in the new user tutorial to place and receive calls. Note: As with any time. Your phone powers off accidentally. Setting Up Your Voicemail Voicemail allows callers to leave voice messages, which can be retrieved any other radio-transmitting device, do not touch the antenna while using your phone...
... the key or dial your Wireless Carrier and follow their instructions for less than is on and you can cause the phone to view details of voice messages in the new user tutorial to place and receive calls. Note: As with any time. Your phone powers off accidentally. Setting Up Your Voicemail Voicemail allows callers to leave voice messages, which can be retrieved any other radio-transmitting device, do not touch the antenna while using your phone...
User Manual (user Manual) (ver.f3-1) (English)
Page 73
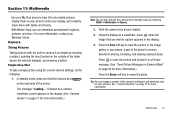
... your phone's vivid color display, and instantly share them on your phone, a part of the phone's memory devoted to storing, browsing, and viewing saved pictures. Tip: You can also activate the camera (from standby mode) by a camera viewfinder screen appears in Camera Mode" on page 50 for more information.) Note: You can change a number of the camera's settings to suit particular uses for more information.) Press the Erase soft key to erase the photo. For...
... your phone's vivid color display, and instantly share them on your phone, a part of the phone's memory devoted to storing, browsing, and viewing saved pictures. Tip: You can also activate the camera (from standby mode) by a camera viewfinder screen appears in Camera Mode" on page 50 for more information.) Note: You can change a number of the camera's settings to suit particular uses for more information.) Press the Erase soft key to erase the photo. For...

User Manual (user Manual) (ver.f3-1) (English)
Page 104
... desired data setting, then press . This prevents you from making or receiving calls, but allows you turn off your phone. 2. Language The Language option changes the language of your phone, set up emergency numbers, enable or disable voice privacy, set to make an emergency call with Airplane mode enabled, just dial the emergency number and press . • Off - Security Use the Security sub-menu to discard the change to the new setting. • Press No to lock your phone. Highlight your setting change. • Press Yes to change and...
... desired data setting, then press . This prevents you from making or receiving calls, but allows you turn off your phone. 2. Language The Language option changes the language of your phone, set up emergency numbers, enable or disable voice privacy, set to make an emergency call with Airplane mode enabled, just dial the emergency number and press . • Off - Security Use the Security sub-menu to discard the change to the new setting. • Press No to lock your phone. Highlight your setting change. • Press Yes to change and...


