Reset PN51E7000FF - Samsung
Reset PN51E7000FF

View Results Below
Free Samsung PN51E7000FF manuals!
Problems with Samsung PN51E7000FF?
Ask a Question
Free Samsung PN51E7000FF manuals!
Problems with Samsung PN51E7000FF?
Ask a Question
Related Manual Pages


Similar Questions

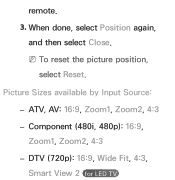
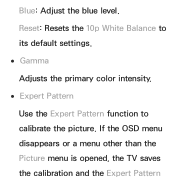
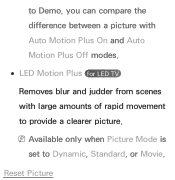
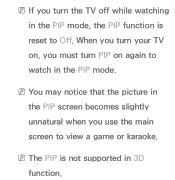
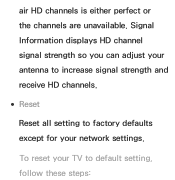
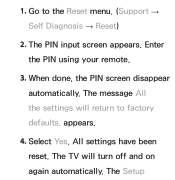
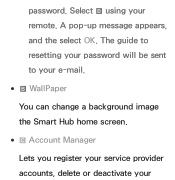
Reset To Factory
how to reset to factory setting a samsung tv all i have read say that reset is insetting and general...
how to reset to factory setting a samsung tv all i have read say that reset is insetting and general...
(Posted by ethel2 3 years ago)

How Do I Factory Reset The Sp-s4243 Thanks
HDMI ports not working how do I factory reset the tv.
HDMI ports not working how do I factory reset the tv.
(Posted by test 7 years ago)

How To Reset The Tv?
I need to reset the TV to unlock the keyboard
I need to reset the TV to unlock the keyboard
(Posted by daniel69597 13 years ago)