
User Guide
Page 2
... the Channel Menu • Memorizing Channels • Other Features Basic Features • Changing the Preset Picture Mode • Adjusting Picture Settings • Changing the Picture Size • Changing the Picture Options • Using the TV with Your PC • Changing the... Preset Sound Modes • Adjusting Sound Settings Preference Features 1 • Wired Network Connection 17 • Wireless Network Connection 22 • Setting the Time • Blocking Programs • Economical Solutions • Picture In Picture (PIP...
... the Channel Menu • Memorizing Channels • Other Features Basic Features • Changing the Preset Picture Mode • Adjusting Picture Settings • Changing the Picture Size • Changing the Picture Options • Using the TV with Your PC • Changing the... Preset Sound Modes • Adjusting Sound Settings Preference Features 1 • Wired Network Connection 17 • Wireless Network Connection 22 • Setting the Time • Blocking Programs • Economical Solutions • Picture In Picture (PIP...
User Guide
Page 4
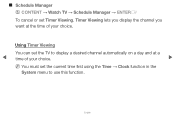
Timer Viewing lets you display the channel you want at a time of your choice. ▶ NN You must set the current time first using the Time → Clock function in the System menu to display a desired channel automatically on a day and at the time of your choice. Using Timer Viewing You can set Timer Viewing. ■■ Schedule Manager OO CONTENT → Watch TV → Schedule Manager → ENTERE To cancel or set the TV to use this function. ▶ English
Timer Viewing lets you display the channel you want at a time of your choice. ▶ NN You must set the current time first using the Time → Clock function in the System menu to display a desired channel automatically on a day and at the time of your choice. Using Timer Viewing You can set Timer Viewing. ■■ Schedule Manager OO CONTENT → Watch TV → Schedule Manager → ENTERE To cancel or set the TV to use this function. ▶ English
User Guide
Page 5
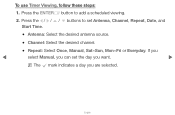
To use Timer Viewing, follow these steps: 1. Press the ENTERE button to set the day you want. ▶ NN The c mark indicates a day you are selected. ▶ English Press the l / r / u / d buttons to add a scheduled viewing. 2. If you select Manual, you can set Antenna, Channel, Repeat, Date, and Start Time. ●● Antenna: Select the desired antenna source. ●● Channel: Select the desired channel. ●● Repeat: Select Once, Manual, Sat~Sun, Mon~Fri or Everyday.
To use Timer Viewing, follow these steps: 1. Press the ENTERE button to set the day you want. ▶ NN The c mark indicates a day you are selected. ▶ English Press the l / r / u / d buttons to add a scheduled viewing. 2. If you select Manual, you can set Antenna, Channel, Repeat, Date, and Start Time. ●● Antenna: Select the desired antenna source. ●● Channel: Select the desired channel. ●● Repeat: Select Once, Manual, Sat~Sun, Mon~Fri or Everyday.
User Guide
Page 6
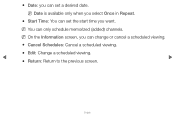
▶ ●● Date: you can change or cancel a scheduled viewing. ●● Cancel Schedules: Cancel a scheduled viewing. ●● Edit: Change a scheduled viewing. ▶ ●● Return: Return to the previous screen. NN You can set a desired date. NN On the Information screen, you can set the start time you want. NN Date is available only when you select Once in Repeat. ●● Start Time: You can only schedule memorized (added) channels. English
▶ ●● Date: you can change or cancel a scheduled viewing. ●● Cancel Schedules: Cancel a scheduled viewing. ●● Edit: Change a scheduled viewing. ▶ ●● Return: Return to the previous screen. NN You can set a desired date. NN On the Information screen, you can set the start time you want. NN Date is available only when you select Once in Repeat. ●● Start Time: You can only schedule memorized (added) channels. English
User Guide
Page 13
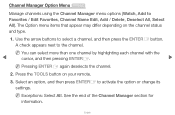
... ENTERE button. The Option menu items that appear may differ depending on your remote. 3. Use the arrow buttons to activate the option or change its settings. See the end of the Channel Manager section for information. ▶ English NN You can select more than one channel by highlighting each channel with...
... ENTERE button. The Option menu items that appear may differ depending on your remote. 3. Use the arrow buttons to activate the option or change its settings. See the end of the Channel Manager section for information. ▶ English NN You can select more than one channel by highlighting each channel with...

User Guide
Page 25
NN Settings are marked with an asterisk "*" on the right-hand side of the channel number in the channel banner. ▶ NN To reset the fine-tuning, ...
NN Settings are marked with an asterisk "*" on the right-hand side of the channel number in the channel banner. ▶ NN To reset the fine-tuning, ...

User Guide
Page 27
...; Color or Tint (G/R), the OSD will be adjusted accordingly. English NN Lowering picture brightness reduces power consumption. ▶ ❑❑ Adjusting Picture Settings OO MENUm → Picture → ENTERE ■■ Cell Light / Contrast / Brightness / Sharpness / Color / Tint (G/R) Your television has... several options for each external device connected to the TV. NN When you can adjust and store settings for adjusting picture quality. Select an option using the up and down arrow keys, and then press ENTERE. When done, press ...
...; Color or Tint (G/R), the OSD will be adjusted accordingly. English NN Lowering picture brightness reduces power consumption. ▶ ❑❑ Adjusting Picture Settings OO MENUm → Picture → ENTERE ■■ Cell Light / Contrast / Brightness / Sharpness / Color / Tint (G/R) Your television has... several options for each external device connected to the TV. NN When you can adjust and store settings for adjusting picture quality. Select an option using the up and down arrow keys, and then press ENTERE. When done, press ...
User Guide
Page 28
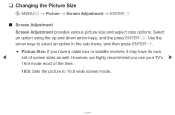
... various picture size and aspect ratio options. However, we highly recommend you have a cable box or satellite receiver, it may have its own set of the time. 16:9: Sets the picture to select an option in the sub-menu, and then press ENTERE. ●● Picture Size: If you use your TV...
... various picture size and aspect ratio options. However, we highly recommend you have a cable box or satellite receiver, it may have its own set of the time. 16:9: Sets the picture to select an option in the sub-menu, and then press ENTERE. ●● Picture Size: If you use your TV...
User Guide
Page 29
... Zoom1, Zoom2, Wide Fit, or Screen fit. ▶ English NN Available with HD 1080i / 720p signals in 16:9 mode. 4:3: Sets the picture to 4:3 format for a long time. Position is only available if Picture size is not covered by the warranty. ▶ Screen Fit: When your... the entire screen. Zoom2: Use for moderate magnification. Wide Fit: Enlarges the aspect ratio of the screen may cause image retention (screen burn) which is set your TV inputs HDMI (720p / 1080i / 1080p) or Component (1080i / 1080p) signals, displays the full image without any cut-off the top and sides. ...
... Zoom1, Zoom2, Wide Fit, or Screen fit. ▶ English NN Available with HD 1080i / 720p signals in 16:9 mode. 4:3: Sets the picture to 4:3 format for a long time. Position is only available if Picture size is not covered by the warranty. ▶ Screen Fit: When your... the entire screen. Zoom2: Use for moderate magnification. Wide Fit: Enlarges the aspect ratio of the screen may cause image retention (screen burn) which is set your TV inputs HDMI (720p / 1080i / 1080p) or Component (1080i / 1080p) signals, displays the full image without any cut-off the top and sides. ...

User Guide
Page 31
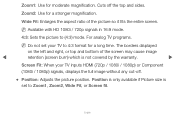
Select Close by pressing the d and r buttons sequentially. Press the ENTERE button. 3. Press the d button to its default position. ▶ English NN If you want to reset the pictures to select Position. 2. NN To use the Position function after selecting Screen Fit when connected to move the picture. 4. Press the u, d, l or r button to an HDMI (1080i/1080p) or Component (1080i/1080p) source, follow these steps: 1. Press the ENTERE button. 5. The picture will be set to its original position, select Reset in the ▶ Position screen.
Select Close by pressing the d and r buttons sequentially. Press the ENTERE button. 3. Press the d button to its default position. ▶ English NN If you want to reset the pictures to select Position. 2. NN To use the Position function after selecting Screen Fit when connected to move the picture. 4. Press the u, d, l or r button to an HDMI (1080i/1080p) or Component (1080i/1080p) source, follow these steps: 1. Press the ENTERE button. 5. The picture will be set to its original position, select Reset in the ▶ Position screen.
User Guide
Page 32
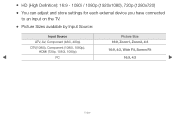
●● HD (High Definition): 16:9 - 1080i / 1080p (1920x1080), 720p (1280x720) ●● You can adjust and store settings for each external device you have connected to an input on the TV. ●● Picture Sizes available by Input Source: Input Source ATV, AV, Component (480i, 480p) DTV(1080i), Component (1080i, 1080p), HDMI (720p, 1080i, 1080p) PC Picture Size 16:9, Zoom1, Zoom2, 4:3 16:9, 4:3, Wide Fit, Screen Fit 16:9, 4:3 ▶ ▶ English
●● HD (High Definition): 16:9 - 1080i / 1080p (1920x1080), 720p (1280x720) ●● You can adjust and store settings for each external device you have connected to an input on the TV. ●● Picture Sizes available by Input Source: Input Source ATV, AV, Component (480i, 480p) DTV(1080i), Component (1080i, 1080p), HDMI (720p, 1080i, 1080p) PC Picture Size 16:9, Zoom1, Zoom2, 4:3 16:9, 4:3, Wide Fit, Screen Fit 16:9, 4:3 ▶ ▶ English
User Guide
Page 33
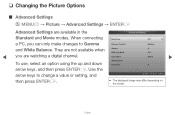
Advanced Settings Black Tone Dynamic Contrast Gamma RGB Only Mode Color Space White Balance Flesh Tone : Off : Medium : 0 : Off : Native ► ▶ : 0 ▼ U Move E Enter R Return ●&#... the Standard and Movie modes. ❑❑ Changing the Picture Options ■■ Advanced Settings OO MENUm → Picture → Advanced Settings → ENTERE Advanced Settings are not available when you can only make changes to change a value or setting, and then press ENTERE. To use, select an option using the up and down...
Advanced Settings Black Tone Dynamic Contrast Gamma RGB Only Mode Color Space White Balance Flesh Tone : Off : Medium : 0 : Off : Native ► ▶ : 0 ▼ U Move E Enter R Return ●&#... the Standard and Movie modes. ❑❑ Changing the Picture Options ■■ Advanced Settings OO MENUm → Picture → Advanced Settings → ENTERE Advanced Settings are not available when you can only make changes to change a value or setting, and then press ENTERE. To use, select an option using the up and down...
User Guide
Page 35
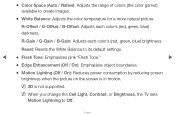
...B-Gain: Adjusts each color's (red, green, blue) darkness. NN When you change the Cell Light, Contrast, or Brightness, the TV sets Motion Lightning to create images. ●● White Balance: Adjusts the color temperature for a more natural picture. Reset: Resets the White Balance... to its default settings. ●● Flesh Tone: Emphasizes pink "Flesh Tone." ▶ ●● Edge Enhancement (Off / On): Emphasizes object boundaries....
...B-Gain: Adjusts each color's (red, green, blue) darkness. NN When you change the Cell Light, Contrast, or Brightness, the TV sets Motion Lightning to create images. ●● White Balance: Adjusts the color temperature for a more natural picture. Reset: Resets the White Balance... to its default settings. ●● Flesh Tone: Emphasizes pink "Flesh Tone." ▶ ●● Edge Enhancement (Off / On): Emphasizes object boundaries....
User Guide
Page 36
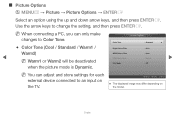
NN When connecting a PC, you can adjust and store settings for each external device connected to Color Tone. ●● Color Tone (Cool / Standard / Warm1 / Warm2) NN Warm1 or Warm2 will be deactivated when the ...; Picture Options → ENTERE Select an option using the up and down arrow keys, and then press ENTERE. Use the arrow keys to change the setting, and then press ENTERE.
NN When connecting a PC, you can adjust and store settings for each external device connected to Color Tone. ●● Color Tone (Cool / Standard / Warm1 / Warm2) NN Warm1 or Warm2 will be deactivated when the ...; Picture Options → ENTERE Select an option using the up and down arrow keys, and then press ENTERE. Use the arrow keys to change the setting, and then press ENTERE.
User Guide
Page 38
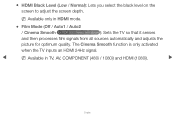
NN Available in HDMI mode. ●● Film Mode (Off / Auto1 / Auto2 / Cinema Smooth for PDP 550 Series and above ): Sets the TV so that it senses and then processes film signals from all sources automatically and adjusts the picture for optimum quality. NN Available only in TV, AV, COMPONENT (480i / 1080i) and HDMI (1080i). ▶ ▶ English The Cinema Smooth function is only activated when the TV inputs an HDMI 24Hz signal. ●● HDMI Black Level (Low / Normal): Lets you select the black level on the screen to adjust the screen depth.
NN Available in HDMI mode. ●● Film Mode (Off / Auto1 / Auto2 / Cinema Smooth for PDP 550 Series and above ): Sets the TV so that it senses and then processes film signals from all sources automatically and adjusts the picture for optimum quality. NN Available only in TV, AV, COMPONENT (480i / 1080i) and HDMI (1080i). ▶ ▶ English The Cinema Smooth function is only activated when the TV inputs an HDMI 24Hz signal. ●● HDMI Black Level (Low / Normal): Lets you select the black level on the screen to adjust the screen depth.
User Guide
Page 40
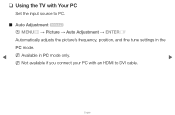
NN Available in PC mode only. ▶ NN Not available if you connect your PC with Your PC Set the input source to DVI cable. ▶ English ❑❑ Using the TV with an HDMI to PC. ■■ Auto Adjustment t OO MENUm → Picture → Auto Adjustment → ENTERE Automatically adjusts the picture's frequency, position, and fine tune settings in the PC mode.
NN Available in PC mode only. ▶ NN Not available if you connect your PC with Your PC Set the input source to DVI cable. ▶ English ❑❑ Using the TV with an HDMI to PC. ■■ Auto Adjustment t OO MENUm → Picture → Auto Adjustment → ENTERE Automatically adjusts the picture's frequency, position, and fine tune settings in the PC mode.

User Guide
Page 41
Press the u or d button to the default settings. Press the l or r button to adjust the horizontal position. ●● Image Reset: Resets the image to adjust the vertical position. English If the noise ...
Press the u or d button to the default settings. Press the l or r button to adjust the horizontal position. ●● Image Reset: Resets the image to adjust the vertical position. English If the noise ...
User Guide
Page 42
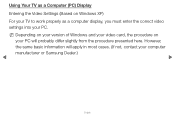
NN Depending on your version of Windows and your video card, the procedure on Windows XP) For your TV to work properly as a Computer (PC) Display Entering the Video Settings (Based on your PC will apply in most cases. (If not, contact your PC. ▶ Using Your TV as a computer display, you must enter the correct video settings into your computer manufacturer or Samsung Dealer.) ▶ English However, the same basic information will probably differ slightly from the procedure presented here.
NN Depending on your version of Windows and your video card, the procedure on Windows XP) For your TV to work properly as a Computer (PC) Display Entering the Video Settings (Based on your PC will apply in most cases. (If not, contact your PC. ▶ Using Your TV as a computer display, you must enter the correct video settings into your computer manufacturer or Samsung Dealer.) ▶ English However, the same basic information will probably differ slightly from the procedure presented here.

User Guide
Page 43
1. On your display settings dialog box, select "60" or "60 Hz". Click the "Settings" tab on the display dialog-box. ●● On the Settings tab, set the correct resolution. ●● If a vertical-frequency option exists on your PC, click "Control Panel" on the Windows start menu. 2. Click "Appearance and Themes" in the "Control Panel" window, A display dialogbox appears. 3. Otherwise, just click "OK" and exit the dialog box. ▶ ▶ English Click "Display". Another display dialog box appears. 4.
1. On your display settings dialog box, select "60" or "60 Hz". Click the "Settings" tab on the display dialog-box. ●● On the Settings tab, set the correct resolution. ●● If a vertical-frequency option exists on your PC, click "Control Panel" on the Windows start menu. 2. Click "Appearance and Themes" in the "Control Panel" window, A display dialogbox appears. 3. Otherwise, just click "OK" and exit the dialog box. ▶ ▶ English Click "Display". Another display dialog box appears. 4.

User Guide
Page 44
...; ●● Clear Voice: Emphasizes voices over other sounds. ●● Amplify: Increase the intensity of high-frequency sound to External Speaker, Sound Mode is set to allow a better listening experience for the hearing impaired. NN If Speaker Select is disabled. ▶ Sound Menu English
...; ●● Clear Voice: Emphasizes voices over other sounds. ●● Amplify: Increase the intensity of high-frequency sound to External Speaker, Sound Mode is set to allow a better listening experience for the hearing impaired. NN If Speaker Select is disabled. ▶ Sound Menu English


