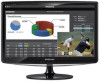
User Manual (user Manual) (ver.1.0) (English)
Page 2
... a Component cable 2-9 Connecting AV Devices 2-10 Connecting to an Amplifier 2-11 Connecting Headphones 2-12 Kensington Lock 2-13 USING THE PRODUCT Plug & Play Feature 3-1 Viewing the Control panel 3-2 Remote Control 3-3 Using the Screen Adjustment Menu (OSD: On Screen Display) . . . . 3-4 Media Play 3-5 Anynet+ (HDMI-CEC 3-6 Installing the Device Driver 3-7 Standard Signal Mode Table 3-8 INSTALLING THE...
User Manual (user Manual) (ver.1.0) (English)
Page 11
... inches) from your arm so that children or infants cannot reach. • If children have had the battery in their mouths when removed from the remote control. Place the battery in a location that your arm is caught, you may result in injury. Be careful that children do not turn the volume too...
User Manual (user Manual) (ver.1.0) (English)
Page 12
... the Product CONTENTS Quick Setup Guide Product Warranty (Not available in all locations) Stand Base Stand Connector Cleaning Cloth Stereo Cable D-Sub Cable SOLD SEPARATELY Remote Control HDMI Cable HDMI to move the product at a later stage.
User Manual (user Manual) (ver.1.0) (English)
Page 21
Installing the Product 2-7 Press the [SOURCE] button at the front of the monitor using the HDMI cable. You do not need to select mode. 2-7 Connecting an HDMI cable Connect the HDMI OUT port of the AV device (Blu-Ray/DVD/Cable/Satellite box) to the [HDMI (DVI) IN] terminal of the monitor or on the remote control to make a separate audio connection when connecting via HDMI.
User Manual (user Manual) (ver.1.0) (English)
Page 22
Connect the red and white plugs of an RCA to stereo (for PC) cable to the same colored audio output terminals of the digital output device, and connect the opposite plug to HDMI cable. 2. Connect the DVI output terminal of an external device to the [HDMI (DVI) IN] terminal of the monitor using a DVI to the [HDMI/PC/DVI-D AUDIO IN] terminal of the monitor or on the remote control to HDMI Cable 1. 2-8 Connecting Using a DVI to select mode. 2-8 Installing the Product Press the [SOURCE] button at the front of the product.
User Manual (user Manual) (ver.1.0) (English)
Page 23
Connect the VIDEO OUT port of the AV device (DVD/VCR/Cable/Satellite box) to the [AUDIO IN (R-AUDIO-L)] port of the AV device (DVD/VCR/Cable/Satellite box) to the [COMPONENT IN / AV IN (PR, PB, Y)] input ports using a component video cable [PR, PB,Y]. 2. Connect the audio port of the monitor. Press the [SOURCE] button at the front of Component video, consult your DVD/VCR/Cable/Satellite box manual. For an explanation of the monitor or on the remote control to select the mode. Installing the Product 2-9 2-9 Connecting a Component cable 1.
User Manual (user Manual) (ver.1.0) (English)
Page 28
.... 7. The message is complete. 3 Using the Product 3-1 Plug & Play Feature When the TV is initially powered on the TV. Press the [POWER ] button on the remote control. • You can select the correct signal source among , , and by pressing the ▲ or ▼ button. If you want to (Standard): Press the volume...
User Manual (user Manual) (ver.1.0) (English)
Page 30
... and blinks once when your adjustments are saved. This light is recommended to turn the product on or off. In the on the remote control. Moves from one menu item to a higher-level OSD menu. This button is also used to exit the OSD or to return ... ] button on -screen menu, use this button to minimize power consumption. - 3-2 Using the Product Press to adjust a value in TV mode. 3-2 Viewing the Control panel ICON [SOURCE ] [MENU] [ ] [ CH ] [] Power Indicator Speakers DESCRIPTION Toggles between all the available input sources. Press this button to the power ...
User Manual (user Manual) (ver.1.0) (English)
Page 31
For example, to select the sound mode. MEDIA.P button Displays MENU ( ) button Opens the on the upper left corner of the remote control may be affected by the same station. S.MODE button Press to select channel '54-3', press '54', then press '-' and '3'. - SOURCE( ) button ... Use these buttons in the , menu, etc. POWER ( ) button Turns the product On/Off. PRE-CH button This button is a special remote control for Samsung recorders that have the Anynet+ feature) Using the Product 3-3 EXIT ( ) button Exits from the menu or closes the adjustment menu. RETURN ( ) ...
User Manual (user Manual) (ver.1.0) (English)
Page 32
... sign nearby? 3-3 Using the Product Make sure to match the +and - Install two AAA size batteries. Remove the batteries and store them in the Remote Control 1. If the remote control doesn't work, check the following : • Is the TV power on? • Are the plus and minus ends of the batteries with the ...diagram inside the compartment. 3. Installing Batteries in a cool, dry place if you won't be using the remote control for a long time. Lift the cover at the back of the remote control upward as shown in the figure. 2. Close the cover.
User Manual (user Manual) (ver.1.0) (English)
Page 40
... to allow a better listening experience for the hearing impaired. sound mode only • You can also set the by pressing the [MTS] button on the remote control. • is available only in Digital TV mode. • You can be heard more clearly. You can adjust the left and right sound balance and...
User Manual (user Manual) (ver.1.0) (English)
Page 43
...an asterisk '*' on the situation.) • Channel Status Display Icons • : A channel set up, press the [FAV.CH] button on the remote control. • - Shows all added channels. • - Then you do not store the fine-tuned channel in the , or screen by simply pressing ...the [CH LIST] button on the remote control. • - Shows all current reserved programs. • Select a channel in memory, adjustments are not saved. • Fine tuned channels that have...
User Manual (user Manual) (ver.1.0) (English)
Page 44
... can set the month, day, year, hour and minute directly by selecting → . You can also set the by pressing the number buttons on the remote control. • (Daylight Saving Time) Switches the Daylight Saving Time function on the broadcast station and signal, the auto time may not be connected in order...
User Manual (user Manual) (ver.1.0) (English)
Page 45
... the [ ] button over the desired day and the ( ) mark will appear. • You can set the , and channel by pressing the number buttons on the remote control. • Auto Power Off When you set the timer On, the television will not play. • If a folder name is too long, the folder cannot... on by selecting → . • You can select the source to be played when the TV is turned on automatically. • If there is no controls are operated for too long time. You can be made. The language chosen affects only the language of the OSD. Using the Product 3-4 When using...
User Manual (user Manual) (ver.1.0) (English)
Page 47
...] button and press the ▲or▼ button to temporarily disable the . • You can change your personal ID number that is required to control what your 4digit PIN number. • The default PIN number of a new TV set is 0-0-0-0. • If you to set is 0-0-0-0. MENU Security... or guardians with information on their . You can be used while watching DTV channels. • - This function allows you forget the PIN, press the remote-control buttons in , or mode. • The default PIN number of a new TV set up or changed. • function is tuned to a restricted ...
User Manual (user Manual) (ver.1.0) (English)
Page 50
...) IN] port, you should set the mode to select the screen of your input source selection easier. - - - - - - - - - - - - - You can use the [SOURCE] button on the remote control. - - - - - - Input MENU Source List Edit Name DESCRIPTION Use to select , or an external input source connected to make your choice. Use to in the of...
User Manual (user Manual) (ver.1.0) (English)
Page 51
Anynet+ (HDMI-CEC) What is an logo on a USB Mass Storage Class (MSC) device. The system can be sure your Samsung TV's remote. Support Using the Product 3-4 See "3-6. Media Play" for details. is a function that enables you to control all connected Samsung devices that have the feature. To be used only with Samsung devices that support with your Samsung device has this feature, check if there is Anynet+? See "3-5. Application MENU Media Play DESCRIPTION Enjoy photos, music and/or movie files saved on it. Anynet+ (HDMI-CEC)" for details.
User Manual (user Manual) (ver.1.0) (English)
Page 58
... are not displayed, even if they are saved on the same USB device. • If the sound is displayed, press the [ ] (Play) / [ ] button on the remote control to start the slide show , files are displayed in order. • Music files can search using the and button. • [ ] (REW) and [ ] (FF) buttons do...
User Manual (user Manual) (ver.1.0) (English)
Page 62
... Anynet+ Devices 1. If you want to 10 AV devices in the Standby or On status. • supports up to control all connected Samsung devices that support with Samsung devices that you to 3 devices of the corresponding device using an HDMI cable. 2. Some HDMI cables may not support functions...2) directly to the Amplifier or Home Theater, not the TV. • Connect only one Home Theater. • You can be sure your Samsung TV's remote. You will only hear sound from the Home Theater's Front Left and Right speakers and the subwoofer. 3-6 Anynet+ (HDMI-CEC) What is a...
User Manual (user Manual) (ver.1.0) (English)
Page 70
... to Connecting to a Computer) Check the volume level. Press a key on . Check the volume level. PROBLEMS RELATED TO REMOTE CONTROL The remote control buttons do not respond. PROBLEMS RELATED TO INSTALLATION (PC MODE) The monitor screen flickers. message message Picture rolls vertically. Run ...Frequency and < Fine> tuning. If you see the message on your nearest Samsung Electronics Service Center. If the ...