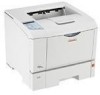
Operating Instructions
Page 3
...-installing the controller board 20 Attaching Paper Feed Unit TK1030...22 Attaching Envelope Feeder Type 400...25 Attaching Hard Disk Drive Type 2650...27 Attaching Memory Unit Type C 128MB/256MB (SDRAM Module 29 Attaching IEEE 802.11b Interface Unit...33 Attaching Gigabit Ethernet Board Type A...37 Attaching Optional Cards...40 Attaching AD1000 (Duplex Unit)...42 3. Connecting the Printer Network Connection...47 Reading the LED Lamps...49 USB Connection...50 Parallel Connection...52 4. TABLE OF CONTENTS Positions of WARNING and CAUTION labels 5 Manuals...
...-installing the controller board 20 Attaching Paper Feed Unit TK1030...22 Attaching Envelope Feeder Type 400...25 Attaching Hard Disk Drive Type 2650...27 Attaching Memory Unit Type C 128MB/256MB (SDRAM Module 29 Attaching IEEE 802.11b Interface Unit...33 Attaching Gigabit Ethernet Board Type A...37 Attaching Optional Cards...40 Attaching AD1000 (Duplex Unit)...42 3. Connecting the Printer Network Connection...47 Reading the LED Lamps...49 USB Connection...50 Parallel Connection...52 4. TABLE OF CONTENTS Positions of WARNING and CAUTION labels 5 Manuals...

Operating Instructions
Page 4
... Configuring WPA (802.1X)...70 Installing a Site Certificate...70 Installing Device Certificate...71 Setting Items of Paper and Other Media...78 Paper Not Supported by this Printer...82 Print Area...83 Loading Paper...85 Loading Paper in Tray 1 and the Optional Paper Feed Unit 85 Loading Paper in the Bypass Tray...94 Loading Envelopes...100 Switching Between Paper Trays...105 6. Replacing Consumables and Maintenance Kit Replacing the Toner Cartridge (Print Cartridge 107 Replacing the Maintenance Kit...112 Before Replacing...112 Replacing the Friction Pad...113 Replacing the Transfer Roller...
... Configuring WPA (802.1X)...70 Installing a Site Certificate...70 Installing Device Certificate...71 Setting Items of Paper and Other Media...78 Paper Not Supported by this Printer...82 Print Area...83 Loading Paper...85 Loading Paper in Tray 1 and the Optional Paper Feed Unit 85 Loading Paper in the Bypass Tray...94 Loading Envelopes...100 Switching Between Paper Trays...105 6. Replacing Consumables and Maintenance Kit Replacing the Toner Cartridge (Print Cartridge 107 Replacing the Maintenance Kit...112 Before Replacing...112 Replacing the Friction Pad...113 Replacing the Transfer Roller...
Operating Instructions
Page 12
... PDF Manuals]. 5. Select an interface language and the model type you are provided on the CD-ROM root directory to your hard disk drive, and then launch "Setup.exe" to start the installation. • To uninstall the Operating Instructions Manual, select [Programs] in the [Start] menu, select your printer driver, and then click [uninstall]. Click [Exit]. • Auto Run may not work under certain operating system setting. Follow the instructions...
... PDF Manuals]. 5. Select an interface language and the model type you are provided on the CD-ROM root directory to your hard disk drive, and then launch "Setup.exe" to start the installation. • To uninstall the Operating Instructions Manual, select [Programs] in the [Start] menu, select your printer driver, and then click [uninstall]. Click [Exit]. • Auto Run may not work under certain operating system setting. Follow the instructions...

Operating Instructions
Page 81
... the paper guides inside the tray. Enabled paper feeding tray Any input tray can be used . • Make sure paper is not stacked higher than the upper limit mark ( ) inside the bypass tray. 79 Number of 60 - 91 g/m2. 5 Letterhead Printer setup Printer driver setup Both-sided printing Make the following settings using the control panel: • Press the [Menu] key, select [Paper Input], and then select [Letterhead] for the selected tray's paper type. Click [Letterhead] in the "Paper type:" list. Paper Recommendations Printer driver setup Click...
... the paper guides inside the tray. Enabled paper feeding tray Any input tray can be used . • Make sure paper is not stacked higher than the upper limit mark ( ) inside the bypass tray. 79 Number of 60 - 91 g/m2. 5 Letterhead Printer setup Printer driver setup Both-sided printing Make the following settings using the control panel: • Press the [Menu] key, select [Paper Input], and then select [Letterhead] for the selected tray's paper type. Click [Letterhead] in the "Paper type:" list. Paper Recommendations Printer driver setup Click...

Operating Instructions
Page 94
...to display the target paper tray, and then press the [ Enter] key. 5. Paper and Other Media Specifying custom size paper for Tray 1 and the optional paper feed unit • When printing on custom size paper, specify the paper size using the control panel or printer driver. • The custom size paper selected using the printer driver overrides that do not support custom size paper. 5 1. However, when printing with a printer driver other than the RPCS printer driver, you have already made settings using the control panel. Press the [ ] or [ ] key to display [Paper Input...
...to display the target paper tray, and then press the [ Enter] key. 5. Paper and Other Media Specifying custom size paper for Tray 1 and the optional paper feed unit • When printing on custom size paper, specify the paper size using the control panel or printer driver. • The custom size paper selected using the printer driver overrides that do not support custom size paper. 5 1. However, when printing with a printer driver other than the RPCS printer driver, you have already made settings using the control panel. Press the [ ] or [ ] key to display [Paper Input...

Operating Instructions
Page 99
... using both the control panel and printer driver. • Paper sizes between 139.7 - 432 mm (5.50 - 17.00 in.) in length and 64 - 216 mm (2.52 - 8.50 in.) in width can be loaded in the bypass tray differs depending on a type of pages that does not support the custom size setting. 97 Press the [ ] or [ ] key to display [Paper Input], and then press the [ Enter] key. 3. Loading Paper The [Menu...
... using both the control panel and printer driver. • Paper sizes between 139.7 - 432 mm (5.50 - 17.00 in.) in length and 64 - 216 mm (2.52 - 8.50 in.) in width can be loaded in the bypass tray differs depending on a type of pages that does not support the custom size setting. 97 Press the [ ] or [ ] key to display [Paper Input], and then press the [ Enter] key. 3. Loading Paper The [Menu...
Operating Instructions
Page 110
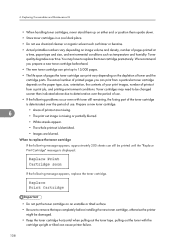
... message appears, approximately 200 sheets can print from a print job, and printing environment conditions. When to remove the tape completely before installing the new toner cartridge, otherwise the printer might be damaged. • Keep the toner cartridge horizontal when pulling out the toner tape. We recommend you can still be changed sooner than indicated above due to 15,000 pages. • The life span of the toner cartridge is deteriorated over time...
... message appears, approximately 200 sheets can print from a print job, and printing environment conditions. When to remove the tape completely before installing the new toner cartridge, otherwise the printer might be damaged. • Keep the toner cartridge horizontal when pulling out the toner tape. We recommend you can still be changed sooner than indicated above due to 15,000 pages. • The life span of the toner cartridge is deteriorated over time...

Operating Instructions
Page 148
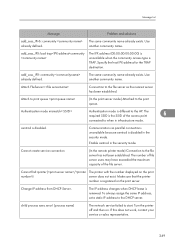
... to check the radio signal was made while [DHCP] was set to [On]. • Make the change the paper type/size using the dial or using the [Paper Input] menu on the control panel. Change Setting Tray #/Paper Size: Paper Type The printer detected that the actual paper type was not the same as the paper tray size and paper type setting. • Change the paper type via the paper type setting menu on the control panel or execute Form Feed by pressing the [Form Feed] key, or cancel the job. 9 DHCP assigned Cannot change...
... to check the radio signal was made while [DHCP] was set to [On]. • Make the change the paper type/size using the dial or using the [Paper Input] menu on the control panel. Change Setting Tray #/Paper Size: Paper Type The printer detected that the actual paper type was not the same as the paper tray size and paper type setting. • Change the paper type via the paper type setting menu on the control panel or execute Form Feed by pressing the [Form Feed] key, or cancel the job. 9 DHCP assigned Cannot change...
Operating Instructions
Page 161
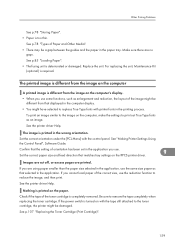
... the toner cartridge is different from that the setting of the correct size, use . Be sure to replace True Type fonts with printer fonts in the paper tray. Other Printing Problems See p.78 "Storing Paper". • Paper is deteriorated or damaged. Make sure there are no gaps. To print an image similar to the image on the computer's display. • When you are printed. For replacing the unit, Maintenance Kit (optional) is printed in the application you cannot load paper...
... the toner cartridge is different from that the setting of the correct size, use . Be sure to replace True Type fonts with printer fonts in the paper tray. Other Printing Problems See p.78 "Storing Paper". • Paper is deteriorated or damaged. Make sure there are no gaps. To print an image similar to the image on the computer's display. • When you are printed. For replacing the unit, Maintenance Kit (optional) is printed in the application you cannot load paper...

Operating Instructions
Page 162
... print using the [PDF: Change PW] menu in the paper tray, the file will print out. Also, if [Sub Paper Size] in the [System] menu is set the password of the image is not printed out properly even after you have finished printing. Troubleshooting PDF Direct Print is not executed (PDF file is performed assuming letter size and A4 size to [Font Priority] after changing the above setting, add an additional memory unit. 9. For [RAM Disk], see the "PDF Menu", Software Guide. The paper size appears on the control panel...
... print using the [PDF: Change PW] menu in the paper tray, the file will print out. Also, if [Sub Paper Size] in the [System] menu is set the password of the image is not printed out properly even after you have finished printing. Troubleshooting PDF Direct Print is not executed (PDF file is performed assuming letter size and A4 size to [Font Priority] after changing the above setting, add an additional memory unit. 9. For [RAM Disk], see the "PDF Menu", Software Guide. The paper size appears on the control panel...
Operating Instructions
Page 169
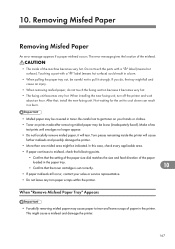
... parts with a " " label (means hot surface) could result in toner. Torn pieces remaining inside of the paper loaded in the printer. After that the setting of the paper size dial matches the size and feed direction of the machine becomes very hot. When "Remove Misfeed Paper Tray" Appears • Forcefully removing misfed paper may be careful not to misfeed, check the following points. • Confirm that , install the new...
... parts with a " " label (means hot surface) could result in toner. Torn pieces remaining inside of the paper loaded in the printer. After that the setting of the paper size dial matches the size and feed direction of the machine becomes very hot. When "Remove Misfeed Paper Tray" Appears • Forcefully removing misfed paper may be careful not to misfeed, check the following points. • Confirm that , install the new...

Software User Guide
Page 27
... box for Admin Help. • To stop installation of the selected software, click [Cancel] before installation is complete. • A message appears if there is a newer version of the printer driver already installed. Select the name of sheets each user prints. The [Printers] window appears. 12. The default interface language is , you want to install the printer driver, use . Specify whether or not to configure the printer as default. 10. On the [Details] tab, click [Add Port...]. 14...
... box for Admin Help. • To stop installation of the selected software, click [Cancel] before installation is complete. • A message appears if there is a newer version of the printer driver already installed. Select the name of sheets each user prints. The [Printers] window appears. 12. The default interface language is , you want to install the printer driver, use . Specify whether or not to configure the printer as default. 10. On the [Details] tab, click [Add Port...]. 14...
Software User Guide
Page 38
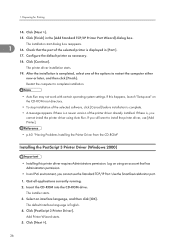
... environment, you cannot install the printer driver using an account that the port of the options to complete installation. • Auto Run may not work with certain operating system settings. The printer driver installation starts. 19. If there is English. 4. The default interface language is , you cannot use [Add Printer]. • p.60 "Having Problems Installing the Printer Driver from the CD-ROM" Installing the PostScript 3 Printer Driver (Windows 2000) • Installing this happens, launch "Setup.exe" on using Auto Run. Insert...
... environment, you cannot install the printer driver using an account that the port of the options to complete installation. • Auto Run may not work with certain operating system settings. The printer driver installation starts. 19. If there is English. 4. The default interface language is , you cannot use [Add Printer]. • p.60 "Having Problems Installing the Printer Driver from the CD-ROM" Installing the PostScript 3 Printer Driver (Windows 2000) • Installing this happens, launch "Setup.exe" on using Auto Run. Insert...
Software User Guide
Page 57
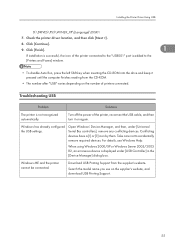
Troubleshooting USB Problem Solutions The printer is displayed under [Universal Serial Bus controllers], remove any conflicting devices. Conflicting devices have a [!] or [?] icon by them. For details, see Windows Help. Take care not to the [Printers and Faxes] window. • To disable Auto Run, press the left Shift key when inserting the CD-ROM into the drive and keep it on again. Windows ME and the printer cannot be connected. Download USB Printing Support from the CD...
Troubleshooting USB Problem Solutions The printer is displayed under [Universal Serial Bus controllers], remove any conflicting devices. Conflicting devices have a [!] or [?] icon by them. For details, see Windows Help. Take care not to the [Printers and Faxes] window. • To disable Auto Run, press the left Shift key when inserting the CD-ROM into the drive and keep it on again. Windows ME and the printer cannot be connected. Download USB Printing Support from the CD...

Software User Guide
Page 79
... installing the RPCS printer driver, a confirmation message appears. Accessing the Printer Properties • The procedure to Tray Assignment]. • For details about settings, see the printer driver Help. 77 RPCS - On the [File] menu, click [Properties]. After clicking [OK], the [Printer Properties] dialog box appears. 4. Settings made in the following procedure are used as the default settings for all users. 1. Windows XP, Windows Server 2003/2003 R2 - Making Printer Default Settings - On the [Start] menu, click [Printers...
... installing the RPCS printer driver, a confirmation message appears. Accessing the Printer Properties • The procedure to Tray Assignment]. • For details about settings, see the printer driver Help. 77 RPCS - On the [File] menu, click [Properties]. After clicking [OK], the [Printer Properties] dialog box appears. 4. Settings made in the following procedure are used as the default settings for all users. 1. Windows XP, Windows Server 2003/2003 R2 - Making Printer Default Settings - On the [Start] menu, click [Printers...

Software User Guide
Page 170
... set a group password specified using PDF printing. For increased security, use a group password, the optional data protection unit must be installed. • The password can be set using Web Image Monitor, but must be set on the PDF menu. PDF: Change PW You can specify the password for the PDF file executing PDF Direct Print. • If you do not set a PDF password, this menu on the control panel to set the password directly. 168 Wait two seconds. 5. Changing the PDF Menu Follow the procedure below to display...
... set a group password specified using PDF printing. For increased security, use a group password, the optional data protection unit must be installed. • The password can be set using Web Image Monitor, but must be set on the PDF menu. PDF: Change PW You can specify the password for the PDF file executing PDF Direct Print. • If you do not set a PDF password, this menu on the control panel to set the password directly. 168 Wait two seconds. 5. Changing the PDF Menu Follow the procedure below to display...
Software User Guide
Page 251
... same IP address, set a static IP address to the print queue. Turn the printer off and then on the print server. add_sess_IPX: bad trapcommunity The IPX address (00:00:00:00:00:00) is unavailable when the community access type is registered on . Attach to print queue (In the print server mode) Attached to the DHCP server. Cannot create service connection (In the remote printer mode) Connection to start. The number of file server users may have...
... same IP address, set a static IP address to the print queue. Turn the printer off and then on the print server. add_sess_IPX: bad trapcommunity The IPX address (00:00:00:00:00:00) is unavailable when the community access type is registered on . Attach to print queue (In the print server mode) Attached to the DHCP server. Cannot create service connection (In the remote printer mode) Connection to start. The number of file server users may have...

Software User Guide
Page 271
... print files directly using DHCP, see "Cautions to set up the printer's network environment about setting the IPv4 address of an IPv4 Address" and continue the setup. • p.321 "Cautions to make network environment settings. 1. When using a host name to specify a printer, proceed to "Using a Host Name Instead of the printer using "ftp" command. Windows 95/98/Me You can print PostScript files for the local setting information. 3. Enable TCP/IP with ssh v2. Install...
... print files directly using DHCP, see "Cautions to set up the printer's network environment about setting the IPv4 address of an IPv4 Address" and continue the setup. • p.321 "Cautions to make network environment settings. 1. When using a host name to specify a printer, proceed to "Using a Host Name Instead of the printer using "ftp" command. Windows 95/98/Me You can print PostScript files for the local setting information. 3. Enable TCP/IP with ssh v2. Install...

Software User Guide
Page 311
... drive. Printer Drivers for Client Help Viewing the contents of the CD-ROM. Font Manager 2000 For installing new screen fonts, or organizing and managing fonts already in the CD-ROMs that come with the printer. SmartDeviceMonitor for This Printer 10 Printing requires installing a printer driver appropriate to manage their network print status. • DeskTopBinder - The installer starts. 2. PCL 5e/6 printer driver This printer driver allows the computer to manage network printers. • SmartDeviceMonitor for Admin...
... drive. Printer Drivers for Client Help Viewing the contents of the CD-ROM. Font Manager 2000 For installing new screen fonts, or organizing and managing fonts already in the CD-ROMs that come with the printer. SmartDeviceMonitor for This Printer 10 Printing requires installing a printer driver appropriate to manage their network print status. • DeskTopBinder - The installer starts. 2. PCL 5e/6 printer driver This printer driver allows the computer to manage network printers. • SmartDeviceMonitor for Admin...

Software User Guide
Page 341
... 223 System Log 223, 248 System Menu 149 T TCP/IP 22, 25, 28, 30 TCP/IP address 206 telnet 197 Terminal Service 329 Toner Saving 298 Top Page 172 Tray Priority 139 Troubleshooting USB 55 U Unauthorized Copy Control 94, 95 Understanding the Displayed Information........237 UNIX 92 upnp 223 USB Connection 19, 51, 53, 54 User Code 296 User Information 181 User Paper Type 127, 129, 130, 131 339
... 223 System Log 223, 248 System Menu 149 T TCP/IP 22, 25, 28, 30 TCP/IP address 206 telnet 197 Terminal Service 329 Toner Saving 298 Top Page 172 Tray Priority 139 Troubleshooting USB 55 U Unauthorized Copy Control 94, 95 Understanding the Displayed Information........237 UNIX 92 upnp 223 USB Connection 19, 51, 53, 54 User Code 296 User Information 181 User Paper Type 127, 129, 130, 131 339


