User Guide
Page 11
...read this machine. z The product name of Windows® Me is a registered trademark of this manual carefully and follow the instructions. Read This First About This Product This section tells you about the use , please be trademarks of Netscape Communication Corporation in the... Please keep this machine before using the machine. Netscape is Microsoft® Windows® 98. Introduction This manual describes detailed instructions on the operation and notes about the product. Trademarks Adobe and Acrobat are either registered trademarks or trademarks of Hewlett-Packard Company....
...read this machine. z The product name of Windows® Me is a registered trademark of this manual carefully and follow the instructions. Read This First About This Product This section tells you about the use , please be trademarks of Netscape Communication Corporation in the... Please keep this machine before using the machine. Netscape is Microsoft® Windows® 98. Introduction This manual describes detailed instructions on the operation and notes about the product. Trademarks Adobe and Acrobat are either registered trademarks or trademarks of Hewlett-Packard Company....
User Guide
Page 15
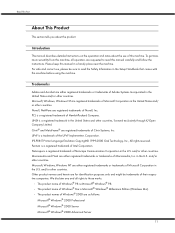
... these notes. This symbol is used in serious injury or death. Read This First Click [OK]to originals, or loss of the machine's functions, and instructions on resolving user errors. Indicates important safety notes. Be sure to read these explanations. Indicates important safety notes. They can find further relevant information. It...
... these notes. This symbol is used in serious injury or death. Read This First Click [OK]to originals, or loss of the machine's functions, and instructions on resolving user errors. Indicates important safety notes. Be sure to read these explanations. Indicates important safety notes. They can find further relevant information. It...
User Guide
Page 16
... appear to remove the User Guide. Select the installed [Product name User Guide], and then click [Change/Remove]. 4. Follow the instructions that appear to remove the User Guide. 16 Click [Start], and then point to the installed [Product name], and then click [Uninstall User Guide]. 3. Point ...
... appear to remove the User Guide. Select the installed [Product name User Guide], and then click [Change/Remove]. 4. Follow the instructions that appear to remove the User Guide. 16 Click [Start], and then point to the installed [Product name], and then click [Uninstall User Guide]. 3. Point ...
User Guide
Page 20
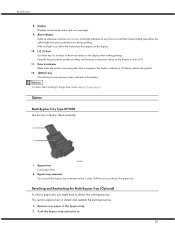
Display Displays current printer status and error messages. 9. If the red light is on, follow the instructions that makes printing impossible; Remove any paper in sheets manually. 1. Pull this bypass tray extension out by 2 clicks. the yellow light indicates a potential error during ...
Display Displays current printer status and error messages. 9. If the red light is on, follow the instructions that makes printing impossible; Remove any paper in sheets manually. 1. Pull this bypass tray extension out by 2 clicks. the yellow light indicates a potential error during ...
User Guide
Page 28
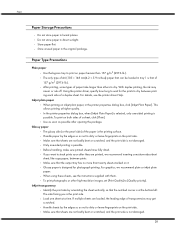
Paper Paper Storage Precautions z Do not store paper in the original package. For details, see the instructions supplied with them. This allows printing at a time. z Only one -sided printing is possible. z Glossy paper is not damaged. z Make sure that the ... dirty or leave fingerprints on both sides of transparencies may smear or rub off. z Use as soon as not to dirty or leave fingerprints on inkjet plain paper, in direct sunlight. z Handle paper by orientating the sheet vertically, so that sheets are loaded, the leading edge of a sheet, click [Plain...
Paper Paper Storage Precautions z Do not store paper in the original package. For details, see the instructions supplied with them. This allows printing at a time. z Only one -sided printing is possible. z Glossy paper is not damaged. z Make sure that the ... dirty or leave fingerprints on both sides of transparencies may smear or rub off. z Use as soon as not to dirty or leave fingerprints on inkjet plain paper, in direct sunlight. z Handle paper by orientating the sheet vertically, so that sheets are loaded, the leading edge of a sheet, click [Plain...
User Guide
Page 29
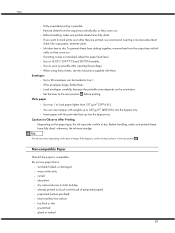
... selector to dry. z Ink takes time to the rear position . z Before handling, make sure printed sheets have fully dried. z When using these sheets, see the instructions supplied with the print side face up to load paper lighter than 157 g/m2 (297.6 lb.). To prevent sheets from sticking together, remove them from...
... selector to dry. z Ink takes time to the rear position . z Before handling, make sure printed sheets have fully dried. z When using these sheets, see the instructions supplied with the print side face up to load paper lighter than 157 g/m2 (297.6 lb.). To prevent sheets from sticking together, remove them from...
User Guide
Page 84
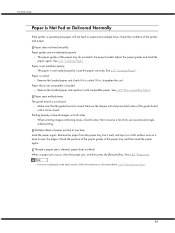
... sides of the printer and paper. Remove the paper from the paper tray, fan it well, and tap it on the Status monitor, follow the instructions to even the edges. Adjust the paper guides and load the paper again. Load the paper correctly. The guide board is cleared, paper does not...
... sides of the printer and paper. Remove the paper from the paper tray, fan it well, and tap it on the Status monitor, follow the instructions to even the edges. Adjust the paper guides and load the paper again. Load the paper correctly. The guide board is cleared, paper does not...

User Guide
Page 134
The following the instructions that the power is off , and then click [Next >]. Check again that appear on the screen. 2. Click [Next >]. 5. z To install the printer driver under Windows ...
The following the instructions that the power is off , and then click [Next >]. Check again that appear on the screen. 2. Click [Next >]. 5. z To install the printer driver under Windows ...
User Guide
Page 138
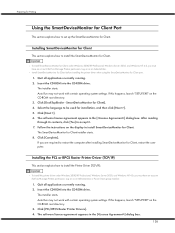
... Printers permission. If this happens, launch "SETUP.EXE" on the CD-ROM root directory. 3. SmartDeviceMonitor for Client. Click [PCL/RPCS Raster Printer Drivers]. 4. Follow the instructions on as an Administrator. Preparing for Printing Using the SmartDeviceMonitor for Client Port This section explains how to set up the SmartDeviceMonitor for Client]. 4. The...
... Printers permission. If this happens, launch "SETUP.EXE" on the CD-ROM root directory. 3. SmartDeviceMonitor for Client. Click [PCL/RPCS Raster Printer Drivers]. 4. Follow the instructions on as an Administrator. Preparing for Printing Using the SmartDeviceMonitor for Client Port This section explains how to set up the SmartDeviceMonitor for Client]. 4. The...
User Guide
Page 242
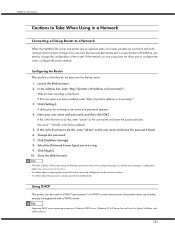
... Service Pack 4 or higher, NetWare, and UNIX standard. 242 Web browser top page is the factory default. 5. z For details about printing a configuration page, see the instructions below. Launch the Web browser. 2. Close the Web browser. For details about the password, consult your user name and password, and then click [OK]. z For...
... Service Pack 4 or higher, NetWare, and UNIX standard. 242 Web browser top page is the factory default. 5. z For details about printing a configuration page, see the instructions below. Launch the Web browser. 2. Close the Web browser. For details about the password, consult your user name and password, and then click [OK]. z For...
User Guide
Page 245
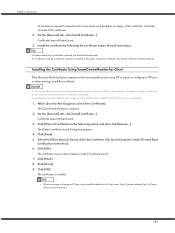
... starts. 3. The [Select certificate store] dialog box appears. 4. Click [OK]. Install the certificate by a certificate authority is installed in the following the Certificate Import Wizard instructions. Installing the Certificate Using SmartDeviceMonitor for Client, enter "http://(printer's-address)/ipp" in the following store], and then click [Browse...]. z To select the certificate store...
... starts. 3. The [Select certificate store] dialog box appears. 4. Click [OK]. Install the certificate by a certificate authority is installed in the following the Certificate Import Wizard instructions. Installing the Certificate Using SmartDeviceMonitor for Client, enter "http://(printer's-address)/ipp" in the following store], and then click [Browse...]. z To select the certificate store...

