

Operating Instructions
Page 232
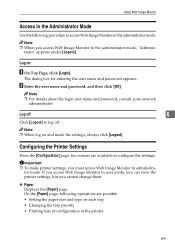
ASH104S 3. Paper Click to display the [Network] page. Network Click to display the [Paper] page. 2. Paper 2. In this mode, users can make input tray and network settings. 1. Help Source File Setting Click to display the [Network] page. Network 6 Click to display the [Paper] page. ❖ Administrator Mode Click to specify the Help source file. 68 Change Login Password Click to change them. 1 2 ASI209S 1. Monitoring and Configuring the Printer ❖ User Mode In this mode, users can view settings but cannot change the login password. 4.
ASH104S 3. Paper Click to display the [Network] page. Network Click to display the [Paper] page. 2. Paper 2. In this mode, users can make input tray and network settings. 1. Help Source File Setting Click to display the [Network] page. Network 6 Click to display the [Paper] page. ❖ Administrator Mode Click to specify the Help source file. 68 Change Login Password Click to change them. 1 2 ASI209S 1. Monitoring and Configuring the Printer ❖ User Mode In this mode, users can view settings but cannot change the login password. 4.
Operating Instructions
Page 233
The dialog box for entering the user name and password appears. Log off 6 Click [Logout] to log off. Important ❒ To make printer settings, you must access Web Image Monitor in user mode, you can view the printer settings, but you cannot change them. ❖ Paper Displays the [Paper] ...page. B Enter the user name and password, and then click [OK]. Note ❒ For details about the login user name and password, consult your network administrator. tor mode. ...
The dialog box for entering the user name and password appears. Log off 6 Click [Logout] to log off. Important ❒ To make printer settings, you must access Web Image Monitor in user mode, you can view the printer settings, but you cannot change them. ❖ Paper Displays the [Paper] ...page. B Enter the user name and password, and then click [OK]. Note ❒ For details about the login user name and password, consult your network administrator. tor mode. ...
Operating Instructions
Page 236
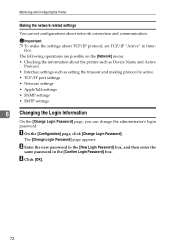
C Click [OK]. 72 B Enter the new password in the [New Login Password] box, and then enter the same password in Inter- face. A On the [Configuration] page, click [Change Login Password]. Important ❒ To make the settings about the printer such as Device Name and Active Protocol. • Interface settings such as setting the timeout and making...
C Click [OK]. 72 B Enter the new password in the [New Login Password] box, and then enter the same password in Inter- face. A On the [Configuration] page, click [Change Login Password]. Important ❒ To make the settings about the printer such as Device Name and Active Protocol. • Interface settings such as setting the timeout and making...

Operating Instructions
Page 246
... function is available only if you are using this notification, you must add the sender to notify the printer status. C Enter the user name and password, and then click [OK]. The [Network] page appears. dress bar. A Open a Web browser, and then enter ...mail application's Help. For details about the login user name and password, consult your network administrator. To prevent phishing warnings appearing after you can make the e-mail notification settings. Monitoring and Configuring the Printer Printer Status Notification by E-Mail Whenever a toner cartridge becomes empty or...
... function is available only if you are using this notification, you must add the sender to notify the printer status. C Enter the user name and password, and then click [OK]. The [Network] page appears. dress bar. A Open a Web browser, and then enter ...mail application's Help. For details about the login user name and password, consult your network administrator. To prevent phishing warnings appearing after you can make the e-mail notification settings. Monitoring and Configuring the Printer Printer Status Notification by E-Mail Whenever a toner cartridge becomes empty or...

Operating Instructions
Page 247
...authentication. • E-mail Address: Enter the e-mail address. • SMTP User Name: Enter the user name for SMTP Authentication. • SMTP Password: Enter the password set [Auto E-mail Notification:] to [On] using the SMTP AUTH protocol by E-Mail G Make the necessary settings: • Items in the ...your mailing environment, and then specify the necessary items. You can configure mail authentication to enter the user name and password. When mail is sent to specify SMTP authentication. C Make the following procedure to the SMTP server, authentication is performed using ...
...authentication. • E-mail Address: Enter the e-mail address. • SMTP User Name: Enter the user name for SMTP Authentication. • SMTP Password: Enter the password set [Auto E-mail Notification:] to [On] using the SMTP AUTH protocol by E-Mail G Make the necessary settings: • Items in the ...your mailing environment, and then specify the necessary items. You can configure mail authentication to enter the user name and password. When mail is sent to specify SMTP authentication. C Make the following procedure to the SMTP server, authentication is performed using ...

Operating Instructions
Page 258
...8 as option strings. ❒ For "mput" command, option can be used as an argument and use the "ftp" command. % ftp printer's IP address B Enter the user name and password, and then press the {OK} key. can not be printed. Special Operations under Windows A Formulate the... printer's IP address or the host name of printing a PostScript file named "file 1" in the "C:\PRINT" directory and printing file 1 and file 2. User: Password: C When printing a binary file, set the file mode to be defined. ...
...8 as option strings. ❒ For "mput" command, option can be used as an argument and use the "ftp" command. % ftp printer's IP address B Enter the user name and password, and then press the {OK} key. can not be printed. Special Operations under Windows A Formulate the... printer's IP address or the host name of printing a PostScript file named "file 1" in the "C:\PRINT" directory and printing file 1 and file 2. User: Password: C When printing a binary file, set the file mode to be defined. ...
Operating Instructions
Page 267
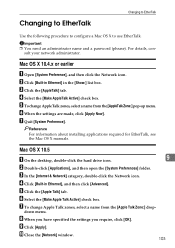
.... Changing to EtherTalk Changing to EtherTalk Use the following procedure to configure a Mac OS X to use EtherTalk. Important ❒ You need an administrator name and a password (phrase). B Click [Built-in Ethernet] in Ethernet], and then click [Advanced]. G Quit [System Preference]. G To change AppleTalk zones, select a name from the [Apple Talk Zone...
.... Changing to EtherTalk Changing to EtherTalk Use the following procedure to configure a Mac OS X to use EtherTalk. Important ❒ You need an administrator name and a password (phrase). B Click [Built-in Ethernet] in Ethernet], and then click [Advanced]. G Quit [System Preference]. G To change AppleTalk zones, select a name from the [Apple Talk Zone...

Operating Instructions
Page 285
... 112 Paper size, 36, 46, 69, 70, 79, 112 Paper type, 46, 69, 70, 79, 112 Password, 72, 78, 111 PCL 5c printer driver, 3, 8, 115 PCL 6 printer driver, 3, 8, 115 PCL Configuration/Font Page, 77, 110 PCL Menu, 61 PCL printer drivers, 3, 8, 17, 81 PictBridge, 37, 38, 40, 41 PictBridge feature, 39 PostScript...server, 7, 89 PS 3, 25 PS Configuration/Font Page, 77, 110 PS Menu, 63 R Registration, 50, 80, 114 Resolution, 36 S Service call, 82 Shared printer, 7 Smart Organizing Monitor, 74, 108 SMTP, 72, 81, 114 SMTP authentication, 83 SNMP, 72, 81, 84, 114 Software and utilities, 115 Sort, 32 Standard ...
... 112 Paper size, 36, 46, 69, 70, 79, 112 Paper type, 46, 69, 70, 79, 112 Password, 72, 78, 111 PCL 5c printer driver, 3, 8, 115 PCL 6 printer driver, 3, 8, 115 PCL Configuration/Font Page, 77, 110 PCL Menu, 61 PCL printer drivers, 3, 8, 17, 81 PictBridge, 37, 38, 40, 41 PictBridge feature, 39 PostScript...server, 7, 89 PS 3, 25 PS Configuration/Font Page, 77, 110 PS Menu, 63 R Registration, 50, 80, 114 Resolution, 36 S Service call, 82 Shared printer, 7 Smart Organizing Monitor, 74, 108 SMTP, 72, 81, 114 SMTP authentication, 83 SNMP, 72, 81, 84, 114 Software and utilities, 115 Sort, 32 Standard ...


