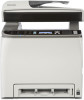
User Manual
Page 10
... on the computer, install Presto! For details, see p.9 "Configuring the IPv4 Address Settings". 3. 1. For details, see "Configuring the DNS Settings" and "Configuring the SMTP Settings", User Guide . 4. Preparation for sending scanned files via e-mail using Web Image Monitor. Specify the network settings, such as the machine's IP address. For details, see the...
... on the computer, install Presto! For details, see p.9 "Configuring the IPv4 Address Settings". 3. 1. For details, see "Configuring the DNS Settings" and "Configuring the SMTP Settings", User Guide . 4. Preparation for sending scanned files via e-mail using Web Image Monitor. Specify the network settings, such as the machine's IP address. For details, see the...
User Manual
Page 19
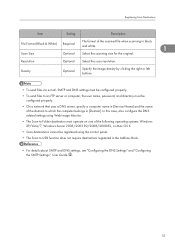
.... • To send files via e-mail, SMTP and DNS settings must be configured properly. • To send files to an FTP server or computer, the user name, password, and directory must operate on one of the following operating systems: Windows XP/Vista/7, Windows Server 2003/2003 R2/2008/2008 R2, or... require destinations registered in the Address Book. • For details about SMTP and DNS settings, see "Configuring the DNS Settings" and "Configuring the SMTP Settings", User Guide . 15 Resolution Optional Select the scan resolution.
.... • To send files via e-mail, SMTP and DNS settings must be configured properly. • To send files to an FTP server or computer, the user name, password, and directory must operate on one of the following operating systems: Windows XP/Vista/7, Windows Server 2003/2003 R2/2008/2008 R2, or... require destinations registered in the Address Book. • For details about SMTP and DNS settings, see "Configuring the DNS Settings" and "Configuring the SMTP Settings", User Guide . 15 Resolution Optional Select the scan resolution.
User Manual
Page 20
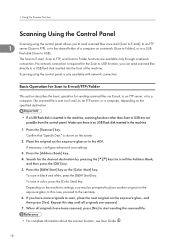
...] key. The Scan to E-mail, Scan to FTP, and Scan to start sending the scanned file. • For complete information about the scanner function, see User Guide . 16 Press the [Scanner] key. If necessary, configure advanced scan settings. 3. Press the [Address Book] key. 4. To scan in the machine. 1.
...] key. The Scan to E-mail, Scan to FTP, and Scan to start sending the scanned file. • For complete information about the scanner function, see User Guide . 16 Press the [Scanner] key. If necessary, configure advanced scan settings. 3. Press the [Address Book] key. 4. To scan in the machine. 1.
User Manual
Page 21
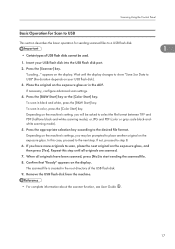
... (color or gray scale black-andwhite scanning mode). 5. Remove the USB flash disk from the machine. • For complete information about the scanner function, see User Guide . 17 "Loading..." Depending on the display. When all originals are scanned. 7. Insert your USB flash disk). 3. Scanning Using the Control Panel Basic Operation for Scan...
... (color or gray scale black-andwhite scanning mode). 5. Remove the USB flash disk from the machine. • For complete information about the scanner function, see User Guide . 17 "Loading..." Depending on the display. When all originals are scanned. 7. Insert your USB flash disk). 3. Scanning Using the Control Panel Basic Operation for Scan...

User Manual
Page 24
... an external telephone 1. Connect an external telephone to a Telephone Line". 2. Sending Faxes from a Computer (LAN-Fax) You can send a document directly from a Computer (LAN-Fax)", User Guide . 20 CES191 • For details about the LAN-Fax function, see p.29 "Receiving a Fax".
... an external telephone 1. Connect an external telephone to a Telephone Line". 2. Sending Faxes from a Computer (LAN-Fax) You can send a document directly from a Computer (LAN-Fax)", User Guide . 20 CES191 • For details about the LAN-Fax function, see p.29 "Receiving a Fax".
User Manual
Page 32
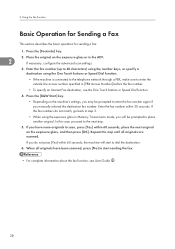
... original on the exposure glass, and then press [OK]. If you will start sending the fax. • For complete information about the fax function, see User Guide . 28 Enter the fax number within 60 seconds, place the next original on the exposure glass or in Memory Transmission mode, you have been scanned...
... original on the exposure glass, and then press [OK]. If you will start sending the fax. • For complete information about the fax function, see User Guide . 28 Enter the fax number within 60 seconds, place the next original on the exposure glass or in Memory Transmission mode, you have been scanned...


