User's Guide
Page 2
...subject to change without prior notice. i It also provides all of handling or operating the machine. The User's Guide shows you how to scan for using your machine as a result of the detailed instructions for copying. This guide also provides the basic description of their respective companies ... User's Guide This Laser MFP User's Guide provides information you need for scanning and saving documents, and printing documents stored on the USB flash drive. SmarThru also lets you access scanned images that you to scan and edit images and to use a USB flash drive with your machine for...
...subject to change without prior notice. i It also provides all of handling or operating the machine. The User's Guide shows you how to scan for using your machine as a result of the detailed instructions for copying. This guide also provides the basic description of their respective companies ... User's Guide This Laser MFP User's Guide provides information you need for scanning and saving documents, and printing documents stored on the USB flash drive. SmarThru also lets you access scanned images that you to scan and edit images and to use a USB flash drive with your machine for...
User's Guide
Page 12
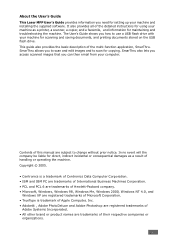
... Sounds 2.22 Speaker, Ringer, Key Sound, and Alarm Sound 2.22 Speaker Volume 2.23 Using the Save Modes 2.24 Power Save Mode 2.24 Scan Lamp Save Mode 2.24 About the Software 2.26 Printer Driver Features 2.27 Installing the Software in Windows 2.28 System Requirements 2.28 Installing Software for... the SmarThru 4 2.41 Repairing Software 2.43 Removing Software 2.44 Uninstalling the MFP Driver 2.44 Uninstalling the SmarThru 2.45 Uninstalling the Network Scan Driver 2.45 Using the Set IP 2.46 Installing Set IP 2.46 To Use Set IP 2.47 Using the Printer Settings Utility 2.48 xi
... Sounds 2.22 Speaker, Ringer, Key Sound, and Alarm Sound 2.22 Speaker Volume 2.23 Using the Save Modes 2.24 Power Save Mode 2.24 Scan Lamp Save Mode 2.24 About the Software 2.26 Printer Driver Features 2.27 Installing the Software in Windows 2.28 System Requirements 2.28 Installing Software for... the SmarThru 4 2.41 Repairing Software 2.43 Removing Software 2.44 Uninstalling the MFP Driver 2.44 Uninstalling the SmarThru 2.45 Uninstalling the Network Scan Driver 2.45 Using the Set IP 2.46 Installing Set IP 2.46 To Use Set IP 2.47 Using the Printer Settings Utility 2.48 xi

User's Guide
Page 14
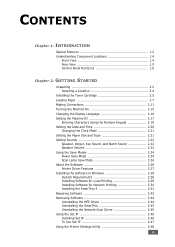
... Out Option 5.15 Chapter 6: SCANNING Scanning Basics 6.2 Scanning From the Control Panel to an Application 6.3 Scanning Using the SmarThru 6.4 Using Onscreen Help File 6.6 Scanning Using the WIA Driver 6.7 Scanning to USB Flash Drive 6.8 Scanning Using the Network Scan 6.9 About Network Scan 6.9 Setting the Network Scan Option 6.9 Scanning Using Network Scan 6.10 Setting Network Scan Timeout 6.11 Using the Network Scan Driver 6.12 Adding a Scanner...
... Out Option 5.15 Chapter 6: SCANNING Scanning Basics 6.2 Scanning From the Control Panel to an Application 6.3 Scanning Using the SmarThru 6.4 Using Onscreen Help File 6.6 Scanning Using the WIA Driver 6.7 Scanning to USB Flash Drive 6.8 Scanning Using the Network Scan 6.9 About Network Scan 6.9 Setting the Network Scan Option 6.9 Scanning Using Network Scan 6.10 Setting Network Scan Timeout 6.11 Using the Network Scan Driver 6.12 Adding a Scanner...

User's Guide
Page 15
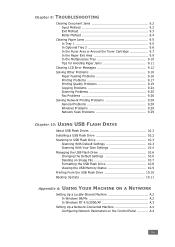
... Changing Setting Options 7.37 Advanced Fax Setting Options 7.38 Chapter 8: MAINTENANCE Clearing the Memory 8.2 Cleaning Your Machine 8.3 Cleaning the Outside 8.3 Cleaning the Inside 8.3 Cleaning the Scan Unit 8.5 Maintaining the Toner Cartridge 8.6 Redistributing Toner 8.7 Replacing the Toner Cartridge 8.8 Setting the Notify Toner Option 8.10 Cleaning the Drum 8.11 Ignoring the Toner Empty...
... Changing Setting Options 7.37 Advanced Fax Setting Options 7.38 Chapter 8: MAINTENANCE Clearing the Memory 8.2 Cleaning Your Machine 8.3 Cleaning the Outside 8.3 Cleaning the Inside 8.3 Cleaning the Scan Unit 8.5 Maintaining the Toner Cartridge 8.6 Redistributing Toner 8.7 Replacing the Toner Cartridge 8.8 Setting the Notify Toner Option 8.10 Cleaning the Drum 8.11 Ignoring the Toner Empty...
User's Guide
Page 16
... Problems 9.16 Printing Problems 9.17 Printing Quality Problems 9.19 Copying Problems 9.24 Scanning Problems 9.25 Fax Problems 9.26 Solving Network Printing Problems 9.28 General Problems 9.28 Windows Problems 9.29 Network Scan Problems 9.29 Chapter 10: USING USB FLASH DRIVE About USB Flash Drives 10.2... Installing a USB Flash Drive 10.2 Scanning to USB Flash Drive 10.3 Scanning With Default Settings 10.3 Scanning With Your Own Settings 10.4 Managing the USB Flash Drive 10.6 Changing the Default Settings 10.6 Deleting...
... Problems 9.16 Printing Problems 9.17 Printing Quality Problems 9.19 Copying Problems 9.24 Scanning Problems 9.25 Fax Problems 9.26 Solving Network Printing Problems 9.28 General Problems 9.28 Windows Problems 9.29 Network Scan Problems 9.29 Chapter 10: USING USB FLASH DRIVE About USB Flash Drives 10.2... Installing a USB Flash Drive 10.2 Scanning to USB Flash Drive 10.3 Scanning With Default Settings 10.3 Scanning With Your Own Settings 10.4 Managing the USB Flash Drive 10.6 Changing the Default Settings 10.6 Deleting...
User's Guide
Page 18
This chapter includes: • Special Features • Understanding Component Locations 1 INTRODUCTION Thank you for purchasing this multifunctional product. Your machine provides printing, copying, scanning, and faxing functions!
This chapter includes: • Special Features • Understanding Component Locations 1 INTRODUCTION Thank you for purchasing this multifunctional product. Your machine provides printing, copying, scanning, and faxing functions!
User's Guide
Page 20
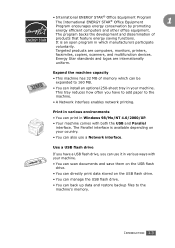
... and Parallel interface. It is available depending on your country. • You can install an optional 250-sheet tray in your machine. • You can scan documents and save them on the USB flash drive. • You can directly print data stored on the USB flash drive. • You can manage...
... and Parallel interface. It is available depending on your country. • You can install an optional 250-sheet tray in your machine. • You can scan documents and save them on the USB flash drive. • You can directly print data stored on the USB flash drive. • You can manage...
User's Guide
Page 23
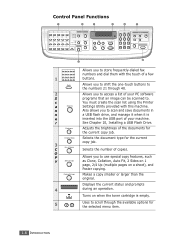
...the numbers 21 through the available options for the current copy job. of Copies Text Text/Photo Photo Shift Original Type Scanner Scan-to Special Copy Reduce/Enlarge Enter Clear/Stop Menu Upper Level Start Symbols Facsimile Resolution Broadcasting Facsimile Phone Book Redial/Pause On ...Hook Dial Direct Print 1 Shift 2 S c a Scan-to . See Chapter 10, Installing a USB Flash Drive. Selects the number of your machine. Allows you to shift the one-touch buttons...
...the numbers 21 through the available options for the current copy job. of Copies Text Text/Photo Photo Shift Original Type Scanner Scan-to Special Copy Reduce/Enlarge Enter Clear/Stop Menu Upper Level Start Symbols Facsimile Resolution Broadcasting Facsimile Phone Book Redial/Pause On ...Hook Dial Direct Print 1 Shift 2 S c a Scan-to . See Chapter 10, Installing a USB Flash Drive. Selects the number of your machine. Allows you to shift the one-touch buttons...
User's Guide
Page 28
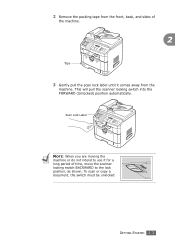
GETTING STARTED 2.3 Scan Lock Label NOTE: When you are moving the machine or do not intend to use it comes away from the front, back, and sides of the machine. 2 Tape 3 Gently pull the scan lock label until it for a long period of time, move the scanner locking switch BACKWARD to the lock position, as shown. This will pull the scanner locking switch into the FORWARD (Unlocked) position automatically. 2 Remove the packing tape from the machine. To scan or copy a document, the switch must be unlocked.
GETTING STARTED 2.3 Scan Lock Label NOTE: When you are moving the machine or do not intend to use it comes away from the front, back, and sides of the machine. 2 Tape 3 Gently pull the scan lock label until it for a long period of time, move the scanner locking switch BACKWARD to the lock position, as shown. This will pull the scanner locking switch into the FORWARD (Unlocked) position automatically. 2 Remove the packing tape from the machine. To scan or copy a document, the switch must be unlocked.

User's Guide
Page 49
... lamp automatically wakes up time when you to save the selection. 6 To return to Standby mode, press Clear/Stop. Scan Lamp Save Mode Scan Lamp Save mode allows you start scanning. Press Enter. 2.24 GETTING STARTED Using the Save Modes Power Save Mode Power Save mode allows your machine to reduce ... means that the power save mode. 1 Press Menu until "Machine Setup" appears on top line of the display. 2 Press the scroll button ( or ) until "Scan PWR Save" appears on the bottom line and press Enter. Press Enter. 3 Press the scroll button ( or ) to display "On" on the bottom line.
... lamp automatically wakes up time when you to save the selection. 6 To return to Standby mode, press Clear/Stop. Scan Lamp Save Mode Scan Lamp Save mode allows you start scanning. Press Enter. 2.24 GETTING STARTED Using the Save Modes Power Save Mode Power Save mode allows your machine to reduce ... means that the power save mode. 1 Press Menu until "Machine Setup" appears on top line of the display. 2 Press the scroll button ( or ) until "Scan PWR Save" appears on the bottom line and press Enter. Press Enter. 3 Press the scroll button ( or ) to display "On" on the bottom line.
User's Guide
Page 51
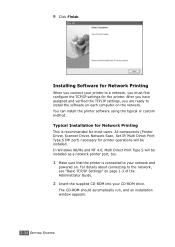
...information. In addition, this application can install selectively or all the following tabs: Scan Settings, Phonebook, Printer, and Firmware Update. This program is the accompanying Windows-based software for scanning images. For information about using the program, see page 6.12. • Set...window provides the following components: • Printer Driver- For information about using the program, see page 2.48. • Network Scan Driver- It is automatically installed when you have set up your machine and connected it to your machine. • Printer Settings ...
...information. In addition, this application can install selectively or all the following tabs: Scan Settings, Phonebook, Printer, and Firmware Update. This program is the accompanying Windows-based software for scanning images. For information about using the program, see page 6.12. • Set...window provides the following components: • Printer Driver- For information about using the program, see page 2.48. • Network Scan Driver- It is automatically installed when you have set up your machine and connected it to your machine. • Printer Settings ...
User's Guide
Page 59
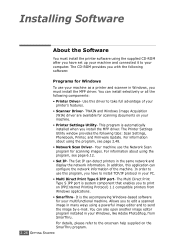
.../IP settings for printer operations will be installed. For details about connecting to your network and powered on. All components (Printer Driver, Scanner Driver, Network Scan, Set IP, Multi Direct Print Type S IPP port) necessary for the printer. 9 Click Finish.
.../IP settings for printer operations will be installed. For details about connecting to your network and powered on. All components (Printer Driver, Scanner Driver, Network Scan, Set IP, Multi Direct Print Type S IPP port) necessary for the printer. 9 Click Finish.

User's Guide
Page 67
6 Select the installation type and click Next. Click Next. • Basic SmarThru components: to use the basic SmarThru 4 applications and core service. • Scan component: to scan the original document and save it in an application or folder, email it, or publish it on a web site. • Image component: to edit an ...
6 Select the installation type and click Next. Click Next. • Basic SmarThru components: to use the basic SmarThru 4 applications and core service. • Scan component: to scan the original document and save it in an application or folder, email it, or publish it on a web site. • Image component: to edit an ...

User's Guide
Page 70
... beginning uninstallation, ensure that all applications are closed on your computer asks you to confirm, click OK. 4 Click Finish. GETTING STARTED 2.45 Uninstalling the Network Scan Driver 1 Start Windows. 2 From the Start menu select Programs or All Programs → ScanClair Type 103 → Uninstall ScanClair Type 103. 3 When your computer. A system...
... beginning uninstallation, ensure that all applications are closed on your computer asks you to confirm, click OK. 4 Click Finish. GETTING STARTED 2.45 Uninstalling the Network Scan Driver 1 Start Windows. 2 From the Start menu select Programs or All Programs → ScanClair Type 103 → Uninstall ScanClair Type 103. 3 When your computer. A system...
User's Guide
Page 73
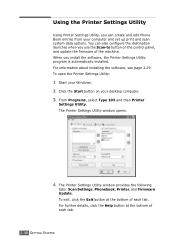
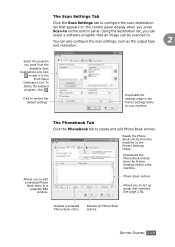
... information about installing the software, see page 2.29. The Printer Settings Utility window opens. 4 The Printer Settings Utility window provides the following tabs: Scan Settings, Phonebook, Printer, and Firmware Update. To open the Printer Settings Utility: 1 Start your Windows. 2 Click the Start button on the control...details, click the Help button at the bottom of each tab. 2.48 GETTING STARTED When you use the Scan-to button on your computer and set up print and scan system data options. To exit, click the Exit button at the bottom of the machine. You can create ...
... information about installing the software, see page 2.29. The Printer Settings Utility window opens. 4 The Printer Settings Utility window provides the following tabs: Scan Settings, Phonebook, Printer, and Firmware Update. To open the Printer Settings Utility: 1 Start your Windows. 2 Click the Start button on the control...details, click the Help button at the bottom of each tab. 2.48 GETTING STARTED When you use the Scan-to button on your computer and set up print and scan system data options. To exit, click the Exit button at the bottom of the machine. You can create ...
User's Guide
Page 74
...program, click . Deletes all Phone Book entries. Downloads the settings made in a separate Edit window. Reads the Phone Book entries from the Available Scan Destinations and click to add it to the Printer Settings Utility. Click to create and edit Phone Book entries. Allows you can select a software... program that appears on the control panel. Phone Book entries Allows you press Scan-to on the control panel display when you to your machine. Using the destination list, you to edit a selected Phone Book entry in...
...program, click . Deletes all Phone Book entries. Downloads the settings made in a separate Edit window. Reads the Phone Book entries from the Available Scan Destinations and click to add it to the Printer Settings Utility. Click to create and edit Phone Book entries. Allows you can select a software... program that appears on the control panel. Phone Book entries Allows you press Scan-to on the control panel display when you to your machine. Using the destination list, you to edit a selected Phone Book entry in...

User's Guide
Page 116
... paper - coated paper - onion skin or thin paper 5 - Preparing a Document You can load up to 50 documents (47 ~ 105 g/m2, 12.5 ~ 28 lb) for copying, scanning, and sending a fax.
... paper - coated paper - onion skin or thin paper 5 - Preparing a Document You can load up to 50 documents (47 ~ 105 g/m2, 12.5 ~ 28 lb) for copying, scanning, and sending a fax.
User's Guide
Page 118
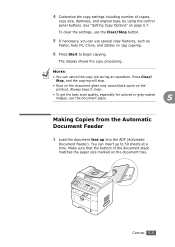
... can insert up into the ADF (Automatic Document Feeder). COPYING 5.5 The display shows the copy processing. Always keep it clean. • To get the best scan quality, especially for colored or gray-scaled images, use the Clear/Stop button. 5 If necessary, you can cancel the copy job during an operation. 4 Customize...
... can insert up into the ADF (Automatic Document Feeder). COPYING 5.5 The display shows the copy processing. Always keep it clean. • To get the best scan quality, especially for colored or gray-scaled images, use the Clear/Stop button. 5 If necessary, you can cancel the copy job during an operation. 4 Customize...

User's Guide
Page 125
... necessary, customize the copy settings, including number of copies, darkness, and original type, by using the control panel buttons. Close the cover. Your machine begins scanning the front side. 7 When "Set Backside" displays on page 5.7. NOTE: If you press the Clear/Stop button or if no buttons are pressed for making...
... necessary, customize the copy settings, including number of copies, darkness, and original type, by using the control panel buttons. Close the cover. Your machine begins scanning the front side. 7 When "Set Backside" displays on page 5.7. NOTE: If you press the Clear/Stop button or if no buttons are pressed for making...

User's Guide
Page 126
... Options" on page 5.7. 5 NOTE: You cannot adjust the copy size using the control panel buttons. Each portion is divided into 9 portions. Your original document is scanned and printed one by using the Reduce/ Enlarge button when making a poster. 6 Press Start to be applied only when you place a document on the document...
... Options" on page 5.7. 5 NOTE: You cannot adjust the copy size using the control panel buttons. Each portion is divided into 9 portions. Your original document is scanned and printed one by using the Reduce/ Enlarge button when making a poster. 6 Press Start to be applied only when you place a document on the document...


