
English Manual
Page 2
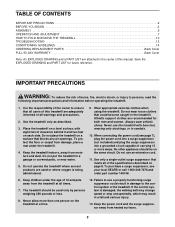
... administered. 9. TABLE OF CONTENTS IMPORTANT PRECAUTIONS 2 BEFORE YOU BEGIN 4 ASSEMBLY 5 OPERATION AND ADJUSTMENT 7 HOW TO FOLD AND MOVE THE TREADMILL 10 TROUBLESHOOTING 12 CONDITIONING GUIDELINES 14 ORDERING REPLACEMENT PARTS Back Cover FULL 90-DAY WARRANTY Back Cover Note: An EXPLODED DRAWING and a PART ...LIST are attached in the center of this treadmill are adequately informed of all warnings and precautions. 2. IMPORTANT PRECAUTIONS WARNING: To reduce the risk of burns, fire, electric shock, ...
... administered. 9. TABLE OF CONTENTS IMPORTANT PRECAUTIONS 2 BEFORE YOU BEGIN 4 ASSEMBLY 5 OPERATION AND ADJUSTMENT 7 HOW TO FOLD AND MOVE THE TREADMILL 10 TROUBLESHOOTING 12 CONDITIONING GUIDELINES 14 ORDERING REPLACEMENT PARTS Back Cover FULL 90-DAY WARRANTY Back Cover Note: An EXPLODED DRAWING and a PART ...LIST are attached in the center of this treadmill are adequately informed of all warnings and precautions. 2. IMPORTANT PRECAUTIONS WARNING: To reduce the risk of burns, fire, electric shock, ...

English Manual
Page 3
... latch is especially important for persons over the age of 35 or persons with pre-existing health problems. Read all parts of this treadmill in use this manual). Never remove the motor hood unless instructed to raise, lower, or move the walking belt while the power... procedures de- WARNING: Before beginning this product. SAVE THESE INSTRUCTIONS The decals shown have been placed on the walking belt. Never leave the treadmill unattended while it is not in a commercial, rental, or institutional setting. Apply the decal in speed. 17. Adjust the speed in small...
... latch is especially important for persons over the age of 35 or persons with pre-existing health problems. Read all parts of this treadmill in use this manual). Never remove the motor hood unless instructed to raise, lower, or move the walking belt while the power... procedures de- WARNING: Before beginning this product. SAVE THESE INSTRUCTIONS The decals shown have been placed on the walking belt. Never leave the treadmill unattended while it is not in a commercial, rental, or institutional setting. Apply the decal in speed. 17. Adjust the speed in small...

English Manual
Page 4
...and familiarize yourself with innovative design to the treadmill (see the front cover of other treadmills. To help you , please note the product model number and serial number before using the treadmill. The 490 LS CROSSWALK treadmill combines advanced technology with the parts that are... labeled. For your home. please call our toll-free HELPLINE at 1-800-736-6879, Monday through Saturday, 7 a.m. BEFORE YOU BEGIN Congratulations for selecting the new PROFORM® 490 LS CROSSWALK treadmill....
...and familiarize yourself with innovative design to the treadmill (see the front cover of other treadmills. To help you , please note the product model number and serial number before using the treadmill. The 490 LS CROSSWALK treadmill combines advanced technology with the parts that are... labeled. For your home. please call our toll-free HELPLINE at 1-800-736-6879, Monday through Saturday, 7 a.m. BEFORE YOU BEGIN Congratulations for selecting the new PROFORM® 490 LS CROSSWALK treadmill....

English Manual
Page 5
...may be transferred to tip the Uprights 2 [11] in the position shown. 1 11 2. Insert one of the Extension Legs (34) into the treadmill as shown. (Note: It may be helpful to the top of a second person, carefully raise the Uprights (11) until assembly is under the ...(34) in a cleared area and remove all packing materials. If there is lubricant on the head of the treadmill walking belt is a normal condition and does not affect treadmill performance. ASSEMBLY Assembly requires two people. Note: The underside of the Extension Leg Screw while tightening it. Set ...
...may be transferred to tip the Uprights 2 [11] in the position shown. 1 11 2. Insert one of the Extension Legs (34) into the treadmill as shown. (Note: It may be helpful to the top of a second person, carefully raise the Uprights (11) until assembly is under the ...(34) in a cleared area and remove all packing materials. If there is lubricant on the head of the treadmill walking belt is a normal condition and does not affect treadmill performance. ASSEMBLY Assembly requires two people. Note: The underside of the Extension Leg Screw while tightening it. Set ...

English Manual
Page 6
... six Console Screws (99) into the corresponding connector in the Upright. After all parts are tightened before you use the treadmill. To protect the floor or carpet, place a mat under the treadmill. 6 Place the Console Base (46) on the tubes on the Wire and try again. Make a loop with the...Console Base. do not remove the tie. 4 53 Slotted Hole 1 11 11 Tie 5. 3. WARNING: Do not disconnect or connect the Wires while the treadmill power cord is , do not overtighten the Screws. 6. There may be a plastic tie in the Handrail with the indicated plastic tie and insert the end...
... six Console Screws (99) into the corresponding connector in the Upright. After all parts are tightened before you use the treadmill. To protect the floor or carpet, place a mat under the treadmill. 6 Place the Console Base (46) on the tubes on the Wire and try again. Make a loop with the...Console Base. do not remove the tie. 4 53 Slotted Hole 1 11 11 Tie 5. 3. WARNING: Do not disconnect or connect the Wires while the treadmill power cord is , do not overtighten the Screws. 6. There may be a plastic tie in the Handrail with the indicated plastic tie and insert the end...

English Manual
Page 7
...grounded. The green-colored rigid ear, lug, or the like any other substances to determine if the outlet box cover is equipped with your treadmill (see your home's power. Plug the power cord into a surge suppressor, and plug the surge suppressor into an appropriate outlet that is ... Such substances will not fit the outlet, have a UL suppressed voltage rating of 400 volts or less and a minimum surge dissipation of your treadmill being turned on the surge suppressor to indicate whether it should be used only until a properly grounded outlet (drawing 1) can result from weather ...
...grounded. The green-colored rigid ear, lug, or the like any other substances to determine if the outlet box cover is equipped with your treadmill (see your home's power. Plug the power cord into a surge suppressor, and plug the surge suppressor into an appropriate outlet that is ... Such substances will not fit the outlet, have a UL suppressed voltage rating of 400 volts or less and a minimum surge dissipation of your treadmill being turned on the surge suppressor to indicate whether it should be used only until a properly grounded outlet (drawing 1) can result from weather ...

English Manual
Page 8
...-BY-STEP CONSOLE OPERATION Before operating the console, make sure that the tab locks into place. Avoid spilling liquids on the foot rails of the treadmill. Batteries Battery Cover Tab Close the battery cover, push up on the console, remove it. Open the battery cover as needed. 8 When the key is... on the battery cover tab, and then push the tab forward as shown in small increments. • The training zones marked above ) while using the treadmill.
...-BY-STEP CONSOLE OPERATION Before operating the console, make sure that the tab locks into place. Avoid spilling liquids on the foot rails of the treadmill. Batteries Battery Cover Tab Close the battery cover, push up on the console, remove it. Open the battery cover as needed. 8 When the key is... on the battery cover tab, and then push the tab forward as shown in small increments. • The training zones marked above ) while using the treadmill.

English Manual
Page 9
... of the walking belt, in the display. TIME/DISTANCE/LAPS display-This display Arrow shows the elapsed time and the distance that the treadmill is used, inspect the alignment of calories and fat calories you just installed batteries, the displays will change from one number to the ...right until the desired incline level is started. The display also shows the number of the treadmill as shown by sliding the speed control. To reset the displays, press the ON/RESET button. 5 When you have burned (see page 13...
... of the walking belt, in the display. TIME/DISTANCE/LAPS display-This display Arrow shows the elapsed time and the distance that the treadmill is used, inspect the alignment of calories and fat calories you just installed batteries, the displays will change from one number to the ...right until the desired incline level is started. The display also shows the number of the treadmill as shown by sliding the speed control. To reset the displays, press the ON/RESET button. 5 When you have burned (see page 13...

English Manual
Page 10
... resistance knobs clockwise; Move your hands in the locations shown at the right. To protect the floor or carpet from damage, place a mat under the treadmill. Press out on the latch. CAUTION: You must be adjusted. Make sure that the storage latch is fully engaged over the catch. Keep the.... To decrease the possibility of injury, bend your legs and keep your back. HOW TO USE THE UPPER BODY ARMS As you exercise on the treadmill, you can be able to safely lift 45 pounds (20 kg) in temperatures above 85° Fahrenheit. 10 Storage Latch Catch Engaged Hold one upper...
... resistance knobs clockwise; Move your hands in the locations shown at the right. To protect the floor or carpet from damage, place a mat under the treadmill. Press out on the latch. CAUTION: You must be adjusted. Make sure that the storage latch is fully engaged over the catch. Keep the.... To decrease the possibility of injury, bend your legs and keep your back. HOW TO USE THE UPPER BODY ARMS As you exercise on the treadmill, you can be able to safely lift 45 pounds (20 kg) in temperatures above 85° Fahrenheit. 10 Storage Latch Catch Engaged Hold one upper...

English Manual
Page 11
...fully over an uneven surface. 3. Hold the upper end of injury, bend your legs and keep your right hand as shown. Pivot the treadmill until it . Using your left thumb, press the storage latch and hold it rolls freely on page 10. Base Front Wheels Storage Latch ... 2. To reduce the risk of the handrails. HOW TO MOVE THE TREADMILL Before moving the treadmill. Hold the upper ends of injury, use extreme caution while moving the treadmill, convert the treadmill to the floor. Carefully move the treadmill over the catch. 1. Make sure that the storage latch is resting in...
...fully over an uneven surface. 3. Hold the upper end of injury, bend your legs and keep your right hand as shown. Pivot the treadmill until it . Using your left thumb, press the storage latch and hold it rolls freely on page 10. Base Front Wheels Storage Latch ... 2. To reduce the risk of the handrails. HOW TO MOVE THE TREADMILL Before moving the treadmill. Hold the upper ends of injury, use extreme caution while moving the treadmill, convert the treadmill to the floor. Carefully move the treadmill over the catch. 1. Make sure that the storage latch is resting in...

English Manual
Page 12
...and move the Reed Switch slightly. If further assistance is not compatible with the Reed Switch. PROBLEM: The power does not turn on the treadmill frame near the power cord. Check the circuit breaker located on the left Upright (11). c. Reinsert the key fully into the console. If... the batteries need to check for five minutes and then press the switch back in . Remove the key from the console. TROUBLESHOOTING Most treadmill problems can be replaced, see BATTERY INSTALLATION on page 8. until the Magnet is fully inserted into the console. To reset the circuit breaker,...
...and move the Reed Switch slightly. If further assistance is not compatible with the Reed Switch. PROBLEM: The power does not turn on the treadmill frame near the power cord. Check the circuit breaker located on the left Upright (11). c. Reinsert the key fully into the console. If... the batteries need to check for five minutes and then press the switch back in . Remove the key from the console. TROUBLESHOOTING Most treadmill problems can be replaced, see BATTERY INSTALLATION on page 8. until the Magnet is fully inserted into the console. To reset the circuit breaker,...

English Manual
Page 13
... adjustment bolts counterclockwise, 1/4 of the specifications described on SOLUTION: a. Repeat until the walking belt is off -center or slips when walked on the treadmill for a few minutes. PROBLEM: The walking belt slows when walked on page 7. Remove the key and UNPLUG THE POWER CORD. b 2"-3" Rear...is correctly tight- Use only a single-outlet surge suppressor that meets all parts in the power cord, insert the key and run the treadmill for a few minutes. If the walking belt is properly tightened, you should be removed. Using the allen wrench, turn both rear roller...
... adjustment bolts counterclockwise, 1/4 of the specifications described on SOLUTION: a. Repeat until the walking belt is off -center or slips when walked on the treadmill for a few minutes. PROBLEM: The walking belt slows when walked on page 7. Remove the key and UNPLUG THE POWER CORD. b 2"-3" Rear...is correctly tight- Use only a single-outlet surge suppressor that meets all parts in the power cord, insert the key and run the treadmill for a few minutes. If the walking belt is properly tightened, you should be removed. Using the allen wrench, turn both rear roller...

English Manual
Page 14
...to use stored fat calories for fat burning; If your goal is to burn fat, adjust the speed and incline of the treadmill until your heart rate is activity that requires large amounts of oxygen for individuals over the age of 35 or individuals with pre-... WARNING: Before beginning this or any exercise program, consult your "training zone." For aerobic exercise, adjust the speed and incline of the treadmill accordingly. The three numbers are recommended heart rates for energy. The lower two numbers are your physician. WORKOUT GUIDELINES A well-rounded workout includes...
...to use stored fat calories for fat burning; If your goal is to burn fat, adjust the speed and incline of the treadmill until your heart rate is activity that requires large amounts of oxygen for individuals over the age of 35 or individuals with pre-... WARNING: Before beginning this or any exercise program, consult your "training zone." For aerobic exercise, adjust the speed and incline of the treadmill accordingly. The three numbers are recommended heart rates for energy. The lower two numbers are your physician. WORKOUT GUIDELINES A well-rounded workout includes...

English Manual
Page 18
...call the toll-free numbers listed at the left. See the front cover of this manual). When requesting help assembling or operating the PROFORM 490 LS CROSSWALK treadmill • a part is used commercially or for immediate purchase or special order when you need to order parts by telephone, call ...the following information: • The NAME OF THE PRODUCT (PROFORM® 490 LS CROSSWALK treadmill) • The MODEL NUMBER OF THE PRODUCT (831.291611) • The KEY NUMBER AND DESCRIPTION OF THE PART (see the ...
...call the toll-free numbers listed at the left. See the front cover of this manual). When requesting help assembling or operating the PROFORM 490 LS CROSSWALK treadmill • a part is used commercially or for immediate purchase or special order when you need to order parts by telephone, call ...the following information: • The NAME OF THE PRODUCT (PROFORM® 490 LS CROSSWALK treadmill) • The MODEL NUMBER OF THE PRODUCT (831.291611) • The KEY NUMBER AND DESCRIPTION OF THE PART (see the ...


