

Uk Manual
Page 2
...dizziness at all times. 6. Inspect and tighten all parts regularly. do not wear loose clothing that all users of the stepper are adequately informed of serious injury, read the following important precau- tions before using . Replace any exercise program, consult ...institutional setting. 12. TABLE OF CONTENTS IMPORTANT PRECAUTIONS 2 BEFORE YOU BEGIN 3 PART IDENTIFICATION CHART 3 ASSEMBLY 4 HOW TO USE THE STEPPER 6 MAINTENANCE AND TROUBLE-SHOOTING 8 CONDITIONING GUIDELINES 9 PART LIST 10 EXPLODED DRAWING 11 HOW TO ORDER REPLACEMENT PARTS Back Cover IMPORTANT PRECAUTIONS ...
...dizziness at all times. 6. Inspect and tighten all parts regularly. do not wear loose clothing that all users of the stepper are adequately informed of serious injury, read the following important precau- tions before using . Replace any exercise program, consult ...institutional setting. 12. TABLE OF CONTENTS IMPORTANT PRECAUTIONS 2 BEFORE YOU BEGIN 3 PART IDENTIFICATION CHART 3 ASSEMBLY 4 HOW TO USE THE STEPPER 6 MAINTENANCE AND TROUBLE-SHOOTING 8 CONDITIONING GUIDELINES 9 PART LIST 10 EXPLODED DRAWING 11 HOW TO ORDER REPLACEMENT PARTS Back Cover IMPORTANT PRECAUTIONS ...

Uk Manual
Page 3
...provide you , please mention the product model number and serial number when calling. Note: If a part is PFEOST51080. If you use the PROFORM® 225C stepper. To help us assist you with contemporary styling to the key number of the part, from the PART LIST on a decal attached to... Head Bolt (21)-2 M10 x 82mm Carriage Bolt (24)-2 M4 x 12mm Console Screw (22)-4 M4 x 10mm Screw (28)-8 M4 x 16mm Screw (27)-4 3 The 225C stepper blends advanced engineering with a low-impact workout in parenthesis below to see the front cover of your benefit, read this manual for selecting the new...
...provide you , please mention the product model number and serial number when calling. Note: If a part is PFEOST51080. If you use the PROFORM® 225C stepper. To help us assist you with contemporary styling to the key number of the part, from the PART LIST on a decal attached to... Head Bolt (21)-2 M10 x 82mm Carriage Bolt (24)-2 M4 x 12mm Console Screw (22)-4 M4 x 10mm Screw (28)-8 M4 x 16mm Screw (27)-4 3 The 225C stepper blends advanced engineering with a low-impact workout in parenthesis below to see the front cover of your benefit, read this manual for selecting the new...

Uk Manual
Page 4
... assembly is angled in the Base (2). Refer to each Pedal Leg (6, 7) with four M10 Locknuts (15). 8 15 1 2 15 24 2. ASSEMBLY Place all parts of the stepper in the Right Pedal Leg (7). Assembly requires the included allen wrench , a phillips spanner , two adjustable spanners and a rubber mallet . 1. Attach the Upright with four M4...
... assembly is angled in the Base (2). Refer to each Pedal Leg (6, 7) with four M10 Locknuts (15). 8 15 1 2 15 24 2. ASSEMBLY Place all parts of the stepper in the Right Pedal Leg (7). Assembly requires the included allen wrench , a phillips spanner , two adjustable spanners and a rubber mallet . 1. Attach the Upright with four M4...

Uk Manual
Page 5
... Locknuts (15). 5. Slide the Handlebar Bushings and the Handlebars onto the upper shafts on the Upright (1). Alkaline batteries are properly tightened before you use the stepper. 5 Make sure that the negative ends of the batteries (marked "-") are on the Upright (1). Make sure that the Resistance Cylinders are turned so the arrows...
... Locknuts (15). 5. Slide the Handlebar Bushings and the Handlebars onto the upper shafts on the Upright (1). Alkaline batteries are properly tightened before you use the stepper. 5 Make sure that the negative ends of the batteries (marked "-") are on the Upright (1). Make sure that the Resistance Cylinders are turned so the arrows...

Uk Manual
Page 6
..., the target pace will be during that during the program; For example, in the display. This shows that two-minute period. HOW TO USE THE STEPPER Note: If there is one of the three pacer programs, this mode will count up the length of time you have selected; This shows that...
..., the target pace will be during that during the program; For example, in the display. This shows that two-minute period. HOW TO USE THE STEPPER Note: If there is one of the three pacer programs, this mode will count up the length of time you have selected; This shows that...

Uk Manual
Page 7
... minutes, the power will show which mode is not selected.) If desired, the display can select the scan mode again by pressing the on the stepper. gram button. lowing order: program 1, program 2 , program 3, manual mode. 4 Follow your progress with the monitor modes When the power is turned Mode Indicators on, the...
... minutes, the power will show which mode is not selected.) If desired, the display can select the scan mode again by pressing the on the stepper. gram button. lowing order: program 1, program 2 , program 3, manual mode. 4 Follow your progress with the monitor modes When the power is turned Mode Indicators on, the...

Uk Manual
Page 8
...step or the stepping pace until the con- Resistance Collar 5 9 9 WARNING: The resistance cylinders become very hot during use the stepper. In addition, keep liquid away from the console, keep the console out of hydraulic cylinders.) Hold the handlebars and step onto the ...is moved. To change the stepping resistance, simply turn the resistance collars on a level surface and place a mat under the stepper. (The stepper features precision hydraulic cylinders. Touch only the resistance collars when changing the stepping resistance. Repeat until you can comfortably maintain a continuous...
...step or the stepping pace until the con- Resistance Collar 5 9 9 WARNING: The resistance cylinders become very hot during use the stepper. In addition, keep liquid away from the console, keep the console out of hydraulic cylinders.) Hold the handlebars and step onto the ...is moved. To change the stepping resistance, simply turn the resistance collars on a level surface and place a mat under the stepper. (The stepper features precision hydraulic cylinders. Touch only the resistance collars when changing the stepping resistance. Repeat until you can comfortably maintain a continuous...
Uk Manual
Page 12
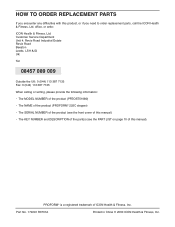
PROFORM® is a registered trademark of this product, or if you encounter any difficulties with this manual). Part No. 172291 R0701A Printed in China © 2000 ... 387 7125 When calling or writing, please provide the following information: • The MODEL NUMBER of the product (PFEOST51080) • The NAME of the product (PROFORM® 225C stepper) • The SERIAL NUMBER of the product (see the front cover of this manual) • The KEY NUMBER and DESCRIPTION of the part(s) (see...
PROFORM® is a registered trademark of this product, or if you encounter any difficulties with this manual). Part No. 172291 R0701A Printed in China © 2000 ... 387 7125 When calling or writing, please provide the following information: • The MODEL NUMBER of the product (PFEOST51080) • The NAME of the product (PROFORM® 225C stepper) • The SERIAL NUMBER of the product (see the front cover of this manual) • The KEY NUMBER and DESCRIPTION of the part(s) (see...