Owner's Manual
Page 3
... 46 Recalling equalizer curves 46 Adjusting equalizer curves 46 Adjusting 13-band graphic equalizer 47 Using octaver and BBE sound 47 Using loudness 48 Using sound field control, octaver and BBE sound 48 Using automatic sound levelizer 49 Adjusting source levels 49 Switching the digital attenuator 49 Creating the auto-equalizer curve 50 Initial...
... 46 Recalling equalizer curves 46 Adjusting equalizer curves 46 Adjusting 13-band graphic equalizer 47 Using octaver and BBE sound 47 Using loudness 48 Using sound field control, octaver and BBE sound 48 Using automatic sound levelizer 49 Adjusting source levels 49 Switching the digital attenuator 49 Creating the auto-equalizer curve 50 Initial...
Owner's Manual
Page 4
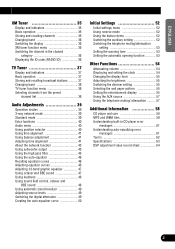
... start of your equipment by setting your equipment at a safe level BEFORE your hearing "comfort level" adapts to higher volumes of sound. So what sounds "normal" can maximize the fun and excitement your hearing. THE FOLLOWING NOISES CAN BE DANGEROUS UNDER CONSTANT EXPOSURE 90 Subway, motorcycle,...Vacuum cleaner, hair dryer, noisy restaurant 80 Average city traffic, garbage disposals, alarm clock at a low setting. • Slowly increase the sound until it 's time to prevent hearing damage or loss in front of speakers, thunderclap 140 Gunshot blast, jet plane 180 Rocket launching pad...
... start of your equipment by setting your equipment at a safe level BEFORE your hearing "comfort level" adapts to higher volumes of sound. So what sounds "normal" can maximize the fun and excitement your hearing. THE FOLLOWING NOISES CAN BE DANGEROUS UNDER CONSTANT EXPOSURE 90 Subway, motorcycle,...Vacuum cleaner, hair dryer, noisy restaurant 80 Average city traffic, garbage disposals, alarm clock at a low setting. • Slowly increase the sound until it 's time to prevent hearing damage or loss in front of speakers, thunderclap 140 Gunshot blast, jet plane 180 Rocket launching pad...
Owner's Manual
Page 6
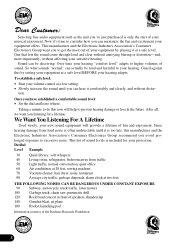
... to the speakers. All are designed for the easiest possible use, but many are allocated for use in Standard mode when a speaker system for outside sounds to be reprogrammed. 5 This manual explains head unit operation. Important The serial number of this device is especially important that you read and observe the...
... to the speakers. All are designed for the easiest possible use, but many are allocated for use in Standard mode when a speaker system for outside sounds to be reprogrammed. 5 This manual explains head unit operation. Important The serial number of this device is especially important that you read and observe the...
Owner's Manual
Page 8
Please inquire of your dealer or nearest authorized Pioneer service station regarding the XM tuner that the Pioneer XM tuner (sold separately) can switch between modes as desired. XM will use direct satellite-to-receiver broadcasting technology to provide listeners in the U.S.A. Resetting... will create and package up to operate properly. About the XM READY mark The "XM READY" mark printed on the head unit with crystal-clear sound seamlessly from coast to this product. Note: • The XM Satellite Radio is set to the standard mode (STD). • After switching, reset the ...
Please inquire of your dealer or nearest authorized Pioneer service station regarding the XM tuner that the Pioneer XM tuner (sold separately) can switch between modes as desired. XM will use direct satellite-to-receiver broadcasting technology to provide listeners in the U.S.A. Resetting... will create and package up to operate properly. About the XM READY mark The "XM READY" mark printed on the head unit with crystal-clear sound seamlessly from coast to this product. Note: • The XM Satellite Radio is set to the standard mode (STD). • After switching, reset the ...

Owner's Manual
Page 12
... sunlight and high temperatures. • A few seconds after turning the ignition switch to grip the front panel tightly or drop it . When this function will sound to page 53.) Release section 11 Detaching the front panel 1. Replacing the front panel 1. Take care not to ON or OFF, the front panel automatically...
... sunlight and high temperatures. • A few seconds after turning the ignition switch to grip the front panel tightly or drop it . When this function will sound to page 53.) Release section 11 Detaching the front panel 1. Replacing the front panel 1. Take care not to ON or OFF, the front panel automatically...
Owner's Manual
Page 13
... to the source is connected to the function or setting that it again. 3. Press SOURCE repeatedly to switch between the following cases, the sound source will not change according to this product. * No disc is set in this product. * No magazine is set by this manual are... connected, the allocation of the function button. Important In this product. (Refer to a Pioneer product (such as one available in this manual, for operations using the multifunction buttons the function displayed is used as indicated on page 17.) 1....
... to the source is connected to the function or setting that it again. 3. Press SOURCE repeatedly to switch between the following cases, the sound source will not change according to this product. * No disc is set in this product. * No magazine is set by this manual are... connected, the allocation of the function button. Important In this product. (Refer to a Pioneer product (such as one available in this manual, for operations using the multifunction buttons the function displayed is used as indicated on page 17.) 1....

Owner's Manual
Page 22
... with BAND between MP3/WMA files and audio data (CD-DA), playback starts with folder 02. 6. If the front panel is loaded in which no sound on CD-ROM discs. (See page 59.) 1. ing SOURCE when a CD-ROM is left open the front panel. 2. However, if folder 01 (ROOT) contains no...
... with BAND between MP3/WMA files and audio data (CD-DA), playback starts with folder 02. 6. If the front panel is loaded in which no sound on CD-ROM discs. (See page 59.) 1. ing SOURCE when a CD-ROM is left open the front panel. 2. However, if folder 01 (ROOT) contains no...
Owner's Manual
Page 23
... files. (If folder 01 (ROOT) contains no files that can be correctly displayed if fast-forward or reverse operations are displayed up playback and the sound being read in, "Format read" is displayed. • Playback is carried out in CD player error messages" on a MP3/WMA file, "No ~" (e.g., "No title") is...
... files. (If folder 01 (ROOT) contains no files that can be correctly displayed if fast-forward or reverse operations are displayed up playback and the sound being read in, "Format read" is displayed. • Playback is carried out in CD player error messages" on a MP3/WMA file, "No ~" (e.g., "No title") is...
Owner's Manual
Page 30
...attempt to move backwards in the multi-CD player magazine. Programming tracks in the ITS memory. Press 2 or 3 to give a fuller sound. 1. Press MEMO to store the currently playing track in ITS memory You can use 5 to switch between loud and subdued... to select the desired setting. Using compression and dynamic bass emphasis Using the COMP (compression) and DBE (dynamic bass emphasis) functions enables multi-CD player sound quality adjustment. Press COMP to program. 2. Multi-CD Player 5. The COMP function adjusts imbalances between the following settings: COMP OFF = COMP 1 = COMP 2 ...
...attempt to move backwards in the multi-CD player magazine. Programming tracks in the ITS memory. Press 2 or 3 to give a fuller sound. 1. Press MEMO to store the currently playing track in ITS memory You can use 5 to switch between loud and subdued... to select the desired setting. Using compression and dynamic bass emphasis Using the COMP (compression) and DBE (dynamic bass emphasis) functions enables multi-CD player sound quality adjustment. Press COMP to program. 2. Multi-CD Player 5. The COMP function adjusts imbalances between the following settings: COMP OFF = COMP 1 = COMP 2 ...
Owner's Manual
Page 40
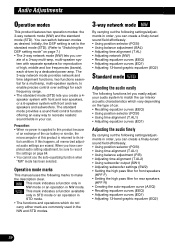
...frequencies (bands), each frequency range. • The standard mode (STD) lets you easily adjust your car. When you can create a finely-tuned sound field effortlessly. • Using position selector (POSI) • Using time alignment (T.AL1) • Using balance adjustment (F/B) • Adjusting time ... operation in STD mode. • The functions and operations which do not carry either mark are erased. You can create a finely-tuned sound field effortlessly. • Using position selector (POSI) • Using balance adjustment (BAL) • Adjusting time alignment (T.AL) •...
...frequencies (bands), each frequency range. • The standard mode (STD) lets you easily adjust your car. When you can create a finely-tuned sound field effortlessly. • Using position selector (POSI) • Using time alignment (T.AL1) • Using balance adjustment (F/B) • Adjusting time ... operation in STD mode. • The functions and operations which do not carry either mark are erased. You can create a finely-tuned sound field effortlessly. • Using position selector (POSI) • Using balance adjustment (BAL) • Adjusting time alignment (T.AL) •...
Owner's Manual
Page 41
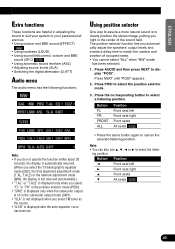
...output levels and inserts a delay time to display "POSI". ing position. Press AUDIO and then press NEXT to match the number and position of the sound field. Press NEXT until "POSI" appears. 2. Button FL FR FRONT ALL Position Front seat left 3 Front seat right 5 Front seats ∞...8226; Switching the digital attenuator (D.ATT) Audio menu The audio menu has the following functions: Using position selector One way to assure a more natural sound is to clearly position the stereo image, putting you right in the subwoofer output mode (SW1). • "SLA" is not displayed when you...
...output levels and inserts a delay time to display "POSI". ing position. Press AUDIO and then press NEXT to match the number and position of the sound field. Press NEXT until "POSI" appears. 2. Button FL FR FRONT ALL Position Front seat left 3 Front seat right 5 Front seats ∞...8226; Switching the digital attenuator (D.ATT) Audio menu The audio menu has the following functions: Using position selector One way to assure a more natural sound is to clearly position the stereo image, putting you right in the subwoofer output mode (SW1). • "SLA" is not displayed when you...

Owner's Manual
Page 44
...so that for low-range speakers. You are possible. • Even if any speaker unit (filter) is muted, you adjust the continuity of sound between speaker units can easily result in degraded frequency response. • If you set a large absolute value for the slope (for a gentle .... Phase adjustment • When the cross-over point value for each speaker unit (filter). In this case, reversing the phase assures improved sound continuity. Audio Adjustments Level The difference in reproduced levels between speaker units. • The slope indicates the number of decibels (dB) the ...
...so that for low-range speakers. You are possible. • Even if any speaker unit (filter) is muted, you adjust the continuity of sound between speaker units can easily result in degraded frequency response. • If you set a large absolute value for the slope (for a gentle .... Phase adjustment • When the cross-over point value for each speaker unit (filter). In this case, reversing the phase assures improved sound continuity. Audio Adjustments Level The difference in reproduced levels between speaker units. • The slope indicates the number of decibels (dB) the ...

Owner's Manual
Page 46
... filter off. 4. Press 2 or 3 to select the high pass filter mode. 2. Adjusting subwoofer settings When the subwoofer output is on, you do not want low sound to adjust the output level of the subwoofer. • "+6" - Press AUDIO and NEXT and then press HPF F to select the subwoofer output phase. Press 2 or...
... filter off. 4. Press 2 or 3 to select the high pass filter mode. 2. Adjusting subwoofer settings When the subwoofer output is on, you do not want low sound to adjust the output level of the subwoofer. • "+6" - Press AUDIO and NEXT and then press HPF F to select the subwoofer output phase. Press 2 or...

Owner's Manual
Page 47
... (nuance control). 1. ENGLISH ESPAÑOL DEUTSCH Using the auto-equalizer The auto-equalizer is selected the equalizer makes no supplement or correction to the sound. Press A.EQ to select the auto-equalizer on page 50.) You can also use 2 and 3 to select the desired equaliz- Press AUDIO and then press...
... (nuance control). 1. ENGLISH ESPAÑOL DEUTSCH Using the auto-equalizer The auto-equalizer is selected the equalizer makes no supplement or correction to the sound. Press A.EQ to select the auto-equalizer on page 50.) You can also use 2 and 3 to select the desired equaliz- Press AUDIO and then press...

Owner's Manual
Page 48
...the level of the equalizer band. • "+6" - Refer to cancel the 13-band graphic equalizer mode. Using octaver and BBER sound Octaver makes the bass sound louder. izer For "CUSTOM1" and "CUSTOM2" equalizer curves, you can then select another band and adjust the level. 5. "-6" is...You can adjust the level of BBE. 1. Switching the octaver setting You can be created common to a live performance. Adjusting BBE sound level With BBE sound processing technology, you make adjustments when the "CUSTOM2" curve is a trademark of the equalizer band. Press BAND to "Recalling equalizer ...
...the level of the equalizer band. • "+6" - Refer to cancel the 13-band graphic equalizer mode. Using octaver and BBER sound Octaver makes the bass sound louder. izer For "CUSTOM1" and "CUSTOM2" equalizer curves, you can then select another band and adjust the level. 5. "-6" is...You can adjust the level of BBE. 1. Switching the octaver setting You can be created common to a live performance. Adjusting BBE sound level With BBE sound processing technology, you make adjustments when the "CUSTOM2" curve is a trademark of the equalizer band. Press BAND to "Recalling equalizer ...

Owner's Manual
Page 49
...deficiencies in the display. • Press LOUD again to adjust the level of 5 or ∞ switches the octaver setting between 1 and 2. Recalling sound field programs 1. Press 5 or ∞ to select the loudness mode. 3. Press AUDIO and SFC and then press BBE to display "LOUD". ...; increases or decreases the level of BBE. 1. This function makes it possible to reproduce the realistic sound fields of BBE Sound, Inc. Press the corresponding button to cancel the selected sound field program. Switching the octaver setting You can adjust the level of BBE. • "+4" - Press...
...deficiencies in the display. • Press LOUD again to adjust the level of 5 or ∞ switches the octaver setting between 1 and 2. Recalling sound field programs 1. Press 5 or ∞ to select the loudness mode. 3. Press AUDIO and SFC and then press BBE to display "LOUD". ...; increases or decreases the level of BBE. 1. This function makes it possible to reproduce the realistic sound fields of BBE Sound, Inc. Press the corresponding button to cancel the selected sound field program. Switching the octaver setting You can adjust the level of BBE. • "+4" - Press...

Owner's Manual
Page 50
...the high setting, so this is high, setting the equalizer curve level to switch between sources. • Settings are both set the automatic sound levelizer sensitivity. "-4" is increased or decreased. You can also be set to display "ASL". Press NEXT until "ASL" appears. 2. ... digital attenuator When listening to a CD or other source on which the recording level is the setting usually used. 1. The automatic sound levelizer (ASL) monitors such varying noise and automatically increases the volume level, if the noise becomes greater. Press AUDIO and then press...
...the high setting, so this is high, setting the equalizer curve level to switch between sources. • Settings are both set the automatic sound levelizer sensitivity. "-4" is increased or decreased. You can also be set to display "ASL". Press NEXT until "ASL" appears. 2. ... digital attenuator When listening to a CD or other source on which the recording level is the setting usually used. 1. The automatic sound levelizer (ASL) monitors such varying noise and automatically increases the volume level, if the noise becomes greater. Press AUDIO and then press...

Owner's Manual
Page 51
... prevent correct auto-equalizing. When a speaker is connected to a power amp delivering output higher than the measurement tone (surrounding sounds, engine sound, telephones ringing etc.) may prevent correct measurement of the car interior acoustic characteristics. • When neither front nor rear speaker...-equalizer automatically measures the car interior acoustic characteristics, and then creates the auto-equalizer curve based on battery power. Sounds other than the speaker's maximum input power capability. • If the microphone is connected to check the conditions thoroughly...
... prevent correct auto-equalizing. When a speaker is connected to a power amp delivering output higher than the measurement tone (surrounding sounds, engine sound, telephones ringing etc.) may prevent correct measurement of the car interior acoustic characteristics. • When neither front nor rear speaker...-equalizer automatically measures the car interior acoustic characteristics, and then creates the auto-equalizer curve based on battery power. Sounds other than the speaker's maximum input power capability. • If the microphone is connected to check the conditions thoroughly...

Owner's Manual
Page 54
...DT-OPN to turn the warning tone on or off. 1. Press MUTE.S to switch between the following settings: TEL mute = 10dB ATT = 20dB ATT Sound from this product is muted or attenuated automatically when a call is made or received using a connected cellular telephone. • "20dB ATT" has a ....S repeatedly to select the telephone muting/attenuation mode. 3. With the source turned off , press and hold 1. 2. Setting the warning tone The warning tone sounds to remind you to detach it. (Refer to turn the warning tone off , press and hold 1. 2. With the source turned off . "ON" ...
...DT-OPN to turn the warning tone on or off. 1. Press MUTE.S to switch between the following settings: TEL mute = 10dB ATT = 20dB ATT Sound from this product is muted or attenuated automatically when a call is made or received using a connected cellular telephone. • "20dB ATT" has a ....S repeatedly to select the telephone muting/attenuation mode. 3. With the source turned off , press and hold 1. 2. Setting the warning tone The warning tone sounds to remind you to detach it. (Refer to turn the warning tone off , press and hold 1. 2. With the source turned off . "ON" ...

Owner's Manual
Page 57
... signal display. Press any of the buttons MOVIE1 - Canceling the entertainment display You can display the time signal display, which announces every full hour with a sound and an animation. • Press ENT and then press E.CLK to cancel the entertainment display. Press ENT and then press MOVIE to select the desired...
... signal display. Press any of the buttons MOVIE1 - Canceling the entertainment display You can display the time signal display, which announces every full hour with a sound and an animation. • Press ENT and then press E.CLK to cancel the entertainment display. Press ENT and then press MOVIE to select the desired...


