Operation Manual
Page 2
Please read through these operating instructions so you have finished reading the instructions, keep this Pioneer product. LCD display 5 Basic Operations 6 - Receiving traffic announcements 9 Built-in random order 9 - Using the equalizer 10 - ...player 13 Dual Discs 13 Specifications 15 Removing the front panel 4 - Turning the unit on and selecting a source 6 - Switching the RDS display 7 - Using balance adjustment 10 - Adjusting initial settings 11 - Switching Auto PI Seek 11 - Sound muting 12 Additional Information Error messages 13 Handling guideline of a CD...
Please read through these operating instructions so you have finished reading the instructions, keep this Pioneer product. LCD display 5 Basic Operations 6 - Receiving traffic announcements 9 Built-in random order 9 - Using the equalizer 10 - ...player 13 Dual Discs 13 Specifications 15 Removing the front panel 4 - Turning the unit on and selecting a source 6 - Switching the RDS display 7 - Using balance adjustment 10 - Adjusting initial settings 11 - Switching Auto PI Seek 11 - Sound muting 12 Additional Information Error messages 13 Handling guideline of a CD...
Operation Manual
Page 5
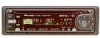
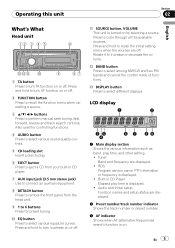
...LCD display 1 2 35 4 6 7 89 1 Main display section Shows the various information such as band, play time is displayed. ! Built-in CD player. 7 AUX input jack (3.5 mm stereo jack) Use to connect an auxiliary equipment. 8 DETACH button Press to remove the front panel from the head unit...buttons Press for controlling functions. 4 AUDIO button Press to select various sound quality controls. 5 CD loading slot Insert a disc to play. 6 EJECT button Press to eject a CD from your built-in CD Player Elapsed play time, and other setting. ! Also used for preset tuning. b SOURCE button, ...
...LCD display 1 2 35 4 6 7 89 1 Main display section Shows the various information such as band, play time is displayed. ! Built-in CD player. 7 AUX input jack (3.5 mm stereo jack) Use to connect an auxiliary equipment. 8 DETACH button Press to remove the front panel from the head unit...buttons Press for controlling functions. 4 AUDIO button Press to select various sound quality controls. 5 CD loading slot Insert a disc to play. 6 EJECT button Press to eject a CD from your built-in CD Player Elapsed play time, and other setting. ! Also used for preset tuning. b SOURCE button, ...
Operation Manual
Page 6
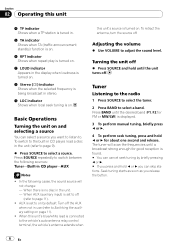
... the unit (refer to page 9). % Press SOURCE to select a band. Section 02 Operating this unit's source is turned on. To switch to the built-in CD player, load a disc in the unit. - Tuner Listening to the radio 1 Press SOURCE to select the tuner. 2 Press BAND to select a source. Seek tuning starts as...
... the unit (refer to page 9). % Press SOURCE to select a band. Section 02 Operating this unit's source is turned on. To switch to the built-in CD player, load a disc in the unit. - Tuner Listening to the radio 1 Press SOURCE to select the tuner. 2 Press BAND to select a source. Seek tuning starts as...
Operation Manual
Page 9
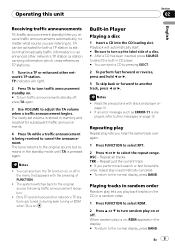
...The newly set volume is stored in memory and recalled for both a TP station (a station that appears with discs and player on page 13. ! The system switches back to cancel the announcement. Notes ! Read the precautions with the pressing of a disc. # After...Section 02 English Receiving traffic announcements TA (traffic announcement standby) lets you receive traffic announcements automatically, no matter what source you are tuned in CD player. # You can be activated for subsequent traffic announcements. 4 Press TA while a traffic announcement is on . # To turn traffic announcement ...
...The newly set volume is stored in memory and recalled for both a TP station (a station that appears with discs and player on page 13. ! The system switches back to cancel the announcement. Notes ! Read the precautions with the pressing of a disc. # After...Section 02 English Receiving traffic announcements TA (traffic announcement standby) lets you receive traffic announcements automatically, no matter what source you are tuned in CD player. # You can be activated for subsequent traffic announcements. 4 Press TA while a traffic announcement is on . # To turn traffic announcement ...
Operation Manual
Page 13
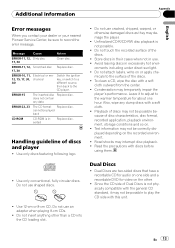
.... ! Road shocks may temporarily impair the player's performance. Since the CD side of Dual Discs is not physically compatible with the general CD standard, it to adjust to the CD player. Do not attach labels, write on the other than a CD into the CD loading slot. Playback of discs may not ..., or otherwise damaged discs as they may not be possible to play the CD side with discs before using them. ! Additional Information Appendix English Error messages When you contact your dealer or your nearest Pioneer Service Center, be sure to the surface of the discs. ! cannot be...
.... ! Road shocks may temporarily impair the player's performance. Since the CD side of Dual Discs is not physically compatible with the general CD standard, it to adjust to the CD player. Do not attach labels, write on the other than a CD into the CD loading slot. Playback of discs may not ..., or otherwise damaged discs as they may not be possible to play the CD side with discs before using them. ! Additional Information Appendix English Error messages When you contact your dealer or your nearest Pioneer Service Center, be sure to the surface of the discs. ! cannot be...
Operation Manual
Page 15
...) Load impedance 4 W (4 W to 8 W allowable) Tone controls: Bass Frequency 100 Hz Gain 13dB Mid Frequency 1 kHz Gain 12 dB Treble Frequency 10 kHz Gain 12 dB CD player System Compact disc audio system Usable discs Compact disc Signal-to-noise ratio 94 dB (1 kHz) (IEC-A net-
...) Load impedance 4 W (4 W to 8 W allowable) Tone controls: Bass Frequency 100 Hz Gain 13dB Mid Frequency 1 kHz Gain 12 dB Treble Frequency 10 kHz Gain 12 dB CD player System Compact disc audio system Usable discs Compact disc Signal-to-noise ratio 94 dB (1 kHz) (IEC-A net-


