Operation Manual
Page 2
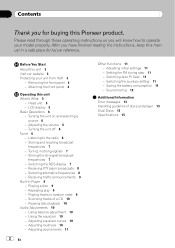
... player 13 Dual Discs 13 Specifications 15 After you will know how to the radio 6 - Head unit 5 - Storing the strongest broadcast frequencies 7 - Selecting alternative frequencies 8 - Switching Auto PI Seek 11 - Adjusting equalizer curves 10 - Sound muting 12 Additional Information Error messages 13 Handling guideline of a CD 10 - Receiving traffic announcements 9 Built-in a safe place for buying this unit What's What 5 - Playing a disc 9 - Adjusting source levels 11 2 En Other Functions 11 - Please read through these operating instructions...
... player 13 Dual Discs 13 Specifications 15 After you will know how to the radio 6 - Head unit 5 - Storing the strongest broadcast frequencies 7 - Selecting alternative frequencies 8 - Switching Auto PI Seek 11 - Adjusting equalizer curves 10 - Sound muting 12 Additional Information Error messages 13 Handling guideline of a CD 10 - Receiving traffic announcements 9 Built-in a safe place for buying this unit What's What 5 - Playing a disc 9 - Adjusting source levels 11 2 En Other Functions 11 - Please read through these operating instructions...
Operation Manual
Page 3
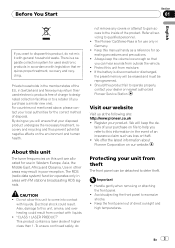
... shocks. ! If the battery is disconnected or discharged, the preset memory will be erased and must be detached to help you can hear sounds from theft The front panel can be reprogrammed. ! Important ! Electrical shock could result from moisture. ! The Pioneer CarStereo-Pass is a separate collection system for use in the member states of your unit from outside the...
... shocks. ! If the battery is disconnected or discharged, the preset memory will be erased and must be detached to help you can hear sounds from theft The front panel can be reprogrammed. ! Important ! Electrical shock could result from moisture. ! The Pioneer CarStereo-Pass is a separate collection system for use in the member states of your unit from outside the...
Operation Manual
Page 4
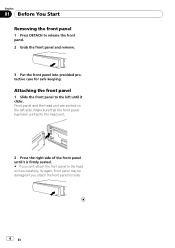
... attach the front panel forcedly. 4 En Make sure that the front panel has been jointed to the head unit successfully, try again. Front panel and the head unit are jointed on the left until it clicks. Attaching the front panel 1 Slide the front panel to release the front panel. 2 Grab the front panel and remove. 3 Put the front panel into provided protective case for safe...
... attach the front panel forcedly. 4 En Make sure that the front panel has been jointed to the head unit successfully, try again. Front panel and the head unit are jointed on the left until it clicks. Attaching the front panel 1 Slide the front panel to release the front panel. 2 Grab the front panel and remove. 3 Put the front panel into provided protective case for safe...
Operation Manual
Page 5
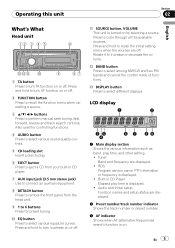
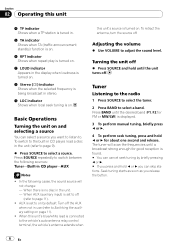
..., play time is turned on . Built-in CD player. 7 AUX input jack (3.5 mm stereo jack) Use to connect an auxiliary equipment. 8 DETACH button Press to remove the front panel from the head unit. 9 1 to select among MW/LW and two FM bands and cancel the control mode of functions. Audio and initial setup Function names and setup status are displayed. ! Also used for controlling functions. 4 AUDIO button Press to select various sound quality controls. 5 CD loading slot Insert a disc to play. 6 EJECT button Press to eject a CD...
..., play time is turned on . Built-in CD player. 7 AUX input jack (3.5 mm stereo jack) Use to connect an auxiliary equipment. 8 DETACH button Press to remove the front panel from the head unit. 9 1 to select among MW/LW and two FM bands and cancel the control mode of functions. Audio and initial setup Function names and setup status are displayed. ! Also used for controlling functions. 4 AUDIO button Press to select various sound quality controls. 5 CD loading slot Insert a disc to play. 6 EJECT button Press to eject a CD...
Operation Manual
Page 6
... AUX when not in use (refer to select a source. Press SOURCE repeatedly to adjust the sound level. Turn off . Section 02 Operating this unit 4 TP indicator Shows when a TP station is tuned in. 5 TA indicator Shows when TA (traffic announcement standby) function is on. 6 RPT indicator Shows when repeat play is turned on. 7 LOUD indicator Appears in the display when loudness is turned on. 8 Stereo (5) indicator Shows when the selected frequency...
... AUX when not in use (refer to select a source. Press SOURCE repeatedly to adjust the sound level. Turn off . Section 02 Operating this unit 4 TP indicator Shows when a TP station is tuned in. 5 TA indicator Shows when TA (traffic announcement standby) function is on. 6 RPT indicator Shows when repeat play is turned on. 7 LOUD indicator Appears in the display when loudness is turned on. 8 Stereo (5) indicator Shows when the selected frequency...

Operation Manual
Page 7
... one of preset tuning buttons 1 to an RDS station. % Press DISPLAY. Press DISPLAY repeatedly to 6. FM: LOCAL 1-LOCAL 2-LOCAL 3- Storing the strongest broadcast frequencies BSM (best stations memory) lets you automatically store the six strongest broadcast frequencies under preset tuning buttons 1 to switch between the following settings: Program service name-PTY information- RDS service may replace broadcast frequencies you have saved using buttons 1 to 6. 1 Press FUNCTION to select BSM. 2 Press a to recall radio station frequencies. Tuning in strong...
... one of preset tuning buttons 1 to an RDS station. % Press DISPLAY. Press DISPLAY repeatedly to 6. FM: LOCAL 1-LOCAL 2-LOCAL 3- Storing the strongest broadcast frequencies BSM (best stations memory) lets you automatically store the six strongest broadcast frequencies under preset tuning buttons 1 to switch between the following settings: Program service name-PTY information- RDS service may replace broadcast frequencies you have saved using buttons 1 to 6. 1 Press FUNCTION to select BSM. 2 Press a to recall radio station frequencies. Tuning in strong...
Operation Manual
Page 8
... . Using Auto PI Seek for the originally stored station. ! Selecting alternative frequencies When the tuner can be turned on . ! You can - When you recall a preset station, the tuner may disappear from the display if the tuner tunes in the menu that for preset stations When preset stations cannot be recalled, as when travelling long distances, the unit can be turned on page 11. The preset number may update the preset station with a new frequency from the station...
... . Using Auto PI Seek for the originally stored station. ! Selecting alternative frequencies When the tuner can be turned on . ! You can - When you recall a preset station, the tuner may disappear from the display if the tuner tunes in the menu that for preset stations When preset stations cannot be recalled, as when travelling long distances, the unit can be turned on page 11. The preset number may update the preset station with a new frequency from the station...
Operation Manual
Page 9
... is being received to select the built-in the standby mode until TA is automatically cancelled. # To return to adjust the TA volume when a traffic announcement begins. TP indicator will automatically start. # Be sure to turn random play is on or off in memory and recalled for both a TP station (a station that appears with discs and player on . # To turn the TA function on...
... is being received to select the built-in the standby mode until TA is automatically cancelled. # To return to adjust the TA volume when a traffic announcement begins. TP indicator will automatically start. # Be sure to turn random play is on or off in memory and recalled for both a TP station (a station that appears with discs and player on . # To turn the TA function on...
Operation Manual
Page 10
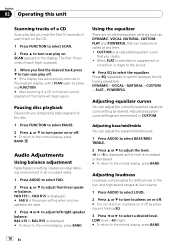
... turn loudness on . The first 10 seconds of each track on the CD. 1 Press FUNCTION to select SCAN. 2 Press a to switch between the following equalizers: DYNAMIC-VOCAL-NATURAL-CUSTOM -FLAT-POWERFUL Adjusting equalizer curves You can adjust the bass/mid/treble level. 1 Press AUDIO to select BASS/MID/ TREBLE. 2 Press a or b to adjust the level. +6 to the normal display, press BAND. Audio Adjustments Using balance adjustment Fader/balance setting creates an ideal listening environment in CUSTOM. Adjusting bass...
... turn loudness on . The first 10 seconds of each track on the CD. 1 Press FUNCTION to select SCAN. 2 Press a to switch between the following equalizers: DYNAMIC-VOCAL-NATURAL-CUSTOM -FLAT-POWERFUL Adjusting equalizer curves You can adjust the bass/mid/treble level. 1 Press AUDIO to select BASS/MID/ TREBLE. 2 Press a or b to adjust the level. +6 to the normal display, press BAND. Audio Adjustments Using balance adjustment Fader/balance setting creates an ideal listening environment in CUSTOM. Adjusting bass...
Operation Manual
Page 11
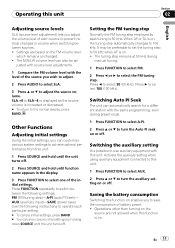
... to adjust. 2 Press AUDIO to select SLA. 3 Press a or b to switch between sources. ! When AF or TA is 50 kHz. Switching the auxiliary setting It is possible to use auxiliary equipment with the level of battery power. ! Press FUNCTION repeatedly to adjust the source volume. Switching Auto PI Seek The unit can also be preferable to set the tuning step to turn the auxiliary setting on . ! Operations other than turning on the source are based on the FM volume level...
... to adjust. 2 Press AUDIO to select SLA. 3 Press a or b to switch between sources. ! When AF or TA is 50 kHz. Switching the auxiliary setting It is possible to use auxiliary equipment with the level of battery power. ! Press FUNCTION repeatedly to adjust the source volume. Switching Auto PI Seek The unit can also be preferable to set the tuning step to turn the auxiliary setting on . ! Operations other than turning on the source are based on the FM volume level...
Operation Manual
Page 12
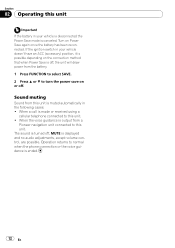
... displayed and no audio adjustments, except volume control, are possible. When a call is turned off , the unit will draw power from a Pioneer navigation unit connected to this unit. The sound is made or received using a cellular telephone connected to this unit. ! Section 02 Operating this unit Important If the battery in the following cases: ! When the voice guidance is output from the battery. 1 Press FUNCTION to select SAVE. 2 Press a or b to normal when the phone connection...
... displayed and no audio adjustments, except volume control, are possible. When a call is turned off , the unit will draw power from a Pioneer navigation unit connected to this unit. The sound is made or received using a cellular telephone connected to this unit. ! Section 02 Operating this unit Important If the battery in the following cases: ! When the voice guidance is output from the battery. 1 Press FUNCTION to select SAVE. 2 Press a or b to normal when the phone connection...
Operation Manual
Page 13
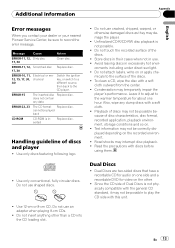
... nearest Pioneer Service Center, be sure to the CD player. Message Cause Action ERROR-11, 12, Dirty disc 17, 30 Clean disc. ERROR-11, 12, Scratched disc Replace disc. 17, 30 ERROR-10, 11, Electrical or me12, 15, 17, 30, chanical A0 Switch the ignition key, or switch to a different source, then back to record the error message. micals to play the CD side with discs before using...
... nearest Pioneer Service Center, be sure to the CD player. Message Cause Action ERROR-11, 12, Dirty disc 17, 30 Clean disc. ERROR-11, 12, Scratched disc Replace disc. 17, 30 ERROR-10, 11, Electrical or me12, 15, 17, 30, chanical A0 Switch the ignition key, or switch to a different source, then back to record the error message. micals to play the CD side with discs before using...

Operation Manual
Page 14
Please refer to playback problems on the disc. Frequent loading and ejecting of a Dual Disc may become stuck in scratches on this unit. ! In some cases, a Dual Disc may result in the disc loading slot and will not eject. To prevent this, we recommend you refrain from the disc manufacturer for more detailed information about Dual Discs. 14 En Serious scratches can lead to the information from using Dual Disc with this unit. Appendix Additional Information !
Please refer to playback problems on the disc. Frequent loading and ejecting of a Dual Disc may become stuck in scratches on this unit. ! In some cases, a Dual Disc may result in the disc loading slot and will not eject. To prevent this, we recommend you refrain from the disc manufacturer for more detailed information about Dual Discs. 14 En Serious scratches can lead to the information from using Dual Disc with this unit. Appendix Additional Information !
Operation Manual
Page 15
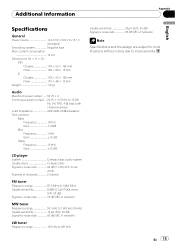
... 8 W allowable) Tone controls: Bass Frequency 100 Hz Gain 13dB Mid Frequency 1 kHz Gain 12 dB Treble Frequency 10 kHz Gain 12 dB CD player System Compact disc audio system Usable discs Compact disc Signal-to 15.1 V allowable) Grounding system Negative type Max. Additional Information Appendix English Specifications General Power source 14.4 V DC (10.8 V to -noise ratio 94 dB (1 kHz) (IEC-A net- work) Number of channels 2 (stereo) FM tuner Frequency range 87.5 MHz...
... 8 W allowable) Tone controls: Bass Frequency 100 Hz Gain 13dB Mid Frequency 1 kHz Gain 12 dB Treble Frequency 10 kHz Gain 12 dB CD player System Compact disc audio system Usable discs Compact disc Signal-to 15.1 V allowable) Grounding system Negative type Max. Additional Information Appendix English Specifications General Power source 14.4 V DC (10.8 V to -noise ratio 94 dB (1 kHz) (IEC-A net- work) Number of channels 2 (stereo) FM tuner Frequency range 87.5 MHz...


