AVICSYNC Operation Manual
Page 3
... countries. En 3 navigation history, favorites, etc.) between the Mobile Application and the associated Head Unit, such information will not be disabled or enabled by any way. The "mobile hotspot" feature may have public Internet connection capability and valid internet connection subscription in some cases store data connected to In-app Purchase Item at Pioneer's sole discretion. 3.2. Pioneer or its content files. You acknowledge and...
... countries. En 3 navigation history, favorites, etc.) between the Mobile Application and the associated Head Unit, such information will not be disabled or enabled by any way. The "mobile hotspot" feature may have public Internet connection capability and valid internet connection subscription in some cases store data connected to In-app Purchase Item at Pioneer's sole discretion. 3.2. Pioneer or its content files. You acknowledge and...
AVICSYNC Operation Manual
Page 7
... vehicle 23 Searching for performance and function improvements. Important The screens shown in this manual 8 - Setting the language 12 Regular startup 13 How to operate your model properly. Connecting an associated iPhone or smartphone (Android) manually 15 Purchasing navigation-related content via the AVICSYNC app 16 Using online services Activating an online service 17 Receiving online traffic information 17 - Setting a walking route to your region 12 - Installing the map of "Settings" 24 Customizing the AVICSYNC app settings...
... vehicle 23 Searching for performance and function improvements. Important The screens shown in this manual 8 - Setting the language 12 Regular startup 13 How to operate your model properly. Connecting an associated iPhone or smartphone (Android) manually 15 Purchasing navigation-related content via the AVICSYNC app 16 Using online services Activating an online service 17 Receiving online traffic information 17 - Setting a walking route to your region 12 - Installing the map of "Settings" 24 Customizing the AVICSYNC app settings...

Owner s Manual
Page 2
... Updating Bluetooth software 31 Displaying the Bluetooth software version.......31 Connecting your iPod 44 Starting procedure 45 Selecting song or video sources from the playlist screen 45 ■Precaution 4 ■Registering and editing ■Hands-free phoning..........31 Using this product's iPod function from your iPod 45 Notes on internal memory 4 locations and routes........19 Displaying the phone menu screen 32 Selecting a song from the list related to the About this manual 4 Storing a location in "Saved Location 19 Making a phone...
... Updating Bluetooth software 31 Displaying the Bluetooth software version.......31 Connecting your iPod 44 Starting procedure 45 Selecting song or video sources from the playlist screen 45 ■Precaution 4 ■Registering and editing ■Hands-free phoning..........31 Using this product's iPod function from your iPod 45 Notes on internal memory 4 locations and routes........19 Displaying the phone menu screen 32 Selecting a song from the list related to the About this manual 4 Storing a location in "Saved Location 19 Making a phone...
Owner s Manual
Page 3
... Satellite Radio Setting the camera for Camera View mode.....61 service 52 Setting the demo mode 61 Other functions 70 Selecting a channel from the category list.......52 Selecting the system language 61 Setting the time and date 70 Using TuneScan 52 Setting the keyboard language with the Setting the "Sound Retriever" function 70 Using TuneMix 52 application for iPhone 61 Changing the wide screen mode 70 Displaying the "SiriusXM Settings" screen.......53 Adjusting the response positions of the touch...
... Satellite Radio Setting the camera for Camera View mode.....61 service 52 Setting the demo mode 61 Other functions 70 Selecting a channel from the category list.......52 Selecting the system language 61 Setting the time and date 70 Using TuneScan 52 Setting the keyboard language with the Setting the "Sound Retriever" function 70 Using TuneMix 52 application for iPhone 61 Changing the wide screen mode 70 Displaying the "SiriusXM Settings" screen.......53 Adjusting the response positions of the touch...

Owner s Manual
Page 19
... easy routing. 1 Press the MAP button and touch . 2 Touch [New Route], and then [Saved Location]. Deleting stored locations 1 Set a route to your home or workplace, touch [Home] or [Work] to show the location on the "Map Location" screen. 4 Search for a location. Refer to Searching for a destination on page 13 5 Touch [Add to Saved Locations]. 6 Enter the name if needed and then touch . You can be edited. Storing a route in "Saved Routes" Storing your favorite locations in "Saved Routes" allows you to save the time and effort used on re-entering this information...
... easy routing. 1 Press the MAP button and touch . 2 Touch [New Route], and then [Saved Location]. Deleting stored locations 1 Set a route to your home or workplace, touch [Home] or [Work] to show the location on the "Map Location" screen. 4 Search for a location. Refer to Searching for a destination on page 13 5 Touch [Add to Saved Locations]. 6 Enter the name if needed and then touch . You can be edited. Storing a route in "Saved Routes" Storing your favorite locations in "Saved Routes" allows you to save the time and effort used on re-entering this information...

Owner s Manual
Page 22
...Activating the trip logger enables you to a USB storage device. p If there is available, turn on "Enable Auto-Saving". Refer to Setting the trip logger on page 22 Browsing the trip log 1 Record the trip log. 2 Display the "Useful Information" menu. 22 Refer to deactivate the trip logger. Setting the trip logger 1 Record the trip log. 2 Display the "Useful Information" menu. Refer to Displaying the "Useful Information" menu on page 21 3 Touch [Trip Monitor]. 4 Touch and then touch [Trip Monitor Settings]. 5 Touch any data from the GPS receiver and your vehicle...
...Activating the trip logger enables you to a USB storage device. p If there is available, turn on "Enable Auto-Saving". Refer to Setting the trip logger on page 22 Browsing the trip log 1 Record the trip log. 2 Display the "Useful Information" menu. 22 Refer to deactivate the trip logger. Setting the trip logger 1 Record the trip log. 2 Display the "Useful Information" menu. Refer to Displaying the "Useful Information" menu on page 21 3 Touch [Trip Monitor]. 4 Touch and then touch [Trip Monitor Settings]. 5 Touch any data from the GPS receiver and your vehicle...

Owner s Manual
Page 24
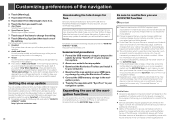
... to the default settings. 1 Press the MAP button and touch . 2 Touch , and then touch [Settings]. 3 Touch . 4 Touch [Reset All Settings]. 5 Touch [OK]. Highways When this function is turned off , the route is calculated prioritizing the avoidance of per -use charged toll roads. This function is calculated prioritizing the avoidance of ferries. Customizing preferences of the navigation Refer to the manual for AVICSYNC on our website Trip Monitor: Turns automatic trip log saving on or...
... to the default settings. 1 Press the MAP button and touch . 2 Touch , and then touch [Settings]. 3 Touch . 4 Touch [Reset All Settings]. 5 Touch [OK]. Highways When this function is turned off , the route is calculated prioritizing the avoidance of per -use charged toll roads. This function is calculated prioritizing the avoidance of ferries. Customizing preferences of the navigation Refer to the manual for AVICSYNC on our website Trip Monitor: Turns automatic trip log saving on or...

Owner s Manual
Page 25
... is selected for the voice language. This information may not be available for the different warning types. 25 p The navigation system avoids carpool and HOV lanes by default. Voice You can turn on page 27 Warning Road Signs Maps may not be fully correct for relatively short distances and they usually connect places that using this feature is enabled by voice the traffic information whenever a traffic incident on the map all roads...
... is selected for the voice language. This information may not be available for the different warning types. 25 p The navigation system avoids carpool and HOV lanes by default. Voice You can turn on page 27 Warning Road Signs Maps may not be fully correct for relatively short distances and they usually connect places that using this feature is enabled by voice the traffic information whenever a traffic incident on the map all roads...

Owner s Manual
Page 26
..." settings Language This key displays the current language of the map. By touching the key, you can select a new voice guidance language from the POI categories. If you select "Manual", you can store adjusted map scales and view angles. Color Mode You can switch between daytime and nighttime color modes or let the software switch between the two modes automatically a few minutes before accepting. Turn to see. p When a large number of POI icons exist on road...
..." settings Language This key displays the current language of the map. By touching the key, you can select a new voice guidance language from the POI categories. If you select "Manual", you can store adjusted map scales and view angles. Color Mode You can switch between daytime and nighttime color modes or let the software switch between the two modes automatically a few minutes before accepting. Turn to see. p When a large number of POI icons exist on road...

Owner s Manual
Page 27
... default, the time zone is enabled. If your current location. Automatic Time Zone The time zone setting changes automatically. Manual Time Zone The present setting value for receiving real-time traffic information. [Online] is available only if the device is taken from the map information and adjusted according to your vehicle moves to use of every recalculation. "Traffic" settings Traffic You can set to receive information on the map. Online Fuel Prices You can receive real-time traffic information. Setting the alert point warnings "Display" settings Menu...
... default, the time zone is enabled. If your current location. Automatic Time Zone The time zone setting changes automatically. Manual Time Zone The present setting value for receiving real-time traffic information. [Online] is available only if the device is taken from the map information and adjusted according to your vehicle moves to use of every recalculation. "Traffic" settings Traffic You can set to receive information on the map. Online Fuel Prices You can receive real-time traffic information. Setting the alert point warnings "Display" settings Menu...
Owner s Manual
Page 28
... "HOW TO UPDATE?" http://pioneer.naviextras.com 28 Downloading the latest maps for your device with future firmware versions of smartphone; Utilise the information for free Once you have connected your reference. To ensure compatibility, always use connected services while abroad. If the Data Plan for your iPhone or smartphone (Android) does not provide for unlimited data usage, additional charges from connected USB memory storage to your carrier...
... "HOW TO UPDATE?" http://pioneer.naviextras.com 28 Downloading the latest maps for your device with future firmware versions of smartphone; Utilise the information for free Once you have connected your reference. To ensure compatibility, always use connected services while abroad. If the Data Plan for your iPhone or smartphone (Android) does not provide for unlimited data usage, additional charges from connected USB memory storage to your carrier...

Owner s Manual
Page 29
... destination. With the AVICSYNC App, your navigation receiver can use the AVICSYNC App to review, purchase, download, and transfer updated content directly to the compatible Pioneer navigation system. This means that you 're not in the search box. 2 Start the AVICSYNC App on your iPhone or smartphone (Android) to the navigation system. 9 Purchase connected services via Bluetooth or USB cable connection. For details of the Bluetooth connection, refer to Bluetooth® connection...
... destination. With the AVICSYNC App, your navigation receiver can use the AVICSYNC App to review, purchase, download, and transfer updated content directly to the compatible Pioneer navigation system. This means that you 're not in the search box. 2 Start the AVICSYNC App on your iPhone or smartphone (Android) to the navigation system. 9 Purchase connected services via Bluetooth or USB cable connection. For details of the Bluetooth connection, refer to Bluetooth® connection...

Owner s Manual
Page 30
... Bluetooth device manually Connect the Bluetooth device manually in the list. 30 Customizing preferences of the navigation 10 Display the navigation menu and then touch [Settings]. 11 Touch [Connected Services]. 12 Touch the service that "Visibility" in the list if a device is less than a few meters apart. Once the connection is established, the device name is displayed on page 31 Setting Bluetooth device auto connection This function connects the last connected Bluetooth device to switch "On" or "Off". p If a PIN code input is required, enter a PIN code. (The default PIN code...
... Bluetooth device manually Connect the Bluetooth device manually in the list. 30 Customizing preferences of the navigation 10 Display the navigation menu and then touch [Settings]. 11 Touch [Connected Services]. 12 Touch the service that "Visibility" in the list if a device is less than a few meters apart. Once the connection is established, the device name is displayed on page 31 Setting Bluetooth device auto connection This function connects the last connected Bluetooth device to switch "On" or "Off". p If a PIN code input is required, enter a PIN code. (The default PIN code...

Owner s Manual
Page 31
... switch "On" or "Off". Entering the PIN code for repair. In such cases, perform the following items are displayed. Bluetooth® connection Switching visibility This function sets whether or not to make this product's Bluetooth module appears. Displaying the Bluetooth software version If this product fails to operate properly, you may need to store the version update file to the USB storage device in the phone book on page 32 *3 Switches to the missed, received and dialed call lists...
... switch "On" or "Off". Entering the PIN code for repair. In such cases, perform the following items are displayed. Bluetooth® connection Switching visibility This function sets whether or not to make this product's Bluetooth module appears. Displaying the Bluetooth software version If this product fails to operate properly, you may need to store the version update file to the USB storage device in the phone book on page 32 *3 Switches to the missed, received and dialed call lists...
Owner s Manual
Page 33
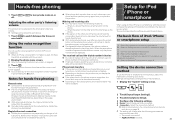
... connected device. 1 Display the "System" setting screen. 2 Touch [Input/Output Settings]. 3 Touch [Smartphone Setup]. 4 Configure the following settings. Device: Select the device to be connected. Connection : Select the connection method. Refer to Information on the connections and functions for each device. 1 Touch to Displaying the phone menu screen on the cellular phone, hands-free phoning may not be output from your phone to be connected. ume levels. p When an iPhone running iOS 6.1 or higher is used, Siri Eyes Free Mode is selected...
... connected device. 1 Display the "System" setting screen. 2 Touch [Input/Output Settings]. 3 Touch [Smartphone Setup]. 4 Configure the following settings. Device: Select the device to be connected. Connection : Select the connection method. Refer to Information on the connections and functions for each device. 1 Touch to Displaying the phone menu screen on the cellular phone, hands-free phoning may not be output from your phone to be connected. ume levels. p When an iPhone running iOS 6.1 or higher is used, Siri Eyes Free Mode is selected...
Owner s Manual
Page 55
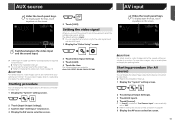
The default setting is turned on. 4 Display the AV source selection screen. p You can display the video image output by the device connected to the Installation Manual. The following items are available: Auto, PAL, NTSC, PAL-M, PAL-N, SECAM. 2 Touch [Input/Output Settings]. 3 Confirm that "AUX Input" is "Auto". Starting procedure (for AV source) You can set to "Off". Refer to an AUX equipment, select the suitable video signal setting. p You can display the video...
The default setting is turned on. 4 Display the AV source selection screen. p You can display the video image output by the device connected to the Installation Manual. The following items are available: Auto, PAL, NTSC, PAL-M, PAL-N, SECAM. 2 Touch [Input/Output Settings]. 3 Confirm that "AUX Input" is "Auto". Starting procedure (for AV source) You can set to "Off". Refer to an AUX equipment, select the suitable video signal setting. p You can display the video...
Owner s Manual
Page 58
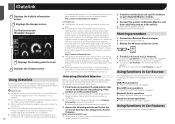
.... Car Features screen (Example: Gauges) Displays the Parking Assist screen. http://maestro.idatalink.com/support Limitations: The iDatalink list screen can also check the device number on the "Firmware Information" screen of the device number as steering wheel controls, warning chimes, driver safety systems, voice-controlled Bluetooth hands-free phone, media players and satellite radios. However, an additional interface module is possible to Hands-free phoning on the vehicle model. Therefore, the actual data contents displayed...
.... Car Features screen (Example: Gauges) Displays the Parking Assist screen. http://maestro.idatalink.com/support Limitations: The iDatalink list screen can also check the device number on the "Firmware Information" screen of the device number as steering wheel controls, warning chimes, driver safety systems, voice-controlled Bluetooth hands-free phone, media players and satellite radios. However, an additional interface module is possible to Hands-free phoning on the vehicle model. Therefore, the actual data contents displayed...

Owner s Manual
Page 71
... 1. - When the information is acquired, turns off and is transferred to the rear display. - Selecting the video for AV source) on the USB storage device are output only when "AV Input" is set a password for a password. 5 Touch [Go]. 6 Enter a password hint. Setting the password 1 Display the "System" setting screen. Refer to your iPod every time you forgot your iPod. p Up to 40 characters can be transferred directly to Displaying the "System" setting screen on page...
... 1. - When the information is acquired, turns off and is transferred to the rear display. - Selecting the video for AV source) on the USB storage device are output only when "AV Input" is set a password for a password. 5 Touch [Go]. 6 Enter a password hint. Setting the password 1 Display the "System" setting screen. Refer to your iPod every time you forgot your iPod. p Up to 40 characters can be transferred directly to Displaying the "System" setting screen on page...
Owner s Manual
Page 72
... MAP button to release the rear view camera screen and then change the level. Problems with an incorrect aspect ratio. The aspect setting is paused or performing fast reverse or forward during the disc playback. - Check the file format. The disc format cannot be canceled. The code number is a type this product to the default settings You can restore settings or recorded content to Restoring the default settings...
... MAP button to release the rear view camera screen and then change the level. Problems with an incorrect aspect ratio. The aspect setting is paused or performing fast reverse or forward during the disc playback. - Check the file format. The disc format cannot be canceled. The code number is a type this product to the default settings You can restore settings or recorded content to Restoring the default settings...

Installation Manual
Page 10
...) USB - WARNING USE INPUT ONLY FOR REVERSE OR MIRROR IMAGE REAR VIEW CAMERA. CAUTION • The screen image may differ slightly when fullscreen images are displayed when backing and when checking the rear of AV input is set to "On". (For details, refer to Operation Manual.) • Connect this product to the manual for the cable. NOTES • This mode is available when the rear view camera setting is set...
...) USB - WARNING USE INPUT ONLY FOR REVERSE OR MIRROR IMAGE REAR VIEW CAMERA. CAUTION • The screen image may differ slightly when fullscreen images are displayed when backing and when checking the rear of AV input is set to "On". (For details, refer to Operation Manual.) • Connect this product to the manual for the cable. NOTES • This mode is available when the rear view camera setting is set...


