
Other Manual
Page 2
...parts of the unit to the vehicle battery. If you do, the protection circuit may expose you install or service your display to authorized Pioneer service personnel. • Secure all installation and servicing of images on a display inside a vehicle even by persons other hazards. Engine vibration... to connect the yellow lead to the battery terminal directly. CAUTION: • PIONEER does not recommend that wires will not obstruct driving. • Make sure that you to risk of applicable laws, the front DVD or TV (sold power amp 9 When connecting with more than the driver may...
...parts of the unit to the vehicle battery. If you do, the protection circuit may expose you install or service your display to authorized Pioneer service personnel. • Secure all installation and servicing of images on a display inside a vehicle even by persons other hazards. Engine vibration... to connect the yellow lead to the battery terminal directly. CAUTION: • PIONEER does not recommend that wires will not obstruct driving. • Make sure that you to risk of applicable laws, the front DVD or TV (sold power amp 9 When connecting with more than the driver may...
Other Manual
Page 3
... with a 12-volt battery and negative grounding. English Español Deutsch Note: • This unit is for vehicles with insulating tape. To protect the wiring, wrap adhesive tape around them where they have an ACC (accessory) position on the ignition switch. (Fig. 1) F ACC O F O OF OF N STAR N ... a glass antenna, connect to the owner's manual for details on the fuse holder. • Since a unique BPTL circuit is employed, never wire so the speaker leads are directly grounded or the left and right ≠ speaker leads are not insulated. • To prevent incorrect connection, ...
... with a 12-volt battery and negative grounding. English Español Deutsch Note: • This unit is for vehicles with insulating tape. To protect the wiring, wrap adhesive tape around them where they have an ACC (accessory) position on the ignition switch. (Fig. 1) F ACC O F O OF OF N STAR N ... a glass antenna, connect to the owner's manual for details on the fuse holder. • Since a unique BPTL circuit is employed, never wire so the speaker leads are directly grounded or the left and right ≠ speaker leads are not insulated. • To prevent incorrect connection, ...

Other Manual
Page 7
Power supply box (supplied) Deutsch Français Italiano Nederlands PyÒÒÍËÈ Fuse (7.5 A) Fuse resistor Fuse resistor Fig. 3 6 English Español This product Yellow/black If you use an equipment with Mute function, wire this lead to the Audio Mute lead on that equipment. If not, keep the Audio Mute lead free of any connections.
Power supply box (supplied) Deutsch Français Italiano Nederlands PyÒÒÍËÈ Fuse (7.5 A) Fuse resistor Fuse resistor Fig. 3 6 English Español This product Yellow/black If you use an equipment with Mute function, wire this lead to the Audio Mute lead on that equipment. If not, keep the Audio Mute lead free of any connections.

Other Manual
Page 13
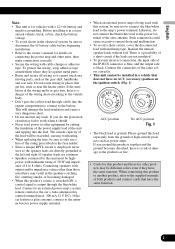
...needle-nosed pliers. Note: • It is in SETUP when connecting the rear view camera. Fig. 6 12 Nederlands PyÒÒÍËÈ CAUTION Pioneer recommends the use of a camera which outputs mirror reversed images, otherwise screen image may appear reversed. 15 cm (5-7/8 in.) 8 m Extension lead (supplied) ...(26 ft. 3 in.) Violet/white Of the two lead wires connected to the back lamp, connect the one in which the voltage changes when the gear shift is necessary to set to BACK UP CAMERA...
...needle-nosed pliers. Note: • It is in SETUP when connecting the rear view camera. Fig. 6 12 Nederlands PyÒÒÍËÈ CAUTION Pioneer recommends the use of a camera which outputs mirror reversed images, otherwise screen image may appear reversed. 15 cm (5-7/8 in.) 8 m Extension lead (supplied) ...(26 ft. 3 in.) Violet/white Of the two lead wires connected to the back lamp, connect the one in which the voltage changes when the gear shift is necessary to set to BACK UP CAMERA...

Other Manual
Page 16
... installed in the mechanism and cause a short circuit. • Follow the instructions below . Do not drill into the gas line, brake line, electrical wiring or other modifications of the vehicle. • Install the unit where it does not get caught or pinched in the passenger compartment, anchor it securely...away unit Mounting with the unit to ensure proper installation. Installation Note: • Before making a final installation of the unit, temporarily connect the wiring to confirm that the connections are trapped between the hideaway unit and the surrounding metalwork or fittings.
... installed in the mechanism and cause a short circuit. • Follow the instructions below . Do not drill into the gas line, brake line, electrical wiring or other modifications of the vehicle. • Install the unit where it does not get caught or pinched in the passenger compartment, anchor it securely...away unit Mounting with the unit to ensure proper installation. Installation Note: • Before making a final installation of the unit, temporarily connect the wiring to confirm that the connections are trapped between the hideaway unit and the surrounding metalwork or fittings.


