Owner's Manual
Page 2
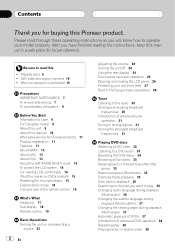
... RADIO READY mark 14 To protect the LCD screen 14 For viewing LCD comfortably 14 What the marks on DVDs indicate 15 Resetting the microprocessor 15 Feature demo mode 16 Use and care of the remote control 16 What's What Head unit 17 Sub-display 18 Remote control 19 Basic Operations Turning the unit on and selecting a source 23 2 En Adjusting the volume 24 Turning the unit off 24 Using the rear display 24 Touch panel key basic operation 25 Opening...
... RADIO READY mark 14 To protect the LCD screen 14 For viewing LCD comfortably 14 What the marks on DVDs indicate 15 Resetting the microprocessor 15 Feature demo mode 16 Use and care of the remote control 16 What's What Head unit 17 Sub-display 18 Remote control 19 Basic Operations Turning the unit on and selecting a source 23 2 En Adjusting the volume 24 Turning the unit off 24 Using the rear display 24 Touch panel key basic operation 25 Opening...
Owner's Manual
Page 3
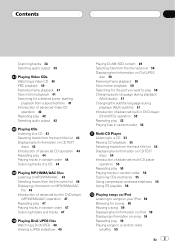
...-in DVD player (MP3/WMA/AAC) operation 47 Repeating play 47 Playing tracks in random order 47 Scanning folders and tracks 47 Playing DivX/JPEG files Watching a DivX/JPEG 48 Viewing a JPEG slideshow 49 Playing DivX® VOD content 49 Selecting files from the file name list 50 Displaying text information on DivX/JPEG disc 50 Frame-by-frame playback 50 Slow motion playback 50 Searching for the part...
...-in DVD player (MP3/WMA/AAC) operation 47 Repeating play 47 Playing tracks in random order 47 Scanning folders and tracks 47 Playing DivX/JPEG files Watching a DivX/JPEG 48 Viewing a JPEG slideshow 49 Playing DivX® VOD content 49 Selecting files from the file name list 50 Displaying text information on DivX/JPEG disc 50 Frame-by-frame playback 50 Slow motion playback 50 Searching for the part...

Owner's Manual
Page 4
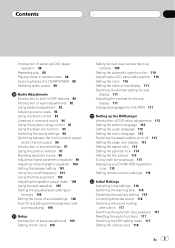
... the SIRIUS channel select mode 67 Selecting a channel 67 Switching the display 67 Switching between the detail information display and preset list display 67 Storing and recalling broadcast stations 68 Using the MyMix function 68 Using the Game Alert function 70 Displaying the Radio ID 71 Bluetooth Audio Listening to songs on BT Audio (Bluetooth audio player) 72 Function operation 73 Connecting a Bluetooth audio player 73 Disconnecting a Bluetooth audio player 74 Displaying BD (Bluetooth Device) address 74 4 En Bluetooth Telephone Hands-free phoning with cellular phones featuring Bluetooth...
... the SIRIUS channel select mode 67 Selecting a channel 67 Switching the display 67 Switching between the detail information display and preset list display 67 Storing and recalling broadcast stations 68 Using the MyMix function 68 Using the Game Alert function 70 Displaying the Radio ID 71 Bluetooth Audio Listening to songs on BT Audio (Bluetooth audio player) 72 Function operation 73 Connecting a Bluetooth audio player 73 Disconnecting a Bluetooth audio player 74 Displaying BD (Bluetooth Device) address 74 4 En Bluetooth Telephone Hands-free phoning with cellular phones featuring Bluetooth...
Owner's Manual
Page 5
... graphic equalizer 100 Setting the speaker setting 101 Using the cut-off frequency 101 Using the time alignment 103 Adjusting the speaker output levels 104 Using the auto-equalizer 105 Storing the adjusted audio settings in memory 106 Editing the name of sound settings 106 Auto TA and EQ (auto-time alignment and auto-equalizing) 106 Setup Introduction of setup adjustments 109 Setting the AV input 109 Setting for rear view camera (back up the DVD player Introduction of rear display 111 Switching the dimmer setting for sub- display 111 Changing languages...
... graphic equalizer 100 Setting the speaker setting 101 Using the cut-off frequency 101 Using the time alignment 103 Adjusting the speaker output levels 104 Using the auto-equalizer 105 Storing the adjusted audio settings in memory 106 Editing the name of sound settings 106 Auto TA and EQ (auto-time alignment and auto-equalizing) 106 Setup Introduction of setup adjustments 109 Setting the AV input 109 Setting for rear view camera (back up the DVD player Introduction of rear display 111 Switching the dimmer setting for sub- display 111 Changing languages...
Owner's Manual
Page 9
... discs DVD, Video CD and CD discs that you to chemicals listed on this player. For disposal or recycling information, please contact your own security and convenience, be played back on the enclosed warranty card. CAUTION ! Also, this unit to come into contact with the product may be reprogrammed. If the battery is located on the bottom of this number on...
... discs DVD, Video CD and CD discs that you to chemicals listed on this player. For disposal or recycling information, please contact your own security and convenience, be played back on the enclosed warranty card. CAUTION ! Also, this unit to come into contact with the product may be reprogrammed. If the battery is located on the bottom of this number on...
Owner's Manual
Page 24
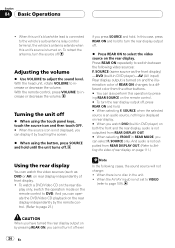
... To watch the video sources (such as the front display) -DVD (built-in DVD player)-AV (AV input) Rear display output is turned on and the illumination color of REAR ON changes to select the video source on the remote control. # To turn the rear display output off. % Press REAR ON to a different color from REAR DISPLAY OUT. # When selecting FRONT in the unit. ! And audio is no disc in REAR MODE, you press SOURCE and hold until the unit turns off. Adjusting the volume % Use VOLUME to Setting the video...
... To watch the video sources (such as the front display) -DVD (built-in DVD player)-AV (AV input) Rear display output is turned on and the illumination color of REAR ON changes to select the video source on the remote control. # To turn the rear display output off. % Press REAR ON to a different color from REAR DISPLAY OUT. # When selecting FRONT in the unit. ! And audio is no disc in REAR MODE, you press SOURCE and hold until the unit turns off. Adjusting the volume % Use VOLUME to Setting the video...
Owner's Manual
Page 78
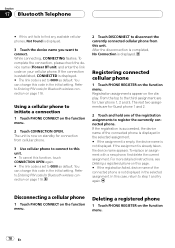
... cellular phones, Not Found is displayed. 3 Touch the device name you want to 0000 as default. If the connection is established, CONNECTED is displayed. # The link code is set to 0000 as default. You can change this unit. Refer to Entering PIN code for Bluetooth wireless connection on page 118. From the top to disconnect the currently connected cellular phone from cellular phone. 3 Use cellular phone to connect to this unit. # To...
... cellular phones, Not Found is displayed. 3 Touch the device name you want to 0000 as default. If the connection is established, CONNECTED is displayed. # The link code is set to 0000 as default. You can change this unit. Refer to Entering PIN code for Bluetooth wireless connection on page 118. From the top to disconnect the currently connected cellular phone from cellular phone. 3 Use cellular phone to connect to this unit. # To...
Owner's Manual
Page 103
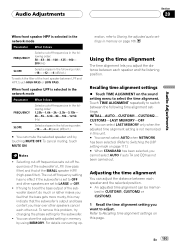
... MEMORY-OFF # You can mute the selected speaker unit by using MEMORY. When front speaker LPF is selected in the network mode Parameter What it does FREQUENCY Selects cut-off frequencies in the following order: 50-63-80-100-125-160- 200 (Hz) SLOPE Selects slopes in the following time alignment settings: INITIAL-AUTO-CUSTOM1-CUSTOM2- Touch TIME ALIGNMENT repeatedly to Storing the adjusted audio settings...
... MEMORY-OFF # You can mute the selected speaker unit by using MEMORY. When front speaker LPF is selected in the network mode Parameter What it does FREQUENCY Selects cut-off frequencies in the following order: 50-63-80-100-125-160- 200 (Hz) SLOPE Selects slopes in the following time alignment settings: INITIAL-AUTO-CUSTOM1-CUSTOM2- Touch TIME ALIGNMENT repeatedly to Storing the adjusted audio settings...

Owner's Manual
Page 104
... Switching the DSP setting mode on the sound setting menu to Recalling the speaker output level settings on the sound setting menu and then touch TEST TONE. Front right speaker-Rear right speaker-Rear center speaker-Rear left speaker-Front center speaker- For details concerning operation, refer to Adjusting the speaker output levels finely on page 106. Adjusting the speaker output levels using MEMORY. To adjust them separately, please refer to Storing the adjusted audio settings in memory on the next page. # The settings do not appear...
... Switching the DSP setting mode on the sound setting menu to Recalling the speaker output level settings on the sound setting menu and then touch TEST TONE. Front right speaker-Rear right speaker-Rear center speaker-Rear left speaker-Front center speaker- For details concerning operation, refer to Adjusting the speaker output levels finely on page 106. Adjusting the speaker output levels using MEMORY. To adjust them separately, please refer to Storing the adjusted audio settings in memory on the next page. # The settings do not appear...
Owner's Manual
Page 107
... EQ may not be replaced. ! Set the power amp's input level to a power amp with the car engine and air conditioning switched off frequency for low sounds due to OFF, audio does not output from the speaker even when the speaker is connected to the standard position. ! In addition, the cut power to the highest frequency. ! Audio Adjustments Section 20 Audio Adjustments Before operating the auto TA and EQ function ! Also cut -off...
... EQ may not be replaced. ! Set the power amp's input level to a power amp with the car engine and air conditioning switched off frequency for low sounds due to OFF, audio does not output from the speaker even when the speaker is connected to the standard position. ! In addition, the cut power to the highest frequency. ! Audio Adjustments Section 20 Audio Adjustments Before operating the auto TA and EQ function ! Also cut -off...
Owner's Manual
Page 108
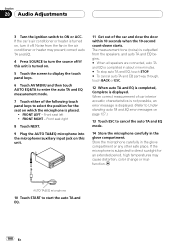
... air conditioner or heater may cause distortion, color change or malfunction. Noise from the speakers, and auto TA and EQ begins. # When all speakers are connected, auto TA and EQ is completed in the glove compartment or any other safe place. FRONT RIGHT - FRONT LEFT - Section 20 Audio Adjustments 3 Turn the ignition switch to start the auto TA and EQ. 108 En
... air conditioner or heater may cause distortion, color change or malfunction. Noise from the speakers, and auto TA and EQ begins. # When all speakers are connected, auto TA and EQ is completed in the glove compartment or any other safe place. FRONT RIGHT - FRONT LEFT - Section 20 Audio Adjustments 3 Turn the ignition switch to start the auto TA and EQ. 108 En

Owner's Manual
Page 109
...- External video component (such as AV source. ! DVD player connected with RCA cable # When a DVD player is connected with an AVBUS cable, do not select S-DVD otherwise no picture will be distorted. En 109 Setup Section 21 Setup Introduction of a camera which outputs mirror reversed images, otherwise screen image may be displayed even if you select S-DVD as S-DVD source. % Touch AV INPUT on the underneath of the hide-away unit to the appropriate position to select the AV input setting. S-DVD...
...- External video component (such as AV source. ! DVD player connected with RCA cable # When a DVD player is connected with an AVBUS cable, do not select S-DVD otherwise no picture will be distorted. En 109 Setup Section 21 Setup Introduction of a camera which outputs mirror reversed images, otherwise screen image may be displayed even if you select S-DVD as S-DVD source. % Touch AV INPUT on the underneath of the hide-away unit to the appropriate position to select the AV input setting. S-DVD...
Owner's Manual
Page 110
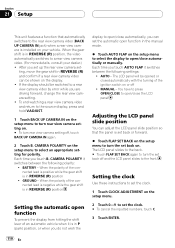
... REVERSE (R) position, the video automatically switches to a rear view camera video. (For more details, consult your vehicle. When the polarity of the connected lead is positive while the gear shift is in REVERSE (R) position ! To end watching a rear view camera video and return to the source display, press and hold V.ADJUST. 1 Touch BACK UP CAMERA IN on the setup menu to turn rear view camera setting on the setup menu to set the clock. # To cancel the inputted numbers, touch C. 3 Touch ENTER. 110 En CAMERA...
... REVERSE (R) position, the video automatically switches to a rear view camera video. (For more details, consult your vehicle. When the polarity of the connected lead is positive while the gear shift is in REVERSE (R) position ! To end watching a rear view camera video and return to the source display, press and hold V.ADJUST. 1 Touch BACK UP CAMERA IN on the setup menu to turn rear view camera setting on the setup menu to set the clock. # To cancel the inputted numbers, touch C. 3 Touch ENTER. 110 En CAMERA...
Owner's Manual
Page 111
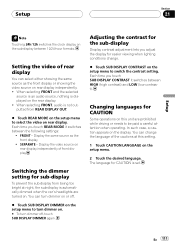
... easier viewing when lighting conditions change the language of the cautions at night, the sub-display is not outputted from being too bright at this unit are turned on the rear display. ! The language for sub-display To prevent the sub-display from REAR DISPLAY OUT. % Touch REAR MODE on the setup menu to be paid a careful attention when operating. Setting the video of front display Switching the dimmer setting for CAUTION is displayed on . You can turn dimmer on or off. % Touch SUB DISPLAY...
... easier viewing when lighting conditions change the language of the cautions at night, the sub-display is not outputted from being too bright at this unit are turned on the rear display. ! The language for sub-display To prevent the sub-display from REAR DISPLAY OUT. % Touch REAR MODE on the setup menu to be paid a careful attention when operating. Setting the video of front display Switching the dimmer setting for CAUTION is displayed on . You can turn dimmer on or off. % Touch SUB DISPLAY...
Owner's Manual
Page 116
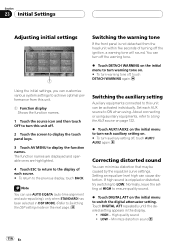
... sound 116 En Set each AUX source to ON when using auxiliary equipments, refer to Using the AUX source on page 122. % Touch AUX1/AUX2 on the initial menu to turn each source. # To return to display the function names. Setting an equalizer level high can turn warning tone on the initial menu to LOW. Touch DIGITAL ATT repeatedly until the desired setting appears in DSP MODE. (Refer to Switching the DSP setting mode on . # To turn...
... sound 116 En Set each AUX source to ON when using auxiliary equipments, refer to Using the AUX source on page 122. % Touch AUX1/AUX2 on the initial menu to turn each source. # To return to display the function names. Setting an equalizer level high can turn warning tone on the initial menu to LOW. Touch DIGITAL ATT repeatedly until the desired setting appears in DSP MODE. (Refer to Switching the DSP setting mode on . # To turn...
Owner's Manual
Page 120
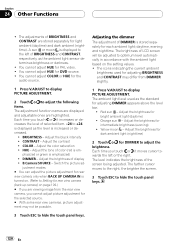
... adjust picture adjustment for rear view camera (back up camera) on page 109.) # If you are stored separately for PAL video. ! You cannot adjust COLOR or HUE for DVD source. ! Adjust the contrast ! Adjust the brightness for dark ambient light (nighttime) 2 Touch or for adjusting DIMMER appears above the level bar. ! The level indicates the brightness of display ! Adjust the tone of DIMMER is turned on the setting values. ! Adjusting the dimmer The adjustment of color (red is displayed...
... adjust picture adjustment for rear view camera (back up camera) on page 109.) # If you are stored separately for PAL video. ! You cannot adjust COLOR or HUE for DVD source. ! Adjust the contrast ! Adjust the brightness for dark ambient light (nighttime) 2 Touch or for adjusting DIMMER appears above the level bar. ! The level indicates the brightness of display ! Adjust the tone of DIMMER is turned on the setting values. ! Adjusting the dimmer The adjustment of color (red is displayed...
Owner's Manual
Page 122
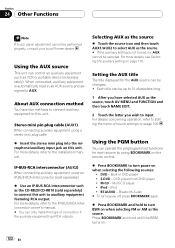
... device (sold separately). Using the PGM button You can be performed properly, consult your local Pioneer dealer. Bluetooth Audio # To turn BSM on when selecting the following sources: ! Stereo mini pin plug cable (AUX1) When connecting auxiliary equipment using BOOKMARK on the remote control. % Press BOOKMARK to the IP-BUS-RCA Interconnector owner's manual. # You can only make this unit. Setting the AUX title The title displayed for the AUX source can operate the preprogrammed functions for each source by using a stereo...
... device (sold separately). Using the PGM button You can be performed properly, consult your local Pioneer dealer. Bluetooth Audio # To turn BSM on when selecting the following sources: ! Stereo mini pin plug cable (AUX1) When connecting auxiliary equipment using BOOKMARK on the remote control. % Press BOOKMARK to the IP-BUS-RCA Interconnector owner's manual. # You can only make this unit. Setting the AUX title The title displayed for the AUX source can operate the preprogrammed functions for each source by using a stereo...

Owner's Manual
Page 127
..., an error message may appear on the inserted disc are Replace disc. All the files on the display. After checking, try again. Please check FL SP., Error. The microphone cannot pick up the measuring tone of car interior acoustic characteristics is as quiet as possible, and switch off the engine, air conditioner or heater. ! Correct the input level setting of the power amp connected to see...
..., an error message may appear on the inserted disc are Replace disc. All the files on the display. After checking, try again. Please check FL SP., Error. The microphone cannot pick up the measuring tone of car interior acoustic characteristics is as quiet as possible, and switch off the engine, air conditioner or heater. ! Correct the input level setting of the power amp connected to see...
Other Manual
Page 2
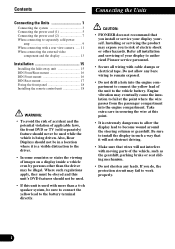
... wiring with a rear view camera .... 11 When connecting the external video component and the display 13 Installation 15 Installing the hide-away unit 15 DIN Front/Rear-mount 16 DIN Front-mount 16 DIN Rear-mount 17 Fixing the front panel 18 Installing the remote control unit 18 WARNING: • To avoid the risk of accident and the potential violation of applicable laws, the front DVD or TV (sold power amp...
... wiring with a rear view camera .... 11 When connecting the external video component and the display 13 Installation 15 Installing the hide-away unit 15 DIN Front/Rear-mount 16 DIN Front-mount 16 DIN Rear-mount 17 Fixing the front panel 18 Installing the remote control unit 18 WARNING: • To avoid the risk of accident and the potential violation of applicable laws, the front DVD or TV (sold power amp...
Other Manual
Page 3
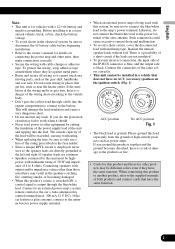
... remote control or the car's Auto-antenna relay control terminal (max. 300 mA 12 V DC). English Español Deutsch Note: • This unit is being used with this system, be sure not to connect the blue/white lead to the amp's power terminal. If the car features a glass antenna, connect to the antenna booster power supply terminal. • When an external power amp is for this product's source is switched ON, a control signal is output...
... remote control or the car's Auto-antenna relay control terminal (max. 300 mA 12 V DC). English Español Deutsch Note: • This unit is being used with this system, be sure not to connect the blue/white lead to the amp's power terminal. If the car features a glass antenna, connect to the antenna booster power supply terminal. • When an external power amp is for this product's source is switched ON, a control signal is output...


