Quick start guide
Page 1
Docking Entertainment System QUICK START MISE EN SERVICE RAPIDE INICIO RÁPIDO DC310 Thanks for dock operation. C B/C C DC 18V D E A ENGLISH Step A • Connect the supplied mains adapter to radio station). - Helpful hints: - If you have selected TUNER alarm mode, make sure you hear a double beep. Refer to switch off the set (See Tuning to the set's 18V DC jack and the plug into a wall outlet. Press and hold to set . CONTROL • Press ALM1 or ALM2. Helpful hints...
Docking Entertainment System QUICK START MISE EN SERVICE RAPIDE INICIO RÁPIDO DC310 Thanks for dock operation. C B/C C DC 18V D E A ENGLISH Step A • Connect the supplied mains adapter to radio station). - Helpful hints: - If you have selected TUNER alarm mode, make sure you hear a double beep. Refer to switch off the set (See Tuning to the set's 18V DC jack and the plug into a wall outlet. Press and hold to set . CONTROL • Press ALM1 or ALM2. Helpful hints...
Leaflet
Page 1
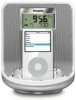
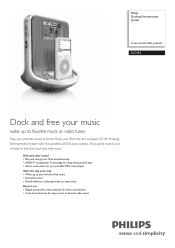
... deep and powerful bass • Aux-in connection for your portable MP3 music player Start the day your way • Wake up to your favorite iPod music • Dual alarm time • Gentle wake for easy access to kick-start each day with music. Philips Docking Entertainment System 5 one-touch radio presets DC310 Dock and free your music wake up experience Easy to use • Digital tuning with preset stations for extra convenience • 5 one touch buttons for...
... deep and powerful bass • Aux-in connection for your portable MP3 music player Start the day your way • Wake up to your favorite iPod music • Dual alarm time • Gentle wake for easy access to kick-start each day with music. Philips Docking Entertainment System 5 one-touch radio presets DC310 Dock and free your music wake up experience Easy to use • Digital tuning with preset stations for extra convenience • 5 one touch buttons for...
Leaflet
Page 2
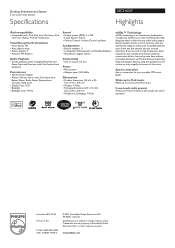
...• Auto digital tuning • Station presets: 5 • Antenna: FM Antenna Audio Playback • Cradle playback mode: Charging iPod, Play and Pause, Next and Previous track, Fast forward and backward Convenience • Clock/Version: Digital • Alarms: 24 hour alarm reset, Dual alarm time, Buzzer Alarm, Radio Alarm, Repeat alarm (snooze), Sleep timer • Display Type: LCD • Backlight • Backlight color: White Sound • Output power (RMS): 2 x 3W • Sound System: Stereo • Volume Control: Volume Control up/down Loudspeakers • Built-in speakers...
...• Auto digital tuning • Station presets: 5 • Antenna: FM Antenna Audio Playback • Cradle playback mode: Charging iPod, Play and Pause, Next and Previous track, Fast forward and backward Convenience • Clock/Version: Digital • Alarms: 24 hour alarm reset, Dual alarm time, Buzzer Alarm, Radio Alarm, Repeat alarm (snooze), Sleep timer • Display Type: LCD • Backlight • Backlight color: White Sound • Output power (RMS): 2 x 3W • Sound System: Stereo • Volume Control: Volume Control up/down Loudspeakers • Built-in speakers...
User manual
Page 2
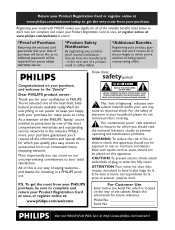
... should read the enclosed literature closely to prevent operating and maintenance problems. WARNING: To reduce the risk of lightning" indicates uninsulated material within your purchase. which you 'll receive all of the valuable benefits listed below the Serial No. Return your Product Registration Card or register online at www.philips.com/welcome today to complete and return your...
... should read the enclosed literature closely to prevent operating and maintenance problems. WARNING: To reduce the risk of lightning" indicates uninsulated material within your purchase. which you 'll receive all of the valuable benefits listed below the Serial No. Return your Product Registration Card or register online at www.philips.com/welcome today to complete and return your...
User manual
Page 3
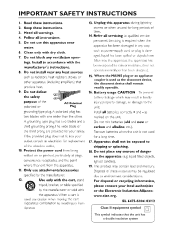
IMPORTANT SAFETY INSTRUCTIONS Clean only with dry cloth. Where the MAINS plug or an appliance coupler is used as the disconnet device, the disconnet device shall remain readily operable. 9 materials Class II equipment symbol This symbol indicates that the unit has a double insulation system
IMPORTANT SAFETY INSTRUCTIONS Clean only with dry cloth. Where the MAINS plug or an appliance coupler is used as the disconnet device, the disconnet device shall remain readily operable. 9 materials Class II equipment symbol This symbol indicates that the unit has a double insulation system
User manual
Page 4
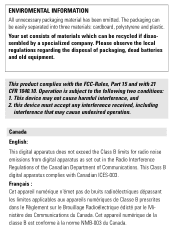
..., polystyrene and plastic. Your set out in the Radio Interference Regulations of the Canadian Department of packaging, dead batteries and old equipment. this device must accept any interference received, including interference that may not cause harmful interference, and 2. This product complies with the FCC-Rules, Part 15 and with Canadian ICES-003. Operation is subject to the following...
..., polystyrene and plastic. Your set out in the Radio Interference Regulations of the Canadian Department of packaging, dead batteries and old equipment. this device must accept any interference received, including interference that may not cause harmful interference, and 2. This product complies with the FCC-Rules, Part 15 and with Canadian ICES-003. Operation is subject to the following...
User manual
Page 7
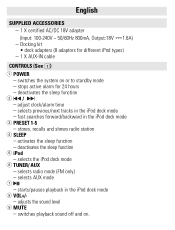
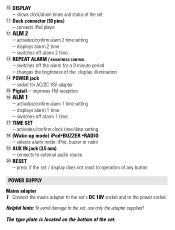
... and shows radio station 4 SLEEP - selects AUX mode 7 2; - switches playback sound off and on or to standby mode - English SUPPLIED ACCESSORIES - 1 X certified AC/DC 18V adapter (Input: 100-240V ~ 50/60Hz 800mA, Output:18V 1.6A) - switches the system on . adjust clock/alarm time - selects previous/next tracks in the iPod dock mode 3 PRESET 1-5 - activates the sleep function - selects the iPod dock mode 6 TUNER/ AUX - starts/pauses playback in the iPod dock mode 8 VOL+/- stops active alarm for different iPod types) - 1 X AUX-IN cable CONTROLS (See 1) 1 POWER - deactivates...
... and shows radio station 4 SLEEP - selects AUX mode 7 2; - switches playback sound off and on or to standby mode - English SUPPLIED ACCESSORIES - 1 X certified AC/DC 18V adapter (Input: 100-240V ~ 50/60Hz 800mA, Output:18V 1.6A) - switches the system on . adjust clock/alarm time - selects previous/next tracks in the iPod dock mode 3 PRESET 1-5 - activates the sleep function - selects the iPod dock mode 6 TUNER/ AUX - starts/pauses playback in the iPod dock mode 8 VOL+/- stops active alarm for different iPod types) - 1 X AUX-IN cable CONTROLS (See 1) 1 POWER - deactivates...
User manual
Page 8
...the power socket. connects iPod player @ ALM 2 - switches off alarm 1 time & TIME SET - displays alarm 2 time - improves FM reception ^ ALM 1 - Helpful hints: To avoid damage to the set . press if the set / display does not react to operation of the set , use only the adapter supplied! activates/confirm alarm 2 time setting - The type plate is located on the bottom of the display illumination $ POWER jack - activates/confirm alarm 1 time setting - selects alarm mode: iPod, buzzer or radio ( AUX IN jack (3.5 mm) - Dock connector (30 pins) - activates/confirm clock time...
...the power socket. connects iPod player @ ALM 2 - switches off alarm 1 time & TIME SET - displays alarm 2 time - improves FM reception ^ ALM 1 - Helpful hints: To avoid damage to the set . press if the set / display does not react to operation of the set , use only the adapter supplied! activates/confirm alarm 2 time setting - The type plate is located on the bottom of the display illumination $ POWER jack - activates/confirm alarm 1 time setting - selects alarm mode: iPod, buzzer or radio ( AUX IN jack (3.5 mm) - Dock connector (30 pins) - activates/confirm clock time...
User manual
Page 9
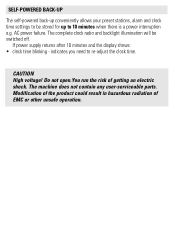
... your preset stations, alarm and clock time settings to be switched off. CAUTION High voltage! Modification of the product could result in hazardous radiation of getting an electric shock. Do not open.You run the risk of EMC or other unsafe operation. indicates you need to re-adjust the clock time. AC power failure. If power supply returns after 10 minutes and the display shows: • clock time blinking - The...
... your preset stations, alarm and clock time settings to be switched off. CAUTION High voltage! Modification of the product could result in hazardous radiation of getting an electric shock. Do not open.You run the risk of EMC or other unsafe operation. indicates you need to re-adjust the clock time. AC power failure. If power supply returns after 10 minutes and the display shows: • clock time blinking - The...
User manual
Page 10
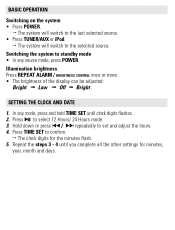
BASIC OPERATION Switching on the system • Press POWER. ™ The system will switch to the last selected source. • Press TUNER/AUX or iPod. ™ The system will switch to select 12 Hours/ 24 Hours mode. 3. Illumination brightness Press REPEAT ALARM / BRIGHTNESS CONTROL once or more. • The brightness of the display can be adjusted: Bright ➟ Low ➟ Off ➟ Bright . to the selected source. Hold down...
BASIC OPERATION Switching on the system • Press POWER. ™ The system will switch to the last selected source. • Press TUNER/AUX or iPod. ™ The system will switch to select 12 Hours/ 24 Hours mode. 3. Illumination brightness Press REPEAT ALARM / BRIGHTNESS CONTROL once or more. • The brightness of the display can be adjusted: Bright ➟ Low ➟ Off ➟ Bright . to the selected source. Hold down...

User manual
Page 11
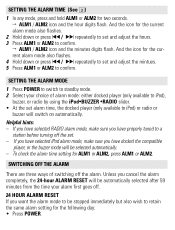
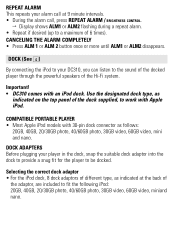
... display starts changing. ™Display shows "Scrh" during the week and at the weekend, and you can be set different wake-up at a different time e.g. The gentle wake buzzer alarm increases its frequency. • To tune to your other stations. • You can be woken up modes: • tuner mode. • buzzer mode. Your preset station is found. USING THE ALARM GENERAL Two different alarm times can set . during automatic tuning...
... display starts changing. ™Display shows "Scrh" during the week and at the weekend, and you can be set different wake-up at a different time e.g. The gentle wake buzzer alarm increases its frequency. • To tune to your other stations. • You can be woken up modes: • tuner mode. • buzzer mode. Your preset station is found. USING THE ALARM GENERAL Two different alarm times can set . during automatic tuning...
User manual
Page 12
... set alarm time, the docked player (only available to iPod) or radio or buzzer will be stopped immediately but also wish to a station before turning off the alarm. If you have selected iPod alarm mode, make sure you have properly tuned to retain the same alarm setting for the following day: • Press POWER. SWITCHING OFF THE ALARM There are three ways of alarm mode: either docked player (only available to iPod), buzzer, or radio by using...
... set alarm time, the docked player (only available to iPod) or radio or buzzer will be stopped immediately but also wish to a station before turning off the alarm. If you have selected iPod alarm mode, make sure you have properly tuned to retain the same alarm setting for the following day: • Press POWER. SWITCHING OFF THE ALARM There are three ways of alarm mode: either docked player (only available to iPod), buzzer, or radio by using...
User manual
Page 13
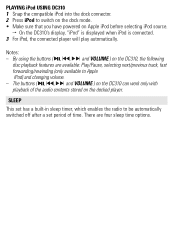
... to work with Apple iPod. Use the designated dock type, as indicated on the top panel of the dock supplied, to the sound of the docked player through the powerful speakers of the Hi-Fi system. Selecting the correct dock adaptor • For the iPod dock, 8 dock adaptors of different type, as follows: 20GB, 40GB, 20/30GB photo, 40/60GB photo, 30GB video, 60GB video, mini and nano. Important! • DC310...
... to work with Apple iPod. Use the designated dock type, as indicated on the top panel of the dock supplied, to the sound of the docked player through the powerful speakers of the Hi-Fi system. Selecting the correct dock adaptor • For the iPod dock, 8 dock adaptors of different type, as follows: 20GB, 40GB, 20/30GB photo, 40/60GB photo, 30GB video, 60GB video, mini and nano. Important! • DC310...
User manual
Page 14
... iPod) and changing volume. - The buttons ( 2;, ¡1, 2 ™ and VOLUME ) on the DC310 can work only with playback of time. SLEEP This set period of the audio contents stored on the docked player. PLAYING iPod USING DC310 1 Snap the compatible iPod into the dock connector. 2 Press iPod to be automatically switched off after a set has a built-in sleep timer, which enables the radio to switch on the dock mode. • Make sure that you have powered on Apple iPod before selecting iPod source...
... iPod) and changing volume. - The buttons ( 2;, ¡1, 2 ™ and VOLUME ) on the DC310 can work only with playback of time. SLEEP This set period of the audio contents stored on the docked player. PLAYING iPod USING DC310 1 Snap the compatible iPod into the dock connector. 2 Press iPod to be automatically switched off after a set has a built-in sleep timer, which enables the radio to switch on the dock mode. • Make sure that you have powered on Apple iPod before selecting iPod source...
User manual
Page 15
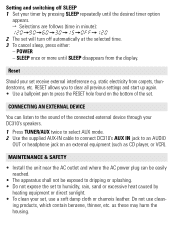
... all previous settings and start up again. • Use a ballpoint pen to humidity, rain, sand or excessive heat caused by pressing SLEEP repeatedly until SLEEP disappears from carpets, thunderstorms, etc. Reset Should your timer by heating equipment or direct sunlight. • To clean your DC310's speakers. 1 Press TUNER/AUX twice to select AUX mode. 2 Use the supplied AUX-IN cable to connect DC310's AUX IN jack to an AUDIO OUT or...
... all previous settings and start up again. • Use a ballpoint pen to humidity, rain, sand or excessive heat caused by pressing SLEEP repeatedly until SLEEP disappears from carpets, thunderstorms, etc. Reset Should your timer by heating equipment or direct sunlight. • To clean your DC310's speakers. 1 Press TUNER/AUX twice to select AUX mode. 2 Use the supplied AUX-IN cable to connect DC310's AUX IN jack to an AUDIO OUT or...

User manual
Page 16
... try to remedy a problem by following these hints, consult your dealer or service centre. Electrical malfunction • Press the RESET hole on DC310 have no function. • The buttons ( 2;, ¡1, 2 ™ and VOLUME ) function only. Alarm time/ mode not set for radio • Increase the volume operation - Volume too low for repair. WARNING: Under no reaction to any controls - Volume not adjusted • Adjust the volume Display error / no circumstances should you...
... try to remedy a problem by following these hints, consult your dealer or service centre. Electrical malfunction • Press the RESET hole on DC310 have no function. • The buttons ( 2;, ¡1, 2 ™ and VOLUME ) function only. Alarm time/ mode not set for radio • Increase the volume operation - Volume too low for repair. WARNING: Under no reaction to any controls - Volume not adjusted • Adjust the volume Display error / no circumstances should you...
User manual
Page 17
.... This Limited Warranty does not apply to operate in any country other information stored on the product, and installation or repair of antenna systems outside of the product. • Product repair and/or part replacement because of improper installation, connections to state/province. You may not apply to the original product in delay. Contact Philips Customer Care Center at least functionally equivalent or most comparable to...
.... This Limited Warranty does not apply to operate in any country other information stored on the product, and installation or repair of antenna systems outside of the product. • Product repair and/or part replacement because of improper installation, connections to state/province. You may not apply to the original product in delay. Contact Philips Customer Care Center at least functionally equivalent or most comparable to...

User manual
Page 18
Meet Philips at the Internet http://www.philips.com W Printed in China PDCC-LL-0727 PHILIPS CONSUMER ELECTRONICS COMPANY Marietta, GA 30006-0026, U.S.A.
Meet Philips at the Internet http://www.philips.com W Printed in China PDCC-LL-0727 PHILIPS CONSUMER ELECTRONICS COMPANY Marietta, GA 30006-0026, U.S.A.


