

User manual
Page 2
......22 Image menu...28 Image advanced menu...30 Image advanced DARBEE menu 32 Display menu...33 Display 3D menu...36 Setup menu...38 Setup audio settings menu...40 Setup security menu...41 Setup advanced menu...43 Options menu...44 2 English
......22 Image menu...28 Image advanced menu...30 Image advanced DARBEE menu 32 Display menu...33 Display 3D menu...36 Setup menu...38 Setup audio settings menu...40 Setup security menu...41 Setup advanced menu...43 Options menu...44 2 English

User manual
Page 3
Options menu...46 Options HDMI link settings menu 48 Options remote settings menu 50 3D Setup...53 maintenance 54 Replacing the lamp...54 Replacing the lamp (continued 55 Installing and cleaning the dust filter 56 additional information 57 Compatible resolutions...57 Image size and projection distance 58 Projector dimensions and ceiling mount installation 59 IR remote codes...60 Using the Help button...62 Troubleshooting...65 Warning indicators...67 Specifications...69 Optoma global offices...70 DARBEEVISION, INC...71 English 3
Options menu...46 Options HDMI link settings menu 48 Options remote settings menu 50 3D Setup...53 maintenance 54 Replacing the lamp...54 Replacing the lamp (continued 55 Installing and cleaning the dust filter 56 additional information 57 Compatible resolutions...57 Image size and projection distance 58 Projector dimensions and ceiling mount installation 59 IR remote codes...60 Using the Help button...62 Troubleshooting...65 Warning indicators...67 Specifications...69 Optoma global offices...70 DARBEEVISION, INC...71 English 3

User manual
Page 5
... the projector in 3D and should be present, as described on pages 54-55. ‡‡ This projector will show on -screen display "Options|Lamp Settings" menu after replacing the lamp module (refer to cool down . Please be sure to change the lamp as soon as recommended before storage. As power...
... the projector in 3D and should be present, as described on pages 54-55. ‡‡ This projector will show on -screen display "Options|Lamp Settings" menu after replacing the lamp module (refer to cool down . Please be sure to change the lamp as soon as recommended before storage. As power...

User manual
Page 18
... up screen will display in approximately 10 seconds and the On/Standby LED will be prompted to select the preferred language, projection orientation, and other settings. 18 English Securely connect the power lead and signal/source cable. USING THE PROJECTOR Powering on / off the projector ON or OFF User1 User2 Brightness...
... up screen will display in approximately 10 seconds and the On/Standby LED will be prompted to select the preferred language, projection orientation, and other settings. 18 English Securely connect the power lead and signal/source cable. USING THE PROJECTOR Powering on / off the projector ON or OFF User1 User2 Brightness...

User manual
Page 21
... or "Enter" key to select any item in the main menu. Use keys to the main menu. 6. Press "Enter" or "Menu" to view further settings. To exit, press "Menu" again. The projector will automatically detect the source. 1. Select the next item to be adjusted in the sub menu and then... press or "Enter" key to confirm, and the screen will automatically save the new settings. When OSD is displayed, use keys to enter sub menu. 3. Main Menu Sub Menu Display Mode Brightness Contrast Sharpness Color Tint Advanced IMAGE Cinema...
... or "Enter" key to select any item in the main menu. Use keys to the main menu. 6. Press "Enter" or "Menu" to view further settings. To exit, press "Menu" again. The projector will automatically detect the source. 1. Select the next item to be adjusted in the sub menu and then... press or "Enter" key to confirm, and the screen will automatically save the new settings. When OSD is displayed, use keys to enter sub menu. 3. Main Menu Sub Menu Display Mode Brightness Contrast Sharpness Color Tint Advanced IMAGE Cinema...

User manual
Page 25
USING THE PROJECTOR Main Menu Sub Menu Sub Menu 2 Internal Speaker Sub Menu 3 Setup Audio Settings Mute Volume Exit Security Security Month Security Timer Day Hour Exit Change Password Exit Advanced Exit Input Source Logo Logo capture Exit Source Lock High ...
USING THE PROJECTOR Main Menu Sub Menu Sub Menu 2 Internal Speaker Sub Menu 3 Setup Audio Settings Mute Volume Exit Security Security Month Security Timer Day Hour Exit Change Password Exit Advanced Exit Input Source Logo Logo capture Exit Source Lock High ...

User manual
Page 26
... No [Default] Off [Default] On Yes No [Default] Mutual PJ→Device Device→PJ [Default] Off [Default] On [Default: DARBEE] Color Settings Color Temp. USING THE PROJECTOR Main Menu Sub Menu 12V Trigger Sub Menu 2 USB Power Options Background Color Lamp Hours Lamp Reminder Lamp... Settings Lamp Mode HDMI Link Settings Lamp Reset Exit HDMI Link Inclusive of TV Power On Link Power Off Link Exit USER 1 Remote Settings USER 2 26 English Sub Menu 3 Sub Menu 4 Values Off [Default] On...
... No [Default] Off [Default] On Yes No [Default] Mutual PJ→Device Device→PJ [Default] Off [Default] On [Default: DARBEE] Color Settings Color Temp. USING THE PROJECTOR Main Menu Sub Menu 12V Trigger Sub Menu 2 USB Power Options Background Color Lamp Hours Lamp Reminder Lamp... Settings Lamp Mode HDMI Link Settings Lamp Reset Exit HDMI Link Inclusive of TV Power On Link Power Off Link Exit USER 1 Remote Settings USER 2 26 English Sub Menu 3 Sub Menu 4 Values Off [Default] On...

User manual
Page 27
...min.) Reset Power Mode (Standby) Exit Sub Menu 3 Sub Menu 4 [Default: Gamma] Values Color Settings Color Temp. Active Eco. [Default] Current [Default] All Note: ‡‡ If the Signal setting is a check box type parameter. The "LAMP RESET" in OSD will appear for user to manually...", or "Keypad Lock" function, a confirmation message will not be reset. English 27 Always On [Default: Unchecked] Note: "Always On" is set to prevent from image break. When you made the changes on the screen. Select "Yes" to Automatic, the Phase, frequency items are grayed out...
...min.) Reset Power Mode (Standby) Exit Sub Menu 3 Sub Menu 4 [Default: Gamma] Values Color Settings Color Temp. Active Eco. [Default] Current [Default] All Note: ‡‡ If the Signal setting is a check box type parameter. The "LAMP RESET" in OSD will appear for user to manually...", or "Keypad Lock" function, a confirmation message will not be reset. English 27 Always On [Default: Unchecked] Note: "Always On" is set to prevent from image break. When you made the changes on the screen. Select "Yes" to Automatic, the Phase, frequency items are grayed out...

User manual
Page 28
... movie theatre. ‡‡ Reference: This mode is intended to have 3D glasses. Color, color temperature, brightness, contrast and gamma settings are many factory presets optimized for various types of images. Make sure your PC/portable device has a 120 Hz signal output quad buffered... graphics card and a 3D Player installed. ‡‡ User: Memorize user's settings. 28 English USING THE PROJECTOR Image menu Display Mode Brightness Contrast Sharpness Color Tint Advanced IMAGE Cinema Reset Exit Display Mode There are all...
... movie theatre. ‡‡ Reference: This mode is intended to have 3D glasses. Color, color temperature, brightness, contrast and gamma settings are many factory presets optimized for various types of images. Make sure your PC/portable device has a 120 Hz signal output quad buffered... graphics card and a 3D Player installed. ‡‡ User: Memorize user's settings. 28 English USING THE PROJECTOR Image menu Display Mode Brightness Contrast Sharpness Color Tint Advanced IMAGE Cinema Reset Exit Display Mode There are all...

User manual
Page 29
... darkest parts of red and green. Sharpness ‡‡ Press the to decrease the sharpness. ‡ ‡ Color Press the to return the factory default settings for "IMAGE". Choose "Yes" to increase the sharpness. Color ‡‡ Press the to increase the contrast. English 29 Sharpness Adjust the sharpness of saturation...
... darkest parts of red and green. Sharpness ‡‡ Press the to decrease the sharpness. ‡ ‡ Color Press the to return the factory default settings for "IMAGE". Choose "Yes" to increase the sharpness. Color ‡‡ Press the to increase the contrast. English 29 Sharpness Adjust the sharpness of saturation...

User manual
Page 30
...menu IMAGE Advanced Gamma Film Dynamic Black Off Color Temp. After the initial setup and fine tuning is completed, utilize the Gamma Adjustment steps to set up gamma curve type. Gamma Film ‡‡ Film: For home theater. ‡‡ Video: For video or TV source. ‡...;‡ Graphics: For PC / Photo source. ‡‡ Standard: For standardized setting. ‡‡ Press the or to select a color temperature from Warm, Standard, Cool, or Cold. Color Temp. BrilliantColorTM This adjustable item utilizes a new ...
...menu IMAGE Advanced Gamma Film Dynamic Black Off Color Temp. After the initial setup and fine tuning is completed, utilize the Gamma Adjustment steps to set up gamma curve type. Gamma Film ‡‡ Film: For home theater. ‡‡ Video: For video or TV source. ‡...;‡ Graphics: For PC / Photo source. ‡‡ Standard: For standardized setting. ‡‡ Press the or to select a color temperature from Warm, Standard, Cool, or Cold. Color Temp. BrilliantColorTM This adjustable item utilizes a new ...

User manual
Page 31
... or to exit the menu. USING THE PROJECTOR Color Matching Press the into the next menu and then use , , , or to return the factory default settings for color adjustments. Red Green Hue Hue Saturation Saturation Gain Gain Exit Exit Blue Cyan Hue Hue Saturation Saturation Gain Gain Exit Exit Magenta Yellow...
... or to exit the menu. USING THE PROJECTOR Color Matching Press the into the next menu and then use , , , or to return the factory default settings for color adjustments. Red Green Hue Hue Saturation Saturation Gain Gain Exit Exit Blue Cyan Hue Hue Saturation Saturation Gain Gain Exit Exit Magenta Yellow...

User manual
Page 34
... SuperWide 480i/p 576i/p 1080i/p 720p PC Scale to select item. Edge Mask Note: ‡‡ ‡‡ Zoom ‡ ‡ ‡ ‡ Each I/O has different setting of video source. Zoom Image Shift Press the into the next menu as below and then use the , , , or to 1440x1080. the image is displayed...
... SuperWide 480i/p 576i/p 1080i/p 720p PC Scale to select item. Edge Mask Note: ‡‡ ‡‡ Zoom ‡ ‡ ‡ ‡ Each I/O has different setting of video source. Zoom Image Shift Press the into the next menu as below and then use the , , , or to 1440x1080. the image is displayed...

User manual
Page 35
... Corner Reset Choose "Yes" to confirm. 3. V Keystone Four Corner Compensate for image distortion by adjusting one corner and press "Enter" to return the factory default settings for "Four Corner Reset". Use "Four Corner" menu to choose one corner at a time. Use the or ► to move the angle and press "Enter...
... Corner Reset Choose "Yes" to confirm. 3. V Keystone Four Corner Compensate for image distortion by adjusting one corner and press "Enter" to return the factory default settings for "Four Corner Reset". Use "Four Corner" menu to choose one corner at a time. Use the or ► to move the angle and press "Enter...

User manual
Page 36
... Use this option to specify how the 3D content should appear on page 57. Invert Off Exit 3D Mode Use this option to use optimized setting for DLP Link 3D Glasses. ‡‡ VESA 3D: Select "VESA 3D" to select the appropriate 3D format content. "3D Format" is only supported on... the appropriate the 3D function. ‡‡ Off: Select "Off" to turn off 3D mode. ‡‡ DLP-Link: Select "DLP-Link" to use optimized settings for VESA 3D Glasses. 3D Mode Off DLP - USING THE PROJECTOR Display 3D menu 3D Mode 3D Format DISPLAY Off Auto 3D Sync.
... Use this option to specify how the 3D content should appear on page 57. Invert Off Exit 3D Mode Use this option to use optimized setting for DLP Link 3D Glasses. ‡‡ VESA 3D: Select "VESA 3D" to select the appropriate 3D format content. "3D Format" is only supported on... the appropriate the 3D function. ‡‡ Off: Select "Off" to turn off 3D mode. ‡‡ DLP-Link: Select "DLP-Link" to use optimized settings for VESA 3D Glasses. 3D Mode Off DLP - USING THE PROJECTOR Display 3D menu 3D Mode 3D Format DISPLAY Off Auto 3D Sync.

User manual
Page 38
... , , , or your preferred language. key to finalize the selection. The image is the default selection. USING THE PROJECTOR Setup menu Language Projection Menu Location Audio Settings Security SETUP English Advanced Exit Language Choose the multilingual OSD menu.
... , , , or your preferred language. key to finalize the selection. The image is the default selection. USING THE PROJECTOR Setup menu Language Projection Menu Location Audio Settings Security SETUP English Advanced Exit Language Choose the multilingual OSD menu.

User manual
Page 40
..." to increase the volume. Note: "Mute" function affects both internal and external speaker volume. Volume Adjust the volume level. USING THE PROJECTOR Setup audio settings menu SETUP Audio Settings Internal Speaker On Mute Off Volume Exit Internal Speaker Choose "On" or "Off" to turn on . ‡‡ Choose the "Off" to turn...
..." to increase the volume. Note: "Mute" function affects both internal and external speaker volume. Volume Adjust the volume level. USING THE PROJECTOR Setup audio settings menu SETUP Audio Settings Internal Speaker On Mute Off Volume Exit Internal Speaker Choose "On" or "Off" to turn on . ‡‡ Choose the "Off" to turn...
User manual
Page 41
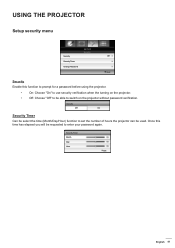
... elapsed you will be requested to enter your password again. Security Off On Security Timer Can be select the time (Month/Day/Hour) function to set the number of hours the projector can be able to be used. Once this function to prompt for a password before using the projector. ‡‡...
... elapsed you will be requested to enter your password again. Security Off On Security Timer Can be select the time (Month/Day/Hour) function to set the number of hours the projector can be able to be used. Once this function to prompt for a password before using the projector. ‡‡...

User manual
Page 42
... will automatically shut down. Use the number button or on the remote control, then press the "Enter" key to confirm. 3. Press the "Enter" key to set the password. 2. Use number button on the remote control or on-screen numeric keypad to enter your new password and then press the "Enter" key...
... will automatically shut down. Use the number button or on the remote control, then press the "Enter" key to confirm. 3. Press the "Enter" key to set the password. 2. Use number button on the remote control or on-screen numeric keypad to enter your new password and then press the "Enter" key...

User manual
Page 43
... time the projector is not displayed on -screen image does not exceed the projector native resolution. (1080p: 1920x1080). Logo Capture Processing... Exit Choose "Exit" to set the desired startup screen. Logo Capture Press to capture an image of the picture currently displayed on . English 43 Logo Default ‡‡ Default: The...
... time the projector is not displayed on -screen image does not exceed the projector native resolution. (1080p: 1920x1080). Logo Capture Processing... Exit Choose "Exit" to set the desired startup screen. Logo Capture Press to capture an image of the picture currently displayed on . English 43 Logo Default ‡‡ Default: The...


