

Owner Manual
Page 2
... this unit 6 Speaker placement 8 System connection 9 Control positions and names 18 Learning remote control codes 21 Using the On-screen display function (This function is done entirely with the remote control) 24 Listening to your favorite source 27 The parameter selector 29 System setup (...CORRESPONDANTE DE LA PRISE ET POUSSER JUSQU AU FOND 2 NO USER-SERVICEABLE PARTS INSIDE. • Congratulations on your purchase of the ONKYO TX-SV919THX Tuner-Amplifier. • Please read this manual for future reference. nitude to constitute a risk of electric shock to persons...
... this unit 6 Speaker placement 8 System connection 9 Control positions and names 18 Learning remote control codes 21 Using the On-screen display function (This function is done entirely with the remote control) 24 Listening to your favorite source 27 The parameter selector 29 System setup (...CORRESPONDANTE DE LA PRISE ET POUSSER JUSQU AU FOND 2 NO USER-SERVICEABLE PARTS INSIDE. • Congratulations on your purchase of the ONKYO TX-SV919THX Tuner-Amplifier. • Please read this manual for future reference. nitude to constitute a risk of electric shock to persons...

Owner Manual
Page 6
... batteries with new ones. • Learned codes are not lost , however, if battery replacement is attached with your TX-SV919THX, the HR-10(W) allows you to control more than one device from a distance but we recommend that use the... 1) (T-shaped FM antenna x 1) ( R I remote control cable x 1) RC-267M (Main remote control x 1 Batteries x 4) RC-268S (Sub remote control x 1 Batteries x 2) Remote control battery insertion RC-267M RC-268S (` 0 0 3 I system. Multiple Room Remote System (MR ) The ONKYO HR-10(W) Remote Sensor (sold separately) greatly increases system flexibility. Up...
... batteries with new ones. • Learned codes are not lost , however, if battery replacement is attached with your TX-SV919THX, the HR-10(W) allows you to control more than one device from a distance but we recommend that use the... 1) (T-shaped FM antenna x 1) ( R I remote control cable x 1) RC-267M (Main remote control x 1 Batteries x 4) RC-268S (Sub remote control x 1 Batteries x 2) Remote control battery insertion RC-267M RC-268S (` 0 0 3 I system. Multiple Room Remote System (MR ) The ONKYO HR-10(W) Remote Sensor (sold separately) greatly increases system flexibility. Up...

Owner Manual
Page 7
...not directly exposed to bright light. • If the TX-SV919THX is exposed to a highly humid climate. 7 If the problem persists, contact your Onkyo Service Center. A built-in order to the TX-SV919THX. • If the remote control does not operate properly, confirm that it since this ...from occurring, place the TX-SV919THX so that the batteries are protected over a period of...
...not directly exposed to bright light. • If the TX-SV919THX is exposed to a highly humid climate. 7 If the problem persists, contact your Onkyo Service Center. A built-in order to the TX-SV919THX. • If the remote control does not operate properly, confirm that it since this ...from occurring, place the TX-SV919THX so that the batteries are protected over a period of...

Owner Manual
Page 11
...provided) Connect them as follows. Audio connections Please refer to Analog with the Parameter Selector button or a cursor button on the remote control. Second tape deck Graphic equalizer TX-SV919THX 3. S-VIDEO OUT_ _ VIDEO OUT AUDIO OUT VIDEO-4 Video disc player DIGITAL IN VIDEO-4 OPTICAL OUT VIDEO-4 OPTICAL INPUT ...the TAPE-2 jacks, connect them when the VDPs are provided with the Parameter Selector button or the Cursor button on the remote control and connect it with an audio cable (RCA connector). Then, remove the protection cap from Analog with S-VIDEO jacks.
...provided) Connect them as follows. Audio connections Please refer to Analog with the Parameter Selector button or a cursor button on the remote control. Second tape deck Graphic equalizer TX-SV919THX 3. S-VIDEO OUT_ _ VIDEO OUT AUDIO OUT VIDEO-4 Video disc player DIGITAL IN VIDEO-4 OPTICAL OUT VIDEO-4 OPTICAL INPUT ...the TAPE-2 jacks, connect them when the VDPs are provided with the Parameter Selector button or the Cursor button on the remote control and connect it with an audio cable (RCA connector). Then, remove the protection cap from Analog with S-VIDEO jacks.

Owner Manual
Page 16
...and on the region. Connect a remote control cable to connect the subroom speaker. Connections for Multiple Room Remote Control Use a power amp to the black jack with the TX-SV919THX. NOTES: • To enable proper remote control operation, both the ONKYO CD player and the cassette tape deck... bearing the RI mark and connected to the TX-SV919THX can be operated using the accessory remote control with the R I mark. USA...
...and on the region. Connect a remote control cable to connect the subroom speaker. Connections for Multiple Room Remote Control Use a power amp to the black jack with the TX-SV919THX. NOTES: • To enable proper remote control operation, both the ONKYO CD player and the cassette tape deck... bearing the RI mark and connected to the TX-SV919THX can be operated using the accessory remote control with the R I mark. USA...

Owner Manual
Page 17
...connecting the 1M . • Insert the fiR mini-plug into the green terminal on fIR cables Any remote sensors and emitters (HR-10, HE-50(AC), HE-10) should also face the TX-SV919THX. If all components, and connect it to control components that are available in the following lengths: 6-1/2'... (2m) (HW-2), 98-7/16' (30m) (HW-30), and 164' (50m) (HW-50). (ONKYO cables may not be connected with low capacitance shielded 2-wire coaxial cables with mini-plug connectors are not ONKYO, or do Input O HR-10 Sub room Loudspeaker set AC adaptor to approximately 164' (50 m) lengths...
...connecting the 1M . • Insert the fiR mini-plug into the green terminal on fIR cables Any remote sensors and emitters (HR-10, HE-50(AC), HE-10) should also face the TX-SV919THX. If all components, and connect it to control components that are available in the following lengths: 6-1/2'... (2m) (HW-2), 98-7/16' (30m) (HW-30), and 164' (50m) (HW-50). (ONKYO cables may not be connected with low capacitance shielded 2-wire coaxial cables with mini-plug connectors are not ONKYO, or do Input O HR-10 Sub room Loudspeaker set AC adaptor to approximately 164' (50 m) lengths...

Owner Manual
Page 18
.../Mode Button (FM MUTE/MODE) CLASSIFIE FM TE O E ME RROUN MODE RAMET ELECTO (SECT ACCESS TUNING 6 6 6 6 o ERASE1. p rrR Off Indicator [56] Stand-by/Received indicator Remote Control Sensor Push Open Button Input Selector Buttons [27] Video Selectors Power Button Audio Selectors Master Volume Control Knob and Indicator l Display o iricy° Integra...
.../Mode Button (FM MUTE/MODE) CLASSIFIE FM TE O E ME RROUN MODE RAMET ELECTO (SECT ACCESS TUNING 6 6 6 6 o ERASE1. p rrR Off Indicator [56] Stand-by/Received indicator Remote Control Sensor Push Open Button Input Selector Buttons [27] Video Selectors Power Button Audio Selectors Master Volume Control Knob and Indicator l Display o iricy° Integra...

Owner Manual
Page 19
...Monitor Indicator Multi Function Display Frequency/input selector/preset station/sleep timer/multi-source volume level/delay time/front UR, center, surround, subwoofer, volume level Remote Control (RC-268S) Power Key (POWER) [30] POWER r DECK-B • = = = ENTER El ESCAPE [ (---) CURSCR M DISC... refer to operate an ONKYO CD player with the R I mark. = = CD IM INN = = CD VOLUME -. = ONKYO R I REMOTE CONTROL RC-268S \ i Tana Operation Keys (DECK-B) These buttons control ONKYO double cassette tape decks with the RI mark that can be remote controlled. VIII TAPE-2 ...
...Monitor Indicator Multi Function Display Frequency/input selector/preset station/sleep timer/multi-source volume level/delay time/front UR, center, surround, subwoofer, volume level Remote Control (RC-268S) Power Key (POWER) [30] POWER r DECK-B • = = = ENTER El ESCAPE [ (---) CURSCR M DISC... refer to operate an ONKYO CD player with the R I mark. = = CD IM INN = = CD VOLUME -. = ONKYO R I REMOTE CONTROL RC-268S \ i Tana Operation Keys (DECK-B) These buttons control ONKYO double cassette tape decks with the RI mark that can be remote controlled. VIII TAPE-2 ...

Owner Manual
Page 20
... (RC-267M) Press Matching Keys Indicator [21] Use/Learn Selector Switch (USE/LEARN)[23] Power Key (POWER)[30] I UNIVERSAL PROGRAMMABLE REMOTE RC-267M Learned/Sending Indicator [21] A / B / C Selector Switch (A / B / C (SUB ROOM)) Input Selector Keys (VIDEO 1 to C(SUBROOM). ...-2) • This can operate a VDP and two VCRs after learning it . I= 0 C) ODE I= 0 sE~ + 1 SLEEP DIMMER OL ET] LEVEL o o) O J ONKYO R I PRESS MATCHING REVS USE LEARN LEARNED, SENDING A B C ISUB BOOM Tuner/TV Operation Keys (CLASS, PRESET) • This can operate a TV after learning it. CD,...
... (RC-267M) Press Matching Keys Indicator [21] Use/Learn Selector Switch (USE/LEARN)[23] Power Key (POWER)[30] I UNIVERSAL PROGRAMMABLE REMOTE RC-267M Learned/Sending Indicator [21] A / B / C Selector Switch (A / B / C (SUB ROOM)) Input Selector Keys (VIDEO 1 to C(SUBROOM). ...-2) • This can operate a VDP and two VCRs after learning it . I= 0 C) ODE I= 0 sE~ + 1 SLEEP DIMMER OL ET] LEVEL o o) O J ONKYO R I PRESS MATCHING REVS USE LEARN LEARNED, SENDING A B C ISUB BOOM Tuner/TV Operation Keys (CLASS, PRESET) • This can operate a TV after learning it. CD,...

Owner Manual
Page 21
... a safe place. If the both indicators flash when a button is low. sary to "learn" them once again using the existing remote con- If you are using an ONKYO compact disc player, or cassette tape deck that has the RI mark, there is no need to memorize them . • If ...satisfied using a product made or when battery power is pressed on the CD. Replace the batteries of the existing remote control with the RI ONKYO mark are worn out. Replace its remote control into the RC-267M. The programmable buttons • The VIDEO section is worn-out batteries on the market...
... a safe place. If the both indicators flash when a button is low. sary to "learn" them once again using the existing remote con- If you are using an ONKYO compact disc player, or cassette tape deck that has the RI mark, there is no need to memorize them . • If ...satisfied using a product made or when battery power is pressed on the CD. Replace the batteries of the existing remote control with the RI ONKYO mark are worn out. Replace its remote control into the RC-267M. The programmable buttons • The VIDEO section is worn-out batteries on the market...

Owner Manual
Page 22
...MATCHING KEYS indicator is lighted, until the LEARNED/SENDING indicator lights. Your existing remote control 05000E00 000[1 0E0 00 0000]0 n 00] L I 0001000 0 0 0 0 OW 0 0 0 0 0-0 E nnnTnrunnnpvio -LoDWDED,[ 1:10j0E00 6 5. NOTES; • Some remote controls use a single key to change codes, with the code changing each... function individually, one function to which the system differs, there are using the infrared system; Most remote control codes can be memorized using this kind of the RC-267M, laying both units on a table or another button, repeat ...
...MATCHING KEYS indicator is lighted, until the LEARNED/SENDING indicator lights. Your existing remote control 05000E00 000[1 0E0 00 0000]0 n 00] L I 0001000 0 0 0 0 OW 0 0 0 0 0-0 E nnnTnrunnnpvio -LoDWDED,[ 1:10j0E00 6 5. NOTES; • Some remote controls use a single key to change codes, with the code changing each... function individually, one function to which the system differs, there are using the infrared system; Most remote control codes can be memorized using this kind of the RC-267M, laying both units on a table or another button, repeat ...

Owner Manual
Page 23
... when the PRESS MATCHING KEYS indicator vas out. point pen, to reset other memorized keys. Remove the battery compartment cover. 6. Operating the remote control 1. Changing commands 1. The reset operation is pressed. Repeat step 4 to 5 to press the Reset switch (indicated by pressing the key...I SI I I EAR, 5. Set the USE/LEARN selector switch to light up . • Please check whether previously memorized functions are preset ONKYO codes, the preset codes will not light up PRESS MATCHING KEYS indicator. 23 IJS, I XRN 2. USE LEARN EEO 2. Press the key you ...
... when the PRESS MATCHING KEYS indicator vas out. point pen, to reset other memorized keys. Remove the battery compartment cover. 6. Operating the remote control 1. Changing commands 1. The reset operation is pressed. Repeat step 4 to 5 to press the Reset switch (indicated by pressing the key...I SI I I EAR, 5. Set the USE/LEARN selector switch to light up . • Please check whether previously memorized functions are preset ONKYO codes, the preset codes will not light up PRESS MATCHING KEYS indicator. 23 IJS, I XRN 2. USE LEARN EEO 2. Press the key you ...

Owner Manual
Page 24
.... TAPE-1 CD STADIUM When the AUDIO MUTING is pressed When the TEST TONE is the indication shown when the Input Selector, the level of the TX-SV919THX main unit or remote control. CURSOR keys AV: Used to the record terminal (out). the function can only be shown on the... each screen differ according to select the menu screen. on on . Menu items on top of TX-SV919THX is When the Input selector is being• played back. When the Surround mode is turned on the remote control. CURSOR keys ENTER/ESCAPE key • Used to the Surround mode etc. is changed...
.... TAPE-1 CD STADIUM When the AUDIO MUTING is pressed When the TEST TONE is the indication shown when the Input Selector, the level of the TX-SV919THX main unit or remote control. CURSOR keys AV: Used to the record terminal (out). the function can only be shown on the... each screen differ according to select the menu screen. on on . Menu items on top of TX-SV919THX is When the Input selector is being• played back. When the Surround mode is turned on the remote control. CURSOR keys ENTER/ESCAPE key • Used to the Surround mode etc. is changed...

Owner Manual
Page 26
... De l as follows Please refer to be chosen. Call the "Input Selector" menu and set the OPTICAL mode. %MN ICI Cal ENTEWESCAPE Se l ector 2. N The TX-SV919THX normally plays back using the remote control.
... De l as follows Please refer to be chosen. Call the "Input Selector" menu and set the OPTICAL mode. %MN ICI Cal ENTEWESCAPE Se l ector 2. N The TX-SV919THX normally plays back using the remote control.

Owner Manual
Page 28
... if you choose. The current Surround mode will be changed. Ci ass = F pres, , - CURSOR keys while the cursor is located on the screen using the remote control 1. CURSOR keys while the cursor is located on Picture. round Mode. When operating with a standard binaural (stereo) plug can change the input source of...
... if you choose. The current Surround mode will be changed. Ci ass = F pres, , - CURSOR keys while the cursor is located on the screen using the remote control 1. CURSOR keys while the cursor is located on Picture. round Mode. When operating with a standard binaural (stereo) plug can change the input source of...
Owner Manual
Page 30
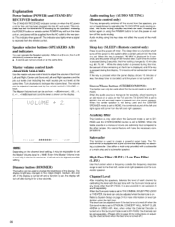
... time. The Master Volume level can not be set to its highest possible setting. Even if the Master Volume knob is standing by operating the TX-SV919THX audio muting circuits. The audio muting indicator MUTING will light. • A and B can be turned on , the A or B SPEAKER indicators .... qterect/Mini, hiiiftnn (sTFRFIVINInN(l) This button can be set to page 33 for a few seconds. 30 Audio muting key (AUDIO MUTING) (Remote control only) This key temporarily switches off the sound from the center speaker. When the center speaker is not being lit for instructions on the...
... time. The Master Volume level can not be set to its highest possible setting. Even if the Master Volume knob is standing by operating the TX-SV919THX audio muting circuits. The audio muting indicator MUTING will light. • A and B can be turned on , the A or B SPEAKER indicators .... qterect/Mini, hiiiftnn (sTFRFIVINInN(l) This button can be set to page 33 for a few seconds. 30 Audio muting key (AUDIO MUTING) (Remote control only) This key temporarily switches off the sound from the center speaker. When the center speaker is not being lit for instructions on the...

Owner Manual
Page 31
... ON) 7,1AZ:roT 00 (15 30) ••• (OFF.-.- nCTS 4( • (4L( 0 2. Speakers system A, B or OFF 1. Move the cursor to System Setup using the remote control 1. I , * * ** LL R L• S. k (.; c„. -.- +12) : : (-12 +12) (-12 .(-12 -. +12) . „ +12) :• • (-12 (-12 ...• . +12) +12) ENTEP ESCAPE =:1 CURSOR * * * * IIL ui. * * * * I ) NI...
... ON) 7,1AZ:roT 00 (15 30) ••• (OFF.-.- nCTS 4( • (4L( 0 2. Speakers system A, B or OFF 1. Move the cursor to System Setup using the remote control 1. I , * * ** LL R L• S. k (.; c„. -.- +12) : : (-12 +12) (-12 .(-12 -. +12) . „ +12) :• • (-12 (-12 ...• . +12) +12) ENTEP ESCAPE =:1 CURSOR * * * * IIL ui. * * * * I ) NI...

Owner Manual
Page 33
... tone using the cursor on the screen Select Delay Time on the Surrond Setup screen and make an adjustment with the DELAY TIME key the remote control The value is recommended that initial delay be made within 2 minutes. Adjust the level. Use the 1 and ► PARAMETER SELECTOR buttons to 75dB spl...
... tone using the cursor on the screen Select Delay Time on the Surrond Setup screen and make an adjustment with the DELAY TIME key the remote control The value is recommended that initial delay be made within 2 minutes. Adjust the level. Use the 1 and ► PARAMETER SELECTOR buttons to 75dB spl...

Owner Manual
Page 34
... l ay Time = 20mS Test Tone - Select a Surround mode. Sur. A.(► Tune Cont rol = OFF 4. Operating the test tone using the cursor on the remote control. P. Adjust the level. CH SEL ENTER/ESCAPE O 1. II II After turning on the Test Tone with the Test Tone turned OFF) When a Surround mode...; To turn off the test tone, press the A CURSOR key, then the -11 CURSOR key. 8. Adjust the Level. When operating with the cursor on the remote control and choosing a channel with the CH.SEL key, set the level with the or ► CURSOR keys. Level =- 5db = 7dB + 1 2dB = OdB...
... l ay Time = 20mS Test Tone - Select a Surround mode. Sur. A.(► Tune Cont rol = OFF 4. Operating the test tone using the cursor on the remote control. P. Adjust the level. CH SEL ENTER/ESCAPE O 1. II II After turning on the Test Tone with the Test Tone turned OFF) When a Surround mode...; To turn off the test tone, press the A CURSOR key, then the -11 CURSOR key. 8. Adjust the Level. When operating with the cursor on the remote control and choosing a channel with the CH.SEL key, set the level with the or ► CURSOR keys. Level =- 5db = 7dB + 1 2dB = OdB...

Owner Manual
Page 35
... mode is chosen) 1. Call the menu screen by pissing ENTER/ESCAPE key. Tech =-12 *OF 1%! • ro 6. When operating with the LEVEL keys using the remote control (When a Surround mode other than DOLBY PRO LOGIC, THX CINEMA or THEATER is set to THX CINEMA.) Operating the tone control using the main...
... mode is chosen) 1. Call the menu screen by pissing ENTER/ESCAPE key. Tech =-12 *OF 1%! • ro 6. When operating with the LEVEL keys using the remote control (When a Surround mode other than DOLBY PRO LOGIC, THX CINEMA or THEATER is set to THX CINEMA.) Operating the tone control using the main...


