Owner Manual
Page 5
... the AV Receiver 12 Connecting Your Speakers 12 About AV Connections 16 Connecting Components with HDMI 17 Connecting Your Components 18 Connecting Onkyo V Components 20 Connecting a Recording Component 20 Connecting the Antennas 21 Connecting the Power Cord 21 Turning On & Basic Operations ...REMOTE MODE Buttons 70 Resetting the Remote Controller 70 Controlling Other Components 70 Learning Commands 72 Using Normal Macros 73 Appendix Troubleshooting 74 Firmware Update 80 Connection Tips and Video Signal Path 83 Using an RIHD-compatible TV, Player, or Recorder ... 86 About HDMI ...
... the AV Receiver 12 Connecting Your Speakers 12 About AV Connections 16 Connecting Components with HDMI 17 Connecting Your Components 18 Connecting Onkyo V Components 20 Connecting a Recording Component 20 Connecting the Antennas 21 Connecting the Power Cord 21 Turning On & Basic Operations ...REMOTE MODE Buttons 70 Resetting the Remote Controller 70 Controlling Other Components 70 Learning Commands 72 Using Normal Macros 73 Appendix Troubleshooting 74 Firmware Update 80 Connection Tips and Video Signal Path 83 Using an RIHD-compatible TV, Player, or Recorder ... 86 About HDMI ...
Owner Manual
Page 43
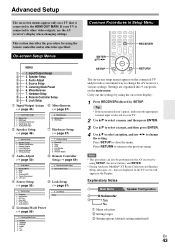
... 1. VCR/DVR 3. Note • This procedure can also be performed on the AV receiver by SETUP. Miscellaneous H 7. Analog Audio Input C Speaker Setup (➔ page 46) 6. Firmware Update I 8. Explanatory Notes B Main Menu Speaker Configuration C ■ Subwoofer D ` Yes ` No B Menu selection C Setting target D Setting options (default setting underlined) En 43 Input/Output Assign...
... 1. VCR/DVR 3. Note • This procedure can also be performed on the AV receiver by SETUP. Miscellaneous H 7. Analog Audio Input C Speaker Setup (➔ page 46) 6. Firmware Update I 8. Explanatory Notes B Main Menu Speaker Configuration C ■ Subwoofer D ` Yes ` No B Menu selection C Setting target D Setting options (default setting underlined) En 43 Input/Output Assign...
Owner Manual
Page 60
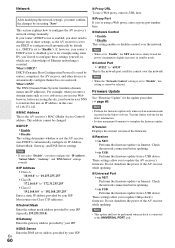
... the network connection before updating. ` via USB: Performs the firmware update from a USB device. DHCP (Dynamic Host Configuration Protocol) is set to automatically configure themselves on the Onkyo web site. Visit the Onkyo web site for control over the network. These settings allow you...the UNIVERSAL PORT jack. This section explains how to update Onkyo dock's firmware. What's DNS? For example, when you to configure the AV receiver's network settings manually. Note • When set to complete the firmware update. ■ Version Displays the current version of ...
... the network connection before updating. ` via USB: Performs the firmware update from a USB device. DHCP (Dynamic Host Configuration Protocol) is set to automatically configure themselves on the Onkyo web site. Visit the Onkyo web site for control over the network. These settings allow you...the UNIVERSAL PORT jack. This section explains how to update Onkyo dock's firmware. What's DNS? For example, when you to configure the AV receiver's network settings manually. Note • When set to complete the firmware update. ■ Version Displays the current version of ...
Owner Manual
Page 80
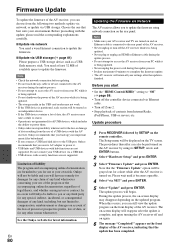
... of liability The program and accompanying online documentation are turned on and an Ethernet cable is connected to the USB port, Onkyo recommends that the "Firmware Update" option will be liable and you will reappear after the update is finished. The update process will be performed on... or device connected to the AV receiver during the update process. • It takes maximum 60 minutes to complete the firmware update. • The AV receiver will Onkyo be treated as a USB flash memory stick. In no responsibility whatsoever for any kind, including, but not limited to,...
... of liability The program and accompanying online documentation are turned on and an Ethernet cable is connected to the USB port, Onkyo recommends that the "Firmware Update" option will be liable and you will reappear after the update is finished. The update process will be performed on... or device connected to the AV receiver during the update process. • It takes maximum 60 minutes to complete the firmware update. • The AV receiver will Onkyo be treated as a USB flash memory stick. In no responsibility whatsoever for any kind, including, but not limited to,...
Owner Manual
Page 81
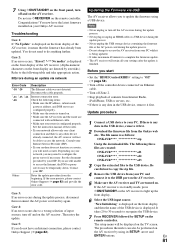
...Onkyo web site. Case 5: If you may be performed on the AV receiver to "Off" (➔ page 58). • Turn off the controller device connected via network Error Code Description *-10, *-20 The Ethernet cable was not detected. It takes 20 to 30 seconds to do not have the latest firmware.... (Alpha-numeric characters on the front display are still unable to access the Internet, the DNS or proxy server may need a router. Updating the Firmware via USB The AV receiver allows you are denoted by using a USB device. Case 2: If an error occurs, "Error!! *-** No media" is...
...Onkyo web site. Case 5: If you may be performed on the AV receiver to "Off" (➔ page 58). • Turn off the controller device connected via network Error Code Description *-10, *-20 The Ethernet cable was not detected. It takes 20 to 30 seconds to do not have the latest firmware.... (Alpha-numeric characters on the front display are still unable to access the Internet, the DNS or proxy server may need a router. Updating the Firmware via USB The AV receiver allows you are denoted by using a USB device. Case 2: If an error occurs, "Error!! *-** No media" is...
Owner Manual
Page 82
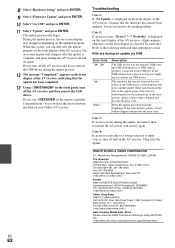
... Tel: 852-2429-3118 Fax: 852-2428-9039 Asia, Oceania, Middle East, Africa Please contact an ONKYO distributor referring to power the USB device. 8 Select "Hardware Setup" and press ENTER. 9 Select "Firmware Update" and press ENTER. 10 Select "via USB Error Code *-10, *-20 *-14 Others Description ..."Error!! *-** No media" is displayed on again. ONKYO SOUND & VISION CORPORATION 2-1, Nisshin-cho, Neyagawa-shi, OSAKA 572-8540, JAPAN The Americas ONKYO U.S.A. Do not turn off and on the front display of the USB device, or the firmware file is properly connected to do not remove the USB ...
... Tel: 852-2429-3118 Fax: 852-2428-9039 Asia, Oceania, Middle East, Africa Please contact an ONKYO distributor referring to power the USB device. 8 Select "Hardware Setup" and press ENTER. 9 Select "Firmware Update" and press ENTER. 10 Select "via USB Error Code *-10, *-20 *-14 Others Description ..."Error!! *-** No media" is displayed on again. ONKYO SOUND & VISION CORPORATION 2-1, Nisshin-cho, Neyagawa-shi, OSAKA 572-8540, JAPAN The Americas ONKYO U.S.A. Do not turn off and on the front display of the USB device, or the firmware file is properly connected to do not remove the USB ...

