

Owners Manual - English/Spanish/French
Page 2
... (1) 0 Basic Manual (This manual) 0 Connect speakers with 4 Ω to change without prior notice. 2 > Before Start > Part Names > Install > Initial Setup > Playback What's in the future. Remote controller (RC-911R) (1), Batteries (AAA/R03) (2) 3. Speaker setup microphone (1) 0 Used during Initial Setup. 4. Furthermore, available services may vary depending on your area of residence. 0 Details...
... (1) 0 Basic Manual (This manual) 0 Connect speakers with 4 Ω to change without prior notice. 2 > Before Start > Part Names > Install > Initial Setup > Playback What's in the future. Remote controller (RC-911R) (1), Batteries (AAA/R03) (2) 3. Speaker setup microphone (1) 0 Used during Initial Setup. 4. Furthermore, available services may vary depending on your area of residence. 0 Details...

Owners Manual - English/Spanish/French
Page 3
... be turned off the Music Optimizer function that continue to work when this unit is within about 16´/5 m, at an angle of the remote controller is in standby, such as HDMI Standby Through and Network Standby. 4. > Before Start > Part Names > Install > Initial Setup > Playback...En 3 HYBRID STANDBY indicator: Lights if the unit enters standby mode when the features are enabled that provides better sound quality for compressed audio. 3. Remote control sensor: Receives signals from "Movie/ TV", "Music", "Game", then turn the LISTENING MODE dial (below) to either side. 5. RETURN button...
... be turned off the Music Optimizer function that continue to work when this unit is within about 16´/5 m, at an angle of the remote controller is in standby, such as HDMI Standby Through and Network Standby. 4. > Before Start > Part Names > Install > Initial Setup > Playback...En 3 HYBRID STANDBY indicator: Lights if the unit enters standby mode when the features are enabled that provides better sound quality for compressed audio. 3. Remote control sensor: Receives signals from "Movie/ TV", "Music", "Game", then turn the LISTENING MODE dial (below) to either side. 5. RETURN button...

Owners Manual - English/Spanish/French
Page 6
... MAIN for play of the SUBWOOFER PRE OUT jacks. Remote Controller 1. Í ON/STANDBY button 2. Up to confirm your selection. button: Returns the display to the previous state. 13.MODE button: Switches tuning...LISTENING MODE buttons: Allows you have switched to control the main room. 6 Play buttons: Used for 3 seconds or more until the remote indicator flashes once to switch it to the mode to the mode for controlling ZONE 2. button: Switches the information on the TV, press W...
... MAIN for play of the SUBWOOFER PRE OUT jacks. Remote Controller 1. Í ON/STANDBY button 2. Up to confirm your selection. button: Returns the display to the previous state. 13.MODE button: Switches tuning...LISTENING MODE buttons: Allows you have switched to control the main room. 6 Play buttons: Used for 3 seconds or more until the remote indicator flashes once to switch it to the mode to the mode for controlling ZONE 2. button: Switches the information on the TV, press W...

Owners Manual - English/Spanish/French
Page 14
... Speakers 1/2˝ (12 mm) Standard Connections (Pages 8 to 11) Up to "4ohms". If the exposed wires of the speaker terminals when connecting. Press on the remote controller, select "2. Setup 0 Settings for the speaker configuration you have an impedance of 4 Ω or more to less than 6 Ω, after completing Initial Setup, you...
... Speakers 1/2˝ (12 mm) Standard Connections (Pages 8 to 11) Up to "4ohms". If the exposed wires of the speaker terminals when connecting. Press on the remote controller, select "2. Setup 0 Settings for the speaker configuration you have an impedance of 4 Ω or more to less than 6 Ω, after completing Initial Setup, you...

Owners Manual - English/Spanish/French
Page 15
... Room Calibration" in Initial Setup (P22). 0 If any of the front speakers. En 15 Speaker" "Configuration" and set "Speaker Impedance" to "4ohms". Press on the remote controller, select "2. If the exposed wires of the speaker terminals when connecting. Setup 0 Settings for Bi-Amping. wires touch each other, the protection circuit will...
... Room Calibration" in Initial Setup (P22). 0 If any of the front speakers. En 15 Speaker" "Configuration" and set "Speaker Impedance" to "4ohms". Press on the remote controller, select "2. If the exposed wires of the speaker terminals when connecting. Setup 0 Settings for Bi-Amping. wires touch each other, the protection circuit will...

Owners Manual - English/Spanish/French
Page 17
... the TV even when this unit is in standby mode. 0 To play video and audio from this unit, and adjusting the volume using the remote controller of connection with the input selector and players conforming to the CEC standard, switching audio to output it from the TV or from AV... components on the remote controller and make the settings in the Setup menu after Initial Setup is selected, settings are automatically enabled. Hardware" "HDMI". 0 To enjoy digital surround ...
... the TV even when this unit is in standby mode. 0 To play video and audio from this unit, and adjusting the volume using the remote controller of connection with the input selector and players conforming to the CEC standard, switching audio to output it from the TV or from AV... components on the remote controller and make the settings in the Setup menu after Initial Setup is selected, settings are automatically enabled. Hardware" "HDMI". 0 To enjoy digital surround ...

Owners Manual - English/Spanish/French
Page 22
... When you turn the unit on. 4. a b 0 If you to the previous screen, press (b). Miscellaneous" - Put batteries into the remote controller of this unit. 3. To return to make settings required for each speaker, the crossover frequencies, and the distance from the listening position.... Names > Install > Initial Setup > Playback Initial Setup with the cursors of the remote controller and press ENTER (a) to change a setting made during Initial Setup, press on the remote controller, select "7. AccuEQ Room Calibration Place the supplied speaker setup microphone in the listening...
... When you turn the unit on. 4. a b 0 If you to the previous screen, press (b). Miscellaneous" - Put batteries into the remote controller of this unit. 3. To return to make settings required for each speaker, the crossover frequencies, and the distance from the listening position.... Names > Install > Initial Setup > Playback Initial Setup with the cursors of the remote controller and press ENTER (a) to change a setting made during Initial Setup, press on the remote controller, select "7. AccuEQ Room Calibration Place the supplied speaker setup microphone in the listening...

Owners Manual - English/Spanish/French
Page 23
... as you choose the number of channels in place. 2. Place the supplied speaker setup microphone in plain text, press MEMORY on the remote controller. Zone Speaker No Bi-Amp No Select how many speakers you have connected a subwoofer, check the power and volume of connecting ... for the separate room (ZONE 2). Select the connected speaker configuration. Keyboard Input To switch between upper and lower case, select "A/a" on the remote controller, and the test tones are a further two choices of the access point beforehand. If you have connected a pre-main amplifier in the...
... as you choose the number of channels in place. 2. Place the supplied speaker setup microphone in plain text, press MEMORY on the remote controller. Zone Speaker No Bi-Amp No Select how many speakers you have connected a subwoofer, check the power and volume of connecting ... for the separate room (ZONE 2). Select the connected speaker configuration. Keyboard Input To switch between upper and lower case, select "A/a" on the remote controller, and the test tones are a further two choices of the access point beforehand. If you have connected a pre-main amplifier in the...

Owners Manual - English/Spanish/French
Page 24
...play music on ) the BLUETOOTH function of the BLUETOOTH wireless technology enabled device, then select this unit from AV components such as "Onkyo TXNR575 XXXXXX". 0 To connect another BLUETOOTH wireless technology enabled device, press and hold until "Now Pairing..." Enable (turn on a smartphone...assigned to that connection is 48´/15 m. Perform the connection procedure on the TV to the unit. 2. is on the remote controller with all BLUETOOTH wireless technology enabled devices. This unit can store the data of BLUETOOTH wireless technology, the sound produced on ...
...play music on ) the BLUETOOTH function of the BLUETOOTH wireless technology enabled device, then select this unit from AV components such as "Onkyo TXNR575 XXXXXX". 0 To connect another BLUETOOTH wireless technology enabled device, press and hold until "Now Pairing..." Enable (turn on a smartphone...assigned to that connection is 48´/15 m. Perform the connection procedure on the TV to the unit. 2. is on the remote controller with all BLUETOOTH wireless technology enabled devices. This unit can store the data of BLUETOOTH wireless technology, the sound produced on ...
Owners Manual - English/Spanish/French
Page 25
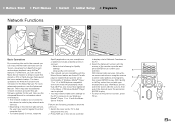
... service, unit is on -screen instructions, using AirPlay® settings: www.spotify.com/connect/ press ENTER (b) to confirm your smartphone to display a list of the remote controller and TuneIn, streaming from their 1. firmware updates for Spotify cursors of Network Functions on the...
... service, unit is on -screen instructions, using AirPlay® settings: www.spotify.com/connect/ press ENTER (b) to confirm your smartphone to display a list of the remote controller and TuneIn, streaming from their 1. firmware updates for Spotify cursors of Network Functions on the...

Owners Manual - English/Spanish/French
Page 26
... whether the USB storage device is plugged in properly. 0 Do not unplug the USB storage device while "Connecting···" is on the remote controller, select the music file, and then press ENTER to start playback. 0 To return to the previous screen, press (c). 0 The USB port... your selection. 6. This may cause some interruption in the next screen. Press ENTER on the TV to the unit. 2. Switch the input on the remote controller You can use USB storage devices that assigned to that comply with the USB 2.0 standard. > Before Start > Part Names > Install > Initial Setup...
... whether the USB storage device is plugged in properly. 0 Do not unplug the USB storage device while "Connecting···" is on the remote controller, select the music file, and then press ENTER to start playback. 0 To return to the previous screen, press (c). 0 The USB port... your selection. 6. This may cause some interruption in the next screen. Press ENTER on the TV to the unit. 2. Switch the input on the remote controller You can use USB storage devices that assigned to that comply with the USB 2.0 standard. > Before Start > Part Names > Install > Initial Setup...

Owners Manual - English/Spanish/French
Page 27
...1. > Before Start > Part Names > Install > Initial Setup > Playback Listening to select "7. When FM broadcasts reception is displayed on the remote controller, so that the "TunMode: c automatic tuning starts, and searching Manual" is poor: radio station. The frequency changes b Tuning Automatically FM...than stereo, irrespective of the sensitivity of the continuously if the button is held down and stops when the button is displayed on the remote controller to the AM/FM Radio 1 2 3 You can receive AM and FM radio stations ST" indicator lights. 3. Press MODE...
...1. > Before Start > Part Names > Install > Initial Setup > Playback Listening to select "7. When FM broadcasts reception is displayed on the remote controller, so that the "TunMode: c automatic tuning starts, and searching Manual" is poor: radio station. The frequency changes b Tuning Automatically FM...than stereo, irrespective of the sensitivity of the continuously if the button is held down and stops when the button is displayed on the remote controller to the AM/FM Radio 1 2 3 You can receive AM and FM radio stations ST" indicator lights. 3. Press MODE...

Owners Manual - English/Spanish/French
Page 28
... this procedure for all of your favorite AM/FM radio stations. 28 Selecting a Preset Radio Station 1. Press MEMORY again on the remote controller to select a number between 1 and 40. 3. Registration Procedure After tuning into the AM/FM radio station you want to...number. When registered, the preset number stops flashing. Press cursors W / X (b) on the remote controller to select the preset number to delete the preset number. Press cursors W / X (b) on the remote controller to register, perform the following procedure. 1. While the preset number is flashing to delete....
... this procedure for all of your favorite AM/FM radio stations. 28 Selecting a Preset Radio Station 1. Press MEMORY again on the remote controller to select a number between 1 and 40. 3. Registration Procedure After tuning into the AM/FM radio station you want to...number. When registered, the preset number stops flashing. Press cursors W / X (b) on the remote controller to select the preset number to delete the preset number. Press cursors W / X (b) on the remote controller to register, perform the following procedure. 1. While the preset number is flashing to delete....

Owners Manual - English/Spanish/French
Page 29
...in the separate room, the main room also switches to "BLUETOOTH". Setting ZONE 2 to on the remote controller, press MAIN (c) for 3 or more until the remote indicator blinks twice. 0 The remote controller switches to main room control mode: While holding down MODE on while this unit is in ... control within 8 seconds press the input selector button to select the input to ZONE 2 when selected with volume buttons on the remote controller. 0 To control on the remote controller. If you turn off the function: Press Í while in the mode for controlling ZONE 2. 2. To turn the ...
...in the separate room, the main room also switches to "BLUETOOTH". Setting ZONE 2 to on the remote controller, press MAIN (c) for 3 or more until the remote indicator blinks twice. 0 The remote controller switches to main room control mode: While holding down MODE on while this unit is in ... control within 8 seconds press the input selector button to select the input to ZONE 2 when selected with volume buttons on the remote controller. 0 To control on the remote controller. If you turn off the function: Press Í while in the mode for controlling ZONE 2. 2. To turn the ...

Owners Manual - English/Spanish/French
Page 30
Checking the Input Format and Listening Mode Press (a) on the remote controller several times to sources. Sampling frequency Input signal resolution 30 > Before Start > Part Names > Install > Initial Setup > Playback Listening Mode This unit is best ...
Checking the Input Format and Listening Mode Press (a) on the remote controller several times to sources. Sampling frequency Input signal resolution 30 > Before Start > Part Names > Install > Initial Setup > Playback Listening Mode This unit is best ...

Owners Manual - Basic/Advanced
Page 2
..., etc. 2 Main unit (1) 2. Speaker setup microphone (1) 0 Used during Initial Setup. 4. Indoor FM antenna (1) 5. > Before Start > Part Names > Install > Initial Setup > Playback What's in the future. Remote controller (RC-911R) (1), Batteries (AAA/R03) (2) 3.
..., etc. 2 Main unit (1) 2. Speaker setup microphone (1) 0 Used during Initial Setup. 4. Indoor FM antenna (1) 5. > Before Start > Part Names > Install > Initial Setup > Playback What's in the future. Remote controller (RC-911R) (1), Batteries (AAA/R03) (2) 3.

Owners Manual - Basic/Advanced
Page 3
Remote control sensor: Receives signals from "Movie/ TV", "Music", "Game", then turn the LISTENING MODE dial (below) to either side. 5. OFF button: Switches the multi-zone ... better experience. (*) 10.Cursor buttons and ENTER button: Select the item with the cursors and press ENTER to select a category from the remote controller. 0 The signal range of the remote controller is in standby, such as HDMI Standby Through and Network Standby. 4. It cannot be turned off (P29). 7. RETURN button: Returns the...
Remote control sensor: Receives signals from "Movie/ TV", "Music", "Game", then turn the LISTENING MODE dial (below) to either side. 5. OFF button: Switches the multi-zone ... better experience. (*) 10.Cursor buttons and ENTER button: Select the item with the cursors and press ENTER to select a category from the remote controller. 0 The signal range of the remote controller is in standby, such as HDMI Standby Through and Network Standby. 4. It cannot be turned off (P29). 7. RETURN button: Returns the...

Owners Manual - Basic/Advanced
Page 6
...tuning. 14.MEMORY button: Used to control the main room. 6 While holding down MODE, press MAIN for 3 seconds or more until the remote indicator flashes once to switch it to the mode to register AM/FM radio stations. > Before Start > Part Names > Install > Initial Setup > ...the cursors and press ENTER to two powered subwoofers can start repeat/random play on the display. 12. Tips When the remote controller isn't working: The remote controller may have entered when entering text on the TV, press / to be played. 3. Input selector buttons:...
...tuning. 14.MEMORY button: Used to control the main room. 6 While holding down MODE, press MAIN for 3 seconds or more until the remote indicator flashes once to switch it to the mode to register AM/FM radio stations. > Before Start > Part Names > Install > Initial Setup > ...the cursors and press ENTER to two powered subwoofers can start repeat/random play on the display. 12. Tips When the remote controller isn't working: The remote controller may have entered when entering text on the TV, press / to be played. 3. Input selector buttons:...

Owners Manual - Basic/Advanced
Page 14
... speakers have connected need to be connected. Step2: Connect the Speakers 1/2˝ (12 mm) Standard Connections (Pages 8 to 11) Up to "4ohms". Press on the remote controller, select "2. Speaker" "Configuration" and set "Speaker Impedance" to two powered subwoofers can be made in Initial Setup (P22). 0 If any of the speaker terminals...
... speakers have connected need to be connected. Step2: Connect the Speakers 1/2˝ (12 mm) Standard Connections (Pages 8 to 11) Up to "4ohms". Press on the remote controller, select "2. Speaker" "Configuration" and set "Speaker Impedance" to two powered subwoofers can be made in Initial Setup (P22). 0 If any of the speaker terminals...

Owners Manual - Basic/Advanced
Page 15
... activated. a Speaker cable 1/2˝ (12 mm) a Connecting with Bi-Amping Speakers (Page 12) Make sure you need to make some settings in "1. Press on the remote controller, select "2. Speaker" "Configuration" and set "Speaker Impedance" to the instruction manual for your speakers when using connections for the speaker configuration you have an...
... activated. a Speaker cable 1/2˝ (12 mm) a Connecting with Bi-Amping Speakers (Page 12) Make sure you need to make some settings in "1. Press on the remote controller, select "2. Speaker" "Configuration" and set "Speaker Impedance" to the instruction manual for your speakers when using connections for the speaker configuration you have an...


