
Installation Guide
Page 5
... 2 Installing a Nokia IP150 Security Appliance 23 Rack Mounting a Nokia IP150 Appliance 23 3 Connecting to the Ethernet Ports 27 Built-In Four-Port 10/100/1000 Ethernet Interface 27 Ethernet Features 27 Connecting to Ethernet Ports 28 4 Performing the Initial Configuration 31 Using a Console Connection 31 Connecting Power and Turning the Power On 32 Performing the Initial Configuration 33 Connecting Network Interfaces 35 Using Nokia Network Voyager 35 Viewing Nokia IPSO Documentation by Using Nokia Network Voyager 36 Using the Command-Line Interface 37 Using Nokia Horizon Manager...
... 2 Installing a Nokia IP150 Security Appliance 23 Rack Mounting a Nokia IP150 Appliance 23 3 Connecting to the Ethernet Ports 27 Built-In Four-Port 10/100/1000 Ethernet Interface 27 Ethernet Features 27 Connecting to Ethernet Ports 28 4 Performing the Initial Configuration 31 Using a Console Connection 31 Connecting Power and Turning the Power On 32 Performing the Initial Configuration 33 Connecting Network Interfaces 35 Using Nokia Network Voyager 35 Viewing Nokia IPSO Documentation by Using Nokia Network Voyager 36 Using the Command-Line Interface 37 Using Nokia Horizon Manager...

Installation Guide
Page 6
... Replacing Components 41 Replacing the Compact Flash Memory Card 41 Before You Start 42 Replacing a Hard-Disk Drive 45 Before You Start 47 Replacing or Upgrading Memory 50 Before You Start 51 Installing or Replacing the Nokia Encryption Accelerator Card 54 Before You Start 55 Configuring and Activating Nokia Encryption Acceleration 57 Replacing the Battery 58 6 Troubleshooting 63 General Troubleshooting Information 63 A Technical Specifications 67 Physical Dimensions 67 Space Requirements 67 Other Specifications 67 Appliance Interfaces...
... Replacing Components 41 Replacing the Compact Flash Memory Card 41 Before You Start 42 Replacing a Hard-Disk Drive 45 Before You Start 47 Replacing or Upgrading Memory 50 Before You Start 51 Installing or Replacing the Nokia Encryption Accelerator Card 54 Before You Start 55 Configuring and Activating Nokia Encryption Acceleration 57 Replacing the Battery 58 6 Troubleshooting 63 General Troubleshooting Information 63 A Technical Specifications 67 Physical Dimensions 67 Space Requirements 67 Other Specifications 67 Appliance Interfaces...

Installation Guide
Page 9
... Ethernet Interface Front Panel Details 16 Figure 4 Pin Assignments for Console Connections 17 Figure 5 Appliance Status LEDs 18 Figure 6 Installing the Mounting Brackets 24 Figure 7 Rack-mounted IP150 Appliance 25 Figure 8 Output Connector for the Ethernet Cable 28 Figure 9 Ethernet Crossover Cable Pin Connections 29 Figure 10 Power Switch Location 32 Figure 11 Nokia Network Voyager Reference Access Points 37 Figure 12 Hard-Disk Drive Location 46 Figure 13 DIMM Socket Locations 50 Nokia IP150 Security Platform Installation Guide...
... Ethernet Interface Front Panel Details 16 Figure 4 Pin Assignments for Console Connections 17 Figure 5 Appliance Status LEDs 18 Figure 6 Installing the Mounting Brackets 24 Figure 7 Rack-mounted IP150 Appliance 25 Figure 8 Output Connector for the Ethernet Cable 28 Figure 9 Ethernet Crossover Cable Pin Connections 29 Figure 10 Power Switch Location 32 Figure 11 Nokia Network Voyager Reference Access Points 37 Figure 12 Hard-Disk Drive Location 46 Figure 13 DIMM Socket Locations 50 Nokia IP150 Security Platform Installation Guide...
Installation Guide
Page 11
... the installation and use of the Nokia IP150 Security Platform. „ Chapter 2, "Installing a Nokia IP150 Security Appliance" explains how to rack mount the appliance and how to physically connect it to a network and power. „ Chapter 3, "Connecting to the Ethernet Ports" describes how to connect to the supported Ethernet ports. „ Chapter 4, "Performing the Initial Configuration" explains how to make the appliance available on the network. „ Chapter 5, "Installing and Replacing Components"describes how to configure and activate...
... the installation and use of the Nokia IP150 Security Platform. „ Chapter 2, "Installing a Nokia IP150 Security Appliance" explains how to rack mount the appliance and how to physically connect it to a network and power. „ Chapter 3, "Connecting to the Ethernet Ports" describes how to connect to the supported Ethernet ports. „ Chapter 4, "Performing the Initial Configuration" explains how to make the appliance available on the network. „ Chapter 5, "Installing and Replacing Components"describes how to configure and activate...
Installation Guide
Page 13
... appliance, documentation for the version of Nokia IPSO you are using „ Nokia Network Voyager inline help , the Nokia Network Voyager Reference Guide, and the CLI Reference Guide from the Check Point Web site at: http:// www.checkpoint.com/ 060306 Nokia IP150 Security Platform Installation Guide 13 Check Point documentation is available from Nokia Network Voyager. You can access inline help You can find the most up-to date version of the Nokia IP150 Security Platform Installation Guide in PDF on the Nokia support Web site (https:// support.nokia.com/) and on the Nokia support...
... appliance, documentation for the version of Nokia IPSO you are using „ Nokia Network Voyager inline help , the Nokia Network Voyager Reference Guide, and the CLI Reference Guide from the Check Point Web site at: http:// www.checkpoint.com/ 060306 Nokia IP150 Security Platform Installation Guide 13 Check Point documentation is available from Nokia Network Voyager. You can access inline help You can find the most up-to date version of the Nokia IP150 Security Platform Installation Guide in PDF on the Nokia support Web site (https:// support.nokia.com/) and on the Nokia support...
Installation Guide
Page 15
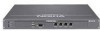
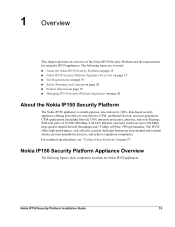
..., one-rack unit (1 RU), disk-based security appliance offering powerful yet cost effective UTM, traditional firewall, and next-generation UTM applications (including firewall, VPN, intrusion protection, antivirus, and web filtering). 1 Overview This chapter provides an overview of the Nokia IP150 Security Platform and the requirements for Nokia IP150 appliances. With four ports of 10/100/1000 Base-T (RJ-45) Ethernet on page 67. The following figures show component locations for using the IP150 appliances.
..., one-rack unit (1 RU), disk-based security appliance offering powerful yet cost effective UTM, traditional firewall, and next-generation UTM applications (including firewall, VPN, intrusion protection, antivirus, and web filtering). 1 Overview This chapter provides an overview of the Nokia IP150 Security Platform and the requirements for Nokia IP150 appliances. With four ports of 10/100/1000 Base-T (RJ-45) Ethernet on page 67. The following figures show component locations for using the IP150 appliances.

Installation Guide
Page 17
... appliance available on the network. Nokia IP150 Security Platform Appliance Overview Console and Serial (AUX) Ports Use the built-in USB (AUX) port for console and serial connections. Use the built-in console port to supply the information that was delivered with your appliance; for example, as a modem connection for Console Connections 1 Input or 5 Pin# Assignment output 1 6 9 2 00460 3 not used RXD TXD Input Output 4 DTR Output 5 GND 6 DSR Input 7 RTS Output 8 CTS Input 9 not used Nokia IP150 Security Platform Installation Guide...
... appliance available on the network. Nokia IP150 Security Platform Appliance Overview Console and Serial (AUX) Ports Use the built-in USB (AUX) port for console and serial connections. Use the built-in console port to supply the information that was delivered with your appliance; for example, as a modem connection for Console Connections 1 Input or 5 Pin# Assignment output 1 6 9 2 00460 3 not used RXD TXD Input Output 4 DTR Output 5 GND 6 DSR Input 7 RTS Output 8 CTS Input 9 not used Nokia IP150 Security Platform Installation Guide...
Installation Guide
Page 19
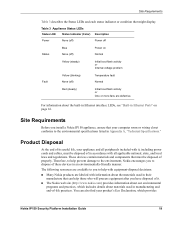
... it . „ The Nokia web site (http://www.nokia.com) provides information about our environmental programs and practices, which provides Nokia IP150 Security Platform Installation Guide 19 These devices contain materials and components that your product's Eco Declaration, which includes details about the built-in Ethernet interface LEDs, see "Built-in Ethernet Ports" on Normal Yellow (steady) Initial boot flash activity or Internal voltage problem Fault Yellow (blinking) None...
... it . „ The Nokia web site (http://www.nokia.com) provides information about our environmental programs and practices, which provides Nokia IP150 Security Platform Installation Guide 19 These devices contain materials and components that your product's Eco Declaration, which includes details about the built-in Ethernet interface LEDs, see "Built-in Ethernet Ports" on Normal Yellow (steady) Initial boot flash activity or Internal voltage problem Fault Yellow (blinking) None...

Installation Guide
Page 20
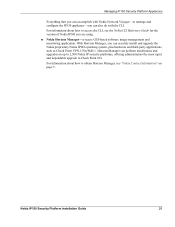
... you to Nokia IP security platforms. Network Voyager is preinstalled on the environmental attributes of the product covering material use a power cord rated at the product end-of-life. Managing IP150 Security Platform Appliances You can manage, monitor, and configure the IP150 appliance from the command line. 20 Nokia IP150 Security Platform Installation Guide Do not use telephone equipment, follow basic safety precautions. 1 basic information on the IP150 appliance and enabled through the Nokia IPSO operating...
... you to Nokia IP security platforms. Network Voyager is preinstalled on the environmental attributes of the product covering material use a power cord rated at the product end-of-life. Managing IP150 Security Platform Appliances You can manage, monitor, and configure the IP150 appliance from the command line. 20 Nokia IP150 Security Platform Installation Guide Do not use telephone equipment, follow basic safety precautions. 1 basic information on the IP150 appliance and enabled through the Nokia IPSO operating...
Installation Guide
Page 21
...using. „ Nokia Horizon Manager-a secure GUI-based software image management and monitoring application. Nokia IP150 Security Platform Installation Guide 21 With Horizon Manager, you can also do with the CLI. Horizon Manager can perform installations and upgrades on page 3. Managing IP150 Security Platform Appliances Everything that you can accomplish with Nokia Network Voyager-to manage and configure the IP150 appliance-you can securely install and upgrade the Nokia proprietary Nokia IPSO operating system, plus hardware and third-party applications such as Check Point VPN-1/FireWall...
...using. „ Nokia Horizon Manager-a secure GUI-based software image management and monitoring application. Nokia IP150 Security Platform Installation Guide 21 With Horizon Manager, you can also do with the CLI. Horizon Manager can perform installations and upgrades on page 3. Managing IP150 Security Platform Appliances Everything that you can accomplish with Nokia Network Voyager-to manage and configure the IP150 appliance-you can securely install and upgrade the Nokia proprietary Nokia IPSO operating system, plus hardware and third-party applications such as Check Point VPN-1/FireWall...
Installation Guide
Page 27
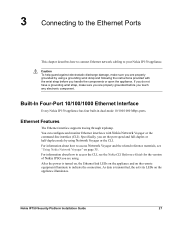
.... Ethernet Features The Ethernet interface supports tracing through tcpdump. For information about how to access Network Voyager and the related reference materials, see the Nokia CLI Reference Guide for the version of Nokia IPSO you set the port speed and full-duplex or half-duplex mode by using . Nokia IP150 Security Platform Installation Guide 27 3 Connecting to the Ethernet Ports This chapter describes how to connect Ethernet network cabling to indicate the connection. As data is turned on, the Ethernet link LEDs on the appliance and on the appliance...
.... Ethernet Features The Ethernet interface supports tracing through tcpdump. For information about how to access Network Voyager and the related reference materials, see the Nokia CLI Reference Guide for the version of Nokia IPSO you set the port speed and full-duplex or half-duplex mode by using . Nokia IP150 Security Platform Installation Guide 27 3 Connecting to the Ethernet Ports This chapter describes how to connect Ethernet network cabling to indicate the connection. As data is turned on, the Ethernet link LEDs on the appliance and on the appliance...
Installation Guide
Page 31
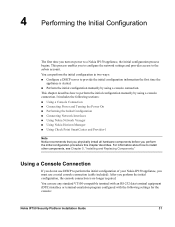
... must use a serial console connection (cable included). This process enables you perform the initial configuration, the console connection is started. „ Perform the initial configuration manually by using a console connection. You can use DHCP to the admin account. After you to configure the network settings and provides access to perform the initial configuration of your Nokia IP150 appliance, you perform the initial configuration procedure this chapter describes. 4 Performing the Initial Configuration The first time you turn on power to install...
... must use a serial console connection (cable included). This process enables you perform the initial configuration, the console connection is started. „ Perform the initial configuration manually by using a console connection. You can use DHCP to the admin account. After you to configure the network settings and provides access to perform the initial configuration of your Nokia IP150 appliance, you perform the initial configuration procedure this chapter describes. 4 Performing the Initial Configuration The first time you turn on power to install...
Installation Guide
Page 33
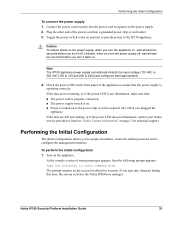
... if the power LED does not illuminate, contact your Nokia service provider as listed in "Nokia Contact Information" on to the IP150 appliance. Nokia IP150 Security Platform Installation Guide 33 Connect the power cord securely into a grounded power strip or wall outlet. 3. Plug the other end of startup messages appears, then the following prompt appears: Type any character during this time, the system activates the Nokia IPSO boot manager. Note The IP150 appliance power supply automatically detects the...
... if the power LED does not illuminate, contact your Nokia service provider as listed in "Nokia Contact Information" on to the IP150 appliance. Nokia IP150 Security Platform Installation Guide 33 Connect the power cord securely into a grounded power strip or wall outlet. 3. Plug the other end of startup messages appears, then the following prompt appears: Type any character during this time, the system activates the Nokia IPSO boot manager. Note The IP150 appliance power supply automatically detects the...
Installation Guide
Page 34
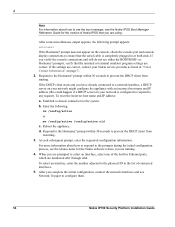
... DHCP client from restarting. 3. For more information about how to use the boot manager, see the Nokia IPSO Boot Manager Reference Guide for the Nokia software release you verify the console connections and still do not see the release notes for the version of Nokia IPSO that you complete the initial configuration, connect the network interfaces and use Network Voyager to configure them. 34 Nokia IP150 Security Platform Installation Guide After some miscellaneous output appears, the following : rm /config/active or mv /config/active /config/active...
... DHCP client from restarting. 3. For more information about how to use the boot manager, see the Nokia IPSO Boot Manager Reference Guide for the Nokia software release you verify the console connections and still do not see the release notes for the version of Nokia IPSO that you complete the initial configuration, connect the network interfaces and use Network Voyager to configure them. 34 Nokia IP150 Security Platform Installation Guide After some miscellaneous output appears, the following : rm /config/active or mv /config/active /config/active...

Installation Guide
Page 35
... configuration and check that all cables are firmly connected. Note If the username login screen does not open Nokia Network Voyager 1. Confirm the information you might not have a network routing problem. For more information, see the troubleshooting section in the following sections. In the Location or Address field, enter the IP address of the initial interface you plan to use as the Nokia Network Voyager system-management interface. Nokia IP150 Security Platform Installation Guide 35 To connect...
... configuration and check that all cables are firmly connected. Note If the username login screen does not open Nokia Network Voyager 1. Confirm the information you might not have a network routing problem. For more information, see the troubleshooting section in the following sections. In the Location or Address field, enter the IP address of the initial interface you plan to use as the Nokia Network Voyager system-management interface. Nokia IP150 Security Platform Installation Guide 35 To connect...

Installation Guide
Page 38
... licensing to invoke the CLI shell: clish The prompt changes, and you are using. Horizon Manager is an extension of Nokia IPSO you can then enter CLI commands. Nokia IPSO command line Enter clish -c "cli-command" Execute a single CLI command. Using Horizon Manager, an administrator can manage multiple devices simultaneously, perform parallel software upgrades, device verifications, device configuration, file backups, and more. For more about how to access and use the CLI, see "Nokia Contact Information" on page 3. 060228 38 Nokia IP150 Security Platform Installation Guide...
... licensing to invoke the CLI shell: clish The prompt changes, and you are using. Horizon Manager is an extension of Nokia IPSO you can then enter CLI commands. Nokia IPSO command line Enter clish -c "cli-command" Execute a single CLI command. Using Horizon Manager, an administrator can manage multiple devices simultaneously, perform parallel software upgrades, device verifications, device configuration, file backups, and more. For more about how to access and use the CLI, see "Nokia Contact Information" on page 3. 060228 38 Nokia IP150 Security Platform Installation Guide...

Installation Guide
Page 64
... serial access to your appliance console to the appliance, the boot prompt does not appear, and you are using a null-modem cable. Problem Terminal set the password to default settings or contact the Nokia customer support site listed in "Nokia Contact Information" on page 32. Solution The IP150 appliance does not use flow control. For pinout information, see the Nokia Network Voyager Reference Guide or CLI Reference Guide for flow control. Do Not Receive a Login Prompt-Error Messages Appear Problem The IP150 appliance...
... serial access to your appliance console to the appliance, the boot prompt does not appear, and you are using a null-modem cable. Problem Terminal set the password to default settings or contact the Nokia customer support site listed in "Nokia Contact Information" on page 32. Solution The IP150 appliance does not use flow control. For pinout information, see the Nokia Network Voyager Reference Guide or CLI Reference Guide for flow control. Do Not Receive a Login Prompt-Error Messages Appear Problem The IP150 appliance...

Installation Guide
Page 65
... about how to Nokia Network Voyager Using the Ethernet Port, But Console Access Works Problem Network Voyager access or Ethernet port disabled. Not Able to Connect to complete the full installation procedure, see the CLI Reference Guide for the version of Nokia IPSO you are located on the Nokia customer support Web site as listed in "Nokia Contact Information" on each end of the drive and might have set the wrong speed. Verify that the interface port is configured as necessary. The...
... about how to Nokia Network Voyager Using the Ethernet Port, But Console Access Works Problem Network Voyager access or Ethernet port disabled. Not Able to Connect to complete the full installation procedure, see the CLI Reference Guide for the version of Nokia IPSO you are located on the Nokia customer support Web site as listed in "Nokia Contact Information" on each end of the drive and might have set the wrong speed. Verify that the interface port is configured as necessary. The...

Installation Guide
Page 73
... 32 DHCP client startup 34 DHCP server, initial configuration 31 DIMMs socket locations 50 documentation for the IP150.appliance 11 E end-of-life information 19 Ethernet cable output connector 28 crossover-cable pin connections 29 network interface cable pin assignments 28 ports, connecting to 28 Ethernet devices connecting 35 H hard-disk drive installing a 45 I installing hard-disk drive, a 45 interfaces connecting network 35 IP150 appliances monitoring 18 M memory (RAM) replacing 50 upgrading 50 modem connection pin assignments for the 17 monitoring IP150 appliances 18 Nokia IP150 Security...
... 32 DHCP client startup 34 DHCP server, initial configuration 31 DIMMs socket locations 50 documentation for the IP150.appliance 11 E end-of-life information 19 Ethernet cable output connector 28 crossover-cable pin connections 29 network interface cable pin assignments 28 ports, connecting to 28 Ethernet devices connecting 35 H hard-disk drive installing a 45 I installing hard-disk drive, a 45 interfaces connecting network 35 IP150 appliances monitoring 18 M memory (RAM) replacing 50 upgrading 50 modem connection pin assignments for the 17 monitoring IP150 appliances 18 Nokia IP150 Security...

Installation Guide
Page 74
...network interfaces, connecting 35 Nokia Horizon Manager using the 38 Nokia IPSO command-line interface (CLI) 37 reference documentation 36 Nokia Network Voyager opening 35 null-modem cable 32 O opening Nokia Network Voyager 35 output connector Ethernet cable, for the 28 output connector for the Ethernet cable 28 P pin assignments for modem connections 17 pin connections Ethernet crossover-cable 29 pin connections for Ethernet crossover cables 29 power connections 32 R recycling retired equipment 19 replacing RAM memory 50 RJ-45 connector 28, 29 S security platform configuring 31 specifications...
...network interfaces, connecting 35 Nokia Horizon Manager using the 38 Nokia IPSO command-line interface (CLI) 37 reference documentation 36 Nokia Network Voyager opening 35 null-modem cable 32 O opening Nokia Network Voyager 35 output connector Ethernet cable, for the 28 output connector for the Ethernet cable 28 P pin assignments for modem connections 17 pin connections Ethernet crossover-cable 29 pin connections for Ethernet crossover cables 29 power connections 32 R recycling retired equipment 19 replacing RAM memory 50 RJ-45 connector 28, 29 S security platform configuring 31 specifications...


