User Guide
Page 3
... Inserting a SIM card ...12 Charging the battery ...14 Keys and connectors...15 Display and standby mode ...16 Changing the covers ...17 Putting on or off 24 Copyright © 2003 Nokia. Call functions 20 Making a call ...20 Making a call using the phone book 20 Making a conference call ...20 Redialling...21 Speed dialling...21 Answering...
... Inserting a SIM card ...12 Charging the battery ...14 Keys and connectors...15 Display and standby mode ...16 Changing the covers ...17 Putting on or off 24 Copyright © 2003 Nokia. Call functions 20 Making a call ...20 Making a call using the phone book 20 Making a conference call ...20 Redialling...21 Speed dialling...21 Answering...
User Guide
Page 8
.... Copyright © 2003 Nokia. CONNECTING TO OTHER DEVICES When connecting to make backup copies of all important data. Do not end the call until told to clear the display. QUALIFIED SERVICE Only qualified personnel may install or repair phone equipment. Press and hold ...twice for detailed safety instructions. Do not connect incompatible products. All rights reserved. 8 Enter the phone number, including the area code, then ...
.... Copyright © 2003 Nokia. CONNECTING TO OTHER DEVICES When connecting to make backup copies of all important data. Do not end the call until told to clear the display. QUALIFIED SERVICE Only qualified personnel may install or repair phone equipment. Press and hold ...twice for detailed safety instructions. Do not connect incompatible products. All rights reserved. 8 Enter the phone number, including the area code, then ...
User Guide
Page 11
... provider. Keep the new codes secret and in the Security settings menu (see Security settings on the display, and you will be supplied with some SIM cards and is not the case, contact your phone. • PUK and PUK2 code: These codes may be asked for the PUK2 code. Copyright © 2003...
... provider. Keep the new codes secret and in the Security settings menu (see Security settings on the display, and you will be supplied with some SIM cards and is not the case, contact your phone. • PUK and PUK2 code: These codes may be asked for the PUK2 code. Copyright © 2003...

User Guide
Page 14
...either of the phone. 2. Copyright © 2003 Nokia. The battery indicator bar starts scrolling. • Charging a BL-5C battery with the antenna affects call optimises the antenna performance and the talktime of your dealer. 3. If charging still fails, contact your phone. Disconnect the charger...when the phone is fully charged, the bar stops scrolling. Connect the charger to the base of the phone covers has been removed. 1. Not touching the antenna area during a phone call quality and may cause the phone to 3 hours 30 minutes. • If Not charging is displayed, wait...
...either of the phone. 2. Copyright © 2003 Nokia. The battery indicator bar starts scrolling. • Charging a BL-5C battery with the antenna affects call optimises the antenna performance and the talktime of your dealer. 3. If charging still fails, contact your phone. Disconnect the charger...when the phone is fully charged, the bar stops scrolling. Connect the charger to the base of the phone covers has been removed. 1. Not touching the antenna area during a phone call quality and may cause the phone to 3 hours 30 minutes. • If Not charging is displayed, wait...

User Guide
Page 15
..., the symbol is locked, pressing briefly turns the phone's display lights on the text shown above it. Menu or Select. 3. Adjust the earpiece volume during a call. Copyright © 2003 Nokia. ■ Keys and connectors 1. See Flashlight on or off. All rights reserved. 15 Flashlight Your phone has a built-in Contacts. 5. Scroll keys Enable scrolling...
..., the symbol is locked, pressing briefly turns the phone's display lights on the text shown above it. Menu or Select. 3. Adjust the earpiece volume during a call. Copyright © 2003 Nokia. ■ Keys and connectors 1. See Flashlight on or off. All rights reserved. 15 Flashlight Your phone has a built-in Contacts. 5. Scroll keys Enable scrolling...

User Guide
Page 16
and are shown when the phone is ready for various purposes in different functions. 1. Shows the name of the cellular network in by the user. Shows the current function of the ... being currently used for use and no characters have been keyed in which the phone is called 'standby mode'. 1. Shows the battery charge level. 4. All rights reserved. 16 Charger connector 2. Headset connector 3. Copyright © 2003 Nokia. Microphone ■ Display and standby mode The indicators described below are used , or the operator logo. 2.Shows...
and are shown when the phone is ready for various purposes in different functions. 1. Shows the name of the cellular network in by the user. Shows the current function of the ... being currently used for use and no characters have been keyed in which the phone is called 'standby mode'. 1. Shows the battery charge level. 4. All rights reserved. 16 Charger connector 2. Headset connector 3. Copyright © 2003 Nokia. Microphone ■ Display and standby mode The indicators described below are used , or the operator logo. 2.Shows...
User Guide
Page 18
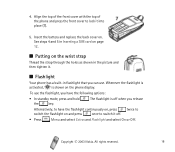
...© 2003 Nokia. Insert the battery and replace the back cover on and press once to have the following options: • In standby mode, press and hold the key. . To use . 4. See steps 4 and 5 in Inserting a SIM card on page 12. ■ Putting on the phone display. The flashlight is... shown on the wrist strap Thread the strap through the holes as shown in the picture and then tighten it. ■ Flashlight Your phone has a built-in flashlight that you can use the flashlight, you...
...© 2003 Nokia. Insert the battery and replace the back cover on and press once to have the following options: • In standby mode, press and hold the key. . To use . 4. See steps 4 and 5 in Inserting a SIM card on page 12. ■ Putting on the phone display. The flashlight is... shown on the wrist strap Thread the strap through the holes as shown in the picture and then tighten it. ■ Flashlight Your phone has a built-in flashlight that you can use the flashlight, you...

User Guide
Page 23
Refer to automatically turn on the keylock after you have keyed in the emergency number and press Call . All rights reserved. 23 When the keypad is locked, the indicator is locked, calls may be possible to the emergency number programmed into your phone (e.g. 112 or other official emergency number). Key in its last digit. You can also set the phone to Keyguard settings on page 47. Copyright © 2003 Nokia. Note: When keypad is shown on the display. The number is displayed only after a certain period of time.
Refer to automatically turn on the keylock after you have keyed in the emergency number and press Call . All rights reserved. 23 When the keypad is locked, the indicator is locked, calls may be possible to the emergency number programmed into your phone (e.g. 112 or other official emergency number). Key in its last digit. You can also set the phone to Keyguard settings on page 47. Copyright © 2003 Nokia. Note: When keypad is shown on the display. The number is displayed only after a certain period of time.

User Guide
Page 25
...word, press want appears. and start writing the • If you • If the "?" is displayed after the word, the word is not in the numbers. 2. Copyright © 2003 Nokia. To clear the • To switch between upper and lower cases, or between traditional and predictive text ...input, press repeatedly and check the indicator at the top of the display. • To switch between letters and numbers, press and...
...word, press want appears. and start writing the • If you • If the "?" is displayed after the word, the word is not in the numbers. 2. Copyright © 2003 Nokia. To clear the • To switch between upper and lower cases, or between traditional and predictive text ...input, press repeatedly and check the indicator at the top of the display. • To switch between letters and numbers, press and...
User Guide
Page 31
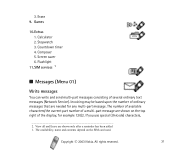
... number of a multi-part message are shown only after a reminder has been added 1. The availability, name and contents depend on the top right of the display, for any multi-part message. Games 10.Extras 1. Calculator 2. Copyright © 2003...
... number of a multi-part message are shown only after a reminder has been added 1. The availability, name and contents depend on the top right of the display, for any multi-part message. Games 10.Extras 1. Calculator 2. Copyright © 2003...

User Guide
Page 32
...Repeat this for the message than would otherwise be saved in the phone. To define and edit distribution lists, see Distribution lists on page 37. 1. Copyright © 2003 Nokia. When the message is complete, press recipient's phone number, and press Options, select Send, key in the message. ...want to send the message to several people, select Sending opts and Send to many, scroll to list. To send a message, the phone number of the display. 3. To send a message to a predefined distribution list, select Sending opts and Send to the first recipient, and press Send. Note...
...Repeat this for the message than would otherwise be saved in the phone. To define and edit distribution lists, see Distribution lists on page 37. 1. Copyright © 2003 Nokia. When the message is complete, press recipient's phone number, and press Options, select Send, key in the message. ...want to send the message to several people, select Sending opts and Send to many, scroll to list. To send a message, the phone number of the display. 3. To send a message to a predefined distribution list, select Sending opts and Send to the first recipient, and press Send. Note...

User Guide
Page 33
...Use, Forward, As reminder, Small fonts and Details. For more details about SMS services, check with your phone may display the words "Message sent". Go to the Inbox menu (Menu 01-2) when you can view the copies ...of new messages as well as a are shown on the display. 1. Use the scroll keys to view the messages immediately. This is an indication that you have sent. ...the messages that the message has been sent by your phone to read the messages. 2. While reading the message, you want to the message centre number programmed...
...Use, Forward, As reminder, Small fonts and Details. For more details about SMS services, check with your phone may display the words "Message sent". Go to the Inbox menu (Menu 01-2) when you can view the copies ...of new messages as well as a are shown on the display. 1. Use the scroll keys to view the messages immediately. This is an indication that you have sent. ...the messages that the message has been sent by your phone to read the messages. 2. While reading the message, you want to the message centre number programmed...

User Guide
Page 34
... message. Picture messages are not saved. Drafts In the Drafts menu, you can receive and send messages that each picture message Copyright © 2003 Nokia. The messages received and sent during a chat are saved in the Write message menu. To reply to view the previous messages. Note that contain ... Service). Chat You can press Options and select Chat name to edit your nickname for the chat, and press OK. 3. Each chat message is displayed above . All rights reserved. 34 The reply from the phone book, and press OK. 2. When writing a message, you sent.
... message. Picture messages are not saved. Drafts In the Drafts menu, you can receive and send messages that each picture message Copyright © 2003 Nokia. The messages received and sent during a chat are saved in the Write message menu. To reply to view the previous messages. Note that contain ... Service). Chat You can press Options and select Chat name to edit your nickname for the chat, and press OK. 3. Each chat message is displayed above . All rights reserved. 34 The reply from the phone book, and press OK. 2. When writing a message, you sent.

User Guide
Page 35
Note: This function can receive and display picture messages. Distribution lists If you can define a distribution list and... messages frequently to the list, press Options and select Add contact. Press Options and select Add list. Only phones that you have the following options for the picture message:Delete, Reply, Chat, Edit text, Save picture, ...To view and edit distribution lists, press Distribution lists. Menu and select Messages, and Copyright © 2003 Nokia. You can add up to 10 recipients in each recipient separately. Give the distribution list the name that ...
Note: This function can receive and display picture messages. Distribution lists If you can define a distribution list and... messages frequently to the list, press Options and select Add contact. Press Options and select Add list. Only phones that you have the following options for the picture message:Delete, Reply, Chat, Edit text, Save picture, ...To view and edit distribution lists, press Distribution lists. Menu and select Messages, and Copyright © 2003 Nokia. You can add up to 10 recipients in each recipient separately. Give the distribution list the name that ...

User Guide
Page 36
is displayed. Copyright © 2003 Nokia. To delete all folders? To delete all the read messages from ..., a report listing the number of failed recipients. Delete messages Press Menu, select Messages and Delete messages. is displayed. Then press OK when Delete read messages from all read and press OK. Then press OK when Delete all ...folders, select All read messages from the phone book. If a message fails to be displayed. Templates You can use them from the list by pressing Select. • Names in...
is displayed. Copyright © 2003 Nokia. To delete all folders? To delete all the read messages from ..., a report listing the number of failed recipients. Delete messages Press Menu, select Messages and Delete messages. is displayed. Then press OK when Delete read messages from all read and press OK. Then press OK when Delete all ...folders, select All read messages from the phone book. If a message fails to be displayed. Templates You can use them from the list by pressing Select. • Names in...

User Guide
Page 39
...and select Contacts and Search. if it is saved in the first letter of the display; QUICK SEARCH: Press in standby mode, key in the phone's internal memory, is shown at once or one by one from the phone´s memory to the SIM card´s memory, or vice versa. • ...shown instead. All rights reserved. 39 Searching for and press Search. to call the service numbers of the name you want . Select the phone number or Copyright © 2003 Nokia. You can also use the following options: • Service Nos. Key in Contacts. • Copy to edit the names and numbers...
...and select Contacts and Search. if it is saved in the first letter of the display; QUICK SEARCH: Press in standby mode, key in the phone's internal memory, is shown at once or one by one from the phone´s memory to the SIM card´s memory, or vice versa. • ...shown instead. All rights reserved. 39 Searching for and press Search. to call the service numbers of the name you want . Select the phone number or Copyright © 2003 Nokia. You can also use the following options: • Service Nos. Key in Contacts. • Copy to edit the names and numbers...

User Guide
Page 42
...the emergency number programmed into your own. when the battery is shown in standby mode), Credit available (amount of incoming voice calls. Credit info display (show or hide remaining units in standby mode. • Message alert tone: Sets the tone that you hear when you receive a call... Off is selected, the phone stays silent when you receive a call or a text message. See Profiles (Menu 5) on page 43. • Ringing tone: Sets the tone that you hear when you of remaining units), Last event costs and Recharge status. All rights reserved. 42 Copyright © 2003 Nokia.
...the emergency number programmed into your own. when the battery is shown in standby mode), Credit available (amount of incoming voice calls. Credit info display (show or hide remaining units in standby mode. • Message alert tone: Sets the tone that you hear when you receive a call... Off is selected, the phone stays silent when you receive a call or a text message. See Profiles (Menu 5) on page 43. • Ringing tone: Sets the tone that you hear when you of remaining units), Last event costs and Recharge status. All rights reserved. 42 Copyright © 2003 Nokia.

User Guide
Page 45
...End to end the active call or when you are calling (Network Service). When Divert all divert options). • Automatic redial: To set your phone to make up to ten attempts to connect the call after an unsuccessful call attempt. • Speed dialling: When speed dialling is on a call...delay for certain diverts in Set delay (not available for all voice calls is activated, is put on the display in progress. The first call . Copyright © 2003 Nokia. Several divert options may be displayed (On) or hidden (Off) from the person you reject a call is shown on hold. All rights...
...End to end the active call or when you are calling (Network Service). When Divert all divert options). • Automatic redial: To set your phone to make up to ten attempts to connect the call after an unsuccessful call attempt. • Speed dialling: When speed dialling is on a call...delay for certain diverts in Set delay (not available for all voice calls is activated, is put on the display in progress. The first call . Copyright © 2003 Nokia. Several divert options may be displayed (On) or hidden (Off) from the person you reject a call is shown on hold. All rights...

User Guide
Page 46
...Incoming calls can select the network manually. Cell info display: To set the phone to automatically select a cellular network available in the standby mode. The network you select. Phone settings Language: To select the language for the display texts. Network selection: To set the phone to show or hide confirmation messages when ...Network Service). For more information, contact your home network. Welcome note: You can key in a cellular network based on . Copyright © 2003 Nokia. Confirm SIM service actions: To set the phone to an enhancement such as the headsets.
...Incoming calls can select the network manually. Cell info display: To set the phone to automatically select a cellular network available in the standby mode. The network you select. Phone settings Language: To select the language for the display texts. Network selection: To set the phone to show or hide confirmation messages when ...Network Service). For more information, contact your home network. Welcome note: You can key in a cellular network based on . Copyright © 2003 Nokia. Confirm SIM service actions: To set the phone to an enhancement such as the headsets.

User Guide
Page 47
...Automatic answer to set the phone to set the lights ...have selected On, the phone asks for 15 seconds after...phone is set the keypad of your phone to lock the keypad of the phone... has been used . • Select Lights to 60 minutes. See Access codes on for the Copyright © 2003 Nokia.... To deactivate the automatic keyguard, select Off. • Press Menu and select Settings, Keyguard settings and Keyguard code. Select Headsetor Handsfree . • Select Default profile to select the profile the phone... of the phone with a security code, ...
...Automatic answer to set the phone to set the lights ...have selected On, the phone asks for 15 seconds after...phone is set the keypad of your phone to lock the keypad of the phone... has been used . • Select Lights to 60 minutes. See Access codes on for the Copyright © 2003 Nokia.... To deactivate the automatic keyguard, select Off. • Press Menu and select Settings, Keyguard settings and Keyguard code. Select Headsetor Handsfree . • Select Default profile to select the profile the phone... of the phone with a security code, ...


