User Manual
Page 5
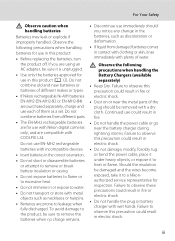
...it to excessive heat. • Do not immerse in fire. • Do not handle the power cable or go near the metal parts of them as a set. iii Continued use with Nikon digital cameras only, and are prone to water. • Do not transport or store with metal objects...; The EN-MH2 rechargeable batteries are for use in fire or electric shock. • Do not handle the plug or battery charger with COOLPIX L24. Failure to observe this precaution could result in or expose to leakage when fully discharged. Observe the following precautions when handling batteries for inspection....
...it to excessive heat. • Do not immerse in fire. • Do not handle the power cable or go near the metal parts of them as a set. iii Continued use with Nikon digital cameras only, and are prone to water. • Do not transport or store with metal objects...; The EN-MH2 rechargeable batteries are for use in fire or electric shock. • Do not handle the plug or battery charger with COOLPIX L24. Failure to observe this precaution could result in or expose to leakage when fully discharged. Observe the following precautions when handling batteries for inspection....

User Manual
Page 6
... adapters designed to convert from the subject. Follow the instructions of the hospital. For Your Safety • Do not use only the cables provided or sold by Nikon for the purpose, to prevent liquid crystal from the monitor touching the skin or entering the eyes or mouth. Use appropriate... cables When connecting cables to the input and output jacks, use with the flash window touching a person or object Failure to observe this camera ...
... adapters designed to convert from the subject. Follow the instructions of the hospital. For Your Safety • Do not use only the cables provided or sold by Nikon for the purpose, to prevent liquid crystal from the monitor touching the skin or entering the eyes or mouth. Use appropriate... cables When connecting cables to the input and output jacks, use with the flash window touching a person or object Failure to observe this camera ...

User Manual
Page 7
...an outlet on a circuit different from that to which the receiver is encouraged to try to cause birth defects or other interface cables may void the user's authority to radio communications. Notice for help. If this equipment does cause harmful interference to radio or ...television reception, which can radiate radio frequency energy and, if not installed and used in a residential installation. Interface Cables Use the interface cables sold or provided by Nikon Corporation may exceed the limits of Class B Part 15 of the FCC rules. CAUTIONS Modifications The FCC requires ...
...an outlet on a circuit different from that to which the receiver is encouraged to try to cause birth defects or other interface cables may void the user's authority to radio communications. Notice for help. If this equipment does cause harmful interference to radio or ...television reception, which can radiate radio frequency energy and, if not installed and used in a residential installation. Interface Cables Use the interface cables sold or provided by Nikon Corporation may exceed the limits of Class B Part 15 of the FCC rules. CAUTIONS Modifications The FCC requires ...

User Manual
Page 68
... the yellow plug to the video-in the Set up menu (A 83) > Video mode (A 99). While connected to the video channel. When disconnecting the AV cable, do not pull the connector at an angle. Yellow White 3 Tune the television to the TV, the camera monitor will be sure that the camera... by your television for details. 4 Hold down c to turn on the TV, and the white plug to the audioin jack. B Connecting an AV Cable When connecting the AV cable, be displayed on a television. 1 Turn off . B Video Mode Be sure that the camera connector is an option set in jack on the camera...
... the yellow plug to the video-in the Set up menu (A 83) > Video mode (A 99). While connected to the video channel. When disconnecting the AV cable, do not pull the connector at an angle. Yellow White 3 Tune the television to the TV, the camera monitor will be sure that the camera... by your television for details. 4 Hold down c to turn on the TV, and the white plug to the audioin jack. B Connecting an AV Cable When connecting the AV cable, be displayed on a television. 1 Turn off . B Video Mode Be sure that the camera connector is an option set in jack on the camera...
User Manual
Page 69
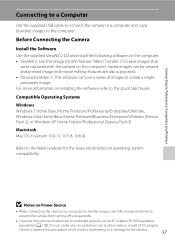
... Pack 2), or Windows XP Home Edition/Professional (Service Pack 3) Macintosh Mac OS X (version 10.4.11, 10.5.8, 10.6.4) Refer to the Nikon website for the latest information on Power Source • When connecting the camera to a computer to transfer images, use fully charged batteries to ...separately) (A 108). For more information on the computer. Connecting to Televisions, Computers and Printers Connecting to a Computer Use the supplied USB cable to connect the camera to a computer and copy (transfer) images to the camera. 57 Before Connecting the Camera Install the Software Use the...
... Pack 2), or Windows XP Home Edition/Professional (Service Pack 3) Macintosh Mac OS X (version 10.4.11, 10.5.8, 10.6.4) Refer to the Nikon website for the latest information on Power Source • When connecting the camera to a computer to transfer images, use fully charged batteries to ...separately) (A 108). For more information on the computer. Connecting to Televisions, Computers and Printers Connecting to a Computer Use the supplied USB cable to connect the camera to a computer and copy (transfer) images to the camera. 57 Before Connecting the Camera Install the Software Use the...

User Manual
Page 70
...insert connectors at an angle, and do not use force when connecting or disconnecting the USB cable. 4 Turn on lamp will remain off . 3 Connect the camera to the computer using the supplied USB cable. The camera monitor will light. The power-on the camera. Connecting to Televisions, Computers... from a Camera to a Computer 1 Start the computer to which ViewNX 2 was installed. 2 Be sure that connectors are properly oriented. B Connecting the USB Cable 58 The connection may not be recognized if the camera is off . Be sure that the camera is connected to the computer via a USB hub.
...insert connectors at an angle, and do not use force when connecting or disconnecting the USB cable. 4 Turn on lamp will remain off . 3 Connect the camera to the computer using the supplied USB cable. The camera monitor will light. The power-on the camera. Connecting to Televisions, Computers... from a Camera to a Computer 1 Start the computer to which ViewNX 2 was installed. 2 Be sure that connectors are properly oriented. B Connecting the USB Cable 58 The connection may not be recognized if the camera is off . Be sure that the camera is connected to the computer via a USB hub.

User Manual
Page 72
Connecting to Televisions, Computers and Printers Connecting to the ViewNX 2 help information (A 61). For more information on using ViewNX 2, refer to a Computer ViewNX 2 starts automatically when the transfer is complete, turn off the camera and disconnect the USB cable. 60 When transfer is complete (default setting of ViewNX 2). Transferred images can be viewed. Disconnecting the Camera Do not turn off the camera or disconnect the camera from the computer during transfer.
Connecting to Televisions, Computers and Printers Connecting to the ViewNX 2 help information (A 61). For more information on using ViewNX 2, refer to a Computer ViewNX 2 starts automatically when the transfer is complete, turn off the camera and disconnect the USB cable. 60 When transfer is complete (default setting of ViewNX 2). Transferred images can be viewed. Disconnecting the Camera Do not turn off the camera or disconnect the camera from the computer during transfer.

User Manual
Page 74
... 62 Print set option (A 68) Connect to printer (A 63) Print pictures one at a time(A 64) Print multiple pictures (A 65) Turn camera off and disconnect USB cable B Note on Power Source When connecting the camera to a printer, use a fully charged batteries to prevent the camera from turning off unexpectedly.
... 62 Print set option (A 68) Connect to printer (A 63) Print pictures one at a time(A 64) Print multiple pictures (A 65) Turn camera off and disconnect USB cable B Note on Power Source When connecting the camera to a printer, use a fully charged batteries to prevent the camera from turning off unexpectedly.

User Manual
Page 75
...the Print selection screen (2) is displayed. 1 2 Print selection 15/05 2011 NO. 12 [ 12] B Connecting the Audio Video/USB Cable When connecting the USB cable, be sure that the connectors are oriented correctly. Connecting the Camera and Printer 1 Turn off the camera. Connecting to Televisions, Computers and ...Printers 4 Turn on the printer. Do not use force when connecting the USB cable. Connecting to the printer using the supplied USB cable. Check printer settings. 3 Connect the camera to a Printer 2 Turn on the camera.
...the Print selection screen (2) is displayed. 1 2 Print selection 15/05 2011 NO. 12 [ 12] B Connecting the Audio Video/USB Cable When connecting the USB cable, be sure that the connectors are oriented correctly. Connecting the Camera and Printer 1 Turn off the camera. Connecting to Televisions, Computers and ...Printers 4 Turn on the printer. Do not use force when connecting the USB cable. Connecting to the printer using the supplied USB cable. Check printer settings. 3 Connect the camera to a Printer 2 Turn on the camera.

User Manual
Page 81
... and time setting are changed from printers that do not support printing of the print set procedure and press k to a printer, via the supplied USB cable, for all pictures. D Date Imprint The shooting date and time can be imprinted in the print order. Choose Date and press k to print date of...
... and time setting are changed from printers that do not support printing of the print set procedure and press k to a printer, via the supplied USB cable, for all pictures. D Date Imprint The shooting date and time can be imprinted in the print order. Choose Date and press k to print date of...

User Manual
Page 120
...-MH batteries EN-MH2-B4 (set of battery. Do not use only Battery Charger MH-72 or MH-73. Technical Notes 108 USB Cable UC-E6 Audio/Video Cable EG-CP14 *1 To charge EN-MH2 batteries, use these battery chargers to charge any other type of four EN-MH2 batteries)*1 Battery Charger... (includes two rechargeable Ni-MH batteries EN-MH2)*1 Battery Charger MH-73 (includes four rechargeable Ni-MH batteries EN-MH2)*1 AC Adapter EH-65A 1 1 2 2 USB Cable AV Cable AC Adapter EH-62B cannot be used.
...-MH batteries EN-MH2-B4 (set of battery. Do not use only Battery Charger MH-72 or MH-73. Technical Notes 108 USB Cable UC-E6 Audio/Video Cable EG-CP14 *1 To charge EN-MH2 batteries, use these battery chargers to charge any other type of four EN-MH2 batteries)*1 Battery Charger... (includes two rechargeable Ni-MH batteries EN-MH2)*1 Battery Charger MH-73 (includes four rechargeable Ni-MH batteries EN-MH2)*1 AC Adapter EH-65A 1 1 2 2 USB Cable AV Cable AC Adapter EH-62B cannot be used.

User Manual
Page 129
...Printer error: check printer status. No paper is not loaded in printer. Ink error. Error Messages Display Problem P USB cable disconnected Communications error during printing. Specified size of paper is loaded in printer. Ink cartridge is empty. and press k ...to resume printing.* Load the specified paper, - After - Paper has jammed in camera's internal circuitry. If error persists, contact retailer or Nikon-authorized service representative. 12, 18 Check printer. select Resume and press k to resume printing.* Check ink, select Resume - select Resume ...
...Printer error: check printer status. No paper is not loaded in printer. Ink error. Error Messages Display Problem P USB cable disconnected Communications error during printing. Specified size of paper is loaded in printer. Ink cartridge is empty. and press k ...to resume printing.* Load the specified paper, - After - Paper has jammed in camera's internal circuitry. If error persists, contact retailer or Nikon-authorized service representative. 12, 18 Check printer. select Resume and press k to resume printing.* Check ink, select Resume - select Resume ...

User Manual
Page 130
...is blank • Camera is off automatically to save 97 power. • Battery is cold. 112 Date and time of recording are connected via AV cable. 56 Monitor is hard to read • Adjust monitor brightness. 90 • Monitor is exhausted; No indicators displayed in Hide info is not set ....-release button halfway. • When flash lamp blinks red, wait until flash has 29 charged. • Camera and computer are connected via USB 58 cable. • Camera and TV are not correct • Pictures taken while the clock is not set will 14 have a time stamp of common problems ...
...is blank • Camera is off automatically to save 97 power. • Battery is cold. 112 Date and time of recording are connected via AV cable. 56 Monitor is hard to read • Adjust monitor brightness. 90 • Monitor is exhausted; No indicators displayed in Hide info is not set ....-release button halfway. • When flash lamp blinks red, wait until flash has 29 charged. • Camera and computer are connected via USB 58 cable. • Camera and TV are not correct • Pictures taken while the clock is not set will 14 have a time stamp of common problems ...

User Manual
Page 133
...cannot be used with red-eye reduction) and try shooting again. Technical Notes Pictures not displayed on picture. For more information about Nikon Transfer 2, refer to play back pictures from internal memory. 121 memory card. Remove memory card to help information contained in on ...contains no pictures. Replace 16 displayed. other cameras. Replace 16 memory card. Nikon Transfer 2 does not start when camera is connected. • Camera is off. 18 • Battery exhausted. 18 • USB cable is not correctly connected. 58 • Camera is not set to V ...
...cannot be used with red-eye reduction) and try shooting again. Technical Notes Pictures not displayed on picture. For more information about Nikon Transfer 2, refer to play back pictures from internal memory. 121 memory card. Remove memory card to help information contained in on ...contains no pictures. Replace 16 displayed. other cameras. Replace 16 memory card. Nikon Transfer 2 does not start when camera is connected. • Camera is off. 18 • Battery exhausted. 18 • USB cable is not correctly connected. 58 • Camera is not set to V ...

User Manual
Page 139
..., 25, 46, 47, 48 j button 4, 11 A AC adapter 13, 108 AF-assist illumination 4, 23, 95 Alkaline 13 Alkaline batteries 12 Aperture 22 Audio Video/USB Cable 56, 63 Audio-in/Video-in jack 56 Auto flash 28 Auto off 13, 97 Autofocus 22, 23, 27, 31 AV... Cable 56 AVI 110 B Backlight o 39 Batteries 12, 88 Battery level 18 Battery type 13, 103 Battery-chamber 5 Battery-chamber/memory card slot cover 5, 12, 16 ...
..., 25, 46, 47, 48 j button 4, 11 A AC adapter 13, 108 AF-assist illumination 4, 23, 95 Alkaline 13 Alkaline batteries 12 Aperture 22 Audio Video/USB Cable 56, 63 Audio-in/Video-in jack 56 Auto flash 28 Auto off 13, 97 Autofocus 22, 23, 27, 31 AV... Cable 56 AVI 110 B Backlight o 39 Batteries 12, 88 Battery level 18 Battery type 13, 103 Battery-chamber 5 Battery-chamber/memory card slot cover 5, 12, 16 ...
User Manual
Page 141
... Strap 11 Sunset h 36 T Tabs 10 The c (Playback) Button 8 Thumbnail playback 46 Time zone 14, 87, 89 Tripod socket 5 TV 56 TV movie 54 U USB cable 58 USB connector and audio/video output 5, 56, 63 USB/audio/video output connector 57, 58 V Video Mode 99 ViewNX 2 57, 61 Vivid color 77...
... Strap 11 Sunset h 36 T Tabs 10 The c (Playback) Button 8 Thumbnail playback 46 Time zone 14, 87, 89 Tripod socket 5 TV 56 TV movie 54 U USB cable 58 USB connector and audio/video output 5, 56, 63 USB/audio/video output connector 57, 58 V Video Mode 99 ViewNX 2 57, 61 Vivid color 77...


