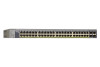
GS728TP/GS728TPP/GS752TP Hardware Installation Guide
Page 3
Contents Chapter 1 Introduction Overview 6 Features 6 Package Contents 8 Chapter 2 Physical Description GS752TP Front Panel and Back Panel Configuration 10 GS728TP Front Panel and Back Panel Configuration 11 GS728TPP Front Panel and Back Panel Configuration 12 LED Designations ... 4: Connect Devices to the Switch 24 Step 5: Install an SFP Transceiver Module 24 Step 6: Apply AC Power 25 Step 7: Apply RPS DC Power 25 Step 8: Manage the Switch Using a Web Browser or the Computer Utility 26 Contents | 3
GS728TP/GS728TPP/GS752TP Hardware Installation Guide
Page 4
GS752TP, GS728TP, and GS728TPP Gigabit Smart Switch Appendix A Troubleshooting Troubleshooting Chart 28 Additional Troubleshooting Suggestions 28 Network Adapter Cards 28 Configuration 28 Switch Integrity 29 Autonegotiation 29 Appendix B Technical Specifications Network Protocol and Standards Compatibility 31 Management 31 Interface 32 LEDs 32 Performance Specifications 32 Power Supply 33 Physical Specifications 33 Environmental Specifications 34 Electromagnetic Emissions 34 Safety 34 Appendix C Notification of Compliance Index 4
GS728TP/GS728TPP/GS752TP Hardware Installation Guide
Page 6
..., and the remaining copper ports are PoE+ providing 30 W of Service (CoS) for the observation, configuration, and control of administrative management with high-speed links • Link to a server or network backbone. All ports can automatically negotiate to support the increased power requirements...IEEE 802.3ab (1000BASE-T) 6 In addition, all RJ-45 ports operate in a simple and intuitive manner. GS752TP, GS728TP, and GS728TPP Gigabit Smart Switch Overview The NETGEAR GS752TP, GS728TP, and GS728TPP Gigabit Smart Switch provides 48 or 24 twisted-pair ports that runs on the network ...
GS728TP/GS728TPP/GS752TP Hardware Installation Guide
Page 20
Switch installation involves the following steps: Step 1: Prepare the Site Step 2: Install the Switch Step 3: Check the Installation Step 4: Connect Devices to the Switch Step 5: Install an SFP Transceiver Module Step 6: Apply AC Power Step 7: Apply RPS DC Power Step 8: Manage the Switch Using a Web Browser or the Computer Utility 21 4. Installation 4 This chapter describes the installation procedures for your GS752TP, GS728TP, and GS728TPP Gigabit Smart Switch.
GS728TP/GS728TPP/GS752TP Hardware Installation Guide
Page 25
...resource CD. You can be configured using the management software. This management software is configured with a default IP address of 192.168.0.239 and a subnet mask of the network. GS752TP, GS728TP, and GS728TPP Gigabit Smart Switch Step 8: Manage the Switch Using a Web Browser or the ...Computer Utility The GS752TP, GS728TP, and GS728TPP Gigabit Smart Switch contains software for viewing, changing, and monitoring...
GS728TP/GS728TPP/GS752TP Hardware Installation Guide
Page 27
... alternate environment where all connected ports and the network is not recognized as part of , and solutions to any other networked device. GS752TP, GS728TP, and GS728TPP Gigabit Smart Switch Troubleshooting Chart The following table lists symptoms and causes of the network. Check the power cord ... and locked into the port at a time. Equipment might have been accidentally disconnected. After you connect to the switch management interface, you alter the network configuration, restore the original connections and determine the problem by testing them in this section.
GS728TP/GS728TPP/GS752TP Hardware Installation Guide
Page 30
...support (9K) IPv6 management and Quality of Service (CoS) SNTP (Simple Network Time Protocol) three servers. Disabled by default. GS752TXS Smart Switch IGMP snooping v1/v2/v3 IEEE 802.1 p Class of Service (QoS) Static routing MLD snooping DHCP snooping ACLs (MAC, IPv4, IPv6, and TCP/UDP based) Interface GS752TP: • 48 RJ...: Power, Fan, PoE Max, LED Mode Performance Specifications Forwarding modes: Store-and-forward Bandwidth (per unit): 56 Gbps for GS728TP/GS728TPP, 104 Gbps for GS752TP Address database size: 8K Media Access Control (MAC) addresses per system PoE power budget: •...
GS728TP/GS728TPP/GS752TP Software Administration Manual
Page 5
GS752TP, GS728TP, and GS728TPP Gigabit Smart Switches Configure VLAN Routing 130 Configure and View Routes 131 Configure ARP 133 ARP Cache 134 ARP Entry Configuration 135 Global ARP Configuration 136 ARP Entry Management 137 Chapter 5 Configure Quality of Service Class of Service 139 ... 147 IPv6 Class Configuration 150 Policy Configuration 153 Service Configuration 155 Service Statistics 156 Chapter 6 Managing Device Security Management Security Settings 159 Change Password 159 Configure RADIUS Settings 160 Configure TACACS 163 Authentication List Configuration 166 Configure...
GS728TP/GS728TPP/GS752TP Software Administration Manual
Page 6
GS752TP, GS728TP, and GS728TPP Gigabit Smart Switches MAC ACL 191 MAC Rules 192 MAC Binding Configuration 194 MAC Binding Table 195 IP ACL 196 IP Rules ... Switch 229 TFTP File Upload 229 HTTP File Upload 231 Download a File to the Switch 232 TFTP File Download 232 HTTP File Download 234 File Management 235 Dual Image Configuration 235 Dual Image Status 236 Troubleshooting 238 Ping 238 Ping IPv6 239 Traceroute 240 Remote Diagnostics 241 Chapter 9 Help 6
GS728TP/GS728TPP/GS752TP Software Administration Manual
Page 9
...01/index.htm. This chapter contains the following sections: • Switch Management Interface • Connect the Switch to the Network • Discover a Switch in a Network with the NETGEAR Switch This chapter provides an overview of starting your computer. It also ...• Configure the Network Settings on the Administrative System • Access the Management Interface from the Web • Interface Naming Convention Getting Started 9 This guide does not document the SCC application. GS752TP, GS728TP, and GS728TPP Gigabit Smart Switches Getting Started with a DHCP Server ...
GS728TP/GS728TPP/GS752TP Software Administration Manual
Page 10
... switch and optimize its configuration for your network. When you power up your switch for managing and monitoring switch functions. GS752TP, GS728TP, and GS728TPP Gigabit Smart Switches Switch Management Interface The NETGEAR switch contains an embedded web server and management software for the first time, use the Smart Control Center to discover the switch and...
GS728TP/GS728TPP/GS752TP Software Administration Manual
Page 11
... DHCP server, you must connect the switch to discover the automatically assigned network information. GS752TP, GS728TP, and GS728TPP Gigabit Smart Switches Connect the Switch to the Network To enable remote management of the switch through the Smart Control Center. To change the settings by using the... web-based management interface on page 14. • Static assignment by default on page 14. •...
GS728TP/GS728TPP/GS752TP Software Administration Manual
Page 13
Select your switch. The default password is password. The Smart Control Center displays a login window. Getting Started 13 Use this screen to manage your switch by clicking the line that displays the switch, then click the Web Browser Access button. For more information, see Access the Management Interface from the Web on page 17. GS752TP, GS728TP, and GS728TPP Gigabit Smart Switches 7.
GS728TP/GS728TPP/GS752TP Software Administration Manual
Page 16
...the original settings. Use a straight-through cable to connect the Ethernet port on the administrative system directly to the management interface. For more information, see Access the Management Interface from the switch's address but within the same subnet. 3. Getting Started 16 Be sure to the rest ..., access the Windows operating system TCP/IP Properties screen. 2. The IP address must be different from the Web on the NETGEAR switch. 2. GS752TP, GS728TP, and GS728TPP Gigabit Smart Switches WARNING: When you change the IP address of your administrative system: 1.
GS728TP/GS728TPP/GS752TP Software Administration Manual
Page 17
... Interface To access the switch by using a web browser, the browser must be available. GS752TP, GS728TP, and GS728TPP Gigabit Smart Switches Access the Management Interface from the Web To access the switch management interface, use that IP address in the address field of the switch in the field on... up the IP address and subnet mask, either with or without a DHCP server, use one of the NETGEAR switch management interface from your administrative system for this application at http://docs.netgear.com/scc/enu/202-10685-01/index.htm. • Open a web browser and enter the IP address...
GS728TP/GS728TPP/GS752TP Software Administration Manual
Page 22
... configure authentication and encryption settings for standard functionality and private MIBs that screen displays if you need to configure an SNMP manager to access the switch. Any user can contain 1 to 159 characters, unless otherwise noted on the web interface. In... Figure 1, Configuration Status and Options shows the location of SNMP groups and users that can manage traps that feature): Table 2: \ < / >| * | ? The online help configure and manage the switch. GS752TP, GS728TP, and GS728TPP Gigabit Smart Switches Help Screen Access Every screen contains a link to ...
GS728TP/GS728TPP/GS752TP Software Administration Manual
Page 24
... and ports 25-28 are used only for all interfaces available on the front panel. The following ports: • GS752TP. CPU Management Interface This is the internal switch interface responsible for Switch Interfaces Interface Description Example Physical The physical ports include Gigabit ports ...Address Table. The number of DC power, and the remaining copper ports are numbered g1, g2, g3 sequentially starting from 1. GS752TP, GS728TP, and GS728TPP Gigabit Smart Switches Interface Naming Convention The switch supports physical and logical interfaces. Ports 1-24 are 10/100...
GS728TP/GS728TPP/GS752TP Software Administration Manual
Page 26
... The factory default is blank. Use this switch. Define the following screen displays: 2. Configuring System Information 26 GS752TP, GS728TP, and GS728TPP Gigabit Smart Switches Management This section describes how to configure and view general device information. To define system information: 1. Enter ...8226; DNS • Green Ethernet Configuration System Information After a successful login, the System Information screen displays. From the Management menu, you want to use up to identify this screen to display the switch status and specify some basic switch information,...
GS728TP/GS728TPP/GS752TP Software Administration Manual
Page 27
...the location of this switch. You can use up to configure network information for the management interface, which traffic is the logical interface used for the management interface: 1. System status information Field Serial Number System Object ID Date & Time System .... To configure the network information for in the System screen. GS752TP, GS728TP, and GS728TPP Gigabit Smart Switches • System Location. Universally assigned network address. Select System Management IP Configuration. The software version of fan operation. The boot ...
GS728TP/GS728TPP/GS752TP Software Administration Manual
Page 28
... obtain the IP address through a DHCP server. • Dynamic IP Address (BOOTP). Each part of the management VLAN. The factory default value is part of the IP address must be made only through any port. GS752TP, GS728TP, and GS728TPP Gigabit Smart Switches The following network information: • IP Address. Enter this radio...