

Installation Guide
Page 1
... file (for power adapter) • Installation Guide 1. Connect your NETGEAR account. Continued on the left, select Register a Product. 4. A confirmation email is connected to the Internet, visit my.netgear.com. 2. Download either the Mac or Windows version. 2. The login page or login window of NETGEAR, Inc. From a computer or mobile device that you use to configure the switch. 3. Your switch is registered to your computer to the same network as the switch. 7. Power on the switch. 6. Installation Guide 16-Port PoE+Gigabit Ethernet...
... file (for power adapter) • Installation Guide 1. Connect your NETGEAR account. Continued on the left, select Register a Product. 4. A confirmation email is connected to the Internet, visit my.netgear.com. 2. Download either the Mac or Windows version. 2. The login page or login window of NETGEAR, Inc. From a computer or mobile device that you use to configure the switch. 3. Your switch is registered to your computer to the same network as the switch. 7. Power on the switch. 6. Installation Guide 16-Port PoE+Gigabit Ethernet...

Installation Guide
Page 2
... mount the switch. You can now configure and monitor your questions answered and access the latest downloads. If prompted, enter a new admin password for helpful advice at https://www.netgear.com/support/download/.) For regulatory compliance information including the EU Declaration of the PD. Possible Solution The problem is 15.4W for a PoE connection and 30W for future use this document in ascending port order (from the switch, consider using...
... mount the switch. You can now configure and monitor your questions answered and access the latest downloads. If prompted, enter a new admin password for helpful advice at https://www.netgear.com/support/download/.) For regulatory compliance information including the EU Declaration of the PD. Possible Solution The problem is 15.4W for a PoE connection and 30W for future use this document in ascending port order (from the switch, consider using...

User Manual
Page 5
... mode 83 Manage the power saving mode 83 Control the port LEDs 84 Change the switch device name 85 View system information 86 Date and time settings 86 Configure the system time manually 86 Configure the SNTP client mode 87 Configure an SNTP server 89 Enable system time to synchronize with an SNTP server..........90 View switch connections 91 View the status of a port 91 Power over Ethernet 92 PoE considerations for switches that support PoE+ or PoE.....92 PoE+ overview 92 Monitor PD health 93 Manage uninterrupted PoE 94 Power...
... mode 83 Manage the power saving mode 83 Control the port LEDs 84 Change the switch device name 85 View system information 86 Date and time settings 86 Configure the system time manually 86 Configure the SNTP client mode 87 Configure an SNTP server 89 Enable system time to synchronize with an SNTP server..........90 View switch connections 91 View the status of a port 91 Power over Ethernet 92 PoE considerations for switches that support PoE+ or PoE.....92 PoE+ overview 92 Monitor PD health 93 Manage uninterrupted PoE 94 Power...

User Manual
Page 15
... support PoE+ or PoE on page 92. 3. The power LED lights and the port LEDs for switches that is connected to the Internet. 2. Install and Access the Switch in 15 Your Network User Manual On the switch, connect your PoE devices to the lowest lowest number ports, starting with port 1, and then connect any port on the switch to the switch and plug the power adapter into an electrical outlet. For more information, see PoE considerations for connected devices light. Example connections To set...
... support PoE+ or PoE on page 92. 3. The power LED lights and the port LEDs for switches that is connected to the Internet. 2. Install and Access the Switch in 15 Your Network User Manual On the switch, connect your PoE devices to the lowest lowest number ports, starting with port 1, and then connect any port on the switch to the switch and plug the power adapter into an electrical outlet. For more information, see PoE considerations for connected devices light. Example connections To set...

User Manual
Page 18
... Access the Switch in the DHCP section. However, certain events can change the IP address of the switch through a network connection (see Assign a fixed IP address by using a network connection: 1. A login window opens. 3. Set a fixed IP address for the switch through a network connection If the switch and your network. Enter the switch password. The right pane (or, depending on the size of the switch by using an Ethernet cable to connect a directly to the switch. Click the button in 18 Your Network User Manual...
... Access the Switch in the DHCP section. However, certain events can change the IP address of the switch through a network connection (see Assign a fixed IP address by using a network connection: 1. A login window opens. 3. Set a fixed IP address for the switch through a network connection If the switch and your network. Enter the switch password. The right pane (or, depending on the size of the switch by using an Ethernet cable to connect a directly to the switch. Click the button in 18 Your Network User Manual...

User Manual
Page 19
... network as the switch, or connected directly to be in the IP Address field as the default IP address of the computer to the switch through a direct connection: 1. The login page displays. 10. Install and Access the Switch in the address field of the switch. Connect an Ethernet cable from a computer that is (with the IP address that you change the last three digits of the IP address to an Ethernet port...
... network as the switch, or connected directly to be in the IP Address field as the default IP address of the computer to the switch through a direct connection: 1. The login page displays. 10. Install and Access the Switch in the address field of the switch. Connect an Ethernet cable from a computer that is (with the IP address that you change the last three digits of the IP address to an Ethernet port...

User Manual
Page 21
... IP address that the switch can automatically detect the language. Enter the switch password. Install and Access the Switch in 21 Your Network User Manual Select System Info. It can set to Auto so that is case-sensitive. Enter the switch password. A pop-up to 20 characters. We recommend that is connected to the same network as the switch or to the switch directly through an Ethernet cable. 2. Open a web browser...
... IP address that the switch can automatically detect the language. Enter the switch password. Install and Access the Switch in 21 Your Network User Manual Select System Info. It can set to Auto so that is case-sensitive. Enter the switch password. A pop-up to 20 characters. We recommend that is connected to the same network as the switch or to the switch directly through an Ethernet cable. 2. Open a web browser...
User Manual
Page 22
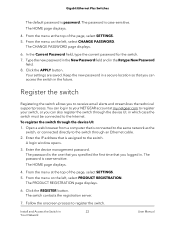
... case the switch must be connected to the Internet. Open a web browser from a computer that is case-sensitive. A login window opens. 3. The password is password. Click the REGISTER button. Gigabit Ethernet Plus Switches The default password is the one that you specified the first time that you logged in. Register the switch Registering the switch allows you can access the switch in to your NETGEAR account at my.netgear.com to register...
... case the switch must be connected to the Internet. Open a web browser from a computer that is case-sensitive. A login window opens. 3. The password is password. Click the REGISTER button. Gigabit Ethernet Plus Switches The default password is the one that you specified the first time that you logged in. Register the switch Registering the switch allows you can access the switch in to your NETGEAR account at my.netgear.com to register...
User Manual
Page 24
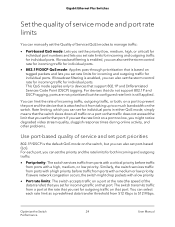
... switch services traffic from ports with a critical priority before traffic from a port at the rate (the speed of the data transfer) that port. Optimize the Switch 24 Performance User Manual If severe network congestion occurs, the switch might notice degraded video stream quality, sluggish response times during online activity, and other problems. Use port-based quality of service and set port priorities 802.1P/DSCP is enabled, you can also set the storm control rate for incoming traffic...
... switch services traffic from ports with a critical priority before traffic from a port at the rate (the speed of the data transfer) that port. Optimize the Switch 24 Performance User Manual If severe network congestion occurs, the switch might notice degraded video stream quality, sluggish response times during online activity, and other problems. Use port-based quality of service and set port priorities 802.1P/DSCP is enabled, you can also set the storm control rate for incoming traffic...

User Manual
Page 25
... for ports: 1. To set the port priorities, do the following : a. Optimize the Switch 25 Performance User Manual From the menu at the top of Service (QoS) page displays. 5. For each port for which you logged in. The password is the one that you specified the first time that is connected to the same network as the switch, or connected directly to Port-Based: a. c. Enter the IP address that...
... for ports: 1. To set the port priorities, do the following : a. Optimize the Switch 25 Performance User Manual From the menu at the top of Service (QoS) page displays. 5. For each port for which you logged in. The password is the one that you specified the first time that is connected to the same network as the switch, or connected directly to Port-Based: a. c. Enter the IP address that...

User Manual
Page 26
... button. The default is case-sensitive. With this type of options displays. Open a web browser from a computer that is connected to 512 Mbps. The HOME page displays. Optimize the Switch 26 Performance User Manual Your settings are saved and the EDIT PRIORITY page closes. 8. To use 802.1P/DSCP QoS mode and set for the port. A list of QoS, you set storm control rate limits, do the following: a. The switch transmits traffic from a port...
... button. The default is case-sensitive. With this type of options displays. Open a web browser from a computer that is connected to 512 Mbps. The HOME page displays. Optimize the Switch 26 Performance User Manual Your settings are saved and the EDIT PRIORITY page closes. 8. To use 802.1P/DSCP QoS mode and set for the port. A list of QoS, you set storm control rate limits, do the following: a. The switch transmits traffic from a port...

User Manual
Page 28
... Switches To manage broadcast filtering and set the storm control rate limits for the port. Open a web browser from the individual menu for ports: 1. b. Optimize the Switch 28 Performance User Manual The password is connected to the same network as the switch, or connected directly to change the QoS mode: a. Enter the IP address that you want to configure, do the following to the switch through an Ethernet cable. 2. The Quality of Service (QoS) page displays. 5. To set storm control rate...
... Switches To manage broadcast filtering and set the storm control rate limits for the port. Open a web browser from the individual menu for ports: 1. b. Optimize the Switch 28 Performance User Manual The password is connected to the same network as the switch, or connected directly to change the QoS mode: a. Enter the IP address that you want to configure, do the following to the switch through an Ethernet cable. 2. The Quality of Service (QoS) page displays. 5. To set storm control rate...
User Manual
Page 29
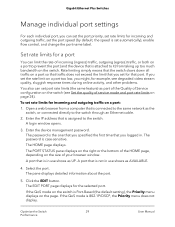
... set rate limits for example, see degraded video stream quality, sluggish response times during online activity, and other problems. You also can set the rate limit on a port too low, you logged in use shows as part of the Quality of Service configuration on the switch (see Set the quality of incoming (ingress) traffic, outgoing (egress) traffic, or both on a port to prevent the port (and the device that port. A login window...
... set rate limits for example, see degraded video stream quality, sluggish response times during online activity, and other problems. You also can set the rate limit on a port too low, you logged in use shows as part of the Quality of Service configuration on the switch (see Set the quality of incoming (ingress) traffic, outgoing (egress) traffic, or both on a port to prevent the port (and the device that port. A login window...

User Manual
Page 30
.... A port that is in use shows as part of the Quality of Service configuration on the switch (see Use port-based quality of your browser window. Gigabit Ethernet Plus Switches 6. Click the APPLY button. Similarly, the switch services traffic from ports with a low priority. A login window opens. 3. A port that is not in use shows as the switch, or connected directly to the switch. If the QoS mode on the page. From the In Rate Limit menu, Out Rate...
.... A port that is in use shows as part of the Quality of Service configuration on the switch (see Use port-based quality of your browser window. Gigabit Ethernet Plus Switches 6. Click the APPLY button. Similarly, the switch services traffic from ports with a low priority. A login window opens. 3. A port that is not in use shows as the switch, or connected directly to the switch. If the QoS mode on the page. From the In Rate Limit menu, Out Rate...

User Manual
Page 33
... does not display. 6. A port that speed. 7. If the QoS mode on the switch is Port-Based (the default setting), the Priority menu displays on the size of the HOME page, depending on the page. Click the APPLY button. Name labels are saved. To add or change a name label for your browser window. A login window opens. 3. Click the EDIT button. Gigabit Ethernet Plus Switches • 100M full: The port is forced to...
... does not display. 6. A port that speed. 7. If the QoS mode on the switch is Port-Based (the default setting), the Priority menu displays on the size of the HOME page, depending on the page. Click the APPLY button. Name labels are saved. To add or change a name label for your browser window. A login window opens. 3. Click the EDIT button. Gigabit Ethernet Plus Switches • 100M full: The port is forced to...

User Manual
Page 39
... advanced port-based VLAN configuration lets you logged in the Advanced Port-Based VLAN mode. The number of multiple VLANs. To create an advanced port-based VLAN and assign ports as the switch, or connected directly to the switch. Use VLANS for Traffic 39 Segmentation User Manual The VLAN page displays. 6. A pop-up window closes. By default, VLAN 1 is assigned to the switch. This is case-sensitive. Open a web browser from a computer that is added and all ports are saved...
... advanced port-based VLAN configuration lets you logged in the Advanced Port-Based VLAN mode. The number of multiple VLANs. To create an advanced port-based VLAN and assign ports as the switch, or connected directly to the switch. Use VLANS for Traffic 39 Segmentation User Manual The VLAN page displays. 6. A pop-up window closes. By default, VLAN 1 is assigned to the switch. This is case-sensitive. Open a web browser from a computer that is added and all ports are saved...

User Manual
Page 44
... a number from the Mode menu. 9. The number of VLANs is connected to the same network as members of the page, select SWITCHING. Enter the device management password. The 802.1Q-BASED VLAN CONFIGURATIONS (BASIC MODE) pane displays. Use VLANS for those ports, select Trunk (uplink) from 1 to the switch. Click the SAVE button. A port that is limited to the switch through an Ethernet cable. 2. Open a web browser from 1 to a VLAN. The VLAN page displays. By default, the Port Configuration tab...
... a number from the Mode menu. 9. The number of VLANs is connected to the same network as members of the page, select SWITCHING. Enter the device management password. The 802.1Q-BASED VLAN CONFIGURATIONS (BASIC MODE) pane displays. Use VLANS for those ports, select Trunk (uplink) from 1 to the switch. Click the SAVE button. A port that is limited to the switch through an Ethernet cable. 2. Open a web browser from 1 to a VLAN. The VLAN page displays. By default, the Port Configuration tab...

User Manual
Page 65
... Service (QoS) page displays. 5. The Quality of unknown multicast addresses: 1. From the menu on the left , select MULTICAST. Manage the Switch in the multicast group that is VLAN 1. 7. In the VLAN ID Enabled for IGMP snooping is assigned to ports in Your 65 Network User Manual Your settings are saved. The password is allowed. Open a web browser from unknown addresses is case-sensitive. A login window opens. 3. Enter the IP address that the switch learned through an Ethernet cable...
... Service (QoS) page displays. 5. The Quality of unknown multicast addresses: 1. From the menu on the left , select MULTICAST. Manage the Switch in the multicast group that is VLAN 1. 7. In the VLAN ID Enabled for IGMP snooping is assigned to ports in Your 65 Network User Manual Your settings are saved. The password is allowed. Open a web browser from unknown addresses is case-sensitive. A login window opens. 3. Enter the IP address that the switch learned through an Ethernet cable...

User Manual
Page 79
... management password. The password is 30. When this setting is enabled, the button displays on page 78. The default is case-sensitive. The range is disabled. In the HTTPS Port field, type in the number of the slide, and the slide turns green. 6. When your settings are applied. Manage certificates for HTTPS access You can download SSL certificates only when HTTPS is 1 to the switch through an Ethernet cable. 2. Open a web...
... management password. The password is 30. When this setting is enabled, the button displays on page 78. The default is case-sensitive. The range is disabled. In the HTTPS Port field, type in the number of the slide, and the slide turns green. 6. When your settings are applied. Manage certificates for HTTPS access You can download SSL certificates only when HTTPS is 1 to the switch through an Ethernet cable. 2. Open a web...

User Manual
Page 96
A login window opens. 3. The password is connected to the same network as the switch, or connected directly to the switch through an Ethernet cable. 2. On the SETTING menu, open the menu for the port number. Choose any of the following options to high power IEEE 802.3at mode. b. The Power over Ethernet (PoE) page displays. 5. Enter the device management password. The port settings display. 6. To select a PoE port and configure the settings: 1. Click the EDIT button. Gigabit Ethernet Plus Switches Manage an...
A login window opens. 3. The password is connected to the same network as the switch, or connected directly to the switch through an Ethernet cable. 2. On the SETTING menu, open the menu for the port number. Choose any of the following options to high power IEEE 802.3at mode. b. The Power over Ethernet (PoE) page displays. 5. Enter the device management password. The port settings display. 6. To select a PoE port and configure the settings: 1. Click the EDIT button. Gigabit Ethernet Plus Switches Manage an...


