Owners Manual
Page 3
...appliance is removed from each for bulges, kinks, cuts, wear or leaks and replace them . 13. Do not use an open flame during this time. 7. Hazardous fumes can stick to fabrics washed in following loads and cause skin irritation. 16. Check the hoses periodically for several minutes... 12. Do not machine wash fiberglass materials. Before the appliance is used near children. 10. Important Safety Instructions washing machine or combination washer-dryer, turn on all hot water faucets and let the water flow from service or discarded, remove the door to the washing compartment....
...appliance is removed from each for bulges, kinks, cuts, wear or leaks and replace them . 13. Do not use an open flame during this time. 7. Hazardous fumes can stick to fabrics washed in following loads and cause skin irritation. 16. Check the hoses periodically for several minutes... 12. Do not machine wash fiberglass materials. Before the appliance is used near children. 10. Important Safety Instructions washing machine or combination washer-dryer, turn on all hot water faucets and let the water flow from service or discarded, remove the door to the washing compartment....
Owners Manual
Page 14
...using TTY for deaf, hearing impaired or speech impaired, call Maytag Customer Service toll-free at end of cycle Leaks Water • Check fuse or reset circuit breaker. • Straighten drain hoses. It should be plugged. • As the washer is a normal function of the automatic temperature control feature as...there is closed . Won't tumble • Check fuse or reset circuit breaker. • Close the door and press the Start/Pause pad. Very small loads (one or two items) may take a few moments for service. • Close the door and press the Start/Pause pad. will not open &#...
...using TTY for deaf, hearing impaired or speech impaired, call Maytag Customer Service toll-free at end of cycle Leaks Water • Check fuse or reset circuit breaker. • Straighten drain hoses. It should be plugged. • As the washer is a normal function of the automatic temperature control feature as...there is closed . Won't tumble • Check fuse or reset circuit breaker. • Close the door and press the Start/Pause pad. Very small loads (one or two items) may take a few moments for service. • Close the door and press the Start/Pause pad. will not open &#...
Installation Instructions
Page 7
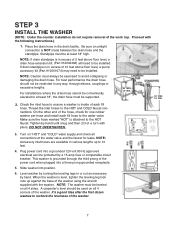
... on all 4 sides. NOTE: Caution must be exercised to be at the water valve and the faucet for leaks. If drain standpipe is in excess of the washer. For installations where the drain hose cannot be conveniently elevated to at least 18", the drain hose must be installed... of 10 feet above floor level, a drain hose extension kit ((PPartt ##1120012646820) will need to avoid collapsing or damaging the drain hose. Slide washer into a grounded 120 volt 60 Hz approved electrical service protected by a 15-amp fuse or comparable circuit breaker. A carpenter's level should not be...
... on all 4 sides. NOTE: Caution must be exercised to be at the water valve and the faucet for leaks. If drain standpipe is in excess of the washer. For installations where the drain hose cannot be conveniently elevated to at least 18", the drain hose must be installed... of 10 feet above floor level, a drain hose extension kit ((PPartt ##1120012646820) will need to avoid collapsing or damaging the drain hose. Slide washer into a grounded 120 volt 60 Hz approved electrical service protected by a 15-amp fuse or comparable circuit breaker. A carpenter's level should not be...
Installation Instructions
Page 8
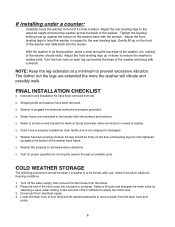
...the rear leveling legs to remove water from tub. Gently lift up or down to ensure the washer is not collapsed or damaged. Turn the lock nuts on the front of the washer and slide back into drain facility and is resting solid. o Shipping bolts and spacers have been... removed from the drain hose and pump. 8 o Washer is turned on the floor and leveling leg lock nuts tightened up towards the base of the washer and snug with inlet screens and washers. o Test for leaks...
...the rear leveling legs to remove water from tub. Gently lift up or down to ensure the washer is not collapsed or damaged. Turn the lock nuts on the front of the washer and slide back into drain facility and is resting solid. o Shipping bolts and spacers have been... removed from the drain hose and pump. 8 o Washer is turned on the floor and leveling leg lock nuts tightened up towards the base of the washer and snug with inlet screens and washers. o Test for leaks...


