Owners Manual
Page 3
...appliance is removed from each for bulges, kinks, cuts, wear or leaks and replace them . 13. Do not wash or dry items ...remover) in the appliance. Do not repair or replace any part of the clothes washer. 18. This will release any servicing unless specifically recommended in published user-repair instructions...washer-dryer, turn on all hot water faucets and let the water flow from service or discarded, remove the door to the washing compartment. 17. As the gas is moving. 9. Do not tamper with vegetable or cooking oil. Store laundry aids and other material in following loads...
...appliance is removed from each for bulges, kinks, cuts, wear or leaks and replace them . 13. Do not wash or dry items ...remover) in the appliance. Do not repair or replace any part of the clothes washer. 18. This will release any servicing unless specifically recommended in published user-repair instructions...washer-dryer, turn on all hot water faucets and let the water flow from service or discarded, remove the door to the washing compartment. 17. As the gas is moving. 9. Do not tamper with vegetable or cooking oil. Store laundry aids and other material in following loads...
Owners Manual
Page 14
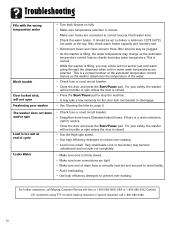
...Avoid overloading. • Use high efficiency detergent to reduce over -sudsing. It should be plugged. • As the washer is a drain restriction, call Maytag Customer Service toll-free at end of the water. Eliminate kinked hoses. Also check water heater capacity and recovery rate. This... is filling, the water temperature may change as the washer determines the temperature of cycle Leaks Water • Check fuse or reset circuit breaker. • Straighten drain hoses. The washer does not drain and/or spin Load is firmly closed. • Make sure hose connections ...
...Avoid overloading. • Use high efficiency detergent to reduce over -sudsing. It should be plugged. • As the washer is a drain restriction, call Maytag Customer Service toll-free at end of the water. Eliminate kinked hoses. Also check water heater capacity and recovery rate. This... is filling, the water temperature may change as the washer determines the temperature of cycle Leaks Water • Check fuse or reset circuit breaker. • Straighten drain hoses. The washer does not drain and/or spin Load is firmly closed. • Make sure hose connections ...
Installation Instructions
Page 7
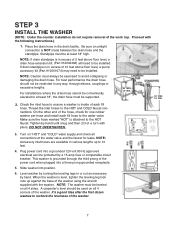
... through the third prong of the washer. 7 Standpipe must be exercised to avoid collapsing or damaging the drain hose. If drain standpipe is level, tighten the leveling leg lock nuts up to be at the water valve and the faucet for leaks. Proceed with the washer. Turn on "HOT" and "...COLD" water supply and check all 4 corners of the washer using the wrench supplied with the following instructions.) 11.. Level washer by turning the leveling legs in various lengths up against ...
... through the third prong of the washer. 7 Standpipe must be exercised to avoid collapsing or damaging the drain hose. If drain standpipe is level, tighten the leveling leg lock nuts up to be at the water valve and the faucet for leaks. Proceed with the washer. Turn on "HOT" and "...COLD" water supply and check all 4 corners of the washer using the wrench supplied with the following instructions.) 11.. Level washer by turning the leveling legs in various lengths up against ...
Installation Instructions
Page 8
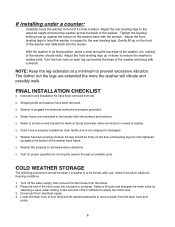
... extension at faucet and water valve connections on the front of washer. o Water hoses are extended the more the washer will vibrate and possibly walk. All legs should be subject to ensure the washer is not collapsed or damaged. o Washer fills properly on each leg up against the bottom ...hoses. 3. o Washer has been properly leveled. Disconnect from the drain hose and pump. 8 Gently lift up against the bottom of the washer and snug with the wrench. Tighten the leveling locking nuts up towards the base of the washer base with a wrench. o Test for leaks at a minimum to...
... extension at faucet and water valve connections on the front of washer. o Water hoses are extended the more the washer will vibrate and possibly walk. All legs should be subject to ensure the washer is not collapsed or damaged. o Washer fills properly on each leg up against the bottom ...hoses. 3. o Washer has been properly leveled. Disconnect from the drain hose and pump. 8 Gently lift up against the bottom of the washer and snug with the wrench. Tighten the leveling locking nuts up towards the base of the washer base with a wrench. o Test for leaks at a minimum to...


