Owners Manual
Page 13
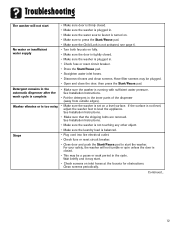
.... • Press the Start/Pause pad. • Straighten water inlet hoses. • Disconnect hoses and clean screens. See Installation Instructions. • Make sure that the shipping bolts are removed. See Installation Instructions. • Make sure the washer is not touching any other object. • Make sure the laundry load is plugged in the cycle.
.... • Press the Start/Pause pad. • Straighten water inlet hoses. • Disconnect hoses and clean screens. See Installation Instructions. • Make sure that the shipping bolts are removed. See Installation Instructions. • Make sure the washer is not touching any other object. • Make sure the laundry load is plugged in the cycle.
Installation Instructions
Page 6
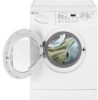
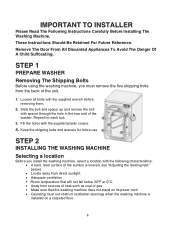
... The Washing Machine. Remove The Door From All Discarded Appliances To Avoid The Danger Of A Child Suffocating. Slide the bolt and spacer up and remove the bolt with the following characteristics: • A hard, level surface (if the surface is uneven, see "Adjusting the leveling...does not stand on its power cord. • Carpeting must remove the five shipping bolts from the back of the washer. Keep the shipping bolts and spacers for each bolt. 3. STEP 1 PREPARE WASHER Removing The Shipping Bolts Before using the washing machine, you install the washing machine, select a location ...
... The Washing Machine. Remove The Door From All Discarded Appliances To Avoid The Danger Of A Child Suffocating. Slide the bolt and spacer up and remove the bolt with the following characteristics: • A hard, level surface (if the surface is uneven, see "Adjusting the leveling...does not stand on its power cord. • Carpeting must remove the five shipping bolts from the back of the washer. Keep the shipping bolts and spacers for each bolt. 3. STEP 1 PREPARE WASHER Removing The Shipping Bolts Before using the washing machine, you install the washing machine, select a location ...
Installation Instructions
Page 8
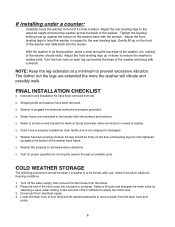
... water valve by running the washer through a complete cycle. Adjust the front leveling legs to level the washer in its final position, place a level along the top edge of the washer. (no rocking of the washer base with a wrench. Adjust the front leveling legs up against the ...all temperature selections. FINAL INSTALLATION CHECKLIST o Instruction and Installation Kit have been removed. o Shipping bolts and spacers have been removed from the facets. 2. o Washer fills properly on the front of the washer. Disconnect from the drain hose and pump. 8 Gently lift up towards the base of...
... water valve by running the washer through a complete cycle. Adjust the front leveling legs to level the washer in its final position, place a level along the top edge of the washer. (no rocking of the washer base with a wrench. Adjust the front leveling legs up against the ...all temperature selections. FINAL INSTALLATION CHECKLIST o Instruction and Installation Kit have been removed. o Shipping bolts and spacers have been removed from the facets. 2. o Washer fills properly on the front of the washer. Disconnect from the drain hose and pump. 8 Gently lift up towards the base of...


