
User Guide
Page 5
Wireless-B Internet Video Camera List of Figures Figure 3-1: Camera LEDs 6 Figure 3-2: Camera Head 6 Figure 3-3: Camera Ports 7 Figure 4-1: Connect the Ethernet Network Cable 8 Figure 4-2: Connect the Power Adapter 8 Figure 5-1: Welcome 10 Figure 5-2: Connection for Setup 10 Figure 5-3: Cameras Found 11 Figure 5-4: Administrator Name and Password 11 Figure 5-5: Basic Settings 11 Figure 5-6: DHCP or Static IP Address 12 Figure 5-7: IP Settings 12 Figure 5-8: Mode Settings...
Wireless-B Internet Video Camera List of Figures Figure 3-1: Camera LEDs 6 Figure 3-2: Camera Head 6 Figure 3-3: Camera Ports 7 Figure 4-1: Connect the Ethernet Network Cable 8 Figure 4-2: Connect the Power Adapter 8 Figure 5-1: Welcome 10 Figure 5-2: Connection for Setup 10 Figure 5-3: Cameras Found 11 Figure 5-4: Administrator Name and Password 11 Figure 5-5: Basic Settings 11 Figure 5-6: DHCP or Static IP Address 12 Figure 5-7: IP Settings 12 Figure 5-8: Mode Settings...
User Guide
Page 6
Wireless-B Internet Video Camera Figure 6-9: Find Camera from LAN 20 Figure 6-10: Find Camera from Internet 21 Figure 6-11: Change Settings 21 Figure 6-12: Delete Camera 22 Figure 6-13: View Video 23 Figure 6-14: Recording Icon 23 Figure 6-15: ...Video 27 Figure 7-1: SoloLink Service 28 Figure 7-2: Welcome 28 Figure 7-3: SoloLink for Dynamic IP Address 29 Figure 7-4: SoloLink for Convenience 29 Figure 7-5: Check Connections 30 Figure 7-6: Cameras Found 30 Figure 7-7: User Name and Password Login 31 Figure 7-8: SoloLink DDNS 31 Figure 7-9: Confirm Active Internet...
Wireless-B Internet Video Camera Figure 6-9: Find Camera from LAN 20 Figure 6-10: Find Camera from Internet 21 Figure 6-11: Change Settings 21 Figure 6-12: Delete Camera 22 Figure 6-13: View Video 23 Figure 6-14: Recording Icon 23 Figure 6-15: ...Video 27 Figure 7-1: SoloLink Service 28 Figure 7-2: Welcome 28 Figure 7-3: SoloLink for Dynamic IP Address 29 Figure 7-4: SoloLink for Convenience 29 Figure 7-5: Check Connections 30 Figure 7-6: Cameras Found 30 Figure 7-7: User Name and Password Login 31 Figure 7-8: SoloLink DDNS 31 Figure 7-9: Confirm Active Internet...
User Guide
Page 7
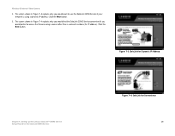
Wireless-B Internet Video Camera Figure 7-17: Create Links 36 Figure 7-18: Successful Registration 36 Figure 7-19: Account Confirmation of Camera 37 Figure 7-20: Successful Setup 37 Figure 7-21: Port Forwarding Information 38 Figure 7-22: Web-based Utility Welcome 38 Figure 7-23: User Name and Password 38 Figure 7-24: SoloLink DDNS 39 Figure 8-1: Camera's Default IP Address 40 Figure 8-2: Web...
Wireless-B Internet Video Camera Figure 7-17: Create Links 36 Figure 7-18: Successful Registration 36 Figure 7-19: Account Confirmation of Camera 37 Figure 7-20: Successful Setup 37 Figure 7-21: Port Forwarding Information 38 Figure 7-22: Web-based Utility Welcome 38 Figure 7-23: User Name and Password 38 Figure 7-24: SoloLink DDNS 39 Figure 8-1: Camera's Default IP Address 40 Figure 8-2: Web...

User Guide
Page 8
... over Wireless-B (802.11b) networking, or over 10/100 Ethernet cable. Wireless-B Internet Video Camera Chapter 1: Introduction Welcome Thank you access your Camera using an easy-to-remember "name", even if your home Internet connection uses a dynamic IP address. The advanced MPEG-4 video compression produces a high-quality, high-framerate, 320 x 240 video stream. This Camera sends live video stream if the situation warrants. The Internet Video Camera...
... over Wireless-B (802.11b) networking, or over 10/100 Ethernet cable. Wireless-B Internet Video Camera Chapter 1: Introduction Welcome Thank you access your Camera using an easy-to-remember "name", even if your home Internet connection uses a dynamic IP address. The advanced MPEG-4 video compression produces a high-quality, high-framerate, 320 x 240 video stream. This Camera sends live video stream if the situation warrants. The Internet Video Camera...

User Guide
Page 18
... can change these through the Web-based Utility). Write down the IP address of Wireless-B Internet Video Cameras on the same network. Enter today's date in Figure 5-3 displays a list of the Camera, so you can alter the following settings: • Camera Name. It has a maximum length of the Camera you will be asked to enter a name and password in the...
... can change these through the Web-based Utility). Write down the IP address of Wireless-B Internet Video Cameras on the same network. Enter today's date in Figure 5-3 displays a list of the Camera, so you can alter the following settings: • Camera Name. It has a maximum length of the Camera you will be asked to enter a name and password in the...

User Guide
Page 19
... 9. Figure 5-6: DHCP or Static IP Address Chapter 5: Setting up and Mounting the Wireless-B Internet Video Camera Setup Wizard Figure 5-7: IP Settings 12 Then complete the Primary DNS and/or Secondary DNS fields. You must enter at least one DNS address, which can be obtained from your ISP. Click the Next button. If your network. Then click the Next button...
... 9. Figure 5-6: DHCP or Static IP Address Chapter 5: Setting up and Mounting the Wireless-B Internet Video Camera Setup Wizard Figure 5-7: IP Settings 12 Then complete the Primary DNS and/or Secondary DNS fields. You must enter at least one DNS address, which can be obtained from your ISP. Click the Next button. If your network. Then click the Next button...

User Guide
Page 27
... number the Camera uses for each Camera. Login. Figure 6-9: Find Camera from LAN Chapter 6: Installing and Using the Wireless-B Internet Video Camera Viewer & Recorder Utility 20 Using the Viewer & Recorder Utility Description. Address. The Camera's IP address. Password. Enter the login Name. Then click the Add button. LAN The LAN screen shows the Cameras found on your local network or the Internet, click the...
... number the Camera uses for each Camera. Login. Figure 6-9: Find Camera from LAN Chapter 6: Installing and Using the Wireless-B Internet Video Camera Viewer & Recorder Utility 20 Using the Viewer & Recorder Utility Description. Address. The Camera's IP address. Password. Enter the login Name. Then click the Add button. LAN The LAN screen shows the Cameras found on your local network or the Internet, click the...

User Guide
Page 28
... 6: Installing and Using the Wireless-B Internet Video Camera Viewer & Recorder Utility Using the Viewer & Recorder Utility Figure 6-10: Find Camera from Internet Figure 6-11: Change Settings 21 See Figure 6-10. Description. Name. Login. If you set up the Camera with the status information for communication. The Camera's IP address or SoloLink DDNS address. If you set up the Camera with a name and...
... 6: Installing and Using the Wireless-B Internet Video Camera Viewer & Recorder Utility Using the Viewer & Recorder Utility Figure 6-10: Find Camera from Internet Figure 6-11: Change Settings 21 See Figure 6-10. Description. Name. Login. If you set up the Camera with the status information for communication. The Camera's IP address or SoloLink DDNS address. If you set up the Camera with a name and...

User Guide
Page 29
... Using the Wireless-B Internet Video Camera Viewer & Recorder Utility 22 Using the Viewer & Recorder Utility Description. Name. Delete To delete a Camera from the list, select the Camera by clicking its name in the Camera List box, and then click the Delete button (see Figure 6-12). Password. Login. If you entered. The Camera's IP address or your SoloLink DDNS address. Port Number...
... Using the Wireless-B Internet Video Camera Viewer & Recorder Utility 22 Using the Viewer & Recorder Utility Description. Name. Delete To delete a Camera from the list, select the Camera by clicking its name in the Camera List box, and then click the Delete button (see Figure 6-12). Password. Login. If you entered. The Camera's IP address or your SoloLink DDNS address. Port Number...
User Guide
Page 35
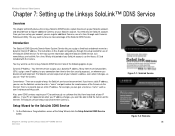
... continuously run software that lets them keep track of your network's address, even when it changes, so you won't be convenient. Convenience - The SoloLink service keeps track of your IP address. If your PC isn't powered on your SoloLink account. Wireless-B Internet Video Camera Chapter 7: Setting up the Linksys SoloLink™ DDNS Service Overview This chapter will guide you...
... continuously run software that lets them keep track of your network's address, even when it changes, so you won't be convenient. Convenience - The SoloLink service keeps track of your IP address. If your PC isn't powered on your SoloLink account. Wireless-B Internet Video Camera Chapter 7: Setting up the Linksys SoloLink™ DDNS Service Overview This chapter will guide you...
User Guide
Page 36
The screen shown in Figure 7-3 explains why you would want to access the Camera using a dynamic IP address. Figure 7-3: SoloLink for Dynamic IP Address Chapter 7: Setting up the Linksys SoloLink™ DDNS Service Setup Wizard for the SoloLink DDNS Service Figure 7-4: SoloLink for Convenience 29 Click the Next button. Click the Next button... 7-4 explains why you would find the SoloLink DDNS Service convenient if you would prefer to use the SoloLink DDNS Service if your network is using a name rather than a series of numbers (its IP address). Wireless-B Internet Video Camera 2.
The screen shown in Figure 7-3 explains why you would want to access the Camera using a dynamic IP address. Figure 7-3: SoloLink for Dynamic IP Address Chapter 7: Setting up the Linksys SoloLink™ DDNS Service Setup Wizard for the SoloLink DDNS Service Figure 7-4: SoloLink for Convenience 29 Click the Next button. Click the Next button... 7-4 explains why you would find the SoloLink DDNS Service convenient if you would prefer to use the SoloLink DDNS Service if your network is using a name rather than a series of numbers (its IP address). Wireless-B Internet Video Camera 2.
User Guide
Page 45
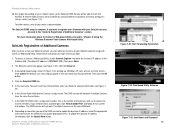
... you will be able to configure a Linksys router (see a similar screen.) Enter admin (the default user name and password) in the Address field. (The default IP address is 192.168.1.115.) Then press Enter. 2. Depending on how to track the Wireless-B Internet Video Camera. Chapter 7: Setting up . (Windows XP...port number. The DDNS service will not work if multiple Cameras have set up port forwarding on -screen instructions. Go to the "SoloLink Registration of Additional Cameras After you add: 1. For more Cameras with your network router, so the SoloLink DDNS Service will use the ...
... you will be able to configure a Linksys router (see a similar screen.) Enter admin (the default user name and password) in the Address field. (The default IP address is 192.168.1.115.) Then press Enter. 2. Depending on how to track the Wireless-B Internet Video Camera. Chapter 7: Setting up . (Windows XP...port number. The DDNS service will not work if multiple Cameras have set up port forwarding on -screen instructions. Go to the "SoloLink Registration of Additional Cameras After you add: 1. For more Cameras with your network router, so the SoloLink DDNS Service will use the ...
User Guide
Page 47
... Enter. How to the Welcome screen, click the Home tab. • View Video. To return to Access the Web-based Utility To access the Utility, launch Internet Explorer, and enter the Camera's IP address in the Utility and its settings. Chapter 8: Using The Wireless-B Internet Video Camera's Web-based Utility Overview Figure 8-1: Camera's Default IP Address Figure 8-2: Web-based Utility Welcome 40
... Enter. How to the Welcome screen, click the Home tab. • View Video. To return to Access the Web-based Utility To access the Utility, launch Internet Explorer, and enter the Camera's IP address in the Utility and its settings. Chapter 8: Using The Wireless-B Internet Video Camera's Web-based Utility Overview Figure 8-1: Camera's Default IP Address Figure 8-2: Web-based Utility Welcome 40
User Guide
Page 48
...Password screen of access to the Camera on the Welcome screen to a dynamic Internet IP address. • Status. Alter the Administrator name and password on the Image screen. • Password. Set up . (Windows XP users will appear. The View Video feature will appear showing you ...name and password) in Figure 8-4 will pop up and manage the SoloLink DDNS Service. Wireless-B Internet Video Camera 1. Then click the OK button. DDNS (Dynamic Domain Name System) lets you must use Internet Explorer version 5.5 or higher. To enable your changes, click the Apply button. You have...
...Password screen of access to the Camera on the Welcome screen to a dynamic Internet IP address. • Status. Alter the Administrator name and password on the Image screen. • Password. Set up . (Windows XP users will appear. The View Video feature will appear showing you ...name and password) in Figure 8-4 will pop up and manage the SoloLink DDNS Service. Wireless-B Internet Video Camera 1. Then click the OK button. DDNS (Dynamic Domain Name System) lets you must use Internet Explorer version 5.5 or higher. To enable your changes, click the Apply button. You have...

User Guide
Page 49
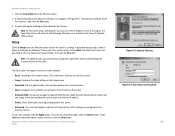
Device Settings Firmware Version. The version number of the Camera is used by the Camera and the Utility to exchange data. Visit www.linksys.com to 15 characters. You can enter up to find out if ...Camera. Wireless-B Internet Video Camera Basic The Basic screen, as shown in this field. You may assign any name to enter at least one DNS address. Date. If you want to alter the Camera's settings, including the network and wireless configuration. Complete these fields if the Camera will assign the Camera a static IP address, then select Static IP Address, and complete the IP Address...
Device Settings Firmware Version. The version number of the Camera is used by the Camera and the Utility to exchange data. Visit www.linksys.com to 15 characters. You can enter up to find out if ...Camera. Wireless-B Internet Video Camera Basic The Basic screen, as shown in this field. You may assign any name to enter at least one DNS address. Date. If you want to alter the Camera's settings, including the network and wireless configuration. Complete these fields if the Camera will assign the Camera a static IP address, then select Static IP Address, and complete the IP Address...

User Guide
Page 54
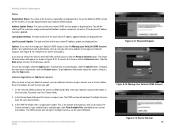
...-screen instructions. Wireless-B Internet Video Camera SoloLink DDNS The SoloLink DDNS screen allows you to set up and configure your SoloLink account. Go to www.linksys.com/portfwd for instructions on your network router. Click here to configure a Linksys router. Follow ...and domain name to cancel your router's documentation. SoloLink DDNS Username. Click the Cancel button to a dynamic Internet IP address. Chapter 8: Using The Wireless-B Internet Video Camera's Web-based Utility Setup Figure 8-11: SoloLink DDNS Figure 8-12: New User Registration 47 Depending on -...
...-screen instructions. Wireless-B Internet Video Camera SoloLink DDNS The SoloLink DDNS screen allows you to set up and configure your SoloLink account. Go to www.linksys.com/portfwd for instructions on your network router. Click here to configure a Linksys router. Follow ...and domain name to cancel your router's documentation. SoloLink DDNS Username. Click the Cancel button to a dynamic Internet IP address. Chapter 8: Using The Wireless-B Internet Video Camera's Web-based Utility Setup Figure 8-11: SoloLink DDNS Figure 8-12: New User Registration 47 Depending on -...
User Guide
Page 55
.... SoloLink Registration of the Camera's registration is displayed here. Chapter 8: Using The Wireless-B Internet Video Camera's Web-based Utility Setup Figure 8-13: Password Request Figure 8-14: Manage Your SoloLink DDNS Account Figure 8-15: Device Removal 48 Last Update Attempt. If you need to access the Camera remotely. To display the most recent IP address update are displayed here...
.... SoloLink Registration of the Camera's registration is displayed here. Chapter 8: Using The Wireless-B Internet Video Camera's Web-based Utility Setup Figure 8-13: Password Request Figure 8-14: Manage Your SoloLink DDNS Account Figure 8-15: Device Removal 48 Last Update Attempt. If you need to access the Camera remotely. To display the most recent IP address update are displayed here...

User Guide
Page 56
.... To update the dynamic IP address immediately, click the Update Now button. 5. For other routers, refer to track the Wireless-B Internet Video Camera. Go to www.linksys.com/portfwd for instructions on how often you want the DDNS service to configure a Linksys router. The Camera will be able to your SoloLink account. 6. Chapter 8: Using The Wireless-B Internet Video Camera's Web-based Utility 49...
.... To update the dynamic IP address immediately, click the Update Now button. 5. For other routers, refer to track the Wireless-B Internet Video Camera. Go to www.linksys.com/portfwd for instructions on how often you want the DDNS service to configure a Linksys router. The Camera will be able to your SoloLink account. 6. Chapter 8: Using The Wireless-B Internet Video Camera's Web-based Utility 49...

User Guide
Page 57
... if there is displayed here. Visit www.linksys.com to -date information, click the Refresh button. Date. Chapter 8: Using The Wireless-B Internet Video Camera's Web-based Utility Setup Figure 8-16: Status 50 Channel. The Camera's Gateway address is updated firmware. Network Type. Status Firmware Version. IP Address. To get additional information about the Camera that you to the Camera is displayed here.
... if there is displayed here. Visit www.linksys.com to -date information, click the Refresh button. Date. Chapter 8: Using The Wireless-B Internet Video Camera's Web-based Utility Setup Figure 8-16: Status 50 Channel. The Camera's Gateway address is updated firmware. Network Type. Status Firmware Version. IP Address. To get additional information about the Camera that you to the Camera is displayed here.

User Guide
Page 58
... heading that you want the video attachment to be, up to be used. Enter the IP address of motion sensitivity levels for communications, click the checkbox. Then enter the port number you want to alter the Camera's e-mail alert features and UPnP...address that you want the Camera to be able to be notified when the Camera detects motion in the "From" field of your specific environment. Subject. If it requires authentication, click the checkbox, and enter the account name and password in the Port Number field. To cancel any e-mail alert message. Wireless-B Internet Video Camera...
... heading that you want the video attachment to be, up to be used. Enter the IP address of motion sensitivity levels for communications, click the checkbox. Then enter the port number you want to alter the Camera's e-mail alert features and UPnP...address that you want the Camera to be able to be notified when the Camera detects motion in the "From" field of your specific environment. Subject. If it requires authentication, click the checkbox, and enter the account name and password in the Port Number field. To cancel any e-mail alert message. Wireless-B Internet Video Camera...

