User's Guide
Page 3
... security warnings during software installation 8 Understanding the parts of the printer...8 Understanding the parts of the printer...9 Installing printer software ...9 Installing the optional XPS driver (Windows Vista users only 10 Using the Windows printer software...11 Using the Macintosh printer software...12 Loading paper 13 Loading paper...13 Loading various paper types...13 Printing 16...
... security warnings during software installation 8 Understanding the parts of the printer...8 Understanding the parts of the printer...9 Installing printer software ...9 Installing the optional XPS driver (Windows Vista users only 10 Using the Windows printer software...11 Using the Macintosh printer software...12 Loading paper 13 Loading paper...13 Loading various paper types...13 Printing 16...
User's Guide
Page 4
... Printing photos from a CD or removable storage device connected to the computer 26 Maintaining the printer 28 Maintaining print cartridges...28 Installing print cartridges...28 Removing a used print cartridge ...29 Refilling print cartridges...30 Using genuine Lexmark print cartridges...30 Aligning the print cartridges ...30 Cleaning the print cartridge nozzles...31 Wiping...
... Printing photos from a CD or removable storage device connected to the computer 26 Maintaining the printer 28 Maintaining print cartridges...28 Installing print cartridges...28 Removing a used print cartridge ...29 Refilling print cartridges...30 Using genuine Lexmark print cartridges...30 Aligning the print cartridges ...30 Cleaning the print cartridge nozzles...31 Wiping...

User's Guide
Page 6
...may change without notice. Customer support Description Where to find (North America) Where to find (rest of world) Telephone support Call us at www.lexmark.com. Visit our Web site at • US: 1-800-332-4120 - Select a country or region, and then select the Customer Support link.... For the most recent telephone numbers available, see the printed warranty that came with your printer. - Note: Not all products come with the printer software. Monday-Friday (8:00 AM-11:00 PM EST), Saturday (Noon-6:00 PM EST) • Canada: 1-800-539...
...may change without notice. Customer support Description Where to find (North America) Where to find (rest of world) Telephone support Call us at www.lexmark.com. Visit our Web site at • US: 1-800-332-4120 - Select a country or region, and then select the Customer Support link.... For the most recent telephone numbers available, see the printed warranty that came with your printer. - Note: Not all products come with the printer software. Monday-Friday (8:00 AM-11:00 PM EST), Saturday (Noon-6:00 PM EST) • Canada: 1-800-539...
User's Guide
Page 7
...some instances. materials and workmanship for a www.lexmark.com. Visit our Web site at printer. this limited warranty, see the printed warranty that came with this printer will be available in printer, or set forth at www.lexmark.com. original date of purchase. 2 Click...mail support, visit our Web site: www.lexmark.com. 1 Click CUSTOMER SUPPORT. 2 Click Technical Support. 3 Select your printer family. 4 Select your printer model. 5 From the Support Tools section, click e- Note: For additional information about contacting Lexmark, see the Statement of 12 months after ...
...some instances. materials and workmanship for a www.lexmark.com. Visit our Web site at printer. this limited warranty, see the printed warranty that came with this printer will be available in printer, or set forth at www.lexmark.com. original date of purchase. 2 Click...mail support, visit our Web site: www.lexmark.com. 1 Click CUSTOMER SUPPORT. 2 Click Technical Support. 3 Select your printer family. 4 Select your printer model. 5 From the Support Tools section, click e- Note: For additional information about contacting Lexmark, see the Statement of 12 months after ...
User's Guide
Page 8
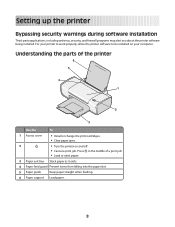
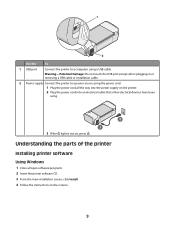
... work properly, allow the printer software to be installed on and off. • Cancel a print job. Understanding the parts of a print job. • Load or eject paper. 3 Paper exit tray ... Prevent items from falling into the paper slot. 5 Paper guide Keep paper straight when feeding. 6 Paper support Load paper. 8 Press in the middle of the printer 6 5 4 1 2 3 Use the To 1 Access cover • Install or change the print cartridges. • Clear paper jams. 2 • Turn the...
... work properly, allow the printer software to be installed on and off. • Cancel a print job. Understanding the parts of a print job. • Load or eject paper. 3 Paper exit tray ... Prevent items from falling into the paper slot. 5 Paper guide Keep paper straight when feeding. 6 Paper support Load paper. 8 Press in the middle of the printer 6 5 4 1 2 3 Use the To 1 Access cover • Install or change the print cartridges. • Clear paper jams. 2 • Turn the...
User's Guide
Page 9
...USB cable or installation cable. 2 Power supply Connect the printer to a computer using a USB cable. Understanding the parts of the printer Installing printer software Using Windows 1 Close all the way into the power supply on the printer. 2 Plug the power cord into an electrical outlet ... the light is not on the screens. 9 1 2 Use the To 1 USB port Connect the printer to a power source using the power cord. 1 Plug the power cord all open software programs. 2 Insert the printer software CD. 3 From the main installation screen, click Install. 4 Follow the instructions on , press...
...USB cable or installation cable. 2 Power supply Connect the printer to a computer using a USB cable. Understanding the parts of the printer Installing printer software Using Windows 1 Close all the way into the power supply on the printer. 2 Plug the power cord into an electrical outlet ... the light is not on the screens. 9 1 2 Use the To 1 USB port Connect the printer to a power source using the power cord. 1 Plug the power cord all open software programs. 2 Insert the printer software CD. 3 From the main installation screen, click Install. 4 Follow the instructions on , press...
User's Guide
Page 10
... From Disk dialog appears. 10 Notes: • Before installing the XPS driver, you install the regular printer software. Follow the instructions on the screens to the Lexmark Web site at www.lexmark.com. 2 From the home page, navigate through the menu selection, and then click Drivers & Downloads.... 3 Choose the printer and the printer driver for your computer, and any required Microsoft XPS files are launched. ...
... From Disk dialog appears. 10 Notes: • Before installing the XPS driver, you install the regular printer software. Follow the instructions on the screens to the Lexmark Web site at www.lexmark.com. 2 From the home page, navigate through the menu selection, and then click Drivers & Downloads.... 3 Choose the printer and the printer driver for your computer, and any required Microsoft XPS files are launched. ...
User's Guide
Page 11
... the print job such as the following table provides an overview of the printer. 11 e From the Install From Disk dialog, click OK. 7 Click Next on your printer model number, and then double-click Drivers. Use the Lexmark Fax Setup Utility to be printed. • Print two-sided copies. ... has your computer: a Click Computer, and then double-click (C:). b Double-click Drivers, and then double-click Printer. The file is located in phone book. • Access the Lexmark Fax Setup Utility. For more information on the XPS driver, see the XPS readme file on a wireless network. • ...
... the print job such as the following table provides an overview of the printer. 11 e From the Install From Disk dialog, click OK. 7 Click Next on your printer model number, and then double-click Drivers. Use the Lexmark Fax Setup Utility to be printed. • Print two-sided copies. ... has your computer: a Click Computer, and then double-click (C:). b Double-click Drivers, and then double-click Printer. The file is located in phone book. • Access the Lexmark Fax Setup Utility. For more information on the XPS driver, see the XPS readme file on a wireless network. • ...
User's Guide
Page 12
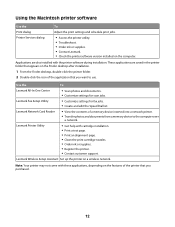
...desktop after installation. 1 From the Finder desktop, double-click the printer folder. 2 Double-click the icon of the application that you purchased. 12 Lexmark Wireless Setup Assistant Set up the printer on the computer. These applications are also installed with cartridge installation. ... Order ink or supplies. • Register the printer. • Contact customer support. Lexmark Network Card Reader • View the contents of the printer that appears on the features of a memory device inserted into a network printer. • Transfer photos and documents from a ...
...desktop after installation. 1 From the Finder desktop, double-click the printer folder. 2 Double-click the icon of the application that you purchased. 12 Lexmark Wireless Setup Assistant Set up the printer on the computer. These applications are also installed with cartridge installation. ... Order ink or supplies. • Register the printer. • Contact customer support. Lexmark Network Card Reader • View the contents of the printer that appears on the features of a memory device inserted into a network printer. • Transfer photos and documents from a ...
User's Guide
Page 13
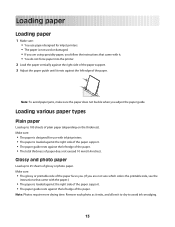
... when you follow the instructions that came with it. • You do not force paper into the printer. 2 Load the paper vertically against the right side of the paper support. 3 Adjust the paper guide... ink smudging. 13 Make sure: • The paper is designed for use paper designed for inkjet printers. • The paper is not used or damaged. • If you are not sure which side...paper (depending on the thickness). Loading paper Loading paper 1 Make sure: • You use with inkjet printers. • The paper is loaded against the right side of the paper support. • The paper ...
... when you follow the instructions that came with it. • You do not force paper into the printer. 2 Load the paper vertically against the right side of the paper support. 3 Adjust the paper guide... ink smudging. 13 Make sure: • The paper is designed for use paper designed for inkjet printers. • The paper is not used or damaged. • If you are not sure which side...paper (depending on the thickness). Loading paper Loading paper 1 Make sure: • You use with inkjet printers. • The paper is loaded against the right side of the paper support. • The paper ...
User's Guide
Page 16
...open in a Windows program , click File Œ Print. Printing Web pages If you chose to install the Lexmark Toolbar software for your Web browser, then you can use it to create a printer-friendly version of Firefox. 16 e Click OK or Print. Notes: • For Windows, the software supports ... Internet Explorer 5.5 or later or a compatible version of Firefox. • For Macintosh, the software supports a compatible version of any printer software dialogs. b From the Printer pop-up menu, choose the print quality, the number of copies to print, the type of paper to be used , and how...
...open in a Windows program , click File Œ Print. Printing Web pages If you chose to install the Lexmark Toolbar software for your Web browser, then you can use it to create a printer-friendly version of Firefox. 16 e Click OK or Print. Notes: • For Windows, the software supports ... Internet Explorer 5.5 or later or a compatible version of Firefox. • For Macintosh, the software supports a compatible version of any printer software dialogs. b From the Printer pop-up menu, choose the print quality, the number of copies to print, the type of paper to be used , and how...
User's Guide
Page 17
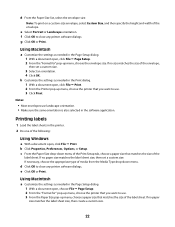
... Open a Web page using a supported browser. 3 Select a print option to close any printer software dialogs. 5 Click OK or Print. Using Macintosh 1 With a document open, click File ΠPrint. 2 From the Printer pop-up menu, choose the printer. 3 In the Copies field, enter the number of pages (not collated). Note: The ... choose to print each copy as a set (collated) or to print the copies as groups of copies that you want to close any printer software dialogs. 5 Click OK or Print. Collating printed copies If you print multiple copies of a document, you want to print, and then...
... Open a Web page using a supported browser. 3 Select a print option to close any printer software dialogs. 5 Click OK or Print. Using Macintosh 1 With a document open, click File ΠPrint. 2 From the Printer pop-up menu, choose the printer. 3 In the Copies field, enter the number of pages (not collated). Note: The ... choose to print each copy as a set (collated) or to print the copies as groups of copies that you want to close any printer software dialogs. 5 Click OK or Print. Collating printed copies If you print multiple copies of a document, you want to print, and then...
User's Guide
Page 18
Using Macintosh 1 With a document open, click File ΠPrint. 2 From the Printer pop-up menu, choose the printer. 3 Do one sheet (N-Up) Using Windows 1 With a document open, click File ΠPrint. 2 Click Properties, Preferences, Options, or Setup. 18 For Mac OS X version 10.3 a ... Handling. Using Macintosh 1 With a document open, click File ΠPrint. 2 In the Copies field, enter the number of copies that you want to close any printer software dialogs. 5 Click OK or Print. Note: To prevent smudging when printing photos, remove each photo as it exits the...
Using Macintosh 1 With a document open, click File ΠPrint. 2 From the Printer pop-up menu, choose the printer. 3 Do one sheet (N-Up) Using Windows 1 With a document open, click File ΠPrint. 2 Click Properties, Preferences, Options, or Setup. 18 For Mac OS X version 10.3 a ... Handling. Using Macintosh 1 With a document open, click File ΠPrint. 2 In the Copies field, enter the number of copies that you want to close any printer software dialogs. 5 Click OK or Print. Note: To prevent smudging when printing photos, remove each photo as it exits the...
User's Guide
Page 19
... number of page images to print on each page image to be surrounded by a border, then select Print Page Borders. 5 Click OK to close any printer software dialogs. 6 Click OK or Print. Using Macintosh 1 With a document open, click File Œ Print. 2 From the print options pop-up menu, choose... Layout. • From the Pages per Sheet pop-up menu. 3 Click Print. Canceling print jobs Using the printer control panel Press . b Click Control Panel. Click Cancel Printing to print on one sheet. • From the Layout Direction area, click the icon that ...
... number of page images to print on each page image to be surrounded by a border, then select Print Page Borders. 5 Click OK to close any printer software dialogs. 6 Click OK or Print. Using Macintosh 1 With a document open, click File Œ Print. 2 From the print options pop-up menu, choose... Layout. • From the Pages per Sheet pop-up menu. 3 Click Print. Canceling print jobs Using the printer control panel Press . b Click Control Panel. Click Cancel Printing to print on one sheet. • From the Layout Direction area, click the icon that ...
User's Guide
Page 20
.... In Windows 2000 a Click Start. b Click Settings ΠPrinters. 2 Right-click the printer, and then select Pause Printing. b Click Printers and Faxes. Using the taskbar in Windows 1 Double-click the printer icon in the queue, click Printer ΠCancel All Documents. 3 Do one of the following :... a Click . c Under Hardware and Sound, click Printer. Using the taskbar in Windows 1 Double-click the printer icon in the queue, click Printer ΠCancel All Documents. Using Macintosh 1 While the document is printing, click the printer icon in the Dock. 2 From the print queue dialog...
.... In Windows 2000 a Click Start. b Click Settings ΠPrinters. 2 Right-click the printer, and then select Pause Printing. b Click Printers and Faxes. Using the taskbar in Windows 1 Double-click the printer icon in the queue, click Printer ΠCancel All Documents. 3 Do one of the following :... a Click . c Under Hardware and Sound, click Printer. Using the taskbar in Windows 1 Double-click the printer icon in the queue, click Printer ΠCancel All Documents. Using Macintosh 1 While the document is printing, click the printer icon in the Dock. 2 From the print queue dialog...
User's Guide
Page 21
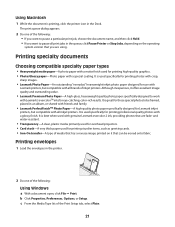
...-A clear, plastic media primarily used for overhead projectors. • Card stock-A very thick paper used for Lexmark inkjet printers, but compatible with genuine Lexmark evercolor 2 ink, providing photos that you want to work with all print jobs in the Dock. c .... It is used specifically for printing photos with crisp, sharp images. • Lexmark Photo Paper-An outstanding "everyday" heavyweight inkjet photo paper designed for use with Lexmark printers, but compatible with Lexmark's evercolorTM inks for printing high-quality graphics. • Photo/Glossy paper-Photo paper...
...-A clear, plastic media primarily used for overhead projectors. • Card stock-A very thick paper used for Lexmark inkjet printers, but compatible with genuine Lexmark evercolor 2 ink, providing photos that you want to work with all print jobs in the Dock. c .... It is used specifically for printing photos with crisp, sharp images. • Lexmark Photo Paper-An outstanding "everyday" heavyweight inkjet photo paper designed for use with Lexmark printers, but compatible with Lexmark's evercolorTM inks for printing high-quality graphics. • Photo/Glossy paper-Photo paper...
User's Guide
Page 22
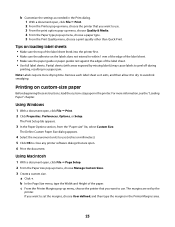
.... b Customize the settings as needed in the Page Setup dialog. 1 With a document open , click File ΠPrint. f Click OK to close any printer software dialogs. c From the Paper Size drop-down menu. Note: To print on a custom-size envelope, select Custom Size, and then specify the height and...; Make sure the same orientation is also selected in the Page Setup dialog. 1 With a document open , click File ΠPrint. 2 From the Printer pop-up menu, choose the printer that you want to use. 3 From the Paper Size pop-up menu, choose a paper size that you want to close any...
.... b Customize the settings as needed in the Page Setup dialog. 1 With a document open , click File ΠPrint. f Click OK to close any printer software dialogs. c From the Paper Size drop-down menu. Note: To print on a custom-size envelope, select Custom Size, and then specify the height and...; Make sure the same orientation is also selected in the Page Setup dialog. 1 With a document open , click File ΠPrint. 2 From the Printer pop-up menu, choose the printer that you want to use. 3 From the Paper Size pop-up menu, choose a paper size that you want to close any...
User's Guide
Page 23
... want to use . b In the Page Size menu, type the Width and Height of the label sheet. • Use full label sheets. c From the Printer Margins pop-up menu, choose Manage Custom Sizes. 3 Create a custom size. The Print Setup tab appears. 3 In the Paper Options section, from the "Paper... size" list, select Custom Size. Tips on loading label sheets • Make sure the top of the label sheet feeds into the printer first. • Make sure the adhesive on custom-size paper Before beginning these instructions, load the custom-size paper in a paper jam. Using Macintosh 1...
... want to use . b In the Page Size menu, type the Width and Height of the label sheet. • Use full label sheets. c From the Printer Margins pop-up menu, choose Manage Custom Sizes. 3 Create a custom size. The Print Setup tab appears. 3 In the Paper Options section, from the "Paper... size" list, select Custom Size. Tips on loading label sheets • Make sure the top of the label sheet feeds into the printer first. • Make sure the adhesive on custom-size paper Before beginning these instructions, load the custom-size paper in a paper jam. Using Macintosh 1...
User's Guide
Page 24
...all open , click File ΠPrint. 2 Click Properties, Preferences, Options, or Setup. 3 Make adjustments to use. b Choose Library ΠPrinters ΠYYYY ΠLexmark, and then select your current settings. 5 Select an empty location for the custom paper size you added in Step 3d. 5 Click Print. Using ...Macintosh 1 From the Finder desktop, double-click the printer folder. Using Windows 1 Do one of the custom paper ...
...all open , click File ΠPrint. 2 Click Properties, Preferences, Options, or Setup. 3 Make adjustments to use. b Choose Library ΠPrinters ΠYYYY ΠLexmark, and then select your current settings. 5 Select an empty location for the custom paper size you added in Step 3d. 5 Click Print. Using ...Macintosh 1 From the Finder desktop, double-click the printer folder. Using Windows 1 Do one of the custom paper ...
User's Guide
Page 26
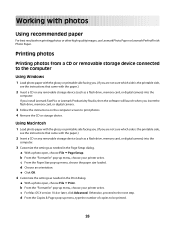
...the CD or storage device. e Click OK. 4 Customize the settings as needed in the Page Setup dialog. If you install Lexmark FastPics or Lexmark Productivity Studio, then the software will launch when you are not sure which side is the printable side, see the instructions that ...digital camera) into the computer. 3 Customize the settings as needed in the Print dialog. d From the Copies & Pages pop-up menu, choose your printer series. a With a photo open , choose File ΠPrint. Printing photos Printing photos from a CD or removable storage device connected to be ...
...the CD or storage device. e Click OK. 4 Customize the settings as needed in the Page Setup dialog. If you install Lexmark FastPics or Lexmark Productivity Studio, then the software will launch when you are not sure which side is the printable side, see the instructions that ...digital camera) into the computer. 3 Customize the settings as needed in the Print dialog. d From the Copies & Pages pop-up menu, choose your printer series. a With a photo open , choose File ΠPrint. Printing photos Printing photos from a CD or removable storage device connected to be ...


