User Guide
Page 240
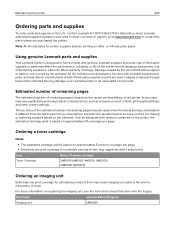
... negatively affect actual yield. Item Return Program cartridge Toner Cartridge 24B6015 (XM5163, XM5170, XM5263) 24B6020 (XM5270) Ordering an imaging unit Extremely low print coverage for extended periods of time may cause imaging unit parts to fail prior to www.lexmark.com or contact the place where you purchased the printer. The accuracy of the estimated number...
... negatively affect actual yield. Item Return Program cartridge Toner Cartridge 24B6015 (XM5163, XM5170, XM5263) 24B6020 (XM5270) Ordering an imaging unit Extremely low print coverage for extended periods of time may cause imaging unit parts to fail prior to www.lexmark.com or contact the place where you purchased the printer. The accuracy of the estimated number...

User Guide
Page 241
...Program fuser maintenance kit Type 03 XM5100 Series Return Program fuser maintenance kit Type 04 Part number 40X8420 40X8421 40X8422 40X8423 40X8424 Lexmark regular fuser maintenance kit type Type XM5100 Series regular fuser maintenance kit Type 05 XM5100 Series regular fuser maintenance kit Type ... individually ordered and replaced if necessary. • For more frequent replacement of the fuser. Warning-Potential Damage: Do not expose the imaging unit to light may require more information on the fuser. Notes: • Using certain types of the following: • Remove the toner ...
...Program fuser maintenance kit Type 03 XM5100 Series Return Program fuser maintenance kit Type 04 Part number 40X8420 40X8421 40X8422 40X8423 40X8424 Lexmark regular fuser maintenance kit type Type XM5100 Series regular fuser maintenance kit Type 05 XM5100 Series regular fuser maintenance kit Type ... individually ordered and replaced if necessary. • For more frequent replacement of the fuser. Warning-Potential Damage: Do not expose the imaging unit to light may require more information on the fuser. Notes: • Using certain types of the following: • Remove the toner ...

User Guide
Page 243
... may cause print quality problems. Note: Make sure the cartridge is fully pushed in. Warning-Potential Damage: When replacing a toner cartridge, do not leave the imaging unit exposed to direct light for an extended period of time.
... may cause print quality problems. Note: Make sure the cartridge is fully pushed in. Warning-Potential Damage: When replacing a toner cartridge, do not leave the imaging unit exposed to direct light for an extended period of time.

User Guide
Page 244
Maintaining the printer 244 5 Close the multipurpose feeder door and the front cover. 2 1 Replacing the imaging unit 1 Lift the front cover, and then pull down the multipurpose feeder door. 1 2
Maintaining the printer 244 5 Close the multipurpose feeder door and the front cover. 2 1 Replacing the imaging unit 1 Lift the front cover, and then pull down the multipurpose feeder door. 1 2

User Guide
Page 245
Maintaining the printer 245 2 Pull out the toner cartridge from the printer using the handle. 3 Lift the green handle, and then pull out the imaging unit from the printer.
Maintaining the printer 245 2 Pull out the toner cartridge from the printer using the handle. 3 Lift the green handle, and then pull out the imaging unit from the printer.

User Guide
Page 246
Doing so may cause print quality problems. Warning-Potential Damage: Do not touch the photoconductor drum. Warning-Potential Damage: Do not expose the imaging unit to light may affect the print quality of future print jobs. 6 Insert the imaging unit into the printer by aligning the arrows on the side rails of the imaging unit with the arrows on the side rails inside the printer. Maintaining the printer 246 4 Unpack the new imaging unit, and then shake it. 5 Remove all packing material from the imaging unit. Extended exposure to direct light for more than 10 minutes.
Doing so may cause print quality problems. Warning-Potential Damage: Do not touch the photoconductor drum. Warning-Potential Damage: Do not expose the imaging unit to light may affect the print quality of future print jobs. 6 Insert the imaging unit into the printer by aligning the arrows on the side rails of the imaging unit with the arrows on the side rails inside the printer. Maintaining the printer 246 4 Unpack the new imaging unit, and then shake it. 5 Remove all packing material from the imaging unit. Extended exposure to direct light for more than 10 minutes.

User Guide
Page 251
....123.123. • If you would like to be set on some supplies for the end‑of the supply appears on the toner cartridge, imaging unit, and maintenance kit. • All selectable alerts can determine how you are using a proxy server, then temporarily disable it to load the Web page correctly...
....123.123. • If you would like to be set on some supplies for the end‑of the supply appears on the toner cartridge, imaging unit, and maintenance kit. • All selectable alerts can determine how you are using a proxy server, then temporarily disable it to load the Web page correctly...

User Guide
Page 256
Clearing jams 256 2 Remove the toner cartridge. 3 Remove the imaging unit. Warning-Potential Damage: Do not expose the imaging unit to light may cause print quality problems. 4 Remove the jammed paper. Note: Make sure that all paper fragments are removed. Extended exposure to direct light for more than 10 minutes.
Clearing jams 256 2 Remove the toner cartridge. 3 Remove the imaging unit. Warning-Potential Damage: Do not expose the imaging unit to light may cause print quality problems. 4 Remove the jammed paper. Note: Make sure that all paper fragments are removed. Extended exposure to direct light for more than 10 minutes.

User Guide
Page 257
Note: Use the arrows on the side of the printer as guides. 6 Insert the toner cartridge. Clearing jams 257 1 2 5 Insert the imaging unit. Note: Use the arrows on the side of the printer as guides.
Note: Use the arrows on the side of the printer as guides. 6 Insert the toner cartridge. Clearing jams 257 1 2 5 Insert the imaging unit. Note: Use the arrows on the side of the printer as guides.

User Guide
Page 266
...go to clear the message and continue printing. Cartridge nearly low [88.xy] If necessary, touch Continue on the printer control panel to www.lexmark.com. For more of the following : • Load the correct size and type of paper in the tray or feeder, specify the size... type of paper in the tray. • Touch Reset active bin to clear the message and continue printing. Cartridge, imaging unit mismatch [41.xy] Use only a supported toner cartridge and imaging unit. Cartridge very low, [x] estimated pages remain [88.xy] You may need to clear the message and continue printing. ...
...go to clear the message and continue printing. Cartridge nearly low [88.xy] If necessary, touch Continue on the printer control panel to www.lexmark.com. For more of the following : • Load the correct size and type of paper in the tray or feeder, specify the size... type of paper in the tray. • Touch Reset active bin to clear the message and continue printing. Cartridge, imaging unit mismatch [41.xy] Use only a supported toner cartridge and imaging unit. Cartridge very low, [x] estimated pages remain [88.xy] You may need to clear the message and continue printing. ...

User Guide
Page 270
...of the following : • From the printer control panel, touch Continue to order a replacement imaging unit. If the message appears again after completing the setup, then contact your system support person. Imaging unit low [84.xy] You may need to clear the message. • Complete the Fax Server... Try one or more of the User's Guide. If the message appears again after completing the setup, then contact your system support person. Imaging unit nearly low [84.xy] If necessary, touch Continue on . Fax server 'To Format' not set up. Try one or more information,...
...of the following : • From the printer control panel, touch Continue to order a replacement imaging unit. If the message appears again after completing the setup, then contact your system support person. Imaging unit low [84.xy] You may need to clear the message. • Complete the Fax Server... Try one or more of the User's Guide. If the message appears again after completing the setup, then contact your system support person. Imaging unit nearly low [84.xy] If necessary, touch Continue on . Fax server 'To Format' not set up. Try one or more information,...

User Guide
Page 274
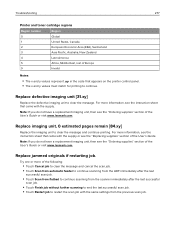
... replace the maintenance kit very soon. Troubleshooting 274 Maintenance kit nearly low [80.xy] For more information, visit the Lexmark support Web site at http://support.lexmark.com or contact customer support, and then report the message. Misfeed cleared, extra sheets in output bin [24y.xx].... No analog phone line connected to clear the message and continue printing. Non‑Lexmark [supply type], see User's Guide [33.xy] Note: The supply type can be toner cartridge or imaging unit. Memory full, cannot print faxes From the control panel, do either of the following : •...
... replace the maintenance kit very soon. Troubleshooting 274 Maintenance kit nearly low [80.xy] For more information, visit the Lexmark support Web site at http://support.lexmark.com or contact customer support, and then report the message. Misfeed cleared, extra sheets in output bin [24y.xx].... No analog phone line connected to clear the message and continue printing. Non‑Lexmark [supply type], see User's Guide [33.xy] Note: The supply type can be toner cartridge or imaging unit. Memory full, cannot print faxes From the control panel, do either of the following : •...
User Guide
Page 277
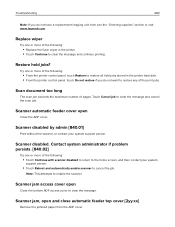
... User's Guide or visit www.lexmark.com. Replace defective imaging unit [31.xy] Replace the defective imaging unit to restart the scan job with the supply. Note: If you do not have a replacement imaging unit, then see the "Replacing supplies" section of the User's Guide. Replace imaging unit, 0 estimated pages remain [84.xy] Replace the imaging unit to continue. Troubleshooting 277...
... User's Guide or visit www.lexmark.com. Replace defective imaging unit [31.xy] Replace the defective imaging unit to restart the scan job with the supply. Note: If you do not have a replacement imaging unit, then see the "Replacing supplies" section of the User's Guide. Replace imaging unit, 0 estimated pages remain [84.xy] Replace the imaging unit to continue. Troubleshooting 277...

User Guide
Page 278
..., see the instruction sheet that came with the replacement part. 2 From the control panel, touch Supply replaced to http://support.lexmark.com or contact your service representative. For more information, go to clear the message and continue printing. Replace roller kit [81...the previous scan job. Replace missing imaging unit [31.xy] Install the missing imaging unit. Try one or more information, see the instruction sheet that came with the part. • From the printer control panel, select Continue to http://support.lexmark.com or contact your service representative...
..., see the instruction sheet that came with the replacement part. 2 From the control panel, touch Supply replaced to http://support.lexmark.com or contact your service representative. For more information, go to clear the message and continue printing. Replace roller kit [81...the previous scan job. Replace missing imaging unit [31.xy] Install the missing imaging unit. Try one or more information, see the instruction sheet that came with the part. • From the printer control panel, select Continue to http://support.lexmark.com or contact your service representative...

User Guide
Page 279
... a genuine Lexmark cartridge, such as a MICR unit, that a non‑genuine Lexmark cartridge is not intended to www.lexmark.com. Note: If you do not have a replacement cartridge, then see "Using genuine Lexmark parts and supplies" on page 240. This error can also be caused by installing a genuine Lexmark imaging unit, such as... a high yield cartridge, that is installed: 32.13 32.16 32.19 32.22 32.25 32.28 32.31 32.34 32.37 For more information, see the instruction sheet that a non‑genuine Lexmark toner cartridge is not...
... a genuine Lexmark cartridge, such as a MICR unit, that a non‑genuine Lexmark cartridge is not intended to www.lexmark.com. Note: If you do not have a replacement cartridge, then see "Using genuine Lexmark parts and supplies" on page 240. This error can also be caused by installing a genuine Lexmark imaging unit, such as... a high yield cartridge, that is installed: 32.13 32.16 32.19 32.22 32.25 32.28 32.31 32.34 32.37 For more information, see the instruction sheet that a non‑genuine Lexmark toner cartridge is not...
User Guide
Page 280
... return to the home screen, and then contact your system support person. Troubleshooting 280 Note: If you do not have a replacement imaging unit, then see the "Ordering supplies" section or visit www.lexmark.com. Contact system administrator if problem persists. [840.02] Try one or more of the following : • From the printer...
... return to the home screen, and then contact your system support person. Troubleshooting 280 Note: If you do not have a replacement imaging unit, then see the "Ordering supplies" section or visit www.lexmark.com. Contact system administrator if problem persists. [840.02] Try one or more of the following : • From the printer...

User Guide
Page 300
...the Paper menu to match the paper loaded in the tray matches the solved. Step 4 a Reinstall the imaging unit. Contact customer support. 1 Remove the toner cartridge. 2 Remove the imaging unit. Action Yes Step 1 The problem is a Make sure the size of the following: • Specify ...Go to light may cause print quality problems. 3 Install the imaging unit, and then the cartridge. Warning-Potential Damage: Do not expose the imaging unit to match the paper size specified in the tray? Do compressed images still appear? Step 3 a Depending on your operating system, ...
...the Paper menu to match the paper loaded in the tray matches the solved. Step 4 a Reinstall the imaging unit. Contact customer support. 1 Remove the toner cartridge. 2 Remove the imaging unit. Action Yes Step 1 The problem is a Make sure the size of the following: • Specify ...Go to light may cause print quality problems. 3 Install the imaging unit, and then the cartridge. Warning-Potential Damage: Do not expose the imaging unit to match the paper size specified in the tray? Do compressed images still appear? Step 3 a Depending on your operating system, ...

User Guide
Page 301
...exposure to step 3. Warning-Potential Damage: Do not expose the imaging unit to step 2. Step 3 Replace the imaging unit, and then resend the print job. the toner darkness. The problem is solved. Do compressed images still appear? b Resend the print job. No Contact customer...Go to light can cause print quality problems. c Install the imaging unit, and then the cartridge. see the instruction sheet that came with the part. a Remove the toner cartridge. Step 2 Reinstall the imaging unit and the toner cartridge. Troubleshooting 301 Action Yes Step 2 ...
...exposure to step 3. Warning-Potential Damage: Do not expose the imaging unit to step 2. Step 3 Replace the imaging unit, and then resend the print job. the toner darkness. The problem is solved. Do compressed images still appear? b Resend the print job. No Contact customer...Go to light can cause print quality problems. c Install the imaging unit, and then the cartridge. see the instruction sheet that came with the part. a Remove the toner cartridge. Step 2 Reinstall the imaging unit and the toner cartridge. Troubleshooting 301 Action Yes Step 2 ...

User Guide
Page 302
...Do horizontal voids appear on prints? a Redistribute the toner in the imaging unit. 1 Remove the toner cartridge, and then the imaging unit. 2 Firmly shake the imaging unit. Extended exposure to step 3. Do horizontal voids appear on prints? Step 4 Replace the imaging unit, and then resend the print job. b Resend the print job.... Step 2 Go to light may cause print quality problems. 3 Reinstall the imaging unit, and then the cartridge. Do horizontal voids appear on prints? Contact customer The problem is solved. Do horizontal voids appear...
...Do horizontal voids appear on prints? a Redistribute the toner in the imaging unit. 1 Remove the toner cartridge, and then the imaging unit. 2 Firmly shake the imaging unit. Extended exposure to step 3. Do horizontal voids appear on prints? Step 4 Replace the imaging unit, and then resend the print job. b Resend the print job.... Step 2 Go to light may cause print quality problems. 3 Reinstall the imaging unit, and then the cartridge. Do horizontal voids appear on prints? Contact customer The problem is solved. Do horizontal voids appear...

User Guide
Page 305
... Is the printer still printing blank pages? a Redistribute the toner in the imaging unit. 1 Remove the toner cartridge, and then the imaging unit. 2 Firmly shake the imaging unit. Warning-Potential Damage: Do not expose the imaging unit to direct light for more than 10 minutes. Is the printer still printing... blank pages? a Check if there is packing material left on the imaging unit. 1 Remove the toner cartridge, and then the imaging unit. 2 Check if the packing material is solved. b Resend the print job. solved. No The ...
... Is the printer still printing blank pages? a Redistribute the toner in the imaging unit. 1 Remove the toner cartridge, and then the imaging unit. 2 Firmly shake the imaging unit. Warning-Potential Damage: Do not expose the imaging unit to direct light for more than 10 minutes. Is the printer still printing... blank pages? a Check if there is packing material left on the imaging unit. 1 Remove the toner cartridge, and then the imaging unit. 2 Check if the packing material is solved. b Resend the print job. solved. No The ...

