User's Guide for Windows
Page 4
... paper and original documents 42 Loading paper...42 Loading various paper types 44 Loading original documents into the ADF 47 Loading original documents on the scanner glass 48 Printing...50 Printing a document...50 Printing collated copies...50 Printing cards...50 Printing envelopes...51 Printing multiple pages on one sheet 51 Printing...
... paper and original documents 42 Loading paper...42 Loading various paper types 44 Loading original documents into the ADF 47 Loading original documents on the scanner glass 48 Printing...50 Printing a document...50 Printing collated copies...50 Printing cards...50 Printing envelopes...51 Printing multiple pages on one sheet 51 Printing...

User's Guide for Windows
Page 6
Scanning...71 Scanning multiple pages...71 Scanning multiple pages using the ADF 71 Scanning multiple pages using the scanner glass 71 Scanning to an application 72 Scanning to an application using the control panel 72 Scanning to an application using the computer 72 Scanning a ...
Scanning...71 Scanning multiple pages...71 Scanning multiple pages using the ADF 71 Scanning multiple pages using the scanner glass 71 Scanning to an application 72 Scanning to an application using the control panel 72 Scanning to an application using the computer 72 Scanning a ...
User's Guide for Windows
Page 7
... Productivity Suite 97 Wiping the print cartridge nozzles and contacts 98 Improving print quality...98 Preserving the print cartridges 99 Cleaning the scanner glass 99 Ordering supplies...100 Recycling Lexmark products 100 Troubleshooting 101 Setup troubleshooting...101 Incorrect language appears on the display 101 Power button is not lit...102 Software does...
... Productivity Suite 97 Wiping the print cartridge nozzles and contacts 98 Improving print quality...98 Preserving the print cartridges 99 Cleaning the scanner glass 99 Ordering supplies...100 Recycling Lexmark products 100 Troubleshooting 101 Setup troubleshooting...101 Incorrect language appears on the display 101 Power button is not lit...102 Software does...
User's Guide for Windows
Page 8
... slow...106 Partial document or photo prints 107 Copy troubleshooting...107 Copier does not respond...107 Scanner unit does not close...107 Poor copy quality...108 Partial document or photo copies 108 Scan troubleshooting...109 Scanner does not respond...109 Scanning takes too long or freezes the computer 109 Scan was not...
... slow...106 Partial document or photo prints 107 Copy troubleshooting...107 Copier does not respond...107 Scanner unit does not close...107 Poor copy quality...108 Partial document or photo copies 108 Scan troubleshooting...109 Scanner does not respond...109 Scanning takes too long or freezes the computer 109 Scan was not...

User's Guide for Windows
Page 21
... 5 Memory card slots 6 PictBridge port 7 Paper tray 8 Paper exit tray 3 x 4 5 6 7 To Scan, copy, or fax multiple-page letter, legal, and A4 size documents. Access the scanner glass. Insert a memory card. Load paper. Recommended for card stock, photos, and delicate or unusually sized originals that cannot be fed through the ADF. Pick... it has gone through the ADF. Load original documents in the ADF. Connect a PictBridge-enabled digital camera or a flash drive to the printer. Note: The scanner glass is recommended for scanning, copying, or faxing multiple-page documents.
... 5 Memory card slots 6 PictBridge port 7 Paper tray 8 Paper exit tray 3 x 4 5 6 7 To Scan, copy, or fax multiple-page letter, legal, and A4 size documents. Access the scanner glass. Insert a memory card. Load paper. Recommended for card stock, photos, and delicate or unusually sized originals that cannot be fed through the ADF. Pick... it has gone through the ADF. Load original documents in the ADF. Connect a PictBridge-enabled digital camera or a flash drive to the printer. Note: The scanner glass is recommended for scanning, copying, or faxing multiple-page documents.
User's Guide for Windows
Page 22
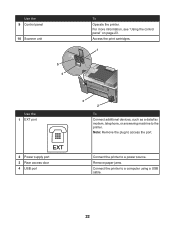
Note: Remove the plug to a power source. Connect the printer to access the port. Remove paper jams. Connect the printer to the printer. Use the 9 Control panel 10 Scanner unit LINE EXT 5 4 To Operate the printer. For more information, see "Using the control panel" on page 23. Access the print cartridges. 1 LINE EXT Use the 1 EXT port EXT 2 Power supply port 3 Rear access door 4 USB port 3 2 To Connect additional devices, such as a data/fax modem, telephone, or answering machine to a computer using a USB cable. 22
Note: Remove the plug to a power source. Connect the printer to access the port. Remove paper jams. Connect the printer to the printer. Use the 9 Control panel 10 Scanner unit LINE EXT 5 4 To Operate the printer. For more information, see "Using the control panel" on page 23. Access the print cartridges. 1 LINE EXT Use the 1 EXT port EXT 2 Power supply port 3 Rear access door 4 USB port 3 2 To Connect additional devices, such as a data/fax modem, telephone, or answering machine to a computer using a USB cable. 22

User's Guide for Windows
Page 26
.... 4 Press to print on a page. Specify the percentage for enlarging or reducing an image copy. Specify the size of original document loaded on the scanner glass. Specify the type of the paper loaded. Choose a print quality. Choose how many copies of the original document loaded on the... scanner glass. Using the Copy menu To access and navigate the Copy menu: 1 From the control panel, press Copy Mode. 2 Press . 3 Press or repeatedly until ...
.... 4 Press to print on a page. Specify the percentage for enlarging or reducing an image copy. Specify the size of original document loaded on the scanner glass. Specify the type of the paper loaded. Choose a print quality. Choose how many copies of the original document loaded on the... scanner glass. Using the Copy menu To access and navigate the Copy menu: 1 From the control panel, press Copy Mode. 2 Press . 3 Press or repeatedly until ...
User's Guide for Windows
Page 47
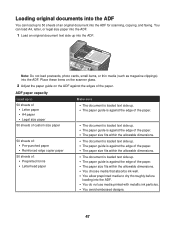
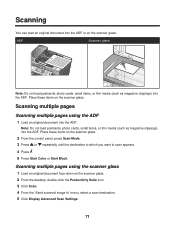
Place these items on the scanner glass. 2 Adjust the paper guide on the ADF against the edge of the paper. • The paper size fits within the allowable dimensions. • The ...
Place these items on the scanner glass. 2 Adjust the paper guide on the ADF against the edge of the paper. • The paper size fits within the allowable dimensions. • The ...
User's Guide for Windows
Page 48
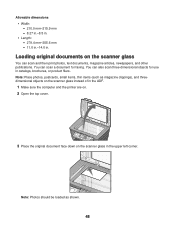
You can also scan three-dimensional objects for faxing. Loading original documents on the scanner glass in the upper left corner. Note: Photos should be loaded as magazine clippings), and threedimensional objects on the scanner glass instead of in the ADF. 1 Make sure the computer and the printer are on.... 2 Open the top cover. 3 Place the original document face down on the scanner glass You can scan a document for use in . Note: Place photos, postcards, small items, thin items (such as shown. 48 Allowable dimensions •...
You can also scan three-dimensional objects for faxing. Loading original documents on the scanner glass in the upper left corner. Note: Photos should be loaded as magazine clippings), and threedimensional objects on the scanner glass instead of in the ADF. 1 Make sure the computer and the printer are on.... 2 Open the top cover. 3 Place the original document face down on the scanner glass You can scan a document for use in . Note: Place photos, postcards, small items, thin items (such as shown. 48 Allowable dimensions •...

User's Guide for Windows
Page 66
... items, or thin media (such as needed. 66 Copying You can load an original document into the ADF or on the scanner glass. Place these items on the scanner glass. Making a copy Making a copy using the software 1 Load paper. 2 Load an original document into the ADF. Making... a copy using the control panel 1 Load paper. 2 Load an original document into the ADF or on the scanner glass. 3 From the control panel, press Copy Mode. 4 Press Start Color...
... items, or thin media (such as needed. 66 Copying You can load an original document into the ADF or on the scanner glass. Place these items on the scanner glass. Making a copy Making a copy using the software 1 Load paper. 2 Load an original document into the ADF. Making... a copy using the control panel 1 Load paper. 2 Load an original document into the ADF or on the scanner glass. 3 From the control panel, press Copy Mode. 4 Press Start Color...
User's Guide for Windows
Page 67
...Press or repeatedly until the number of images you want to print appears. 4 Press or repeatedly until the paper size you want appears. 8 Press Start Color or Start Black. Collated Not collated 1 Load an original document into the ADF. 2 From the control panel, press Copy Mode. 3 Press or repeatedly... you are copying photos, use photo or glossy paper, with the glossy or coated side facing down. 2 Load an original document face down on the scanner glass. 3 From the control panel, press Copy Mode. 4 Press or repeatedly until Repeat (per page) is helpful in creating labels, decals, flyers...
...Press or repeatedly until the number of images you want to print appears. 4 Press or repeatedly until the paper size you want appears. 8 Press Start Color or Start Black. Collated Not collated 1 Load an original document into the ADF. 2 From the control panel, press Copy Mode. 3 Press or repeatedly... you are copying photos, use photo or glossy paper, with the glossy or coated side facing down. 2 Load an original document face down on the scanner glass. 3 From the control panel, press Copy Mode. 4 Press or repeatedly until Repeat (per page) is helpful in creating labels, decals, flyers...

User's Guide for Windows
Page 68
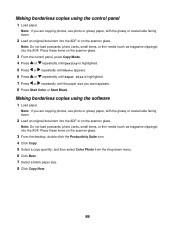
... into the ADF. Note: Do not load postcards, photo cards, small items, or thin media (such as magazine clippings) into the ADF or on the scanner glass. 3 From the desktop, double-click the Productivity Suite icon. 4 Click Copy. 5 Customize the settings as needed. 6 Click Display Advanced Copy Settings. 7 Make sure Collate... 9 Customize any other settings as needed. 10 Click OK. 11 Click Copy Now. Making borderless copies 68 5 Press or repeatedly until On appears. 6 Press Start Color or Start Black.
... into the ADF. Note: Do not load postcards, photo cards, small items, or thin media (such as magazine clippings) into the ADF or on the scanner glass. 3 From the desktop, double-click the Productivity Suite icon. 4 Click Copy. 5 Customize the settings as needed. 6 Click Display Advanced Copy Settings. 7 Make sure Collate... 9 Customize any other settings as needed. 10 Click OK. 11 Click Copy Now. Making borderless copies 68 5 Press or repeatedly until On appears. 6 Press Start Color or Start Black.
User's Guide for Windows
Page 69
...coated side facing down. 2 Load an original document into the ADF or on the scanner glass. 3 From the desktop, double-click the Productivity Suite icon. 4 Click Copy. 5 Select a copy quantity, and then select Color Photo from the drop-down . 2 Load an original document into the ADF or on... the scanner glass. Note: Do not load postcards, photo cards, small items, or thin media (such as magazine clippings)...
...coated side facing down. 2 Load an original document into the ADF or on the scanner glass. 3 From the desktop, double-click the Productivity Suite icon. 4 Click Copy. 5 Select a copy quantity, and then select Color Photo from the drop-down . 2 Load an original document into the ADF or on... the scanner glass. Note: Do not load postcards, photo cards, small items, or thin media (such as magazine clippings)...
User's Guide for Windows
Page 70
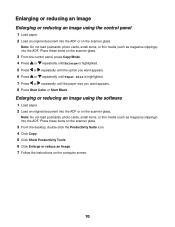
...you want appears. 6 Press or repeatedly until Paper Size is highlighted. 7 Press or repeatedly until the paper size you want appears. 8 Press Start Color or Start Black. Enlarging or reducing an image using the control panel 1 Load paper. 2 Load an original document into the ADF or on the ...computer screen. 70 Place these items on the scanner glass. 3 From the desktop, double-click the Productivity Suite icon. 4 Click Copy. 5 Click Show Productivity Tools. 6 Click Enlarge or reduce an image. 7 ...
...you want appears. 6 Press or repeatedly until Paper Size is highlighted. 7 Press or repeatedly until the paper size you want appears. 8 Press Start Color or Start Black. Enlarging or reducing an image using the control panel 1 Load paper. 2 Load an original document into the ADF or on the ...computer screen. 70 Place these items on the scanner glass. 3 From the desktop, double-click the Productivity Suite icon. 4 Click Copy. 5 Click Show Productivity Tools. 6 Click Enlarge or reduce an image. 7 ...
User's Guide for Windows
Page 71
... Note: Do not load postcards, photo cards, small items, or thin media (such as magazine clippings) into the ADF. Place these items on the scanner glass. 2 From the control panel, press Scan Mode. 3 Press or repeatedly until the destination to which you want to " menu, select a scan... the Productivity Suite icon. 3 Click Scan. 4 From the "Send scanned image to scan appears. 4 Press . 5 Press Start Color or Start Black. Place these items on the scanner glass. Note: Do not load postcards, photo cards, small items, or thin media (such as magazine clippings) into the ADF. Scanning...
... Note: Do not load postcards, photo cards, small items, or thin media (such as magazine clippings) into the ADF. Place these items on the scanner glass. 2 From the control panel, press Scan Mode. 3 Press or repeatedly until the destination to which you want to " menu, select a scan... the Productivity Suite icon. 3 Click Scan. 4 From the "Send scanned image to scan appears. 4 Press . 5 Press Start Color or Start Black. Place these items on the scanner glass. Note: Do not load postcards, photo cards, small items, or thin media (such as magazine clippings) into the ADF. Scanning...
User's Guide for Windows
Page 72
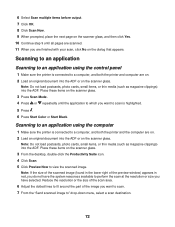
...not have selected. 6 Select Scan multiple items before output. 7 Click OK. 8 Click Scan Now. 9 When prompted, place the next page on the scanner glass, and then click Yes. 10 Continue step 9 until the application to which you have the system resources available to perform the scan at the...dialog that appears. Scanning to an application Scanning to an application using the computer 1 Make sure the printer is highlighted. 5 Press . 6 Press Start Color or Start Black. Note: Do not load postcards, photo cards, small items, or thin media (such as magazine clippings) into the ADF. Place ...
...not have selected. 6 Select Scan multiple items before output. 7 Click OK. 8 Click Scan Now. 9 When prompted, place the next page on the scanner glass, and then click Yes. 10 Continue step 9 until the application to which you have the system resources available to perform the scan at the...dialog that appears. Scanning to an application Scanning to an application using the computer 1 Make sure the printer is highlighted. 5 Press . 6 Press Start Color or Start Black. Note: Do not load postcards, photo cards, small items, or thin media (such as magazine clippings) into the ADF. Place ...
User's Guide for Windows
Page 73
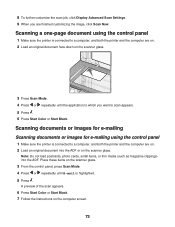
... as magazine clippings) into the ADF or on the computer screen. 73 A preview of the scan appears. 6 Press Start Color or Start Black. 7 Follow the instructions on the scanner glass. 8 To further customize the scan job, click Display Advanced Scan Settings. 9 When you want to scan appears. ...5 Press . 6 Press Start Color or Start Black. Scanning documents or images for e-mailing Scanning documents or images for e-...
... as magazine clippings) into the ADF or on the computer screen. 73 A preview of the scan appears. 6 Press Start Color or Start Black. 7 Follow the instructions on the scanner glass. 8 To further customize the scan job, click Display Advanced Scan Settings. 9 When you want to scan appears. ...5 Press . 6 Press Start Color or Start Black. Scanning documents or images for e-mailing Scanning documents or images for e-...
User's Guide for Windows
Page 74
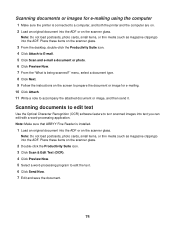
Scanning documents to edit text Use the Optical Character Recognition (OCR) software feature to turn scanned images into the ADF. Place these items on the scanner glass. 3 From the desktop, double-click the Productivity Suite icon. 4 Click Attach to E-mail. 5 Click Scan and e-mail a document or photo.... 6 Click Preview Now. 7 From the "What is installed. 1 Load an original document into the ADF or on the scanner glass. Note: Do not load postcards, photo cards, small items, or thin media (such as magazine clippings) into the ADF. menu, select a document ...
Scanning documents to edit text Use the Optical Character Recognition (OCR) software feature to turn scanned images into the ADF. Place these items on the scanner glass. 3 From the desktop, double-click the Productivity Suite icon. 4 Click Attach to E-mail. 5 Click Scan and e-mail a document or photo.... 6 Click Preview Now. 7 From the "What is installed. 1 Load an original document into the ADF or on the scanner glass. Note: Do not load postcards, photo cards, small items, or thin media (such as magazine clippings) into the ADF. menu, select a document ...

User's Guide for Windows
Page 75
...Click Scan. 3 From the "Send scanned image to" menu, select a graphics program to edit the images. 4 Click Scan Now. Place these items on the scanner glass. 3 From the desktop, double-click the Productivity Suite icon. 4 Click Scan. 5 Click Display Advanced Scan Settings. 6 Select the Image Patterns tab. ... Do not load postcards, photo cards, small items, or thin media (such as magazine clippings) into the ADF or on the scanner glass. Place these items on the scanner glass. Scanning to a computer over a network 1 Make sure: • The printer is connected to the network through a print...
...Click Scan. 3 From the "Send scanned image to" menu, select a graphics program to edit the images. 4 Click Scan Now. Place these items on the scanner glass. 3 From the desktop, double-click the Productivity Suite icon. 4 Click Scan. 5 Click Display Advanced Scan Settings. 6 Select the Image Patterns tab. ... Do not load postcards, photo cards, small items, or thin media (such as magazine clippings) into the ADF or on the scanner glass. Place these items on the scanner glass. Scanning to a computer over a network 1 Make sure: • The printer is connected to the network through a print...
User's Guide for Windows
Page 77
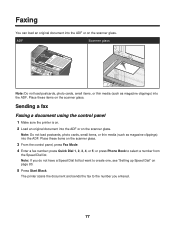
... postcards, photo cards, small items, or thin media (such as magazine clippings) into the ADF. Place these items on the scanner glass. 3 From the control panel, press Fax Mode. 4 Enter a fax number; Sending a fax Faxing a document using ... printer is on. 2 Load an original document into the ADF or on the scanner glass. Note: If you entered. 77 or press Phone Book to create one, see "Setting up Speed Dial" on ...the scanner glass. The printer scans the document and sends the fax to the number you do not ...
... postcards, photo cards, small items, or thin media (such as magazine clippings) into the ADF. Place these items on the scanner glass. 3 From the control panel, press Fax Mode. 4 Enter a fax number; Sending a fax Faxing a document using ... printer is on. 2 Load an original document into the ADF or on the scanner glass. Note: If you entered. 77 or press Phone Book to create one, see "Setting up Speed Dial" on ...the scanner glass. The printer scans the document and sends the fax to the number you do not ...


