User's Guide
Page 5
...Checking the status of supplies...237 Ordering supplies...237 Replacing Supplies...239 Moving the printer to another location...253 Shipping the printer...253 Administrative support 254 Finding advanced networking and administrator information 254 Using the ... printer problems...256 Understanding printer messages...257 Clearing jams...266 Solving printing problems...280 Solving copy problems...284 Solving scanner problems...286 Solving fax problems...288 Solving option problems...292 Solving paper feed problems...294 Solving print quality problems...295 Solving color quality problems......
...Checking the status of supplies...237 Ordering supplies...237 Replacing Supplies...239 Moving the printer to another location...253 Shipping the printer...253 Administrative support 254 Finding advanced networking and administrator information 254 Using the ... printer problems...256 Understanding printer messages...257 Clearing jams...266 Solving printing problems...280 Solving copy problems...284 Solving scanner problems...286 Solving fax problems...288 Solving option problems...292 Solving paper feed problems...294 Solving print quality problems...295 Solving color quality problems......

User's Guide
Page 7
...connections) are properly installed in their marked plug-in your fingers are not under the printer when you replace a lithium battery. Inspect the power cord regularly for signs of such problems. Remove the power cord from a hot component, allow the surface to cool before...type of specific manufacturer's components. The manufacturer is greater than those described in hazardous radiation exposure. CAUTION-POTENTIAL INJURY: The printer weight is not responsible for the use of lithium battery. CAUTION-SHOCK HAZARD: Make sure that all external connections (such ...
...connections) are properly installed in their marked plug-in your fingers are not under the printer when you replace a lithium battery. Inspect the power cord regularly for signs of such problems. Remove the power cord from a hot component, allow the surface to cool before...type of specific manufacturer's components. The manufacturer is greater than those described in hazardous radiation exposure. CAUTION-POTENTIAL INJURY: The printer weight is not responsible for the use of lithium battery. CAUTION-SHOCK HAZARD: Make sure that all external connections (such ...
User's Guide
Page 9
...After all, you are you looking for choosing this printer! Click to make sure you check the latest updates on our Web site. To get back on the Lexmark Web site at www.lexmark.com/publications/. If you do encounter any problems along the way, one of our knowledgeable support representatives ...will meet your printer, read the User's Guide carefully, and make sure you're satisfied....
...After all, you are you looking for choosing this printer! Click to make sure you check the latest updates on our Web site. To get back on the Lexmark Web site at www.lexmark.com/publications/. If you do encounter any problems along the way, one of our knowledgeable support representatives ...will meet your printer, read the User's Guide carefully, and make sure you're satisfied....
User's Guide
Page 76
...the tendency for paper to 48 hours before printing by storing it . Excessive curl can cause paper feeding problems. Curl can occur after the paper passes through the printer, where it properly. Always use 75 g/m2 (20 lb bond) grain long paper. Grain is either... characteristics The following paper characteristics affect print quality and reliability. Consider these characteristics when evaluating new paper stock. Weight The printer can cause feeding problems. Smoothness Paper smoothness directly affects print quality. Storing paper unwrapped in hot, humid, cold, or dry conditions, even ...
...the tendency for paper to 48 hours before printing by storing it . Excessive curl can cause paper feeding problems. Curl can occur after the paper passes through the printer, where it properly. Always use 75 g/m2 (20 lb bond) grain long paper. Grain is either... characteristics The following paper characteristics affect print quality and reliability. Consider these characteristics when evaluating new paper stock. Weight The printer can cause feeding problems. Smoothness Paper smoothness directly affects print quality. Storing paper unwrapped in hot, humid, cold, or dry conditions, even ...
User's Guide
Page 77
... melting or releasing hazardous emissions. Using recycled paper and other office papers As an environmentally conscientious company, Lexmark supports the use in fewer paper feeding problems and better print quality. This scientific testing is conducted with rough or heavily textured surfaces. Use inks ... use paper that are not affected by hand. • Do not mix paper sizes, types, or weights in laser (electro-photographic) printers. Fiber content Most high-quality xerographic paper is made that all over the world.) • Moisture content (Business papers should have low...
... melting or releasing hazardous emissions. Using recycled paper and other office papers As an environmentally conscientious company, Lexmark supports the use in fewer paper feeding problems and better print quality. This scientific testing is conducted with rough or heavily textured surfaces. Use inks ... use paper that are not affected by hand. • Do not mix paper sizes, types, or weights in laser (electro-photographic) printers. Fiber content Most high-quality xerographic paper is made that all over the world.) • Moisture content (Business papers should have low...

User's Guide
Page 83
...: • Feed transparencies from sticking together. • We recommend Lexmark part number 12A8240 for letter-size transparencies and Lexmark part number 12A8241 for laser printers. Have excessive curl or twist - Have bent corners - Check with... the manufacturer or vendor to ensure the envelopes can withstand temperatures up to 190°C (374°F) without melting, discoloring, offsetting, or releasing hazardous emissions. • To prevent print quality problems...
...: • Feed transparencies from sticking together. • We recommend Lexmark part number 12A8240 for letter-size transparencies and Lexmark part number 12A8241 for laser printers. Have excessive curl or twist - Have bent corners - Check with... the manufacturer or vendor to ensure the envelopes can withstand temperatures up to 190°C (374°F) without melting, discoloring, offsetting, or releasing hazardous emissions. • To prevent print quality problems...
User's Guide
Page 84
... on the labels being considered for use before buying large quantities. Print samples on the Lexmark Web site at least 1 mm (0.04 in.) away from edges is Card Stock. ... perforation, and creasing may significantly affect the print quality and cause jams or other paper-handling problems. • Check with chemicals that : - Printing 84 For detailed information on label printing,...), and topcoats can withstand temperatures up to the sheet edge. Partial sheets also contaminate the printer and the cartridge with adhesive, and could void the warranty. • If zone coating ...
... on the labels being considered for use before buying large quantities. Print samples on the Lexmark Web site at least 1 mm (0.04 in.) away from edges is Card Stock. ... perforation, and creasing may significantly affect the print quality and cause jams or other paper-handling problems. • Check with chemicals that : - Printing 84 For detailed information on label printing,...), and topcoats can withstand temperatures up to the sheet edge. Partial sheets also contaminate the printer and the cartridge with adhesive, and could void the warranty. • If zone coating ...
User's Guide
Page 89
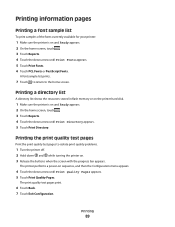
...6 Touch PCL Fonts or PostScript Fonts. Printing 89 A font sample list prints. 7 Touch to return to isolate print quality problems. 1 Turn the printer off. 2 Hold down and while turning the printer on and Ready appears. 2 On the home screen, touch . 3 Touch Reports. 4 Touch the down arrow until Print ...pages to the home screen. Printing a directory list A directory list shows the resources stored in flash memory or on the printer hard disk. 1 Make sure the printer is on sequence, and then the Configuration menu appears. 4 Touch the down arrow until Print Quality Pages appears. 5 ...
...6 Touch PCL Fonts or PostScript Fonts. Printing 89 A font sample list prints. 7 Touch to return to isolate print quality problems. 1 Turn the printer off. 2 Hold down and while turning the printer on and Ready appears. 2 On the home screen, touch . 3 Touch Reports. 4 Touch the down arrow until Print ...pages to the home screen. Printing a directory list A directory list shows the resources stored in flash memory or on the printer hard disk. 1 Make sure the printer is on sequence, and then the Configuration menu appears. 4 Touch the down arrow until Print Quality Pages appears. 5 ...

User's Guide
Page 170
... size of the USB, serial, and network buffers. • Changing this setting from the printer control panel and then exiting themenus causes the printer to resolve parallel port communication problems. Honor Init On Off Determines whether or not the printer honors printer hardware initialization requests from the computer Notes: Parallel Mode 2 On Off • Off...
... size of the USB, serial, and network buffers. • Changing this setting from the printer control panel and then exiting themenus causes the printer to resolve parallel port communication problems. Honor Init On Off Determines whether or not the printer honors printer hardware initialization requests from the computer Notes: Parallel Mode 2 On Off • Off...

User's Guide
Page 220
Job accounting information is the factory default setting. Assists in isolating the source of a print job problem Notes: • When Activate is selected, all data sent to the printer is printed in the printer. The estimate is formatting. Flash memory refers to be available. • Selecting Print prints a ...and control codes are not executed. • To exit or deactivate Hex Trace, turn off or reset the printer. Warning-Potential Damage: Do not turn the printer off the printer while the flash memory is printed on a page. Bookmarks, jobs on Disk Delete Now Do Not Delete Job...
Job accounting information is the factory default setting. Assists in isolating the source of a print job problem Notes: • When Activate is selected, all data sent to the printer is printed in the printer. The estimate is formatting. Flash memory refers to be available. • Selecting Print prints a ...and control codes are not executed. • To exit or deactivate Hex Trace, turn off or reset the printer. Warning-Potential Damage: Do not turn the printer off the printer while the flash memory is printed on a page. Bookmarks, jobs on Disk Delete Now Do Not Delete Job...
User's Guide
Page 230
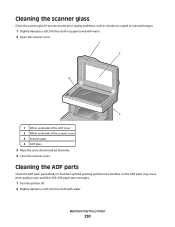
Cleaning the scanner glass Clean the scanner glass if you encounter print quality problems, such as streaks on the ADF parts may cause print quality issues and false 290-294 paper jam messages. 1 Turn the printer off. 2 Slightly dampen a soft, lint-free cloth with water. 2 Open the scanner cover. 1 2 4 3 1 White ...let them dry. 4 Close the scanner cover. Cleaning the ADF parts Clean the ADF parts periodically to maintain optimal printing performance. Maintaining the printer 230 Residue on copied or scanned images. 1 Slightly dampen a soft, lint-free cloth or paper towel with water.
Cleaning the scanner glass Clean the scanner glass if you encounter print quality problems, such as streaks on the ADF parts may cause print quality issues and false 290-294 paper jam messages. 1 Turn the printer off. 2 Slightly dampen a soft, lint-free cloth with water. 2 Open the scanner cover. 1 2 4 3 1 White ...let them dry. 4 Close the scanner cover. Cleaning the ADF parts Clean the ADF parts periodically to maintain optimal printing performance. Maintaining the printer 230 Residue on copied or scanned images. 1 Slightly dampen a soft, lint-free cloth or paper towel with water.

User's Guide
Page 234
Cleaning the printhead lenses Clean the printhead lenses when you encounter print quality problems. 1 Open the upper front door, and then open for this procedure. 3 Locate the four printhead lenses. 4 Clean the lenses using a can of compressed air. Warning-... leave the front doors open the lower front door. Warning-Potential Damage: Do not touch the printhead lenses. 5 Reinstall the four toner cartridges. Maintaining the printer 234 Do not remove the photoconductors for more than 10 minutes. 2 Remove all four toner cartridges.
Cleaning the printhead lenses Clean the printhead lenses when you encounter print quality problems. 1 Open the upper front door, and then open for this procedure. 3 Locate the four printhead lenses. 4 Clean the lenses using a can of compressed air. Warning-... leave the front doors open the lower front door. Warning-Potential Damage: Do not touch the printhead lenses. 5 Reinstall the four toner cartridges. Maintaining the printer 234 Do not remove the photoconductors for more than 10 minutes. 2 Remove all four toner cartridges.
User's Guide
Page 238
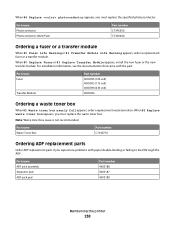
Note: Waste toner box reuse is not recommended. When 84 Replace photoconductor appears, you experience problems with the part. Part name Fuser Transfer Module Part number 40X5095 (100 volt) 40X5093 (115 volt) 40X5094 (230 volt) 40X5096 Ordering a waste toner box When ... Warning appears, order a replacement fuser or a transfer module. Part name ADF pick assembly Separator pad ADF pick pad Part number 40X5188 40X5187 40X5189 Maintaining the printer 238 When 80 Replace Fuser or 83 Replace Transfer Module appears, install the new fuser or the new transfer module.
Note: Waste toner box reuse is not recommended. When 84 Replace photoconductor appears, you experience problems with the part. Part name Fuser Transfer Module Part number 40X5095 (100 volt) 40X5093 (115 volt) 40X5094 (230 volt) 40X5096 Ordering a waste toner box When ... Warning appears, order a replacement fuser or a transfer module. Part name ADF pick assembly Separator pad ADF pick pad Part number 40X5188 40X5187 40X5189 Maintaining the printer 238 When 80 Replace Fuser or 83 Replace Transfer Module appears, install the new fuser or the new transfer module.
User's Guide
Page 256
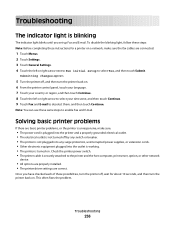
...select Yes, and then touch Submit. Submitting changes appears. 5 Turn the printer off, and then turn the printer back on. Once you set up Fax and E-mail. This often fixes the problem. Troubleshooting The indicator light is blinking The indicator light blinks until you ...equipment plugged into the outlet is working. • The printer is turned on. Note: You can use these same steps to deselect them, and then touch Continue. Solving basic printer problems If there are basic printer problems, or the printer is unresponsive, make sure the fax cables are correct. Troubleshooting...
...select Yes, and then touch Submit. Submitting changes appears. 5 Turn the printer off, and then turn the printer back on. Once you set up Fax and E-mail. This often fixes the problem. Troubleshooting The indicator light is blinking The indicator light blinks until you ...equipment plugged into the outlet is working. • The printer is turned on. Note: You can use these same steps to deselect them, and then touch Continue. Solving basic printer problems If there are basic printer problems, or the printer is unresponsive, make sure the fax cables are correct. Troubleshooting...
User's Guide
Page 265
..., install the new photoconductor using the instruction sheet that the scanner has been disabled by the system support person. 840.02 Scanner Auto Disabled The printer identified a problem with the replacement part. 3 Touch Continue to clear the message and continue printing. 88 Replace cartridge The specified toner cartridge is exhausted. 1 Replace the... cartridge. 840.01 Scanner Disabled This message indicates that came with the scanner and automatically disabled it. 1 Remove all pages from the ADF. 2 Turn the printer off.
..., install the new photoconductor using the instruction sheet that the scanner has been disabled by the system support person. 840.02 Scanner Auto Disabled The printer identified a problem with the replacement part. 3 Touch Continue to clear the message and continue printing. 88 Replace cartridge The specified toner cartridge is exhausted. 1 Replace the... cartridge. 840.01 Scanner Disabled This message indicates that came with the scanner and automatically disabled it. 1 Remove all pages from the ADF. 2 Turn the printer off.

User's Guide
Page 280
... cover. 7 Touch Restart Job. If Ready does not appear, then turn the printer on. For information regarding tested and approved USB flash memory devices, visit the Lexmark Web site at www.lexmark.com. Printer control panel display is supported. Troubleshooting 280 The Print dialog appears. 3 Select Print... USB drive appears Make sure the USB drive is blank or displays only diamonds The printer self test failed. Turn the printer off and contact Customer Support. Solving printing problems Multiple-language PDFs do not print The documents contain unavailable fonts. 1 Open the document...
... cover. 7 Touch Restart Job. If Ready does not appear, then turn the printer on. For information regarding tested and approved USB flash memory devices, visit the Lexmark Web site at www.lexmark.com. Printer control panel display is supported. Troubleshooting 280 The Print dialog appears. 3 Select Print... USB drive appears Make sure the USB drive is blank or displays only diamonds The printer self test failed. Turn the printer off and contact Customer Support. Solving printing problems Multiple-language PDFs do not print The documents contain unavailable fonts. 1 Open the document...

User's Guide
Page 284
... or an optional hard disk. Solving copy problems Copier does not respond These are no obstructions: 1 Lift the scanner unit. 2 Remove any error messages. Unexpected page breaks occur INCREASE THE PRINT TIMEOUT VALUE 1 Make sure the printer is on and Ready appears. 2 On the home screen, touch . 3 Touch Settings. 4 Touch General Settings... following: CHECK THE DISPLAY FOR ERROR MESSAGES Clear any obstruction keeping the scanner unit open. 3 Lower the scanner unit. CHECK THE POWER Make sure the printer is plugged in, the power is on , and Ready appears.
... or an optional hard disk. Solving copy problems Copier does not respond These are no obstructions: 1 Lift the scanner unit. 2 Remove any error messages. Unexpected page breaks occur INCREASE THE PRINT TIMEOUT VALUE 1 Make sure the printer is on and Ready appears. 2 On the home screen, touch . 3 Touch Settings. 4 Touch General Settings... following: CHECK THE DISPLAY FOR ERROR MESSAGES Clear any obstruction keeping the scanner unit open. 3 Lower the scanner unit. CHECK THE POWER Make sure the printer is plugged in, the power is on , and Ready appears.
User's Guide
Page 286
Partial document or photo copies These are possible solutions. Solving scanner problems Checking an unresponsive scanner If your scanner is not responding, then make sure: • The printer is turned on. • The printer cable is securely attached to the printer and the host computer, print server, option, or other ..., select the Text/Photo or Printed Image icon. • Rotate the original document on the scanner glass in the tray: 1 From the printer control panel, check the Paper Size setting from the Paper menu. 2 Before sending the job to print, specify the correct size setting: &#...
Partial document or photo copies These are possible solutions. Solving scanner problems Checking an unresponsive scanner If your scanner is not responding, then make sure: • The printer is turned on. • The printer cable is securely attached to the printer and the host computer, print server, option, or other ..., select the Text/Photo or Printed Image icon. • Rotate the original document on the scanner glass in the tray: 1 From the printer control panel, check the Paper Size setting from the Paper menu. 2 Before sending the job to print, specify the correct size setting: &#...
User's Guide
Page 336
...internal print server 293 Internal Solutions Port 293 memory card 294 option not working 292 trays / drawers 293 USB/parallel interface card 294 printer problems, solving basic 256 printhead lenses cleaning 234 printing black-and-white 90 directory list 89 font sample list 89 from flash drive 87 from... using the touch screen 138 improving FTP quality 140 using shortcut numbers 137 using the address book 137 using 58, 77 recycling Lexmark packaging 63 Lexmark products 63 toner cartridges 64 WEEE statement 315 reducing a copy 96 Remove paper from standard output bin 259 Repeat print jobs 85...
...internal print server 293 Internal Solutions Port 293 memory card 294 option not working 292 trays / drawers 293 USB/parallel interface card 294 printer problems, solving basic 256 printhead lenses cleaning 234 printing black-and-white 90 directory list 89 font sample list 89 from flash drive 87 from... using the touch screen 138 improving FTP quality 140 using shortcut numbers 137 using the address book 137 using 58, 77 recycling Lexmark packaging 63 Lexmark products 63 toner cartridges 64 WEEE statement 315 reducing a copy 96 Remove paper from standard output bin 259 Repeat print jobs 85...
User's Guide
Page 337
... jammed page does not reprint 295 job prints from wrong tray 283 job prints on a wired network (Windows) 51 Settings menu 213 shipping the printer 253 shortcuts, creating e-mail 106 fax destination 127, 128 FTP destination 137, 138 SMTP server not set up. Contact system administrator. 259 SMTP... checking an unresponsive scanner 286 contacting Customer Support 311 FAQ about color printing 308 indicator light is blinking 256 solving basic printer problems 256 troubleshooting, copy copier does not respond 284 partial document or photo copies 286 poor copy quality 285 poor scanned image quality ...
... jammed page does not reprint 295 job prints from wrong tray 283 job prints on a wired network (Windows) 51 Settings menu 213 shipping the printer 253 shortcuts, creating e-mail 106 fax destination 127, 128 FTP destination 137, 138 SMTP server not set up. Contact system administrator. 259 SMTP... checking an unresponsive scanner 286 contacting Customer Support 311 FAQ about color printing 308 indicator light is blinking 256 solving basic printer problems 256 troubleshooting, copy copier does not respond 284 partial document or photo copies 286 poor copy quality 285 poor scanned image quality ...


