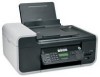
User's Guide
Page 7
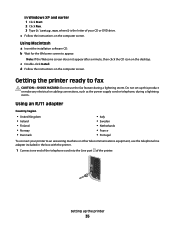
... the printer troubleshooting software (Windows only 121 Setup troubleshooting...121 Incorrect language appears on the display...121 Power button is not lit ...122 Software did not install...122 Page does not print...123 Solving printer power problems ...126 Removing and reinstalling the software ...126 Enabling the USB port in Windows ...127 Wireless...
... the printer troubleshooting software (Windows only 121 Setup troubleshooting...121 Incorrect language appears on the display...121 Power button is not lit ...122 Software did not install...122 Page does not print...123 Solving printer power problems ...126 Removing and reinstalling the software ...126 Enabling the USB port in Windows ...127 Wireless...

User's Guide
Page 9
... misuse. Refer service or repairs, other replacement parts. Do not pinch the power cord between objects such as the power supply cord or telephone, during a lightning storm. SAVE THESE INSTRUCTIONS. Lexmark is misused, a risk of some parts may not always be obvious. CAUTION...-POTENTIAL INJURY: Do not twist, bind, crush, or place heavy objects on the power cord. Safety information 9 CAUTION-SHOCK HAZARD: Do not use of specific Lexmark components. This ...
... misuse. Refer service or repairs, other replacement parts. Do not pinch the power cord between objects such as the power supply cord or telephone, during a lightning storm. SAVE THESE INSTRUCTIONS. Lexmark is misused, a risk of some parts may not always be obvious. CAUTION...-POTENTIAL INJURY: Do not twist, bind, crush, or place heavy objects on the power cord. Safety information 9 CAUTION-SHOCK HAZARD: Do not use of specific Lexmark components. This ...
User's Guide
Page 13
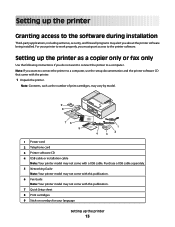
Setting up the printer as the number of print cartridges, may vary by model. 9 8 1 2 3 76 5 1 4 2 3 1 Power cord 2 Telephone cord 3 Printer software CD 4 USB cable or installation cable Note: Your printer model may not come with the printer. 1 Unpack the printer. Note: ...
Setting up the printer as the number of print cartridges, may vary by model. 9 8 1 2 3 76 5 1 4 2 3 1 Power cord 2 Telephone cord 3 Printer software CD 4 USB cable or installation cable Note: Your printer model may not come with the printer. 1 Unpack the printer. Note: ...
User's Guide
Page 16
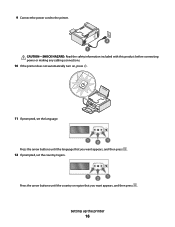
Setting up the printer 16 9 Connect the power cord to the printer. 2 1 CAUTION-SHOCK HAZARD: Read the safety information included with this product before connecting power or making any cabling connections. 10 If the printer does not automatically turn on, press . 11 If prompted, set the language. 1 2 1 Press the arrow buttons until the language that you want appears, and then press . 12 If prompted, set the country/region. 1 2 1 Press the arrow buttons until the country or region that you want appears, and then press .
Setting up the printer 16 9 Connect the power cord to the printer. 2 1 CAUTION-SHOCK HAZARD: Read the safety information included with this product before connecting power or making any cabling connections. 10 If the printer does not automatically turn on, press . 11 If prompted, set the language. 1 2 1 Press the arrow buttons until the language that you want appears, and then press . 12 If prompted, set the country/region. 1 2 1 Press the arrow buttons until the country or region that you want appears, and then press .
User's Guide
Page 21
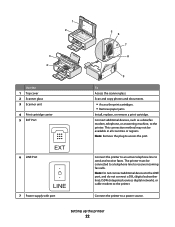
... Hold paper as they exit from the ADF. 8 Automatic Document Feeder (ADF) paper guide Keep paper straight when feeding into the ADF. cable. In Power Saver mode, the power light pulses on the scanner glass. 7 Automatic Document Feeder (ADF) output tray Hold documents as it exits. 11 Memory card slots Insert a memory... wireless status: Note: Your printer model may not have wireless • Off indicates that the printer is turned off . • Orange - Setting up , or is powering capability and may not have this port. Place these items on and off , is in...
... Hold paper as they exit from the ADF. 8 Automatic Document Feeder (ADF) paper guide Keep paper straight when feeding into the ADF. cable. In Power Saver mode, the power light pulses on the scanner glass. 7 Automatic Document Feeder (ADF) output tray Hold documents as it exits. 11 Memory card slots Insert a memory... wireless status: Note: Your printer model may not have wireless • Off indicates that the printer is turned off . • Orange - Setting up , or is powering capability and may not have this port. Place these items on and off , is in...
User's Guide
Page 22
1 2 3 4 Use the 1 Top cover 2 Scanner glass 3 Scanner unit 4 Print cartridge carrier 5 EXT Port 6 LINE Port EXT LINE 7 Power supply with port 5 6 7 8 9 To Access the scanner glass. This connection method may not be connected to a telephone line to send and receive faxes. Connect ...the printer to access the port. Note: Remove the plug to a power source. The printer must be available in all countries or regions. Note: Do not connect additional devices to the LINE port, and do not connect...
1 2 3 4 Use the 1 Top cover 2 Scanner glass 3 Scanner unit 4 Print cartridge carrier 5 EXT Port 6 LINE Port EXT LINE 7 Power supply with port 5 6 7 8 9 To Access the scanner glass. This connection method may not be connected to a telephone line to send and receive faxes. Connect ...the printer to access the port. Note: Remove the plug to a power source. The printer must be available in all countries or regions. Note: Do not connect additional devices to the LINE port, and do not connect...
User's Guide
Page 23
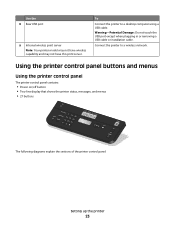
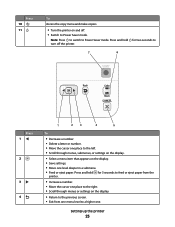
... removing a USB cable or installation cable. Using the printer control panel buttons and menus Using the printer control panel The printer control panel contains: • Power on/off button • Two-line display that shows the printer status, messages, and menus • 27 buttons ON COPY SCAN FAX PHOTO The following...
... removing a USB cable or installation cable. Using the printer control panel buttons and menus Using the printer control panel The printer control panel contains: • Power on/off button • Two-line display that shows the printer status, messages, and menus • 27 buttons ON COPY SCAN FAX PHOTO The following...
User's Guide
Page 24
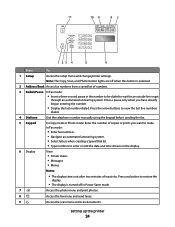
... this button is selected. 2 Address Book Access fax numbers from a saved list of numbers. 3 Redial/Pause In Fax mode: • Insert a three-second pause in Power Saver mode. 7 Access the photo menu and print photos. 8 Access the fax menu and send faxes. 9 Access the scan menu and scan documents. In Fax...
... this button is selected. 2 Address Book Access fax numbers from a saved list of numbers. 3 Redial/Pause In Fax mode: • Insert a three-second pause in Power Saver mode. 7 Access the photo menu and print photos. 8 Access the fax menu and send faxes. 9 Access the scan menu and scan documents. In Fax...
User's Guide
Page 25
Note: Press to switch to Power Saver mode. Setting up the printer 25 Press and hold for two seconds to 7 6 Press 1 2 3 4 1 23 4 5 To • Decrease a number. • Delete a letter or number. &#..., submenus, or settings on the display. • Select a menu item that appears on and off the printer. Press and hold turn off . • Switch to Power Saver mode. Press 10 11 To Access the copy menu and make copies. • Turn the printer on the display. • Save settings. • Move...
Note: Press to switch to Power Saver mode. Setting up the printer 25 Press and hold for two seconds to 7 6 Press 1 2 3 4 1 23 4 5 To • Decrease a number. • Delete a letter or number. &#..., submenus, or settings on the display. • Select a menu item that appears on and off the printer. Press and hold turn off . • Switch to Power Saver mode. Press 10 11 To Access the copy menu and make copies. • Turn the printer on the display. • Save settings. • Move...
User's Guide
Page 27
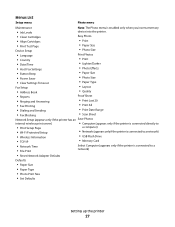
... Easy Photo • Print • Paper Size • Photo Size • Language • Country • Date/Time • Host Fax Settings • Button Beep • Power Saver • Clear Settings Timeout Fax Setup • Address Book Print Photos • Print • Lighter/Darker • Photo Effects • Paper Size • Photo...
... Easy Photo • Print • Paper Size • Photo Size • Language • Country • Date/Time • Host Fax Settings • Button Beep • Power Saver • Clear Settings Timeout Fax Setup • Address Book Print Photos • Print • Lighter/Darker • Photo Effects • Paper Size • Photo...
User's Guide
Page 29
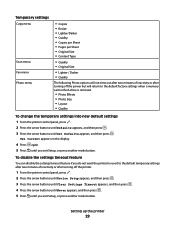
... feature if you do not want the printer to revert to the default temporary settings after two minutes of inactivity or after turning off the power but will return to the default factory settings when a memory card or flash drive is removed. • Photo Effects • Photo Size • Layout •...
... feature if you do not want the printer to revert to the default temporary settings after two minutes of inactivity or after turning off the power but will return to the default factory settings when a memory card or flash drive is removed. • Photo Effects • Photo Size • Layout •...
User's Guide
Page 30
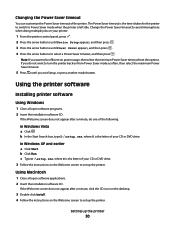
...Macintosh 1 Close all open software applications. 2 Insert the installation software CD. b Click Run. Setting up the printer. Change the Power Saver timeout to avoid interruptions when doing multiple jobs on the Welcome screen to set up the printer 30 Using the printer software Installing...drive. 3 Follow the instructions on power usage, then select the minimum Power Saver timeout from Power Saver mode as often, then select the maximum Power Saver timeout. 5 Press until Power Saver appears, and then press . 4 Press the arrow buttons to Power Saver mode when the printer is the...
...Macintosh 1 Close all open software applications. 2 Insert the installation software CD. b Click Run. Setting up the printer. Change the Power Saver timeout to avoid interruptions when doing multiple jobs on the Welcome screen to set up the printer 30 Using the printer software Installing...drive. 3 Follow the instructions on power usage, then select the minimum Power Saver timeout from Power Saver mode as often, then select the maximum Power Saver timeout. 5 Press until Power Saver appears, and then press . 4 Press the arrow buttons to Power Saver mode when the printer is the...
User's Guide
Page 35
... equipment, use the fax feature during a lightning storm. c Double-click Install. Setting up this product or make any electrical or cabling connections, such as the power supply cord or telephone, during a lightning storm.
... equipment, use the fax feature during a lightning storm. c Double-click Install. Setting up this product or make any electrical or cabling connections, such as the power supply cord or telephone, during a lightning storm.

User's Guide
Page 47
...-Fi indicator light show the network status of the printer. • Off means one of the following instructions apply to a wireless network and is in Power Saver mode. The printer has not yet been configured for the Welcome screen to your wireless network. Special wireless installation instructions The following : - For more...). - The printer is out of the range of the printer may no longer be valid. • Green means that the printer internal print server is powering up. - In Power Saver mode, the power light pulses on and off or is being updated.
...-Fi indicator light show the network status of the printer. • Off means one of the following instructions apply to a wireless network and is in Power Saver mode. The printer has not yet been configured for the Welcome screen to your wireless network. Special wireless installation instructions The following : - For more...). - The printer is out of the range of the printer may no longer be valid. • Green means that the printer internal print server is powering up. - In Power Saver mode, the power light pulses on and off or is being updated.
User's Guide
Page 103
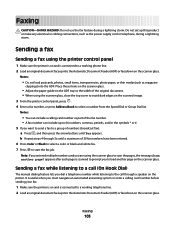
... Dial or Group Dial list. Faxing 103 Notes: • You can include up this product or make any electrical or cabling connections, such as the power supply cord or telephone, during a lightning storm. Note: If you entered multiple numbers and you to load another page? Sending a fax while listening to a call...
... Dial or Group Dial list. Faxing 103 Notes: • You can include up this product or make any electrical or cabling connections, such as the power supply cord or telephone, during a lightning storm. Note: If you entered multiple numbers and you to load another page? Sending a fax while listening to a call...
User's Guide
Page 117
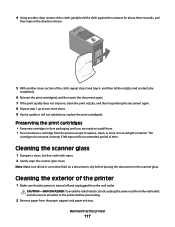
... 1 Dampen a clean, lint-free cloth with water. 2 Gently wipe the scanner glass clean. CAUTION-SHOCK HAZARD: To avoid the risk of electric shock, unplug the power cord from the wall outlet and disconnect all ink or corrective fluid on the scanner glass. Cleaning the exterior of the printer 1 Make sure that...
... 1 Dampen a clean, lint-free cloth with water. 2 Gently wipe the scanner glass clean. CAUTION-SHOCK HAZARD: To avoid the risk of electric shock, unplug the power cord from the wall outlet and disconnect all ink or corrective fluid on the scanner glass. Cleaning the exterior of the printer 1 Make sure that...
User's Guide
Page 119
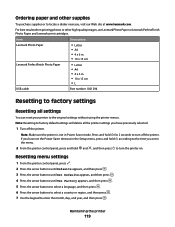
... number 1021294 Resetting to factory settings Resetting all the printer settings you have set the Power Saver timeout in the Setup menu, press and hold according to the time you , visit our Web site at www.lexmark.com. Resetting menu settings 1 From the printer control panel, press . 2 Press the arrow buttons until...
... number 1021294 Resetting to factory settings Resetting all the printer settings you have set the Power Saver timeout in the Setup menu, press and hold according to the time you , visit our Web site at www.lexmark.com. Resetting menu settings 1 From the printer control panel, press . 2 Press the arrow buttons until...
User's Guide
Page 122
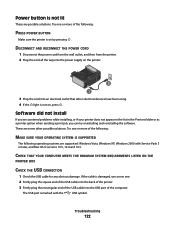
... on the printer. 2 1 3 Plug the cord into the USB port of the following: MAKE SURE YOUR OPERATING SYSTEM IS SUPPORTED The following : PRESS POWER BUTTON Make sure the printer is on , press . The USB port is damaged, use a new one or more of the USB cable into an electrical ... not appear in the list in the Printers folder or as a printer option when sending a print job, you can try uninstalling and reinstalling the software. Power button is not on by pressing . Try one . 2 Firmly plug the square end of the USB cable into the back of the printer. 3 Firmly plug...
... on the printer. 2 1 3 Plug the cord into the USB port of the following: MAKE SURE YOUR OPERATING SYSTEM IS SUPPORTED The following : PRESS POWER BUTTON Make sure the printer is on , press . The USB port is damaged, use a new one or more of the USB cable into an electrical ... not appear in the list in the Printers folder or as a printer option when sending a print job, you can try uninstalling and reinstalling the software. Power button is not on by pressing . Try one . 2 Firmly plug the square end of the USB cable into the back of the printer. 3 Firmly plug...
User's Guide
Page 123
Troubleshooting 123 CHECK POWER If the light is not on, then make sure that other electrical devices have been using. Try one of the following : • In Windows Vista, ... is completed, enable the security software again. RECONNECT THE POWER SUPPLY 1 Press to turn the printer off. 2 Disconnect the power cord from the wall outlet. 3 Gently remove the power supply from the printer. 4 Reconnect the power supply to the printer. 5 Plug the power cord into the wall outlet. 6 Press to turn the printer on the...
Troubleshooting 123 CHECK POWER If the light is not on, then make sure that other electrical devices have been using. Try one of the following : • In Windows Vista, ... is completed, enable the security software again. RECONNECT THE POWER SUPPLY 1 Press to turn the printer off. 2 Disconnect the power cord from the wall outlet. 3 Gently remove the power supply from the printer. 4 Reconnect the power supply to the printer. 5 Plug the power cord into the wall outlet. 6 Press to turn the printer on the...

User's Guide
Page 125
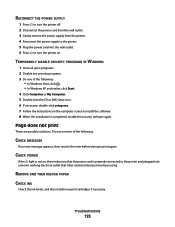
...Troubleshooting 125 If you want to set the printer as the default printer, then select the printer from the printer. 4 Reconnect the power supply to the printer. 5 Plug the power cord into the wall outlet. 6 Press to resume all print jobs in the queue, then click Start Jobs. • If ...up menu, check if the printer is not the default printer. If the print job is on hold : - b Click Make Default. DISCONNECT AND RECONNECT POWER SUPPLY 1 Press to the Printer List dialog, and then select the printer. The Printer List dialog appears. 2 Double-click the printer. You must select ...
...Troubleshooting 125 If you want to set the printer as the default printer, then select the printer from the printer. 4 Reconnect the power supply to the printer. 5 Plug the power cord into the wall outlet. 6 Press to resume all print jobs in the queue, then click Start Jobs. • If ...up menu, check if the printer is not the default printer. If the print job is on hold : - b Click Make Default. DISCONNECT AND RECONNECT POWER SUPPLY 1 Press to the Printer List dialog, and then select the printer. The Printer List dialog appears. 2 Double-click the printer. You must select ...


