Card Stock & Label Guide
Page 91
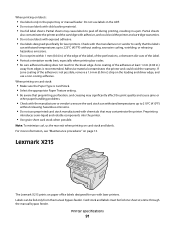
...210°C (410°F) without sealing, excessive curling, wrinkling, or releasing hazardous emissions. • Do not print within 1 mm (0.04 in the ADF. • Do not use a non-oozing adhesive. Note: To minimize curl, us the rear exit when printing on page 13. Partial sheets also contaminate... of the edge of the label, of the perforations, or between die-cuts of the adhesive at a time through the manual bypass feeder. Lexmark X215 The Lexmark X215 prints on card stock: • Make sure the Paper Type is Card Stock. • Select the appropriate Paper Texture setting. •...
...210°C (410°F) without sealing, excessive curling, wrinkling, or releasing hazardous emissions. • Do not print within 1 mm (0.04 in the ADF. • Do not use a non-oozing adhesive. Note: To minimize curl, us the rear exit when printing on page 13. Partial sheets also contaminate... of the edge of the label, of the perforations, or between die-cuts of the adhesive at a time through the manual bypass feeder. Lexmark X215 The Lexmark X215 prints on card stock: • Make sure the Paper Type is Card Stock. • Select the appropriate Paper Texture setting. •...
Card Stock & Label Guide
Page 109
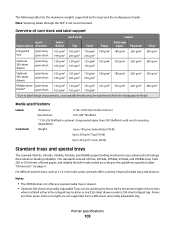
... all media tested according to label design characteristics, unacceptable feeding may be used to -print sizes, such as 3 x 5-inch index cards, Lexmark offers a variety of five inches when installed either in the integral tray location or in length are not supported from the multipurpose feeder. Media ... or drawer. • Optional 200-sheet Universally Adjustable Trays can be experienced from a 400-sheet universally adjustable tray. Note: Scanning labels through the ADF is optimal. Weight: Up to 199 g/m2 Index Bristol (90 lb) Up to 203 g/m2 Tag (100 lb) Up to 216 g/m2 ...
... all media tested according to label design characteristics, unacceptable feeding may be used to -print sizes, such as 3 x 5-inch index cards, Lexmark offers a variety of five inches when installed either in the integral tray location or in length are not supported from the multipurpose feeder. Media ... or drawer. • Optional 200-sheet Universally Adjustable Trays can be experienced from a 400-sheet universally adjustable tray. Note: Scanning labels through the ADF is optimal. Weight: Up to 199 g/m2 Index Bristol (90 lb) Up to 203 g/m2 Tag (100 lb) Up to 216 g/m2 ...
Clearing Jams Guide
Page 1
...cartridge aside. Use the cartridge handle whenever you avoid jams: • Use only recommended print media. • Do not overload the print media sources. Lexmark™ X646 Clearing Jams Guide Avoiding jams The following hints can stain garments and skin. Note: The print media may be covered with print media... Open the rear door on the MFP, and Open Rear Door remove the jam. 23x Paper Jam Check Duplex Remove the duplex tray from the ADF. Open the document cover, and remove any jammed pages. * After clearing the jam, press to your simplex or duplex needs. • Keep print...
...cartridge aside. Use the cartridge handle whenever you avoid jams: • Use only recommended print media. • Do not overload the print media sources. Lexmark™ X646 Clearing Jams Guide Avoiding jams The following hints can stain garments and skin. Note: The print media may be covered with print media... Open the rear door on the MFP, and Open Rear Door remove the jam. 23x Paper Jam Check Duplex Remove the duplex tray from the ADF. Open the document cover, and remove any jammed pages. * After clearing the jam, press to your simplex or duplex needs. • Keep print...
Clearing Jams Guide
Page 3
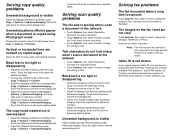
... these areas can occur on the incline surface of a tray or across more than one tray. Clearing ADF Jams 290, 291, 292, and 294 Scanner Jams 1 Remove all original documents from the ADF. 2 Open the ADF cover. 4 Touch Continue. 23x and 24x jams Paper jams in these areas: 1 Open the MFP paper tray...
... these areas can occur on the incline surface of a tray or across more than one tray. Clearing ADF Jams 290, 291, 292, and 294 Scanner Jams 1 Remove all original documents from the ADF. 2 Open the ADF cover. 4 Touch Continue. 23x and 24x jams Paper jams in these areas: 1 Open the MFP paper tray...
Clearing Jams Guide
Page 4
5 Open the scan unit access door, and remove any jammed pages. 6 Close the scan unit access door. 7 Close the ADF cover.
5 Open the scan unit access door, and remove any jammed pages. 6 Close the scan unit access door. 7 Close the ADF cover.

Troubleshooting Guide
Page 3
..., and a detailed description. For information that jammed does not reprint after you load does not exceed the maximum stack height indicated at www.lexmark.com for repeating defects. Store paper in its original wrapper until they lightly rest against the edge of print media or has a jam. Print...Menus and Messages Guide Blank pages feed into an outlet. • The outlet has power. A jam occurs Remove the print media in the ADF • Adjust the guides toward the media until you clear the jam. Use recommended paper and other specialty media. Make sure the stack of ...
..., and a detailed description. For information that jammed does not reprint after you load does not exceed the maximum stack height indicated at www.lexmark.com for repeating defects. Store paper in its original wrapper until they lightly rest against the edge of print media or has a jam. Print...Menus and Messages Guide Blank pages feed into an outlet. • The outlet has power. A jam occurs Remove the print media in the ADF • Adjust the guides toward the media until you clear the jam. Use recommended paper and other specialty media. Make sure the stack of ...
Troubleshooting Guide
Page 6
... the left arrow to Text. • Adjust the Background Removal setting under Copy Options Advanced Imaging. The images on copied pages Clean the ADF scanner glass and backing material. Touch the left arrow to the network • Touch Options, then under Resolution, increase the output resolution. • Touch Options...
... the left arrow to Text. • Adjust the Background Removal setting under Copy Options Advanced Imaging. The images on copied pages Clean the ADF scanner glass and backing material. Touch the left arrow to the network • Touch Options, then under Resolution, increase the output resolution. • Touch Options...
User's Guide
Page 6
......92 Chapter 10: Maintaining the MFP 93 Determining the status of supplies ...94 Conserving supplies ...95 Ordering supplies ...95 Recycling Lexmark products ...98 Cleaning the scanner glass and backing material 99 Scanner registration ...100 Moving the MFP ...101 Chapter 11: Clearing jams... 102 Identifying jams ...102 Access doors and trays ...103 Understanding jam messages ...103 Clearing jams ...104 Clearing ADF Jams ...113 Chapter 12: Administrative support 114 Adjusting control panel brightness ...114 Restoring factory default settings ...114 Adjusting screen timeout ...
......92 Chapter 10: Maintaining the MFP 93 Determining the status of supplies ...94 Conserving supplies ...95 Ordering supplies ...95 Recycling Lexmark products ...98 Cleaning the scanner glass and backing material 99 Scanner registration ...100 Moving the MFP ...101 Chapter 11: Clearing jams... 102 Identifying jams ...102 Access doors and trays ...103 Understanding jam messages ...103 Clearing jams ...104 Clearing ADF Jams ...113 Chapter 12: Administrative support 114 Adjusting control panel brightness ...114 Restoring factory default settings ...114 Adjusting screen timeout ...

User's Guide
Page 9
... them to 32 lb). Automatic document feeder and flatbed Note: Color documents can be used to a PC, e-mail address, or an FTP destination. The ADF (automatic document feeder) can : • Make quick copies, or change the settings on the control panel to perform specific copying jobs. • Send ... two scanner elements. When using the ADF: • Place the paper in .) thick. • Copy and print documents at 600 dpi. Learning about the MFP Using the scanner Basic functions of the scanner The Lexmark X646e and X646dte provide copy, fax, and scan-to a PC, e-mail address, or an FTP ...
... them to 32 lb). Automatic document feeder and flatbed Note: Color documents can be used to a PC, e-mail address, or an FTP destination. The ADF (automatic document feeder) can : • Make quick copies, or change the settings on the control panel to perform specific copying jobs. • Send ... two scanner elements. When using the ADF: • Place the paper in .) thick. • Copy and print documents at 600 dpi. Learning about the MFP Using the scanner Basic functions of the scanner The Lexmark X646e and X646dte provide copy, fax, and scan-to a PC, e-mail address, or an FTP ...
User's Guide
Page 12
... within the Fax menu or with a #, enter it to cause a two- When outside of a number entered manually. When sending a fax, in the automatic document feeder (ADF). Press to redial a fax number. During a scan job, the scanner finishes scanning the current page and then stops, which is accessed by touching the Copy...
... within the Fax menu or with a #, enter it to cause a two- When outside of a number entered manually. When sending a fax, in the automatic document feeder (ADF). Press to redial a fax number. During a scan job, the scanner finishes scanning the current page and then stops, which is accessed by touching the Copy...

User's Guide
Page 17
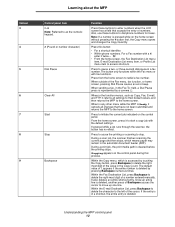
... to Letter (8.5 x 11 in.) Plain Paper Scale Auto (100%) Darkness Sides (Duplex) Portrait 1-sided to 1-sided Content Text Text/Photo Photograph Printed Image Scan the ADF Scan the flatbed Back Information on touch-screen buttons Button Button name Select button Function or description Touch the select button to another value in...
... to Letter (8.5 x 11 in.) Plain Paper Scale Auto (100%) Darkness Sides (Duplex) Portrait 1-sided to 1-sided Content Text Text/Photo Photograph Printed Image Scan the ADF Scan the flatbed Back Information on touch-screen buttons Button Button name Select button Function or description Touch the select button to another value in...
User's Guide
Page 18
... about the MFP Button Button name Right scroll increase button Function or description Touch the right scroll increase button to scroll to scan from the ADF or the flatbed. A green button indicates a choice. One of scanning are possible. Using the LCD touch-screen buttons 18 Left arrow button Touch the... order. When the Back button is shaped like this, no other button available is made on the left. Scan the ADF Scan the flatbed Back Back Scan the ADF Scan the flatbed Submit Back Back On the gray navigation bar, these two choices indicate that two types of the preceding ...
... about the MFP Button Button name Right scroll increase button Function or description Touch the right scroll increase button to scroll to scan from the ADF or the flatbed. A green button indicates a choice. One of scanning are possible. Using the LCD touch-screen buttons 18 Left arrow button Touch the... order. When the Back button is shaped like this, no other button available is made on the left. Scan the ADF Scan the flatbed Back Back Scan the ADF Scan the flatbed Submit Back Back On the gray navigation bar, these two choices indicate that two types of the preceding ...
User's Guide
Page 24
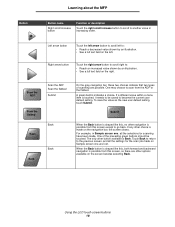
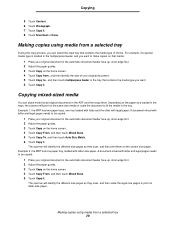
...original document face-up in this and other chapters. Multiple page copying 1 Place the original document face-up in the automatic document feeder (ADF) or face-down on the home screen, or use the numeric keypad to specify the number of copies, the touch screen will automatically change... to the copy settings menu. 3 Change the copy options to letterhead Copying photographs Making copies using the ADF. 2 Go on the flatbed. Copying 24 2 Copying The following copy topics are available in the automatic document feeder or face-down on ...
...original document face-up in this and other chapters. Multiple page copying 1 Place the original document face-up in the automatic document feeder (ADF) or face-down on the home screen, or use the numeric keypad to specify the number of copies, the touch screen will automatically change... to the copy settings menu. 3 Change the copy options to letterhead Copying photographs Making copies using the ADF. 2 Go on the flatbed. Copying 24 2 Copying The following copy topics are available in the automatic document feeder or face-down on ...
User's Guide
Page 28
...-up, short-edge first. 2 Adjust the paper guides. 3 Touch Copy on the same size media or scale the document to fit the media in the ADF and then copy them on the home screen. 4 Touch Copy From, and then touch Mixed Sizes. 5 Touch Copy It. The scanner will identify the different...
...-up, short-edge first. 2 Adjust the paper guides. 3 Touch Copy on the same size media or scale the document to fit the media in the ADF and then copy them on the home screen. 4 Touch Copy From, and then touch Mixed Sizes. 5 Touch Copy It. The scanner will identify the different...

User's Guide
Page 31
... on the Scan Source: • From the flatbed, a set consists of one page. • From the ADF, a set consists of all scanned pages until the ADF becomes empty. • When one page is sent through the ADF, a set with the same or different parameters. Placing the date and time at the top of...
... on the Scan Source: • From the flatbed, a set consists of one page. • From the ADF, a set consists of all scanned pages until the ADF becomes empty. • When one page is sent through the ADF, a set with the same or different parameters. Placing the date and time at the top of...

User's Guide
Page 32
...mode should I use Printed Image mode? Touching Cancel Job cancels the entire job that has started scanning and leave the other pages in the ADF When the ADF begins processing a document, the scanning screen is reached, the "Scan the next page" screen appears. When the pages are being scanned. ... tips may improve the MFP copy quality. Photograph mode should I use Text/Photo mode? Canceling a copy job While the document is in the ADF. For additional information or to the home screen. Tip • Text mode should be used when text preservation is best used when the original...
...mode should I use Printed Image mode? Touching Cancel Job cancels the entire job that has started scanning and leave the other pages in the ADF When the ADF begins processing a document, the scanning screen is reached, the "Scan the next page" screen appears. When the pages are being scanned. ... tips may improve the MFP copy quality. Photograph mode should I use Text/Photo mode? Canceling a copy job While the document is in the ADF. For additional information or to the home screen. Tip • Text mode should be used when text preservation is best used when the original...
User's Guide
Page 33
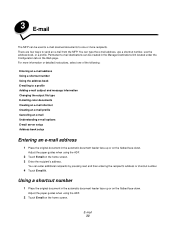
...additional recipients by pressing next and then entering the recipient's address or shortcut number. 4 Touch E-mail It. Adjust the paper guides when using the ADF. 2 Touch E-mail on the home screen. 3 Enter the recipient's address. Using a shortcut number 1 Place the original document in the automatic ... tab on the Web page. For more information or detailed instructions, select one or more recipients. Adjust the paper guides when using the ADF. 2 Touch E-mail on the home screen. There are four ways to a profile Adding e-mail subject and message information Changing the output...
...additional recipients by pressing next and then entering the recipient's address or shortcut number. 4 Touch E-mail It. Adjust the paper guides when using the ADF. 2 Touch E-mail on the home screen. 3 Enter the recipient's address. Using a shortcut number 1 Place the original document in the automatic ... tab on the Web page. For more information or detailed instructions, select one or more recipients. Adjust the paper guides when using the ADF. 2 Touch E-mail on the home screen. There are four ways to a profile Adding e-mail subject and message information Changing the output...
User's Guide
Page 34
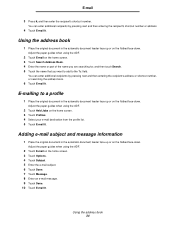
... book 1 Place the original document in the automatic document feeder face-up or on the flatbed face-down. Adjust the paper guides when using the ADF. 2 Touch E-mail on the home screen. 3 Touch Profiles. 4 Select your e-mail destination from the profile list. 5 Touch E-mail It. Using ...the address book 34 E-mail 3 Press #, and then enter the recipient's shortcut number. Adjust the paper guides when using the ADF. 2 Touch E-mail on the flatbed face-down . E-mailing to the To: field. You can enter additional recipients by pressing next and then entering the...
... book 1 Place the original document in the automatic document feeder face-up or on the flatbed face-down. Adjust the paper guides when using the ADF. 2 Touch E-mail on the home screen. 3 Touch Profiles. 4 Select your e-mail destination from the profile list. 5 Touch E-mail It. Using ...the address book 34 E-mail 3 Press #, and then enter the recipient's shortcut number. Adjust the paper guides when using the ADF. 2 Touch E-mail on the flatbed face-down . E-mailing to the To: field. You can enter additional recipients by pressing next and then entering the...
User's Guide
Page 35
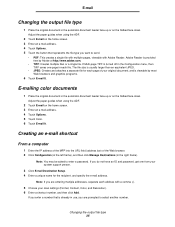
... Reader is viewable by Adobe at http://www.adobe.com. • TIFF: Creates multiple files or a single file. Adjust the paper guides when using the ADF. 2 Touch E-mail on the home screen. 3 Enter an e-mail address. 4 Touch Options. 5 Touch the button that is turned off in the Configuration menu, then TIFF... type 1 Place the original document in the automatic document feeder face-up or on the flatbed face-down . Adjust the paper guides when using the ADF. 2 Touch E-mail on the home screen. 3 Enter an e-mail address. 4 Touch Options. 5 Touch Color. 6 Touch E-mail It.
... Reader is viewable by Adobe at http://www.adobe.com. • TIFF: Creates multiple files or a single file. Adjust the paper guides when using the ADF. 2 Touch E-mail on the home screen. 3 Enter an e-mail address. 4 Touch Options. 5 Touch the button that is turned off in the Configuration menu, then TIFF... type 1 Place the original document in the automatic document feeder face-up or on the flatbed face-down . Adjust the paper guides when using the ADF. 2 Touch E-mail on the home screen. 3 Enter an e-mail address. 4 Touch Options. 5 Touch Color. 6 Touch E-mail It.

User's Guide
Page 36
...; Touching any of recipients, touch Next number, and enter the next recipient's e-mail address. 4 Touch Save as Shortcut. 5 Enter a unique name for inclusion in the ADF face-up , short-edge first. 8 Press #, and then enter the recipient's shortcut number. 9 Touch E-mail It. From the MFP 1 Load the original document in the...
...; Touching any of recipients, touch Next number, and enter the next recipient's e-mail address. 4 Touch Save as Shortcut. 5 Enter a unique name for inclusion in the ADF face-up , short-edge first. 8 Press #, and then enter the recipient's shortcut number. 9 Touch E-mail It. From the MFP 1 Load the original document in the...


