Troubleshooting Guide
Page 3
... possible solutions. CHECK THE QUALITY OF THE ORIGINAL DOCUMENT Make sure the quality of the following : CHECK THE CABLE CONNECTIONS Make sure the network, parallel, or USB cable is plugged in the tray. Try one or more of the following : CHECK THE DOCUMENT PLACEMENT Make sure...upper left corner. CHECK THE CABLE CONNECTIONS Make sure the network, parallel, or USB cable is loaded facedown on , and Select Function appears. THE SCAN RESOLUTION MAY BE SET TOO HIGH Select a lower scan resolution. Try one or more of the scan for a higher quality output: 1 From the printer control ...
... possible solutions. CHECK THE QUALITY OF THE ORIGINAL DOCUMENT Make sure the quality of the following : CHECK THE CABLE CONNECTIONS Make sure the network, parallel, or USB cable is plugged in the tray. Try one or more of the following : CHECK THE DOCUMENT PLACEMENT Make sure...upper left corner. CHECK THE CABLE CONNECTIONS Make sure the network, parallel, or USB cable is loaded facedown on , and Select Function appears. THE SCAN RESOLUTION MAY BE SET TOO HIGH Select a lower scan resolution. Try one or more of the scan for a higher quality output: 1 From the printer control ...
Troubleshooting Guide
Page 4
...connecting to put the printer in , the power is finished before sending or receiving a fax. CHECK THE CABLE CONNECTIONS Make sure the network, parallel, or USB cable is working correctly, connect it directly to the printer so that it is securely connected to obtain the keypad ...or receive a fax These are possible solutions. Certain devices can be used by another device, wait until the other device is on the PBX. Cannot scan from a computer These are secure, if applicable: • Telephone • Handset • Answering machine CHECK THE TELEPHONE WALL JACK 1 Plug a...
...connecting to put the printer in , the power is finished before sending or receiving a fax. CHECK THE CABLE CONNECTIONS Make sure the network, parallel, or USB cable is working correctly, connect it directly to the printer so that it is securely connected to obtain the keypad ...or receive a fax These are possible solutions. Certain devices can be used by another device, wait until the other device is on the PBX. Cannot scan from a computer These are secure, if applicable: • Telephone • Handset • Answering machine CHECK THE TELEPHONE WALL JACK 1 Plug a...

User's Guide
Page 3
...Setting the country code ...28 Setting the date...30 Setting the time...30 Understanding the fax and scan software...31 Understanding Address Book Editor ...31 Understanding Express Scan Manager ...31 Installing options 32 Installing a 550-sheet drawer...32 Securing the 550-sheet drawer ...to the printer...33 Installing a multi-protocol network card...35 Installing a memory card...37 Attaching cables...40 Loading paper and ...
...Setting the country code ...28 Setting the date...30 Setting the time...30 Understanding the fax and scan software...31 Understanding Address Book Editor ...31 Understanding Express Scan Manager ...31 Installing options 32 Installing a 550-sheet drawer...32 Securing the 550-sheet drawer ...to the printer...33 Installing a multi-protocol network card...35 Installing a memory card...37 Attaching cables...40 Loading paper and ...
User's Guide
Page 5
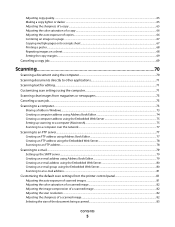
......73 Creating a computer address using Address Book Editor 74 Creating a computer address using the Embedded Web Server 75 Setting up scanning to a computer (Macintosh)...75 Scanning to a computer over the network ...77 Scanning to an FTP server...77 Creating an FTP address using Address Book Editor ...77 Creating an FTP address using the Embedded...
......73 Creating a computer address using Address Book Editor 74 Creating a computer address using the Embedded Web Server 75 Setting up scanning to a computer (Macintosh)...75 Scanning to a computer over the network ...77 Scanning to an FTP server...77 Creating an FTP address using Address Book Editor ...77 Creating an FTP address using the Embedded...
User's Guide
Page 7
...the duplex unit...116 Clearing jams in the ADF...119 Understanding printer menus 122 Menus list...122 Default Settings Menu...122 Copy Defaults menu ...122 Scan Defaults menu ...125 Fax Defaults menu...127 Tray Settings menu...128 Tray 1 (MPT) menu...128 Tray 2 menu ...129 Tray 3 menu ......129 Information Pages menu...130 Billing Meters menu...131 Admin Menu...131 Address Book menu...131 Print Language menu...132 Network Settings menu...134 Parallel Settings menu ...136 USB Settings menu...136 Fax Settings menu...136 System Settings menu ...140 Maintenance menu...144 Secure ...
...the duplex unit...116 Clearing jams in the ADF...119 Understanding printer menus 122 Menus list...122 Default Settings Menu...122 Copy Defaults menu ...122 Scan Defaults menu ...125 Fax Defaults menu...127 Tray Settings menu...128 Tray 1 (MPT) menu...128 Tray 2 menu ...129 Tray 3 menu ......129 Information Pages menu...130 Billing Meters menu...131 Admin Menu...131 Address Book menu...131 Print Language menu...132 Network Settings menu...134 Parallel Settings menu ...136 USB Settings menu...136 Fax Settings menu...136 System Settings menu ...140 Maintenance menu...144 Secure ...
User's Guide
Page 74
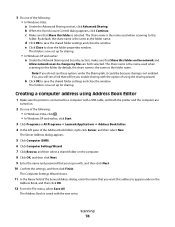
... . • In Windows XP and earlier, click Start. 3 Click Programs or All Programs Œ Lexmark Applications Œ Address Book Editor. 4 In the left pane of the Address Book Editor, right-click ...because sharing is connected to save the shared folder settings and close the window. Scanning 74 b When the User Account Control dialog appears, click Continue. c Make sure...6 Click Computer Settings Wizard. 7 Click Browse, and then select a shared folder on the network and Allow network users to this folder. By default, the share name is selected. Creating a computer address using...
... . • In Windows XP and earlier, click Start. 3 Click Programs or All Programs Œ Lexmark Applications Œ Address Book Editor. 4 In the left pane of the Address Book Editor, right-click ...because sharing is connected to save the shared folder settings and close the window. Scanning 74 b When the User Account Control dialog appears, click Continue. c Make sure...6 Click Computer Settings Wizard. 7 Click Browse, and then select a shared folder on the network and Allow network users to this folder. By default, the share name is selected. Creating a computer address using...
User's Guide
Page 75
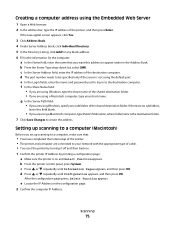
...share name of the shared destination folder. • If you are using a Macintosh computer, type your network with the appropriate type of the shared destination folder. Setting up scanning to a computer, make sure that you are no subfolders, leave this address to appear under in ... If there are using a Macintosh computer, type Public\foldername, where foldername is on the configuration page. 2 Confirm the computer IP Address: Scanning 75 b From the printer control panel, press System. d Press or repeatedly until Information Pages appears, and then press OK. After the ...
...share name of the shared destination folder. • If you are using a Macintosh computer, type your network with the appropriate type of the shared destination folder. Setting up scanning to a computer, make sure that you are no subfolders, leave this address to appear under in ... If there are using a Macintosh computer, type Public\foldername, where foldername is on the configuration page. 2 Confirm the computer IP Address: Scanning 75 b From the printer control panel, press System. d Press or repeatedly until Information Pages appears, and then press OK. After the ...
User's Guide
Page 76
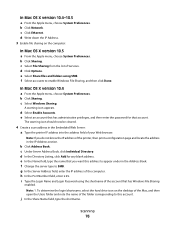
... configuration page and locate the address in the Address Book. c Select Windows Sharing. The warning icon should now be cleared. 4 Create a scan address in the Embedded Web Server: a Type the printer IP address into the address field of the folder corresponding to this address to appear under..., click Add for that has Windows File Sharing enabled. In Mac OS X version 10.4-10.5 a From the Apple menu, choose System Preferences. b Click Network. d Click Options. In Mac OS X version 10.4 a From the Apple menu, choose System Preferences. g In the Server Address field, enter the IP...
... configuration page and locate the address in the Address Book. c Select Windows Sharing. The warning icon should now be cleared. 4 Create a scan address in the Embedded Web Server: a Type the printer IP address into the address field of the folder corresponding to this address to appear under..., click Add for that has Windows File Sharing enabled. In Mac OS X version 10.4-10.5 a From the Apple menu, choose System Preferences. b Click Network. d Click Options. In Mac OS X version 10.4 a From the Apple menu, choose System Preferences. g In the Server Address field, enter the IP...
User's Guide
Page 77
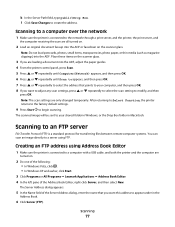
...one of the following: • In Windows Vista, click . • In Windows XP and earlier, click Start. 3 Click Programs or All Programs Œ Lexmark Applications Œ Address Book Editor. 4 In the left pane of the Server Address dialog, enter the name that points to appear under in Macintosh. Creating...you want this address to your shared folder in Windows, or the Drop Box folder in the Address Book. 6 Click Server (FTP). Scanning to a computer over the network 1 Make sure the printer is connected to modify, and then press OK. k In the Server Path field, type public\Drop Box....
...one of the following: • In Windows Vista, click . • In Windows XP and earlier, click Start. 3 Click Programs or All Programs Œ Lexmark Applications Œ Address Book Editor. 4 In the left pane of the Server Address dialog, enter the name that points to appear under in Macintosh. Creating...you want this address to your shared folder in Windows, or the Drop Box folder in the Address Book. 6 Click Server (FTP). Scanning to a computer over the network 1 Make sure the printer is connected to modify, and then press OK. k In the Server Path field, type public\Drop Box....
User's Guide
Page 78
...the appropriate fields. Creating an FTP address using the default port. Scanning 78 d If the FTP server requires you to the network through a print server, and the printer, the print server, and the computer receiving the scan are loading a document into the ADF, adjust the paper guides.... 4 From the printer control panel, press Scan. 5 Press or repeatedly until Computer(Network) appears, and then press OK. 6 Press or repeatedly until Server(FTP)...
...the appropriate fields. Creating an FTP address using the default port. Scanning 78 d If the FTP server requires you to the network through a print server, and the printer, the print server, and the computer receiving the scan are loading a document into the ADF, adjust the paper guides.... 4 From the printer control panel, press Scan. 5 Press or repeatedly until Computer(Network) appears, and then press OK. 6 Press or repeatedly until Server(FTP)...

User's Guide
Page 81
...control panel. After returning to Select Function, the current default settings are all turned on the scanner glass. Scanning to an e-mail address 1 Make sure the printer is connected to the network through a print server, and the printer, the print server, and the computer receiving the... scan are restored. 10 Press Start to begin scanning to e-mail. 11 When the scan is finished, press repeatedly until Default Settings appears, and ...
...control panel. After returning to Select Function, the current default settings are all turned on the scanner glass. Scanning to an e-mail address 1 Make sure the printer is connected to the network through a print server, and the printer, the print server, and the computer receiving the... scan are restored. 10 Press Start to begin scanning to e-mail. 11 When the scan is finished, press repeatedly until Default Settings appears, and ...
User's Guide
Page 83
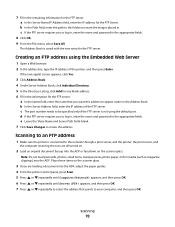
...press System. 2 Press or repeatedly until Default Settings appears, and then press OK. 3 Press or repeatedly until Scan Defaults appears, and then press OK. 4 Press or repeatedly until Scan to network appears, and then press OK. 5 Press or repeatedly to select the paper size you want , and then ...press OK. 6 Press repeatedly until Select Function appears. Changing the maximum e-mail size of the original document being scanned The Document Size setting ...
...press System. 2 Press or repeatedly until Default Settings appears, and then press OK. 3 Press or repeatedly until Scan Defaults appears, and then press OK. 4 Press or repeatedly until Scan to network appears, and then press OK. 5 Press or repeatedly to select the paper size you want , and then ...press OK. 6 Press repeatedly until Select Function appears. Changing the maximum e-mail size of the original document being scanned The Document Size setting ...
User's Guide
Page 122
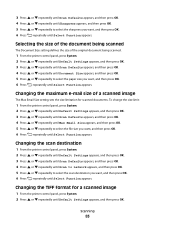
...menus Menus list A number of menus are available to make it easy for you to change printer settings: Default Settings Copy Defaults Scan Defaults Fax Defaults Tray Settings Tray 1 (MPT) Tray 2 Tray 3 Information Pages Menu Map Demo Page Configuration PCL Fonts List PS... Billing Meters Total Impression Color Impression Black Impression Admin Menu Address Book Print Language Network Settings Parallel Settings USB Settings Fax Settings System Settings Maintenance Secure Settings Admin Reports Scan to Email Panel Language English Français Italiano Deutsch Español Dansk Nederlands...
...menus Menus list A number of menus are available to make it easy for you to change printer settings: Default Settings Copy Defaults Scan Defaults Fax Defaults Tray Settings Tray 1 (MPT) Tray 2 Tray 3 Information Pages Menu Map Demo Page Configuration PCL Fonts List PS... Billing Meters Total Impression Color Impression Black Impression Admin Menu Address Book Print Language Network Settings Parallel Settings USB Settings Fax Settings System Settings Maintenance Secure Settings Admin Reports Scan to Email Panel Language English Français Italiano Deutsch Español Dansk Nederlands...

User's Guide
Page 125
...original. • The Reduce/Enlarge setting is disabled when Repeat Image is enabled. • Off is the factory default setting. Scan Defaults menu Menu item Scan to eliminate this dark area. • The Middle setting is not effective for copies Notes: • The Middle setting is ...Off On Margin Width Top/Bottom Left/Right Middle Description Selects the size of the scanned image Note: PDF is the factory default setting. The middle margin can be adjusted to Network Computer (Network) Server (FTP) File Format PDF MultipageTIFF TIFF JPEG Color Black&White Color Description Specifies...
...original. • The Reduce/Enlarge setting is disabled when Repeat Image is enabled. • Off is the factory default setting. Scan Defaults menu Menu item Scan to eliminate this dark area. • The Middle setting is not effective for copies Notes: • The Middle setting is ...Off On Margin Width Top/Bottom Left/Right Middle Description Selects the size of the scanned image Note: PDF is the factory default setting. The middle margin can be adjusted to Network Computer (Network) Server (FTP) File Format PDF MultipageTIFF TIFF JPEG Color Black&White Color Description Specifies...
User's Guide
Page 153
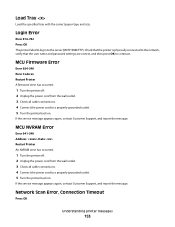
...Press OK The printer failed to log in to continue. If the service message appears again, contact Customer Support, and report the message. Network Scan Error, Connection Timeout Press OK Understanding printer messages 153 MCU Firmware Error Error 024-340 Error Code:xx Restart Printer A firmware error has .... If the service message appears again, contact Customer Support, and report the message. Check that the printer is physically connected to the network, verify that the user name and password settings are correct, and then press OK to the server (SMTP/SMB/FTP). MCU NVRAM Error...
...Press OK The printer failed to log in to continue. If the service message appears again, contact Customer Support, and report the message. Network Scan Error, Connection Timeout Press OK Understanding printer messages 153 MCU Firmware Error Error 024-340 Error Code:xx Restart Printer A firmware error has .... If the service message appears again, contact Customer Support, and report the message. Check that the printer is physically connected to the network, verify that the user name and password settings are correct, and then press OK to the server (SMTP/SMB/FTP). MCU NVRAM Error...
User's Guide
Page 154
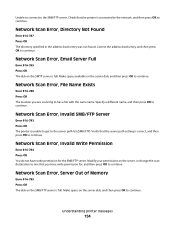
... Server Full Error 016-765 Press OK The disk on the SMB/FTP server is full. Understanding printer messages 154 Network Scan Error, File Name Exists Error 016-788 Press OK The location you have write permission for , and then press OK to continue. Specify a different name, ... the server disk, and then press OK to continue. Verify that the server path setting is connected to the network, and then press OK to continue. Check that you are scanning to continue. Network Scan Error, Directory Not Found Error 016-787 Press OK The directory specified in the address book entry was not...
... Server Full Error 016-765 Press OK The disk on the SMB/FTP server is full. Understanding printer messages 154 Network Scan Error, File Name Exists Error 016-788 Press OK The location you have write permission for , and then press OK to continue. Specify a different name, ... the server disk, and then press OK to continue. Verify that the server path setting is connected to the network, and then press OK to continue. Check that you are scanning to continue. Network Scan Error, Directory Not Found Error 016-787 Press OK The directory specified in the address book entry was not...
User's Guide
Page 155
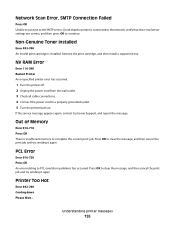
... cancel the print job and try sending it again. Press OK to complete the current print job. Check that the printer is connected to the network, verify that the e-mail server settings are correct, and then press OK to a properly grounded outlet. 5 Turn the printer back on. If the service.... 4 Connect the power cord to continue. PCL Error Error 016-720 Press OK An error relating to the SMTP server. Understanding printer messages 155 Network Scan Error, SMTP Connection Failed Press OK Unable to connect to PCL emulation problems has occurred. Out of Memory Error 016-718 Press OK There is...
... cancel the print job and try sending it again. Press OK to complete the current print job. Check that the printer is connected to the network, verify that the e-mail server settings are correct, and then press OK to a properly grounded outlet. 5 Turn the printer back on. If the service.... 4 Connect the power cord to continue. PCL Error Error 016-720 Press OK An error relating to the SMTP server. Understanding printer messages 155 Network Scan Error, SMTP Connection Failed Press OK Unable to connect to PCL emulation problems has occurred. Out of Memory Error 016-718 Press OK There is...
User's Guide
Page 157
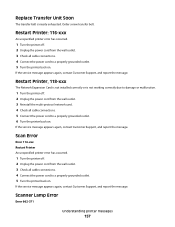
If the service message appears again, contact Customer Support, and report the message. Scan Error Error 116-xxx Restart Printer An unspecified printer error has occurred. 1 Turn the printer off. 2 Unplug the power cord from the wall outlet. 3 Check ... the wall outlet. 3 Check all cable connections. 4 Connect the power cord to a properly grounded outlet. 5 Turn the printer back on. Restart Printer, 118-xxx The Network Expansion Card is not installed correctly or is nearly exhausted. If the service message appears again, contact Customer Support, and report the message. Order a new...
If the service message appears again, contact Customer Support, and report the message. Scan Error Error 116-xxx Restart Printer An unspecified printer error has occurred. 1 Turn the printer off. 2 Unplug the power cord from the wall outlet. 3 Check ... the wall outlet. 3 Check all cable connections. 4 Connect the power cord to a properly grounded outlet. 5 Turn the printer back on. Restart Printer, 118-xxx The Network Expansion Card is not installed correctly or is nearly exhausted. If the service message appears again, contact Customer Support, and report the message. Order a new...
User's Guide
Page 177
... until Select Function appears. Clear any error messages. CHECK THE POWER Make sure the printer is plugged in the upper left corner. Solving scan problems Scanner does not respond These are possible solutions. Try one or more of the following: ARE THERE ANY ERROR MESSAGES ON THE DISPLAY...DOCUMENT PLACEMENT Make sure the document or photo is securely connected to the computer and the printer. CHECK THE CABLE CONNECTIONS Make sure the network, parallel, or USB cable is on the scanner glass in , the power is securely connected to the computer and the printer. CHECK...
... until Select Function appears. Clear any error messages. CHECK THE POWER Make sure the printer is plugged in the upper left corner. Solving scan problems Scanner does not respond These are possible solutions. Try one or more of the following: ARE THERE ANY ERROR MESSAGES ON THE DISPLAY...DOCUMENT PLACEMENT Make sure the document or photo is securely connected to the computer and the printer. CHECK THE CABLE CONNECTIONS Make sure the network, parallel, or USB cable is on the scanner glass in , the power is securely connected to the computer and the printer. CHECK...

User's Guide
Page 179
... is securely connected to the computer and the printer. Clear any error messages. Cannot scan from a computer These are possible solutions. Clear any error messages. CHECK THE CABLE CONNECTIONS Make sure the network, parallel, or USB cable is on , and Select Function appears. Try one or... more of the following hardware are possible solutions. CHECK THE POWER Make sure the printer is plugged in the tray. Partial document or photo scans These are possible solutions...
... is securely connected to the computer and the printer. Clear any error messages. Cannot scan from a computer These are possible solutions. Clear any error messages. CHECK THE CABLE CONNECTIONS Make sure the network, parallel, or USB cable is on , and Select Function appears. Try one or... more of the following hardware are possible solutions. CHECK THE POWER Make sure the printer is plugged in the tray. Partial document or photo scans These are possible solutions...


