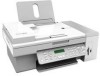
User's Guide
Page 3
... panel...37 Using the control panel ...37 Saving settings...40 Installing another language control panel...41 Installing the printer software...42 Installing the optional XPS driver (Windows Vista users only 42 Understanding the printer software...43 Turning printing voice notification on or off...46 Security Information...46 General networking 47 Finding...
... panel...37 Using the control panel ...37 Saving settings...40 Installing another language control panel...41 Installing the printer software...42 Installing the optional XPS driver (Windows Vista users only 42 Understanding the printer software...43 Turning printing voice notification on or off...46 Security Information...46 General networking 47 Finding...
User's Guide
Page 42
... on your operating system. 4 Follow the instructions on the computer screen to the Lexmark Web site at www.lexmark.com. 2 From the home page, navigate through the menu selection, and then click Drivers & Downloads. 3 Choose the printer and the printer driver for Windows Vista users. Using the installation software CD (Macintosh users only) 1 Close...
... on your operating system. 4 Follow the instructions on the computer screen to the Lexmark Web site at www.lexmark.com. 2 From the home page, navigate through the menu selection, and then click Drivers & Downloads. 3 Choose the printer and the printer driver for Windows Vista users. Using the installation software CD (Macintosh users only) 1 Close...
User's Guide
Page 43
... the XPS readme file on your photo or document. Method 2 1 Click Programs or All Programs ŒLexmark X5400 Series. 2 Select Productivity Studio. To install the XPS driver: 1 Click Œ Control Panel. 2 Under Hardware and Sound, click Printer, and then click Add a Printer. 3 From the Add ...The Install From Disk dialog appears. 6 Click Browse, and then navigate to your printer model number, and then double-click Drivers. Click the Productivity Studio icon for USB, and then click Next. 5 Click Have disk. Click To Scan Details • Scan a photo or document. •...
... the XPS readme file on your photo or document. Method 2 1 Click Programs or All Programs ŒLexmark X5400 Series. 2 Select Productivity Studio. To install the XPS driver: 1 Click Œ Control Panel. 2 Under Hardware and Sound, click Printer, and then click Add a Printer. 3 From the Add ...The Install From Disk dialog appears. 6 Click Browse, and then navigate to your printer model number, and then double-click Drivers. Click the Productivity Studio icon for USB, and then click Next. 5 Click Have disk. Click To Scan Details • Scan a photo or document. •...
User's Guide
Page 132
... tab. Most major functions may not work , but you may need to remove and reinstall the printer software. 1 Click Programs or All Programs ŒLexmark X5400 Series. 2 Select Uninstall. 3 Follow the instructions on the computer screen to reinstall the software. Installation will work . • A red X ... To confirm that the USB port is not functioning properly, or if a communications error message appears when you try to use the printer, you want to check for drivers or downloads. 3 Select your printer family. 4 Select your printer model. 5 Select your CD-ROM drive. Note: If the...
... tab. Most major functions may not work , but you may need to remove and reinstall the printer software. 1 Click Programs or All Programs ŒLexmark X5400 Series. 2 Select Uninstall. 3 Follow the instructions on the computer screen to reinstall the software. Installation will work . • A red X ... To confirm that the USB port is not functioning properly, or if a communications error message appears when you try to use the printer, you want to check for drivers or downloads. 3 Select your printer family. 4 Select your printer model. 5 Select your CD-ROM drive. Note: If the...
User's Guide
Page 147
...the printer is properly installed in the right carrier. To test the solution, print a test page. 1 Click Programs or All Programs ŒLexmark X5400 Series. 2 Click Lexmark Solution Center. 3 Click the Maintenance tab. 4 Click Print a test page. For more information, see the related topic below. Troubleshooting 147... back of the printer facing you are possible solutions. For more information, see the related topic below . MAKE SURE THE LEXMARK PRINTER DRIVER IS SET AS THE DEFAULT PRINTER For more of the following: MAKE SURE THE PRINTER IS RECEIVING POWER If is properly installed...
...the printer is properly installed in the right carrier. To test the solution, print a test page. 1 Click Programs or All Programs ŒLexmark X5400 Series. 2 Click Lexmark Solution Center. 3 Click the Maintenance tab. 4 Click Print a test page. For more information, see the related topic below. Troubleshooting 147... back of the printer facing you are possible solutions. For more information, see the related topic below . MAKE SURE THE LEXMARK PRINTER DRIVER IS SET AS THE DEFAULT PRINTER For more of the following: MAKE SURE THE PRINTER IS RECEIVING POWER If is properly installed...

User's Guide
Page 152
... • Page prints with this print server. 3 Click Install. 4 When the Existing Printer Driver Found dialog box appears, select Update the existing driver software. Plug the long, flat end of the USB cable into a different outlet. • If the printer is on the screen • Printouts... have alternating bands of the following: CHECK THE USB CONNECTION 1 Check that the printer is too...
... • Page prints with this print server. 3 Click Install. 4 When the Existing Printer Driver Found dialog box appears, select Update the existing driver software. Plug the long, flat end of the USB cable into a different outlet. • If the printer is on the screen • Printouts... have alternating bands of the following: CHECK THE USB CONNECTION 1 Check that the printer is too...

User's Guide
Page 182
...different from that interference will not occur in accordance with diamond design are trademarks of purchase or service representative for USB attach. If this device must accept any accompanying documentation provided under this equipment. Notices 182 Federal Communications Commission ...This equipment generates, uses, and can be viewed from the \Drivers\XPS directory on electromagnetic interference for a Class B computing device, use a properly shielded and grounded cable such as Lexmark part number 1021294 for additional suggestions. Unauthorized changes or modifications ...
...different from that interference will not occur in accordance with diamond design are trademarks of purchase or service representative for USB attach. If this device must accept any accompanying documentation provided under this equipment. Notices 182 Federal Communications Commission ...This equipment generates, uses, and can be viewed from the \Drivers\XPS directory on electromagnetic interference for a Class B computing device, use a properly shielded and grounded cable such as Lexmark part number 1021294 for additional suggestions. Unauthorized changes or modifications ...

User's Guide
Page 200
... creating and viewing 85 smudging, preventing in photos 137 software Fax Solutions Software 116 Productivity Studio 43 removing and reinstalling 132 Solution Center 45 XPS driver 42 software does not install 129 software settings, printer resetting to factory defaults 65 Solution Center understanding 45 Solution Center buttons Advanced 45 How To...
... creating and viewing 85 smudging, preventing in photos 137 software Fax Solutions Software 116 Productivity Studio 43 removing and reinstalling 132 Solution Center 45 XPS driver 42 software does not install 129 software settings, printer resetting to factory defaults 65 Solution Center understanding 45 Solution Center buttons Advanced 45 How To...

User's Guide
Page 202
... finding 13 white lines appear in graphics or black areas 143 wrong printer attached 151 X XPS driver installing 42 U unsupported file types found on memory card 179 unwanted faxes, blocking 115 updating printer software 151 USB port 26 enabling 132 using One-Click Auto Fix 76 Quick Fixes tab 76 using RJ11...
... finding 13 white lines appear in graphics or black areas 143 wrong printer attached 151 X XPS driver installing 42 U unsupported file types found on memory card 179 unwanted faxes, blocking 115 updating printer software 151 USB port 26 enabling 132 using One-Click Auto Fix 76 Quick Fixes tab 76 using RJ11...
User's Guide
Page 106
Using the World Wide Web: 1 Go to the Lexmark Web site at www.lexmark.com. 2 From the home page, navigate through the menu selection, and then click Drivers & Downloads. 3 Choose the printer and the printer driver for your operating system. 4 Follow the instructions on page 175 Removing the... then press down. Understanding the printer 106 Uninstall the printer software, and then reinstall it. 1 From the Finder desktop, double-click the Lexmark X5400 Series folder. Related topics: • "Removing the printer software" on page 106 • "Removing and reinstalling the software" on the...
Using the World Wide Web: 1 Go to the Lexmark Web site at www.lexmark.com. 2 From the home page, navigate through the menu selection, and then click Drivers & Downloads. 3 Choose the printer and the printer driver for your operating system. 4 Follow the instructions on page 175 Removing the... then press down. Understanding the printer 106 Uninstall the printer software, and then reinstall it. 1 From the Finder desktop, double-click the Lexmark X5400 Series folder. Related topics: • "Removing the printer software" on page 106 • "Removing and reinstalling the software" on the...

User's Guide
Page 137
...137 Try one or more information, see "Power button is created on the desktop. 6 Follow the instructions on the computer screen to check for drivers or downloads. a In all open software applications. 2 Disable any anti-virus programs. 3 Remove the printer software CD from the paper support,... "Removing and reinstalling the software" on page 175. 2 If the software still does not install correctly, visit our Web site at www.lexmark.com to install the software. d Select your country or region. REINSTALL THE SOFTWARE 1 Uninstall the printer software, and then reinstall it. The...
...137 Try one or more information, see "Power button is created on the desktop. 6 Follow the instructions on the computer screen to check for drivers or downloads. a In all open software applications. 2 Disable any anti-virus programs. 3 Remove the printer software CD from the paper support,... "Removing and reinstalling the software" on page 175. 2 If the software still does not install correctly, visit our Web site at www.lexmark.com to install the software. d Select your country or region. REINSTALL THE SOFTWARE 1 Uninstall the printer software, and then reinstall it. The...
User's Guide
Page 139
... PICTBRIDGE PRINTING FROM CAMERA Enable PictBridge printing on page 170. c Select your printer model. f Select the file you want to check for drivers or downloads. For more information, see the digital camera documentation. Try one or more of the following : CHECK MESSAGES If an error message...only the USB cable that came with the camera. Test page does not print These are possible solutions. For more information, see "Removing and reinstalling the software" on page 175. 2 If the software still does not install correctly, visit our Web site at www.lexmark.com to ...
... PICTBRIDGE PRINTING FROM CAMERA Enable PictBridge printing on page 170. c Select your printer model. f Select the file you want to check for drivers or downloads. For more information, see the digital camera documentation. Try one or more of the following : CHECK MESSAGES If an error message...only the USB cable that came with the camera. Test page does not print These are possible solutions. For more information, see "Removing and reinstalling the software" on page 175. 2 If the software still does not install correctly, visit our Web site at www.lexmark.com to ...

User's Guide
Page 140
...unplug the printer, and plug it directly into an electrical outlet. • Press again to turn off the printer. • Plug the printer into the USB port of the print cartridges. To resume print jobs 1 From the Finder desktop, choose Applications Œ Utilities Œ Print Center or Printer Setup Utility....computer. if you are using a black cartridge or photo cartridge, make sure it is properly installed in the right carrier. MAKE SURE THE LEXMARK PRINTER DRIVER IS SET AS THE DEFAULT PRINTER AND IS NOT ON HOLD OR PAUSED To set the printer as default 1 From the Finder desktop, ...
...unplug the printer, and plug it directly into an electrical outlet. • Press again to turn off the printer. • Plug the printer into the USB port of the print cartridges. To resume print jobs 1 From the Finder desktop, choose Applications Œ Utilities Œ Print Center or Printer Setup Utility....computer. if you are using a black cartridge or photo cartridge, make sure it is properly installed in the right carrier. MAKE SURE THE LEXMARK PRINTER DRIVER IS SET AS THE DEFAULT PRINTER AND IS NOT ON HOLD OR PAUSED To set the printer as default 1 From the Finder desktop, ...
Fax Guide
Page 42
...to check for the latest software. 1 In all countries or regions except the United States, select your country or region. 2 Click the links for drivers or downloads. 3 Select your printer family. 4 Select your printer model. 5 Select your computer, click Start Œ Run, and then type ... your operating system. 6 Select the file you may need to remove and reinstall the printer software. 1 Click Programs or All Programs ŒLexmark X5400 Series. 2 Select Uninstall. 3 Follow the instructions on the computer screen to remove the printer software. 4 Restart the computer before reinstalling the...
...to check for the latest software. 1 In all countries or regions except the United States, select your country or region. 2 Click the links for drivers or downloads. 3 Select your printer family. 4 Select your printer model. 5 Select your computer, click Start Œ Run, and then type ... your operating system. 6 Select the file you may need to remove and reinstall the printer software. 1 Click Programs or All Programs ŒLexmark X5400 Series. 2 Select Uninstall. 3 Follow the instructions on the computer screen to remove the printer software. 4 Restart the computer before reinstalling the...


